
The AirTag may be small but is one of the best trackers for valuables. Some users even integrate an AirTag to a dog collar to find a pet easily if it gets lost. Because the said Apple device is so useful, it can be like a great functional heirloom you can pass on to someone. If you plan to give it away, though, you should not forget to reset the AirTag. We’ll show you how to do so in a few steps, which you’ll find easy even if it is your first time resetting your device.
Also read: How to Set Up a New AirTag
Inside This Article
- Why Reset Your AirTag?
- How to Factory Reset AirTag via iPhone
- How to Factory Reset AirTag Manually
- Bonus Tutorial: How to Name an AirTag
- Benefits of Resetting an AirTag
Why Reset Your AirTag?

Like when selling or giving away an iPhone, you need to factory reset your AirTag. That is because the AirTag stays linked to your Apple ID. In the case of the AirTag, though, that means the new owner cannot use the tracking device unless you unlink your Apple ID from it and they link their own to it. Also, each AirTag links only a single Apple ID. It is meant to be that way to make it difficult for someone else to claim your tracking accessory and the stolen or lost item it is on.
How to Factory Reset AirTag via iPhone
The easiest and fastest way to reset your AirTag is through your iPhone. For this to be possible, your gadget and tracking device need to be in each other’s Bluetooth detection range. Also, the former should have the Find My app. Once you fulfill these conditions, do the following:
1. Access the Find My app from your iPhone’s home dashboard.
2. Select the detected AirTag on the app.
3. On the AirTag info page you’re now on, scroll to the bottom.
4. Press the Remove Item option once you see it.
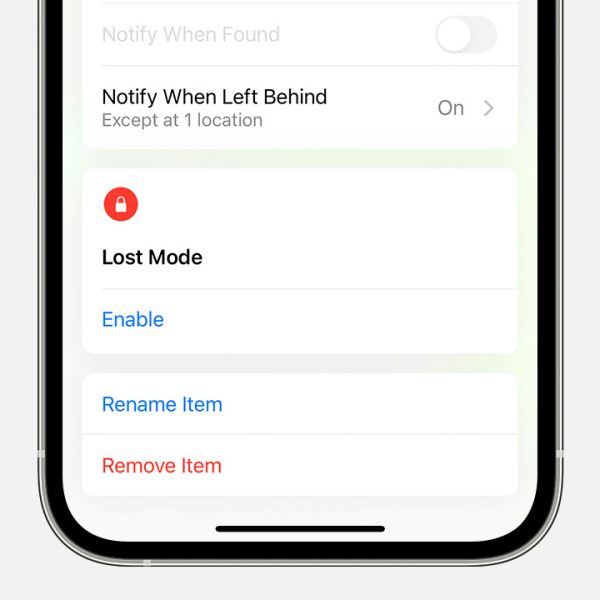
5. On the page that tells you what happens if you unlink the AirTag, hit Remove.
Once you press Remove, the action is final. You’ve successfully reset the AirTag and unlinked it from your Apple ID in just five steps.
How to Factory Reset AirTag Manually
There is another way to reset an Apple AirTag — one that might remind you of how retro phones get reverted to a fresh state manually. It requires removing and putting back the battery and you (the original owner) unlinking your Apple ID from the AirTag first. Because the latter is still required, this method is more suitable when you’ve done the previous tutorial.
To reset an AirTag the manual way, follow this quick tutorial:
1. Follow the first tutorial above to unlink the Apple ID if not done yet.
2. Hold the AirTag afterward.
3. Push down and twist counterclockwise the battery case at the back of the AirTag.
4. Stop rotating the disc and take it off when it is loose already.
5. Take out the battery underneath it too.
6. On the now-empty slot, return the battery and push it down until the AirTag emits a sound.
*The battery should be in the proper orientation (positive side up).
7. Do Steps 5 and 6 again four times, then put the case back on the AirTag after the fifth sound.
8. While pushing the case down, twist it clockwise until it is locked into place.
Did everything correctly? You have now successfully made your Apple AirTag go back to its factory state.
Bonus Tutorial: How to Name an AirTag
If you’re not selling your AirTag or you’re the AirTag recipient, it is good to know how to name the AirTag after a reset. That way, you can personalize it. Here’s our bonus walkthrough for naming your AirTag:
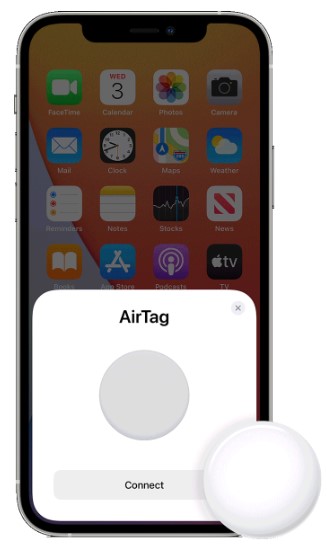
1. Make your phone detect your AirTag.
*The former should have Bluetooth, the Find My iPhone feature, location services, and two-factor authentication activated and be online via a network.
2. On the pop-up prompt on your iPhone, press Connect.
3. Choose the Custom Name option, then hit Continue.
4. Input the new name for the AirTag and pick an emoji.
5. Press Continue if you’re satisfied with the name.
6. Hit Continue once again to link the new Apple ID.
7. Once the new Apple ID is set, hit Done.
Also Read: Find My iPhone Not Working? Here’s 9 Easy Solutions
Benefits of Resetting an AirTag
Now that you know how to factory reset an AirTag, here are the benefits you get after the reset:
1. Hassle-Free Transfer of Ownership
As we’ve highlighted in this guide, a reset is usually done when you’re giving your AirTag to someone else. Doing it before the transfer helps ensure that there will be no hassle in reconfiguring the device on the new owner’s end. After all, if that new owner is someone you do not personally know, you would not want them contacting you for you to do the reset after the transfer.
2. Clears Your Information
Resetting your AirTag does not only make it useable for the next owner. This clears your information on the AirTag — your linked Apple ID and the tracking device’s name (especially if you’ve named it as [Your Name’s] AirTag) before ownership transfer.
3. Fixes AirTag Issues
A factory reset for an AirTag is like an iPhone factory reset. It is a fix for when your tracking device malfunctions or has issues. Common AirTag problems a factory reset can solve are the following:
1. Your AirTag cannot pair with a new iPhone.
2. The AirTag’s signal is weak.
3. Your AirTag is giving off wrong notifications.
4. The AirTag’s precision-finding feature is not working.
5. Your AirTag stopped functioning.
Reset Your AirTag Hassle-Free
Whether you are giving away your AirTag or trying to make it work like it was new, it is good to know how to reset the AirTag properly. With this guide, you can make your AirTag revert to its factory state in a few steps and without any hassle.
Were you able to reset the AirTag successfully? If yes, share your experience with us or share this article with fellow AirTag users who also need a guide!