
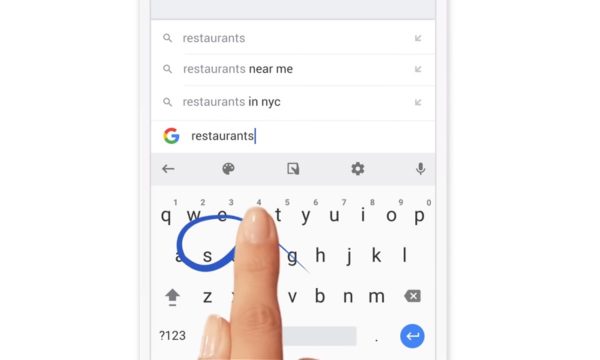
Many mobile device users do not want to settle with the default onscreen keyboard for many reasons. For instance, it is too plain looking and lacks modern features. Consequently, Gboard, which offers features beyond predictive text and personalization, has become popular on Android and iOS devices. It has unique perks such as web search and translation but is not perfect. Sometimes, Gboard keeps stopping, freezes, and cease to work.
If you are encountering the problem, read on. The best solutions are discussed thoroughly in this guide, so you can get your keyboard running smoothly again.
Also read: GIF Keyboard by Tenor
Why Gboard Keeps Stopping
Given that Gboard is a mobile app, some of the possible root causes are the same as what makes any other app malfunction. You’ll often find Gboard not working in these three common scenarios:
1. Gboard Not Set as Default Keyboard
Gboard might not be the only third-party keyboard you have installed and your gadget might be running it when a similar type of app is the default. As a result, your Android or iOS device gets confused about which it is running and Gboard keeps stopping. Always make sure to double-check your keyboard configurations given this.
2. Gboard App Version Issue
Google regularly releases updates for Gboard to give you new features and patches for the bugs. If not updated for a long time, you’ll eventually experience Gboard not working at all like other outdated apps. In fact, an old Gboard app might no longer have supported features and can become incompatible with the latest Android and iOS devices.
3. Low Device RAM for Gboard
Like any other app, Gboard keeps stopping when your gadget does not have enough space to run it. In Android and iOS devices, that space is called Random Access Memory. To elaborate, RAM temporarily stores data for active apps, games, and browsers. It keeps everything running smoothly, having faster reading and writing speeds than internal memory. Although RAM serves as extra storage, it can get nearly overloaded and lead to Gboard not working.
Top Solutions for Gboard That Keeps Stopping
There is more than one fix and it is up to you to test what works when Gboard keeps stopping. We make the task easier by rounding up the top solutions for the Gboard issue on Android and iOS devices. The following methods made the list because these are easy to accomplish without technical expertise and are effective for many users:
1. Restart Mobile Device

Have you ever been advised to “give it a break” when things are going wrong? That tip also applies to the scenario when Gboard keeps stopping.
Restarting the device gives the gadget and the Gboard app a break when not working properly. In fact, it is called a soft reset because it stops the device from running app data as the gadget switches off, without data loss. Consequently, the mobile device and its apps can start running at a “fresh” condition after the fix.
There is no universal method to restart a mobile device as it varies per model. Use your Android device’s power button to open the power options or your iOS device’s button shortcuts to launch the power slider. Also, follow the onscreen prompts.
2. Make Gboard the Default Keyboard
When Gboard is not working, you might have forgotten to set it as a default program. Check and toggle relevant configurations directly from Android or iOS device settings. To elaborate, you will need to pick Gboard from the enabled keyboards list and disable third-party keyboard apps installed if you prefer to do so. Here are the steps to follow:
On Android
1. Tap the Settings icon from the mobile phone or tablet PC’s home interface.
2. Select General or General Management from the menu.
3. Choose Language and Input then On-screen Keyboard.

4. Tap Default Keyboard to change what is set.
5. Pick Gboard from the list of keyboards available.
6. On the Language and Input menu, tap On-screen Keyboard if you want to remove other keyboards.
7. Click on Manage Keyboards afterward.
8. Swipe the slider buttons on other keyboards you want to disable.
On iOS
1. Click on Settings on your iPhone or iPad’s home interface.
2. Tap General from the menu options.
3. Select Keyboards afterward.
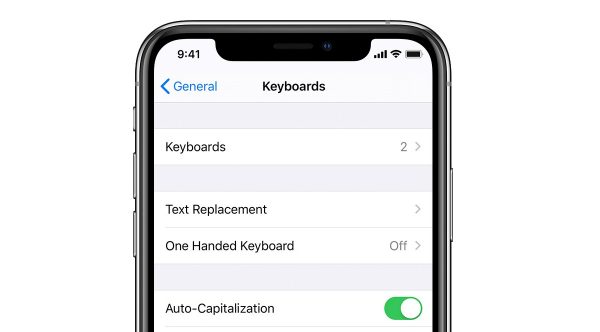
4. Click on Edit on the keyboard list.
5. Drag Gboard to the first slot in the list.
6. Tap Done to confirm the action.
7. Swipe on each of the other keyboards if you want to delete them.
8. Hit the Delete button that appears for each keyboard.
If Gboard is set as default and still not working, you can try to remove it from the keyboard list then re-add it. Just hit the Delete button found beside Gboard or after clicking on the app. Next, tap Add Keyboard under the Manage Keyboard menu then pick Gboard.
3. Clear Gboard App Cache
When the two most basic solutions previously discussed do not work on your end, it is time to address the problem from the mobile app. One thing to do is to clear the app cache when Gboard keeps stopping.
Cache, in layman’s terms, is where Gboard data is kept while the app is running. Also, cache lets the Android or iOS device quickly retrieve information from it to launch Gboard in an instant. Sometimes, the cache becomes overloaded or data is corrupted, so it needs to be cleared or reset. Follow the instructions below for clearing cache for the keyboard app:
On Android
1. Go to the Settings menu of your smartphone or tablet PC.
2. Click on Apps to launch the installed apps list.
3. Scroll down and tap Gboard afterward.
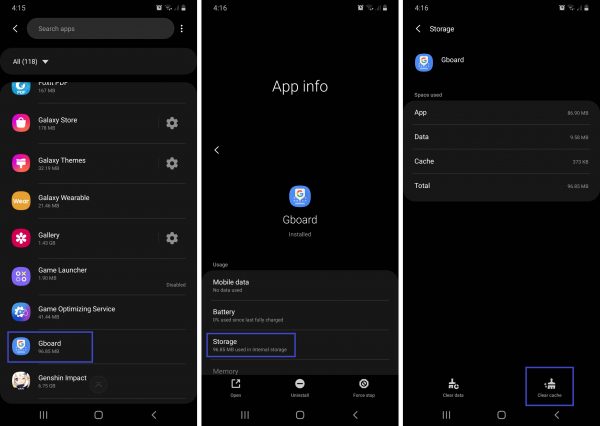
4. On the keyboard app info page, click Storage.
5. Click on the Clear Cache icon or button.
On iOS
1. Hit the Settings icon on your iPhone or iPad.
2. Look for Gboard from the installed apps list down the menu.
3. Click on Gboard afterward.
4. Swipe the slider button on Reset Cached Content on the app info page.
*Some apps on iOS devices do not have the Reset Cached Content slider button, so if not available, you need to delete and reinstall instead.
4. Limit Permissions for Gboard That Keeps Stopping
The more permissions you give an app, the more features it can run. On the other hand, this can lead to Gboard not working. The keyboard app might be stuck while loading with more functions active.
You can temporarily limit Gboard app permissions to just the necessary ones to fix the problem. Below is a guide on how to change the app’s permissions:
On Android
1. Launch the Settings menu from its icon on your smartphone or tablet PC.
2. Click Apps or Apps & Notifications.
3. Scroll down until you find Gboard from the installed apps list.
4. Click on Gboard afterward.
5. On the App Info or Details page, select Permissions.
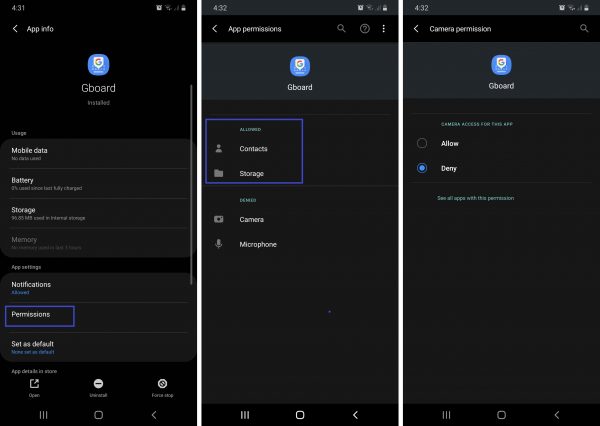
6. Choose only the basic permissions, such as storage and contacts, that you need.
7. Tick the Allow or Deny button on the specific permission.
On iOS
1. Navigate to the Settings menu of your iPhone or iPad.
2. Click on General from the options.
3. Tap Keyboard afterward.
4. Select Keyboards.
5. Choose Gboard from the keyboard apps list.

6. Swipe on the Allow Full Access slider button to disable it.
5. Update Gboard App That Keeps Stopping
When Gboard keeps stopping, its features might be outdated already. You can get the latest version of the keyboard app from the Google Play Store or App Store. Furthermore, below are quick instructions on how to update your apps on Android or iOS devices:
On Android
1. Launch the Google Play Store app on your smartphone or tablet PC.
2. On the app’s search bar, type Gboard.
3. Select Gboard from the results list afterward.
4. On the app details page, hit the Update button.
5. Wait for the download and installation process to finish.
On iOS
1. Navigate to the App Store from your iPhone or iPad.
2. Click on your profile icon on the app afterward.
3. Scroll down to view available apps to update.
4. Tap the Update button next to Gboard on the list.
5. Wait for the new version of Gboard to download and install on the device.
6. Reinstall Gboard App
In case Gboard keeps stopping even if the app is already updated, you can try to uninstall it then install it again. This solution gives you a new version of the app with default configurations and a cleared cache to start with.
On Android
1. Open your smartphone or tablet PC’s Settings menu.
2. Click on Apps or Apps & Notifications from the options.
3. Pick Gboard from the installed apps list.
4. Click on Gboard to open the app details page.
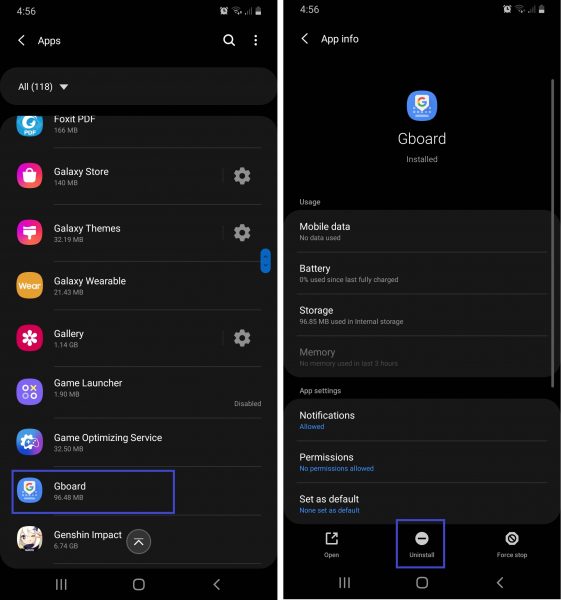
5. Scroll down the page until you find the Uninstall button.
6. Tap Uninstall afterward.
7. After Gboard is removed, redownload and install it from the Google Play Store.
On iOS
1. Long press on the Gboard icon on your iPhone or iPad home screen or app dashboard.
2. Click on Delete App from the pop-up window.
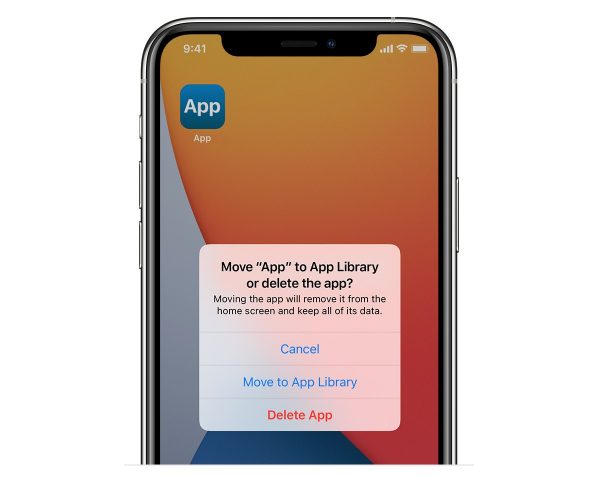
3. Tap Delete again to verify the action.
4. Navigate to the App Store from your iPhone or iPad.
5. Search for Gboard afterward.
6. Select Gboard from the search results.
7. Redownload and install Gboard from the App Store.
7. Update Mobile Device OS
You can try solutions geared at the mobile device when Gboard keeps stopping even if you did everything to fix the app. For instance, you can update the Android or iOS version your gadget has.
Updating the operating system (OS) could work to make Gboard run error-free again because software handles all apps and their functions. Moreover, new OS versions typically include patches for the bugs or glitches of the older versions. The ways to update the software are outlined below:
Update Android
1. Connect your smartphone or tablet PC to a Wi-Fi network.
2. Launch the Settings menu by clicking on its home screen icon.
3. Look for Software Update and tap it.
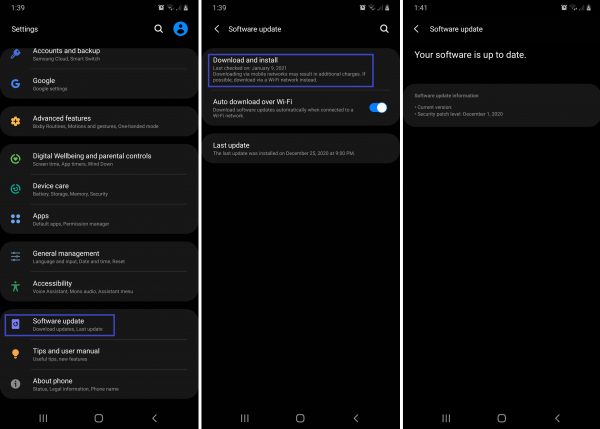
4. Wait for the device to indicate that new software is available or not.
5. If there is a new OS, hit the Download and Install button.
6. Click on Install Now to confirm the action afterward.
7. Wait for the gadget to reboot and finish the update.
Update iOS From Settings Menu
1. Connect your iPhone or iPad to a stable Wi-Fi network.
2. Go to Settings via its home screen icon.
3. Tap General afterward.
4. Click on Software Update from the menu.
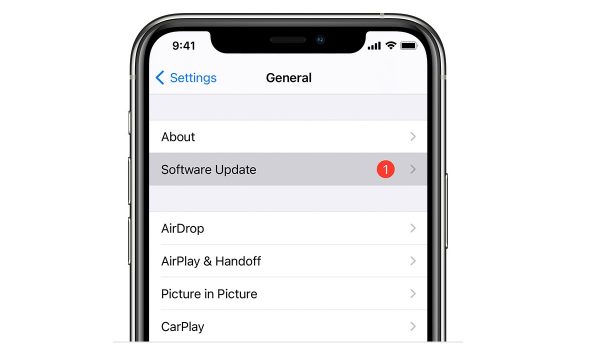
5. Select Download and Install if an update is available.
6. Click on Install to update iOS at the moment.
7. Provide the passcode if necessary.
Update iOS via Mac
1. Launch Finder or the iTunes app on your Mac.
2. Plug your iPhone or iPad into the computer via a cable.
3. Select your device via its name on the Finder or iTunes sidebar.
4. Select the General tab afterward.
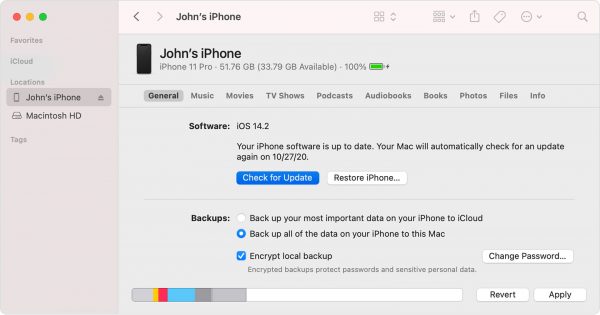
5. Hit the Check for Update button.
6. Click on the Download and Update button once it appears.
7. Input the device passcode as required.
8. Upgrade Mobile Device RAM
Nowadays, the latest mobile devices have 8 GB or more RAM storage, which can already cover plenty of installed apps. If you are using an old gadget and have loaded your device with heavy apps, it is no surprise if low RAM is the root cause of Gboard not working.
What you need to do is to upgrade your gadget’s RAM. Upgrading, in this context, means freeing up useable space. How to upgrade RAM you ask? We list down below the best practices you can try now regardless if you are using an Android or iOS device:
Deactivate Unnecessary Apps
You can deactivate other apps that are running in the background temporarily or permanently to free up RAM. The latter is better so that Gboard can work consistently without errors.
If just for the meantime, force unnecessary running apps to stop. Note that the app can run again after a while or once the mobile device is restarted.
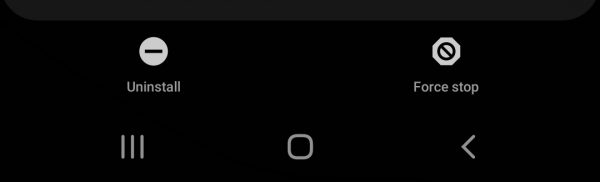
On an Android device, you can stop an active app by going to Settings then Apps. Once you have picked the app, tap Battery then the Force Stop or Disable icon.
On iOS devices, there is no force stop button. Just hold the home button or screen until the App Switcher dashboard appears then swipe on the specific app.
If permanently, what you need to do is to uninstall the app on your Android or iOS device. Just follow the same steps as to how you deleted Gboard before you reinstalled it.
Use RAM Cleaner or Booster Apps

With a RAM cleaner or booster app, you do not need to force stop each app one by one because you can deactivate all storage-heavy apps in just a few taps.
The universal way to use a RAM cleaner or booster varies, so let us tackle in general how it works instead. To elaborate, a RAM cleaner or booster app detects the most space-consuming apps on your Android or iOS device and presents it as a list or a graph with how much RAM is consumed.
Depending on the cleaner or booster app, you are given the option to remove specific apps or free up RAM using a button on the app’s home interface. Once you tap on the clear or boost button, RAM is cleared for your entire device. It is as quick as that.
You can find and download the best iOS or Android cleaner apps from the Google Play Store and App Store.
Disable Widgets and Animations
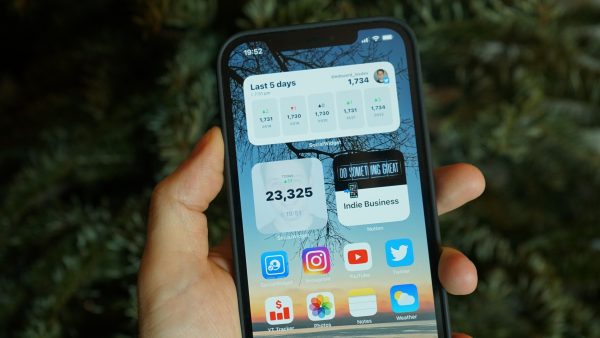
Widgets, such as weather updates and music players, and live animations in rich graphics also consume a significant amount of RAM on a mobile device. Deactivating these are easy.
For widgets, you can just long-press on each and drag those out of the screen. For animations and effects, the option to deactivate is typically within the Settings menu. You can look for it in Advanced features or Wallpapers and Animations then swipe on the slider or set it to Off.
Takeaway
Gboard exceeds regular keyboards in terms of functionality, so it is the personalization app of choice of many mobile device users. When Gboard keeps stopping or is not working, typing and messaging are greatly affected. Also, it can trouble you even more if you do not know how to fix it. The good thing is that there is more than one solution that works. Furthermore, the fixes can be applied easily without expertise in troubleshooting Android or iOS devices.