
Are you tired of using the standard map view on your iPhone’s Apple Maps app? Do you want a more detailed and realistic view of the locations you’re navigating? Look no further! In this article, we will show you how to switch to satellite view in Apple Maps on your iPhone. By enabling satellite view, you can experience a whole new perspective that includes real-life imagery and topographical details. Whether you’re exploring a new city, checking out a hiking trail, or simply curious about what your neighborhood looks like from above, satellite view will provide you with a unique and immersive experience. So, let’s dive in and discover how to access and make the most of satellite view in Apple Maps on your iPhone!
Inside This Article
- Enabling Satellite View in Apple Maps
- Navigating to a Specific Location
- Exploring 3D Perspective in Satellite View
- Customizing Satellite View Settings
- Conclusion
- FAQs
Enabling Satellite View in Apple Maps
Apple Maps provides users with a variety of viewing options to enhance their navigation experience. One of these options is Satellite View, which allows you to see high-resolution satellite imagery of locations around the world. Whether you want to explore a new city or get a better understanding of your surroundings, Satellite View can be a useful feature to have enabled on your iPhone. Here’s how to switch to Satellite View in Apple Maps:
1. Enable Location Services on your iPhone: Before you can access Satellite View in Apple Maps, ensure that your iPhone’s Location Services are enabled. This feature allows your device to determine your current geographic location, making it easier for the app to display the appropriate map details.
2. Open the Apple Maps app: Locate the Apple Maps app on your iPhone’s home screen and tap on it to open it. The app icon features a map with a blue arrow pointing upwards.
3. Zoom in to your desired location: Use the pinch-to-zoom gesture on your iPhone’s screen to zoom in to the area you want to view in Satellite View. You can zoom in by placing two fingers on the screen and moving them apart.
4. Toggle to Satellite View: Once you have zoomed in to your desired location, look for the “i” button at the top right corner of the map screen. Tap on it to reveal a menu with various options. From the menu, select “Satellite” to switch the view from the default map view to Satellite View.
Now, you should be able to see a stunning imagery of the selected location in Satellite View. You can explore the area by panning around, zooming in and out, and even rotating the map with two fingers. Satellite View can be particularly useful when you want to get a closer look at landmarks, landmarks, or when you need a visual reference for navigation.
Remember, Satellite View relies on an internet connection to download and display the high-resolution imagery. If you are in a location with poor or no internet connectivity, the Satellite View may not be available or the imagery may not load properly.
So, the next time you use Apple Maps on your iPhone, don’t forget to enable Satellite View to get a bird’s-eye view of the world around you!
Navigating to a Specific Location
Apple Maps offers a convenient and user-friendly way to navigate to a specific location using satellite view on your iPhone. Whether you’re exploring a new city or trying to find your way in an unfamiliar area, this feature can be incredibly helpful. To switch to satellite view in Apple Maps and easily navigate to your desired location, follow the steps below:
- Enable Location Services on your iPhone: Before you begin using Apple Maps, make sure that Location Services are enabled on your iPhone. This allows the app to access your device’s GPS and provide you with accurate navigation.
- Open the Apple Maps app: Locate the Apple Maps app on your iPhone’s home screen and tap on it to launch the application. The app icon is easily recognizable with its white background and a map pin icon in various shades of green.
- Zoom in to your desired location: Once the Apple Maps app is open, use pinch-to-zoom gestures on the map to zoom in to the area where you want to navigate. This will help you get a closer view and a better understanding of your surroundings.
- Toggle to Satellite View: To switch to satellite view in Apple Maps, look for the “i” button in the lower-right corner of the screen. Tap on it to open the information panel. In the panel, you will see different options such as “Directions,” “Label,” and “Satellite.” Tap on the “Satellite” option to enable satellite view for the selected location.
Once you have successfully switched to satellite view, the Apple Maps app will display a bird’s-eye view of your selected location. You can now explore and navigate the area with detailed imagery and a real-life perspective. Additionally, you can use the available navigation features in Apple Maps to find specific addresses, landmarks, or even get turn-by-turn directions to your destination.
Switching to satellite view in Apple Maps not only provides you with a visually appealing experience but also helps you gain a better understanding of the surrounding area. Whether you’re planning a trip, exploring a new neighborhood, or simply satisfying your curiosity, satellite view in Apple Maps is a valuable tool to enhance your navigation and exploration on your iPhone.
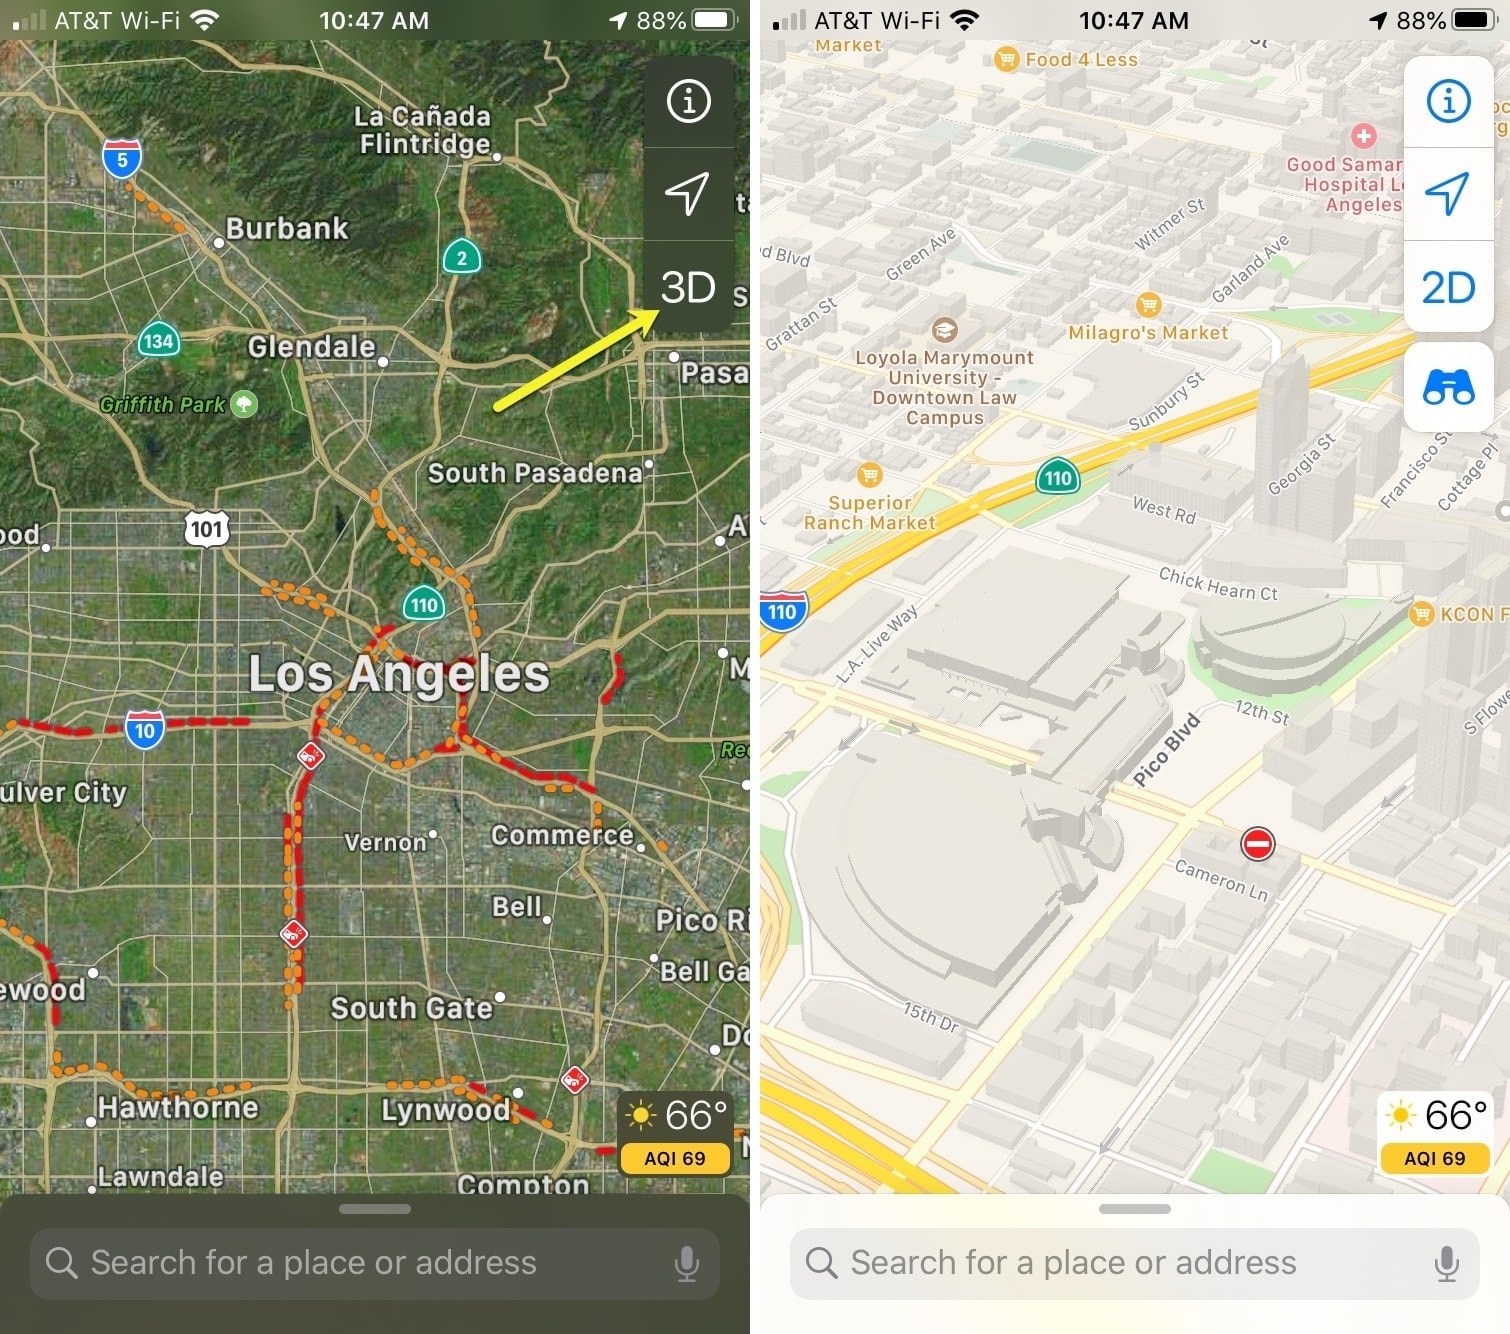
Exploring 3D Perspective in Satellite View
Apple Maps offers a powerful feature called Satellite View that allows you to explore locations with stunning, high-resolution images from above. However, did you know that you can take your satellite view experience to the next level by enabling the 3D perspective? With this feature, you can get a more immersive and realistic view of your surroundings, giving you a deeper understanding of the terrain and architecture in your chosen area.
To enable the 3D perspective in satellite view on your iPhone, follow these steps:
- Open the Apple Maps app on your iPhone. If you don’t have it installed, you can download it from the App Store.
- Search for the location or address you want to explore in satellite view. You can do this by using the search bar at the top of the screen.
- Once you have found your desired location, zoom in by pinching your fingers together on the screen or double-tapping on the area you want to explore.
- When you are in the desired zoom level, swipe up on the screen with two fingers. This action will activate the 3D perspective view and transform the flat satellite imagery into a more three-dimensional representation.
Now, you can enjoy a more realistic and immersive satellite view experience. As you pan and zoom around, you will notice that the buildings, landmarks, and terrain have a lifelike depth and perspective, allowing you to better visualize and navigate the area.
Exploring locations in 3D perspective can be particularly beneficial when planning a trip, exploring new neighborhoods, or even just satisfying your curiosity about a particular place. It provides a unique way to interact with maps and gain a better sense of your surroundings.
It’s worth noting that the availability and quality of 3D perspective imagery may vary depending on the location. Urban areas and popular tourist destinations often have more detailed 3D models, while rural or remote areas may have limited or no 3D coverage.
Customizing Satellite View Settings
Apple Maps offers a variety of customization options to enhance your experience with the Satellite View feature. Whether you want to explore stunning aerial imagery or navigate with more precision, these settings can be easily adjusted to suit your preferences.
To access the Satellite View settings, follow these simple steps:
- Open the Apple Maps app on your iPhone.
- Tap on the “i” icon located in the bottom right corner of the screen to access the Info Card.
- Scroll down and select “Satellite” from the list of available options.
Once you have entered the Satellite View settings, you will find a range of customization options that allow you to personalize your viewing experience:
- Labels: Toggle the switch to display or hide location labels on the satellite imagery. This can be useful when you want a cleaner view of the landscape without any distractions.
- Directions & Scale: Enable or disable the display of direction arrows and scale indicators on the map. These features can help you understand the orientation and size of objects within the satellite view.
- Traffic: Use the traffic overlay option to see real-time traffic information superimposed on the satellite imagery. This can be incredibly useful for planning routes and avoiding congestion.
- Weather: Enable or disable the weather overlay to view current weather conditions on the satellite map. This can be particularly handy when you’re planning outdoor activities and want to check the weather at your desired location.
Once you have customized the Satellite View settings to your liking, simply exit the settings menu and enjoy exploring the world from a unique aerial perspective.
It’s worth noting that the availability and functionality of certain settings may vary depending on your location and the version of the Apple Maps app you are using. If you’re not seeing a specific option mentioned here, make sure your app is up to date and check for any region-specific limitations.
So go ahead, take advantage of the Satellite View settings in Apple Maps and unlock a whole new way to navigate and explore the world around you!
Switching to the Satellite View in Apple Maps on your iPhone opens up a whole new perspective, allowing you to explore the world from above. Whether you’re planning your next adventure or simply curious about the layout of a location, the Satellite View provides you with a bird’s-eye view of the earth.
By following the easy step-by-step guide mentioned earlier, you can quickly switch between the Map and Satellite View on your iPhone running iOS 13 and above. The ability to toggle between these views grants you a versatile navigation experience, from detailed street maps to high-resolution satellite imagery.
So, get ready to embark on a visual journey with Apple Maps on your iPhone. Discover new places, explore your favorite destinations from a different angle, and never miss a detail in the landscape again with the Satellite View feature.
FAQs
Q: Can I switch to satellite view in Apple Maps on my iPhone?
Yes, you can switch to satellite view in Apple Maps on your iPhone. Apple Maps provides a satellite view option that allows you to see an aerial view of the location you are viewing.
Q: How do I switch to satellite view in Apple Maps?
To switch to satellite view in Apple Maps on your iPhone, follow these steps:
- Open the Apple Maps app on your iPhone.
- Enter the location you want to view or find it on the map.
- Swipe up from the bottom of the screen to reveal additional options.
- Tap on the “Satellite” button.
- The map will switch to satellite view, showing you a detailed aerial image of the location.
Q: Can I switch between different satellite imagery in Apple Maps?
No, Apple Maps does not provide the option to switch between different satellite imagery. The satellite view in Apple Maps is based on a single dataset, so you cannot choose different imagery sources like Google Maps.
Q: Is satellite view available for all locations in Apple Maps?
Satellite view is available for many locations in Apple Maps, but it may not be available for all areas. The availability of satellite view depends on the coverage and data available for a particular location. In urban areas and popular landmarks, you are more likely to have access to satellite view.
Q: Can I use satellite view in Apple Maps offline?
No, you cannot use satellite view in Apple Maps offline. Satellite view requires an internet connection to download and display the aerial imagery. If you are in an area with no internet connection, you will only be able to access offline maps in Apple Maps.
Q: Can I use satellite view in Apple Maps on other Apple devices?
Yes, you can use satellite view in Apple Maps on other Apple devices like iPad, Mac, and Apple Watch. The process to switch to satellite view is similar on these devices as well.