
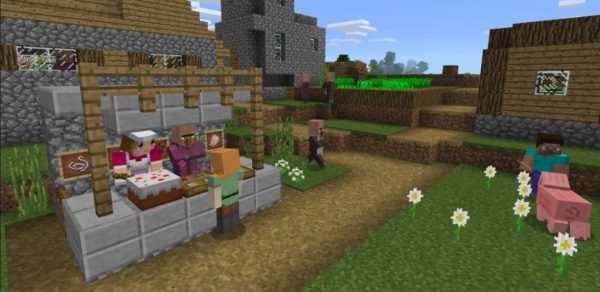
Bartering might be the oldest method of obtaining goods but is exciting when it is part of the mechanics of the best open-world games. In Minecraft, for example, you can exchange precious materials with villagers to receive items that are rare in the game or difficult for you to craft. Also, the more experienced you are in Minecraft villager trades, the better the offers you receive.
If you want to become an expert Minecraft trader who always gets the best deals, this article is for you. We will show you the ropes, including how to trade with and unlock the top offers from villagers.
Minecraft Villagers to Trade With
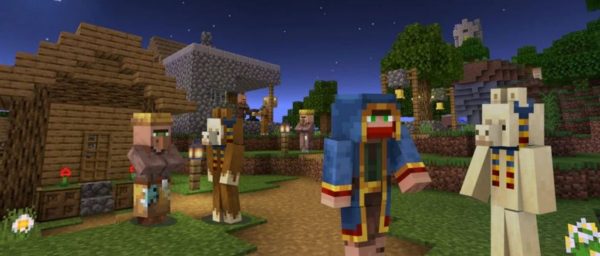
Before engaging in Minecraft villager trades, you should familiarize yourself with the types of characters you can swap items with. If you are a beginner, know that Minecraft lets you exchange goods with non-playable characters (NPCs) that have a job – wandering traders included. That means jobless, nitwit, and baby villagers cannot barter with you.
The villagers who are ready for trading reside in random villages. Wandering traders, meanwhile, appear randomly at day. If you do not want to look or wait for them, you can have traders in your base as long as you give your villagers jobs. Just place a job site block near the villager, then wait for the NPC to claim it and take on a specific role.
A villager’s profession depends on the job site block you give them. For example, a Minecraft smithing table lets the NPC become a toolsmith. A Minecraft grindstone, meanwhile, makes the villager a weaponsmith. Here is a complete reference on what blocks to use depending on what job you want to give.
| Villager Profession | Job Site Block |
|---|---|
| Farmer | Composter |
| Fisherman | Barrel |
| Shepherd | Loom |
| Fletcher | Fletching Table |
| Butcher | Smoker |
| Armorer | Blast Furnace |
| Toolsmith | Smithing Table |
| Weaponsmith | Grindstone |
| Mason | Stonecutter |
| Leatherworker | Cauldron |
| Cleric | Brewing Stand |
| Cartographer | Cartography Table |
| Librarian | Lectern |
How to Trade With Villagers in Minecraft
You now know who to swap goods with, so the next thing to do is to initiate Minecraft villager trades. The exchange can be completed fast if you already have the goods required. Otherwise, gather the supplies first, then go back to the villager once ready.
Follow these steps to trade with a villager:
1. Interact with an employed villager or wandering trader.
2. Once the trading interface is onscreen, find the offers on the left pane of the interface.
3. Pick from the trade options the deal you want (e.g., emeralds for a map instead of glass for emeralds).
4. If you have the required item for the trade, place it on the left empty input slot or both slots if two types of goods are needed.
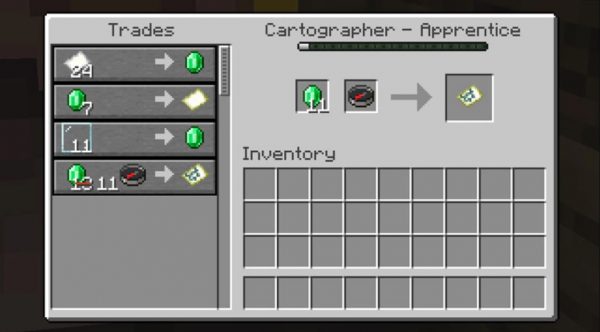
5. The item the villager is offering will be on the right output slot, so grab it from there to your inventory afterward.
There are at least two trade deals available per trader level. Because there are five Minecraft villager job levels, expect about ten offers for each profession.
How to Get the Best Offers from Villager Trades
Like in real life, Minecraft villager trades can be good or bad, depending on the offer. The best deals are those that let you obtain rare materials or gear. Those have high chances to be offered when you do the following:
Level Up Employed Villagers for Great Deals
Minecraft villager jobs have five tiers, as mentioned, and we will discuss those in detail here. Expertise level starts from Novice, which can become Apprentice, Journeyman, Expert, and Master later on. Villagers who have reached the Master status have the best items in store for you, so you need to promote your employed NPCs to the highest level.
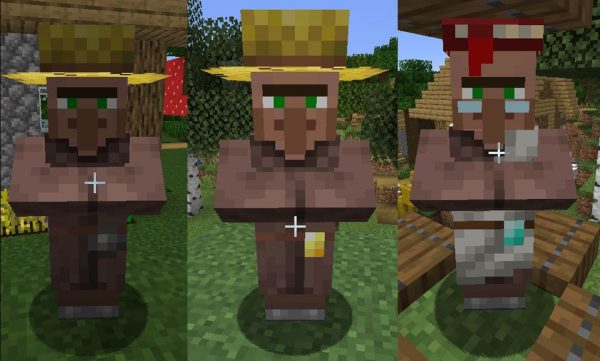
To do that, you should check the villager’s expertise first. If you have tried Minecraft villager trades already, you know that you can see the job level from the trading interface. Also, you might have noticed that most of the traders have gems on their clothing. Looking at the said accessories helps you identify the job level faster.
| Job Level | Gem Worn |
|---|---|
| Novice | None |
| Apprentice | Bronze |
| Journeyman | Gold |
| Expert | Emerald |
| Master | Diamond |
Once you identify the job expertise level, help your villagers get their progress bar filled segment by segment or gems upgraded by frequently trading with them. That also means the more seasoned you are as a trader, the better your villagers and trade offers are.
Use Hero of the Village for Discounted Offers
The best Minecraft offers for you might be the ones you get with a “discount,” so we recommend obtaining and using the Hero of the Village effect.
Hero of the Village is a temporary buff that reduces the cost or items required for Minecraft villager trades. It may be given to you as a reward after a raid. Raids in Minecraft happen when hostile mobs swarm a village. They are triggered once a player with a Bad Omen effect enters a village.
Like Minecraft trident enchantments, the Hero of the Village effect has multiple tiers. Each gives you a different discount percentage and can make any offer worth it.
| Hero of the Village Tier | Effect on Minecraft Villager Trades |
|---|---|
| I (Bedrock/Pocket Edition) | 30% discount |
| II (Java Edition, Survival Mode) | 36.25% discount |
| III (Java Edition, Survival Mode) | 42.5% discount |
| IV (Java Edition, Survival Mode) | 48.75% discount |
| V (Java Edition, Survival Mode) | 55% discount |
If you are a Minecraft Bedrock Edition player, the Hero of the Village only takes effect in the village where the raid mobs were slain. You will know that the buff is active when green particles are floating around your character. To check the remaining time the status effect will last, take a look at its details to the left of your inventory menu.
Create Trading Hall for Easy Offer Comparison
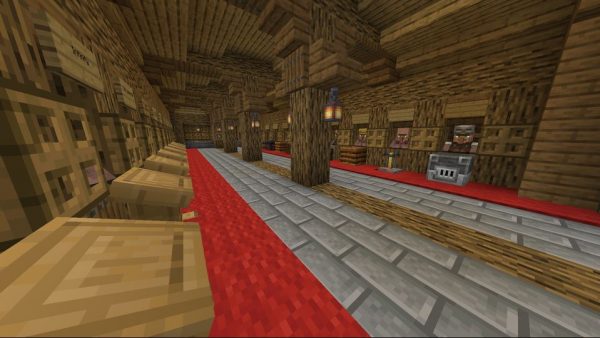
You can also get the best trade offers currently available by comparing all of them. With villagers scattered around the in-game world or roaming in your expansive base, though, going to and from a trader is not easy. That is why players create a trading hall that helps keep employed villagers together.
How your trading hall should look is up to you. It can be comprised of simple booths lined next to each other in an open environment or a majestic walled and roofed structure. Whatever the trading hall design is, the villagers must be “trapped” in their booths. Moreover, their respective job site blocks should be accessible to them.
That way, you would not need to walk too far to check every trade offer. If you settled with a setup that is in an open environment, though, prepare to fend off hostile mobs that might occasionally attack your traders.
Keep Villagers Happy for Low Prices
If you hit villagers, do not expect a favorable offer from them. Trading costs are high when traders are hurt and angered. That is why you should always keep your villagers happy in the game if you want the best deals.
In case you getting on their bad side was accidental, do not worry. You only have to stay away from them, wait a few minutes or hours for their anger to subside, then try approaching them again.
Best Items from Minecraft Villager Trades
If you have not yet thought about which items or offers are the best for you, we are also here to help you decide on those. Below are our recommendations per villager job type.
| Villager Profession (Master Level) | Best Item/s Offered | Item Cost | Item Use |
|---|---|---|---|
| Farmer | Glistering Melon | 4 Emeralds | Ingredient for Potions of Healing |
| Fisherman | Emerald | 4 Pufferfish | Most-wanted trading currency |
| Shepherd | Painting | 2 Emeralds | Decoration |
| Fletcher | Enchanted Crossbow | 8 to 22 Emeralds | For long-range attack damage better than that of bows |
| Butcher | Dried Kelp Block | 10 Emeralds | Fuels furnaces |
| Armorer | Diamond Chestplate or Helmet | 21 to 35 or 13 to 27 Emeralds | Second-best type of armor |
| Toolsmith | Enchanted or Regular Diamond Pickaxe | 18 to 32 Emeralds | Second-best type of tool |
| Weaponsmith | Diamond Sword | 13 to 27 Emeralds | Second-best type of weapon |
| Mason | Block of Quartz or Quartz Pillar | 1 Emerald | Decoration |
| Leatherworker | Saddle | 6 Emeralds | For riding mobs; only obtainable from chests or fishing |
| Cleric | Bottle o’ Enchanting | 3 Emeralds | Drops experience points (XP) when thrown |
| Cartographer | Bordure Indented or Field Masoned Banner Pattern | 2 Emeralds | Banner customization |
| Librarian | Enchanted Book | 5 to 64 Emeralds and 1 Book | Adds special abilities to items |
Are Custom Minecraft Villager Trades Possible?
In Minecraft, custom villager trades are more of a trick or hack than a part of the gameplay. If you have heard of those online and want to confirm whether those are possible, the answer is yes. Custom Minecraft villager trades can only happen in versions of the game specified below, though.
Java Edition (Computers)
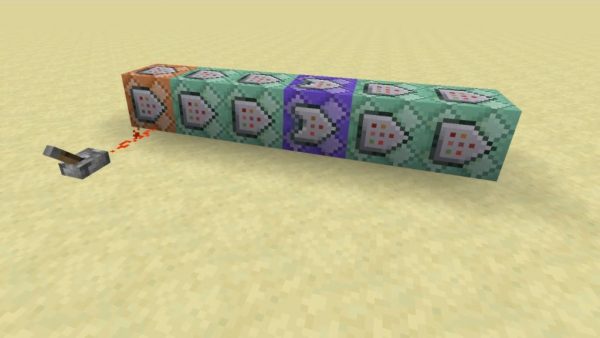
In Java Edition’s Creative Mode, custom trades can be done via the command block and a summon command. The former is the block pictured above while a basic example of the latter is the string of words below.
/summon minecraft:villager ~ ~ ~ {VillagerData:{profession:armorer,level:5,type:plains},Offers:{Recipes:[{buy:{id:diamond helmet,Count:1},sell:{id:emerald,Count:1},maxUses:100}]}}
Here is how to do custom trades in Java Edition:
1. Create a command block by typing /give command_block on the chat window and inserting your Minecraft player name between /give and command.
2. Drag the block from your inventory to the ground.
3. Click the command block to access its interface.
4. Type the sample summon command string above on the text input box.
5. Indicate after /summon minecraft:villager ~ ~ ~ {VillagerData: the trader’s profession, its level, and type of location.
6. Specify what you want to receive after Offers:{Recipes:[{buy:{id: and how many items you need after ,Count:.
7. Indicate what you want to give the trader in exchange after ,sell:{id:, the amount after ,Count:, and how many times the trade should be available after ,maxUses:.
If done correctly, the summoned villager will be standing on top of the Command Block. Also, the offer you want will be visible in the said NPC’s trading interface.
Bedrock/Pocket Edition (Android)
On the Bedrock or Pocket Edition on Android, custom villager trades are possible through third-party apps that work like Minecraft mods. We would not recommend using any of those, though. That is because the apps typically come from unverified sources or are no longer in the Google Play Store. To elaborate, they are not guaranteed safe for your mobile game or device.
Be a Master of Minecraft Villager Trades Today
With your trading skills leveling up through our handy guide, you can obtain the best materials, tools, armors, and weapons. You may also transform your village or base into a community with a flourishing economy. Now get back into the game and try what you have learned to be a master of Minecraft villager trades!