
Smithing can make your Minecraft game even more customizable and enjoyable. Just like combining enchantments via a Minecraft anvil, it is how you can obtain better gear for mining resources and fighting hostile mobs. However, you cannot smith anything without a workstation – the Minecraft smithing table.
In this guide, you’ll learn everything you need to know about the Minecraft smithing table, including how to make it and use it in many ways like a pro.
Also read: How to Make Minecraft Grindstone
Inside This Article
- What Is a Minecraft Smithing Table?
- Minecraft Smithing Table Recipe
- How to Craft a Minecraft Smithing Table?
- How to Use a Minecraft Smithing Table?
What Is a Minecraft Smithing Table?
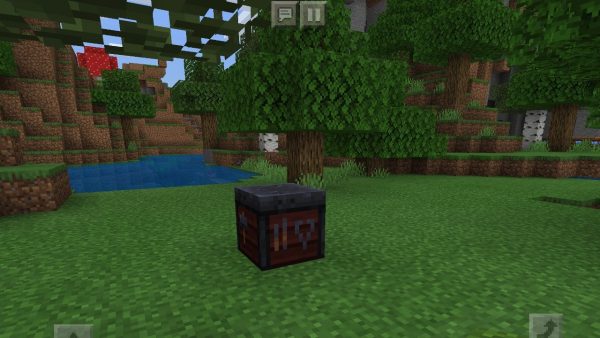
If you are new to the game, let’s get you familiarized first with the Minecraft smithing table. In terms of looks, it resembles a cube just like other in-game assets. What distinguishes the table from other blocks is the pixelated representations of smithing tools on its sides.
As regards functionality, the Minecraft smithing table was originally just a villager job-changer block when it was first added through the Minecraft Version 1.14 Update. It was only after the Version 1.16 Nether Update that the workstation could yield high-level gear. For instance, upgrading diamond tools and armor to their Netherite versions. That has been the main function of the smithing table since then.
Minecraft Smithing Table Recipe
Like when brewing potions on Minecraft, there is a recipe or list of requirements for crafting a Minecraft smithing table. It includes these three important things:
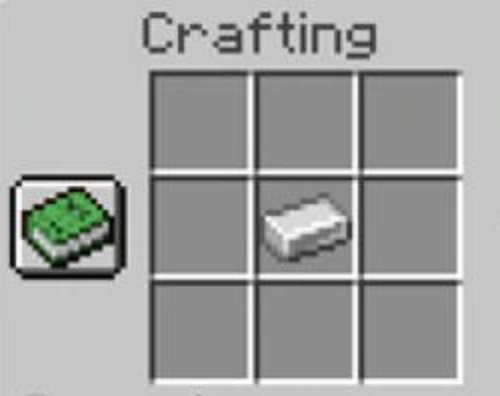
1. Crafting Table

Before you make a Minecraft smithing table, you will need a crafting table. It can be created when you place four wood planks on the empty slots of your crafting menu. Wood planks come from wood blocks and are also made via the crafting menu if you don’t have the crafting table yet. One woodblock generates four planks.
2. Two Iron Ingots
You can source iron ingots from fortresses, pillager outposts, dungeons, temples, shipwrecks, cities, mansions, and chests. You may also opt to defeat mobs to get the material if the said enemies are wearing iron armor or bringing it. Alternatively, you can make iron ingots by melting iron ore in a furnace. Iron ore is usually found four to ten blocks deep in the ground.
3. Four Wood Planks
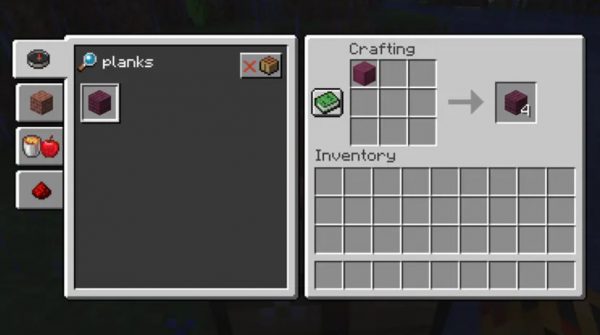
You would need four wood planks for the Minecraft smithing table. The boards can be dark oak, oak, spruce, birch, crimson, acacia, or warped wood, which you can now process via the crafting table.
How to Craft a Minecraft Smithing Table
Have you gathered all the requirements? If yes, it’s time to make the Minecraft smithing table. You’ll find crafting it as easy as how you’ve created the crafting table.
Follow these steps:
1. Take your crafting table from your inventory and set it on the ground.
2. Approach it and open its 3×3 crafting grid.
3. Put one iron ingot in the empty upper-left corner slot.
4. Place another iron ingot on the empty top central slot.
5. Fill the 2×2 grid under the iron ingots with four wood planks as pictured below.
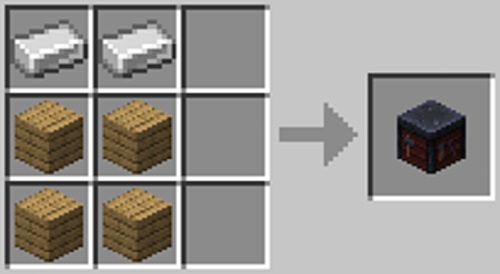
6. Wait for the smithing table to appear on the box the arrow is pointing to.
7. Drag the table to your inventory.
If you do not prefer making the Minecraft smithing table from scratch, you can scour for one in toolsmith houses. You should find those homes in an inhabited village in your world. While the table spawns in the said places, note that it cannot do so in the Netherworld.
How to Use a Minecraft Smithing Table
The Minecraft smithing table is not just for improving your gear in the game. Players have found many ways to use it beyond what it was originally intended for. To elaborate, below is how to use the smithing table in many ways, including the popular and lesser-known functions.
1. Use Smithing Table for Upgrading Diamond Gear to Netherite Gear

The Minecraft smithing table is often used for transforming diamond equipment into their Netherite versions. Whether enchanted or not, the tool, weapon, or armor can be enhanced using the workstation. Also, don’t forget to mine the rare required material beforehand, the Netherite ingot.
How to Obtain a Netherite Ingot
Here’s how to obtain a Netherite ingot:
1. Go to the Netherworld and dig for ancient debris, a brownish cube ore with white veins.
2. Use only a diamond or Netherite pickaxe to mine ancient debris because the ore is blast-resistant.
3. Gather four or more Netherite scraps from several ancient debris.
4. Set up your crafting table on the ground.
5. Put four Netherite scraps and four gold ingots on the crafting table’s interface in any order.
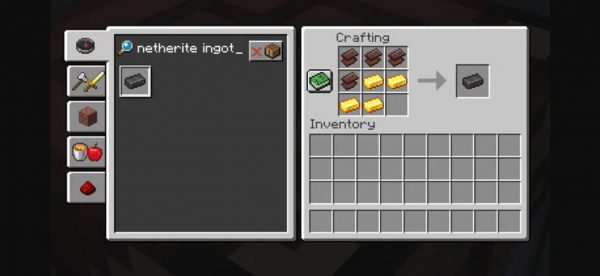
6. Store the created Netherite ingot from the crafting menu to your inventory.
How to Upgrade Diamond Gear
Here’s how to upgrade diamond gear into Netherite gear afterward:
1. Get the smithing table from your inventory and place it on the ground.
2. Go near it and activate its interface.
3. On the empty left slot, put the regular or enchanted diamond tool, weapon, or armor.
4. On the empty middle slot, place the Netherite ingot.
5. Wait for the Netherite version of the gear to appear on the rightmost box.
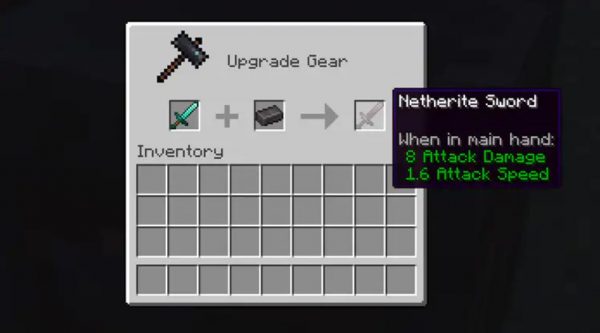
6. Drag the improved equipment into the inventory to store it.
Cool Gear to Make via a Minecraft Smithing Table
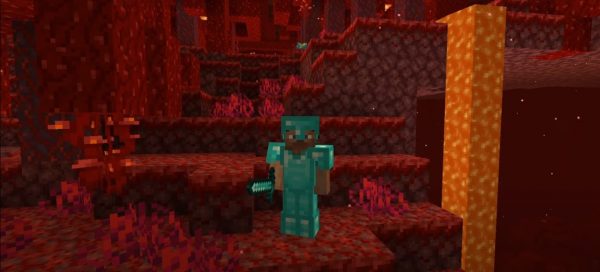
Now that you know how to make Netherite gear from diamond gear, it will be to your advantage to create the complete gear set. That is because Netherite tools, armor, and weapons are currently the best gear in Minecraft and give you perks when used together. Besides strength, Netherite gear also impresses for they can float on lava.
To make it easier for you to complete the set, refer to the table below. It lists all the cool gear you can make via the smithing table, what you need for crafting them, and their advantages.
| Gear | Recipe | Ratings Boost | Perks |
|---|---|---|---|
| Netherite Helmet | Diamond Helmet + Netherite Ingot | Durability increases to 407 from 363
|
+1 Armor Toughness and +1 Knockback Resistance if with the complete set |
| Netherite Chestplate | Diamond Chestplate + Netherite Ingot | Durability increases to 592 from 528 | |
| Netherite Leggings | Diamond Leggings + Netherite Ingot | Durability increases to 555 from 495 | |
| Netherite Boots | Diamond Boots + Netherite Ingot | Durability increases to 481 from 429 | |
| Netherite Sword | Diamond Sword + Netherite Ingot | Durability increases to 2031 from 1561,
Attack goes up to 10 from 6 |
|
| Netherite Axe | Diamond Axe + Netherite Ingot | Durability increases to 2031 from 1561,
Attack goes up to 10 from 6 |
|
| Netherite Pickaxe | Diamond Pickaxe + Netherite Ingot | Durability increases to 2031 from 1561,
Attack goes up to 6 from 5 |
|
| Netherite Shovel | Diamond Shovel + Netherite Ingot | Durability increases to 2031 from 1561,
Attack goes up to 6.5 from 4 |
|
| Netherite Hoe | Diamond Hoe + Netherite Ingot | Durability increases to 2031 from 1561 | |
| Weapon, armor, or tool of a different material (Possible only with a mod installed) | Weapon, armor, or tool + New material (e.g. Stone, Wood, Gold, etc.) | Depends on mod | Have any gear in the material you want |
2. Use Smithing Table When Changing Villager Roles

Before Netherite gear came into the game, the smithing table was not much of a game-changer. It was only used to make an employed or unemployed villager a toolsmith. That was still possible after the Nether Update.
How to Turn a Villager Into a Toolsmith
Here’s how to turn a villager into a toolsmith via the smithing table:
1. Visit the villager’s house in the town or your base.
2. Look for his or her job site block and destroy it.
3. Place the smithing table within a 48 horizontal-block radius near the villager or broken job site block.
4. Wait for the villager to approach the table and claim it.
5. Approach the villager and double-check if his or her job description already indicates “Toolsmith”.
Note that when you destroy the job site block, the villager will get angry. Consequently, that disrupts their activities and makes their trading price more expensive for you. To appease their anger, you can move away from them for a short while.
Also, keep in mind that some villagers cannot take on any job or switch to a type of work unrelated to their original profession. They are the nitwits and the villagers who have already engaged in trades, respectively. The former can be distinguished easily among the townsfolk through their green outfits. Meanwhile, the latter can be identified via their clothing badge and job expertise, which depends on how many trades you did with them. You can check the expertise from the interface that shows up on the screen as you interact with each villager.
Job Site Blocks to Destroy
Villagers have different job site blocks depending on their occupation. To make it easier for you to know what specific block to break and replace with the Minecraft smithing table, check out the table below.
| Villager Occupation | Job Site Block | Block Appearance | Block Functions |
|---|---|---|---|
| Farmer | Composter | Wooden block that is hollow from the top | Turns food and plants into bone meal |
| Shepherd | Loom | Wooden block with vertical threads running from the top to the front | Creates banners |
| Fisherman | Barrel | Wooden block resembling closely traditional wine barrels | Storage |
| Weaponsmith | Grindstone | Square stone attached to an upright wooden beam | Repairs and disenchants items |
| Stonemason | Stonecutter | Stone block with visible disc blade on top | Slices stone precisely |
| Leatherworker | Cauldron | Iron block that is hollow from the top and has four legs | Stores brewed potions |
| Cleric | Brewing stand | Upright yellow beam with three square base plates | Makes potions |
| Fletcher | Fletching table | Rugged wooden block with bullseye mark on one side | Makes villagers fletchers |
| Butcher | Smoker | Block resembling a furnace | Cooks food fast |
| Librarian | Lectern | A stand with a sloped top and book container | Holds books |
| Cartographer | Cartography table | Wooden block with map patch and earth detailing | Resizes, locks, and copies maps |
3. Use Smithing Table to Get More Diamond Gear
In Minecraft, even diamond gear breaks when used beyond the limit. That is why you would need them to be repaired via a Minecraft grindstone or replaced with new ones. The smithing table helps you avoid the hassle of mining and crafting again to replace broken items or stock up on new diamond gear.
With a smithing table, you already know that you can make villagers toolsmiths who are also the game’s best traders. Trade with a toolsmith working on a smithing table until his or her job expertise level goes up from Novice to Master. Once the villager becomes a master toolsmith, you can get diamond gear in exchange for emeralds or other in-game materials.
4. Use Smithing Table as Flooring Material or Wall Decoration
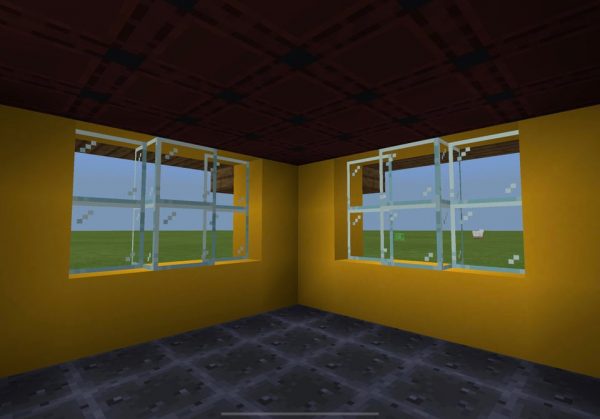
Nowadays, Minecraft players are so creative that every in-game item can double as a completely different thing. The smithing table got new functions because of that. Among the unconventional ways to use the workstation is to treat it as a building or decorative block.
For example, the smithing table can substitute stone flooring when you don’t have the resources to make one. That is due to the cube’s unique stone-like top texture. Also, the table can make a workshop-themed room look like it has hanging equipment when integrated into the wall. That is because it has smithing tools on its sides. You’ll need many smithing tables, though, if you’re working on the floors or walls of a big room.
5. Use Smithing Table to Make Music

Have you ever heard of making music within Minecraft? If not yet, know that it is possible to set up the smithing table and special cubes, called note blocks, to play something as simple as “Do Re Mi” to a complicated pop song.
The smithing table produces a low drum-like sound when a note block is on top of it, and you hit it. If you don’t have a note block yet, you can make one by placing eight wood planks surrounding one Redstone on the crafting table grid. To hear other sounds and carry out a tune, try using different blocks with note blocks.
6. Use Smithing Table to Fuel Furnaces
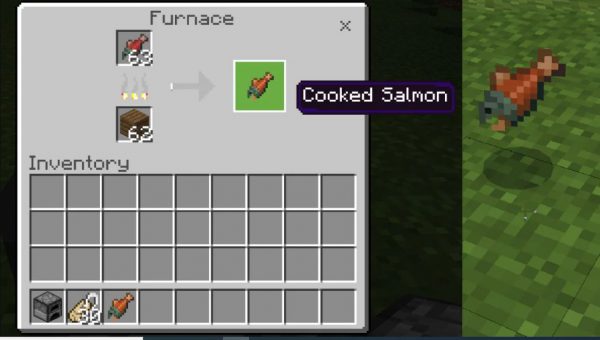
Burning the Minecraft smithing table is an unorthodox way to fuel a furnace in the game. If you do not know, it replaces charcoal, coal, logs, planks, blaze rods, dried kelp blocks, and lava buckets.
How efficient is a smithing table as fuel, you ask? The block can generate an item and a half, meaning it is not as good as your usual fire-making materials. On the other hand, it’s great to use for fuel when you’re on the brink of survival or do not know what else to do with the extra ones in your inventory.
Hammer Your Way to Minecraft Success Now
By making the most of the Minecraft smithing table, you can craft the game’s best gear like a pro blacksmith and build structures in new creative ways like an expert builder. You’ll also enjoy the game more, whether in survival or creative mode. If you’re all set through our guide, it’s time to hammer your way to Minecraft success today!