
Are you looking for a fun and creative way to showcase your photos on your Android device? Look no further than creating a collage! With the countless collage-making apps available on Android, it has never been easier to combine multiple images into one visually stunning masterpiece. Whether you want to create a collage to commemorate a special occasion or simply to add some flair to your social media feed, this article will guide you through the process of making a collage on Android. From selecting the perfect photos to arranging them in a beautiful layout, we will provide step-by-step instructions and recommendations for the best collage-making apps. Let your creativity shine and turn your cherished memories into stunning collages with just a few taps of your finger!
Inside This Article
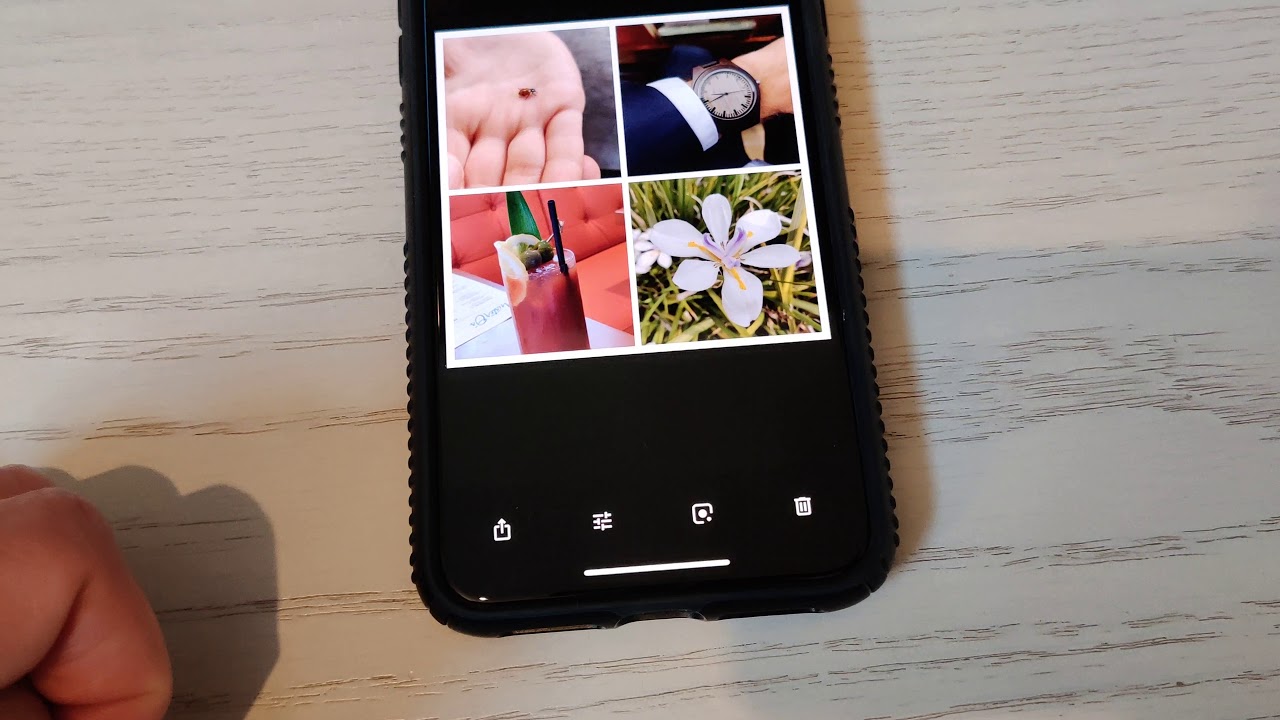
- Step 1: Download a Collage Maker App
- Step 2: Select Photos for Your Collage
- Step 3: Arrange and Customize Your Collage
- Step 4: Add Effects and Filters
- Step 5: Save and Share Your Collage
- Conclusion
- FAQs
Step 1: Download a Collage Maker App
Creating a collage on your Android device is easier than ever with the help of collage maker apps. These apps allow you to transform your favorite photos into beautiful collages with just a few taps. To get started, you’ll need to download a reliable collage maker app from the Google Play Store.
There are plenty of collage maker apps available, each with its own unique features and interface. Some popular options include Pixlr, PhotoGrid, and Canva. Before selecting an app, take some time to read user reviews and check the ratings to ensure that you’re choosing a reputable and user-friendly app.
Once you’ve decided on an app, simply open the Google Play Store on your Android device and search for the name of the collage maker app. Tap on the app when you find it, and then click on the “Install” button to download it onto your device. Depending on your internet connection speed, the download process should only take a few moments.
After the app has finished downloading, you can find it on your device’s home screen or in the app drawer. Simply tap on the app’s icon to open it and begin creating your collage.
Note: Make sure to grant the necessary permissions to the collage maker app, such as access to your device’s gallery or storage, so that it can retrieve the photos you want to include in your collage.
Now that you’ve successfully downloaded a collage maker app, you’re ready to move on to the next step and start selecting photos for your collage.
Step 2: Select Photos for Your Collage
Once you have downloaded a collage maker app, it’s time to dive into the fun part: selecting photos for your collage. The photos you choose will play a significant role in the overall look and feel of your collage, so it’s important to pick ones that align with your desired theme or style.
Here are a few tips to help you select the perfect photos for your collage:
- Consider the story you want to tell: Think about the message or story you want your collage to convey. Are you aiming for a playful and lighthearted vibe, or do you want to evoke a sense of nostalgia? Choose photos that best represent the emotions or themes you want to capture.
- Vary your photo subject: To add visual interest and enhance the overall aesthetic, try to include a mix of different subjects in your collage. Include photos of people, landscapes, objects, or anything else that adds diversity to the composition.
- Experiment with different angles and perspectives: Don’t limit yourself to straightforward, head-on shots. Get creative with angles and perspectives to add depth and dimension to your collage. Consider close-up detail shots, interesting angles, or even using photos taken from above or below.
- Balance colors and tones: Pay attention to the color palette and tonal range of your photos. Aim for a cohesive and balanced look by selecting images that complement each other in terms of color scheme and tone. This will help create a harmonious visual flow within your collage.
- Think about composition: Keep in mind the overall composition of your collage. Think about how the photos will fit together and consider the placement and arrangement of each image. Play around with different layouts until you find the one that feels most visually appealing.
Remember, the photos you choose should reflect your personal style and the message you want to convey through your collage. Take your time to curate a collection of images that resonates with you and enhances the overall visual impact of your creation.
Step 3: Arrange and Customize Your Collage
Once you have selected the photos for your collage, it’s time to arrange and customize them to create a visually appealing composition. Here are the steps to follow:
1. Choose a Layout: Most collage maker apps offer a variety of layout options, such as grids, freeform, and pre-designed templates. Select the layout that best suits your vision for the collage.
2. Drag and Drop: Using the touch screen on your Android device, drag and drop the photos to different positions within the layout. Experiment with different arrangements until you find the one that looks best to you.
3. Adjust Size and Orientation: Some collage maker apps allow you to resize and rotate each photo individually. This feature can be handy when you want to emphasize certain photos or create an interesting visual effect.
4. Add Text and Stickers: Want to personalize your collage further? Look for options to add text or stickers. You can include quotes, captions, or decorative elements to enhance the overall look and convey a specific message.
5. Apply Filters and Effects: Collage maker apps often offer a range of filters and effects to enhance the colors and mood of your photos. Experiment with different settings to find the ones that best complement your chosen images.
6. Adjust Borders and Margins: Some collage maker apps allow you to customize the borders and margins between photos. Play around with these settings to create a more balanced and visually appealing composition.
7. Preview and Fine-tune: Before finalizing your collage, take a moment to preview it in full-screen mode. This will give you a better sense of how the final result will look. Make any necessary adjustments to ensure the collage meets your expectations.
8. Save and Share: Once you are satisfied with your collage, save it to your device or share it directly on social media platforms or messaging apps. Show off your creativity and let others admire your masterpiece!
By following these steps, you can arrange and customize your collage to create a unique and visually stunning piece of art. Have fun experimenting with different layouts, effects, and personalized touches to bring your photos to life in a whole new way!
Step 4: Add Effects and Filters
Once you’ve arranged and customized your collage, it’s time to take your creation to the next level by adding effects and filters. This step allows you to enhance the overall look and feel of your collage, giving it a unique and eye-catching appeal.
Here are some tips on how to add effects and filters to your collage on Android:
- Explore Built-in Effects: Many collage maker apps offer a range of built-in effects to choose from. These effects can include options like vintage, sepia, black and white, cinematic, and more. Experiment with different effects to find the one that best complements your collage.
- Adjust Opacity: Some effects may appear too strong or overpowering when applied to your collage. In such cases, you can adjust the opacity or transparency of the effect to achieve the desired look. This will help you strike the right balance between the effect and the underlying photos.
- Apply Filters: Filters can add a touch of vibrancy, warmth, boldness, or coolness to your collage. Explore the available filter options in your collage maker app and see which one complements the mood and theme of your collage. Whether you prefer a bright and vibrant look or a more subdued and vintage feel, there’s likely a filter that suits your style.
- Control Intensity: Some collage maker apps allow you to adjust the intensity of the applied filter. This gives you the flexibility to achieve the desired effect without overwhelming the overall composition. Play around with the intensity settings to find the perfect balance for your collage.
- Add Textures: If you want to add a unique and textured look to your collage, consider applying textures on top of your photos. These textures can simulate surfaces like canvas, paper, wood, and more. Experiment with different textures to give your collage a more tactile and artistic feel.
- Experiment with Blending Modes: Some collage maker apps offer blending modes that allow you to merge the effects and filters with your photos in creative ways. These blending modes can alter the colors, textures, and transparency, resulting in interesting and visually appealing effects. Explore the blending mode options and see how they transform your collage.
Adding effects and filters to your collage on Android is a great way to elevate its visual impact. Whether you want to enhance the colors, create a vintage look, or add a touch of artistic flair, the options are plentiful. Take your time to explore different effects and filters, and don’t be afraid to experiment until you achieve the desired result.
Step 5: Save and Share Your Collage
Once you have created a stunning collage using your Android device, the final step is to save and share it with others. This allows you to showcase your creativity and artistic vision to friends, family, or the wider online community. Here’s how you can save and share your collage.
1. Save your collage: Most collage maker apps have a built-in save option. Look for an icon or menu item that resembles a floppy disk or the word “Save.” Tap on it, and you will be prompted to choose a location to save your collage. You can either save it to your device’s internal storage or an external SD card, depending on your preference and available storage space.
2. Choose the image format: Collage maker apps typically give you the option to save your collage in various image formats, such as JPEG or PNG. If you plan to print your collage, it’s recommended to save it as a high-resolution JPEG file. If you want to share your collage on social media or via messaging apps, PNG format generally provides better image quality.
3. Rename your collage: Some collage maker apps automatically generate a generic name for the collage file. To make it easier to find and identify your collage later, consider giving it a meaningful name. This can be done during the saving process or by renaming the file in your device’s file manager.
4. Choose a sharing method: After saving your collage, you’ll likely want to share it with others. Collage maker apps usually offer a range of sharing options, including email, social media platforms, messaging apps, and cloud storage services. Select the sharing method that best suits your needs and preferences.
5. Share your collage: Once you’ve chosen a sharing method, follow the prompts to share your collage. For example, if you choose to share via email, you’ll be asked to enter the recipient’s email address, add a message, and hit the send button. If you opt for social media sharing, you may need to log in to the respective platform and grant permission to the collage maker app to access your account.
6. Consider privacy settings: Before sharing your collage on social media or any public platform, take a moment to review the privacy settings. Collage maker apps often allow you to control who can see your shared creations. You can choose to share only with your friends or followers, or make it visible to everyone. Adjust these settings to ensure your collage is shared with the audience you desire.
7. Enjoy the feedback: Once you’ve shared your collage, sit back and enjoy the feedback and reactions from others. Engage in conversations about your collage, answer questions, and cherish the compliments. Sharing your creativity can be a rewarding experience and can inspire others to explore their own artistic side.
Now that you know how to save and share your collage on Android, go ahead and unleash your imagination. Create beautiful collages that reflect your style, memories, and emotions, and let the world admire your creative prowess.
Conclusion
In conclusion, creating collages on Android devices has become easier than ever thanks to the availability of numerous collage-making apps on the Google Play Store. These apps offer a wide range of features and tools to help users unleash their creativity and showcase their memories in stunning collages. Whether you want to combine photos, add stickers and text, apply filters and effects, or customize layouts and backgrounds, there is a collage-making app out there to suit your needs.
With just a few taps, you can effortlessly turn your collection of photos into a beautiful collage that can be shared with friends and family on social media platforms or printed out as a physical memento. So, go ahead and explore the world of collage-making apps on your Android device, and let your imagination run wild!
FAQs
1. Can I make a collage on my Android phone?
Yes, you can definitely make a collage on your Android phone. There are several apps available on the Google Play Store that allow you to create stunning collages with ease.
2. What are some popular collage making apps for Android?
There are many popular collage making apps for Android. Some of the widely used ones include Pixlr, Canva, Adobe Spark, PicsArt, and PhotoGrid. These apps offer various features and options to help you create beautiful collages.
3. Do I need any special skills to make a collage on Android?
No, you do not need any special skills to make a collage on Android. The collage making apps are designed to be user-friendly and intuitive, making it easy for anyone to create a collage. You simply need to choose your photos, select a layout, customize the collage with effects and stickers, and save or share your creation.
4. Can I edit the photos within the collage making app?
Yes, most collage making apps for Android offer photo editing features. You can adjust brightness, contrast, saturation, apply filters, add text, crop, and rotate your photos within the app itself. This allows you to enhance your photos and make them fit perfectly into your collage.
5. Can I share my collages on social media directly from the app?
Yes, sharing your collages on social media is made easy by the collage making apps. Once you have created your collage, you can directly share it on popular social media platforms like Instagram, Facebook, and Twitter. This allows you to showcase your creativity and share your collages with your friends and followers.
Note: The provided HTML tags may not be rendered properly on all platforms.