
Welcome to the world of Windows Phone 8! In this article, we will explore five exciting ways you can customize your Start Screen. The Start Screen is the heart and soul of your Windows Phone 8 device, serving as your gateway to all your apps, contacts, and important information. By personalizing and customizing your Start Screen, you can make your Windows Phone 8 reflect your unique style and preferences. Whether you’re looking to add a personal touch, boost your productivity, or enhance your overall user experience, we’ve got you covered. So, let’s dive in and discover how you can transform your Start Screen into a visually stunning and functional interface that suits your needs.
Inside This Article
- Personalizing your Windows Phone 8 Start Screen
- Customizing Tile Sizes
- Rearranging Tiles on the Start Screen
- Changing the Background Image
- Adding or Removing Tiles
- Conclusion
- FAQs
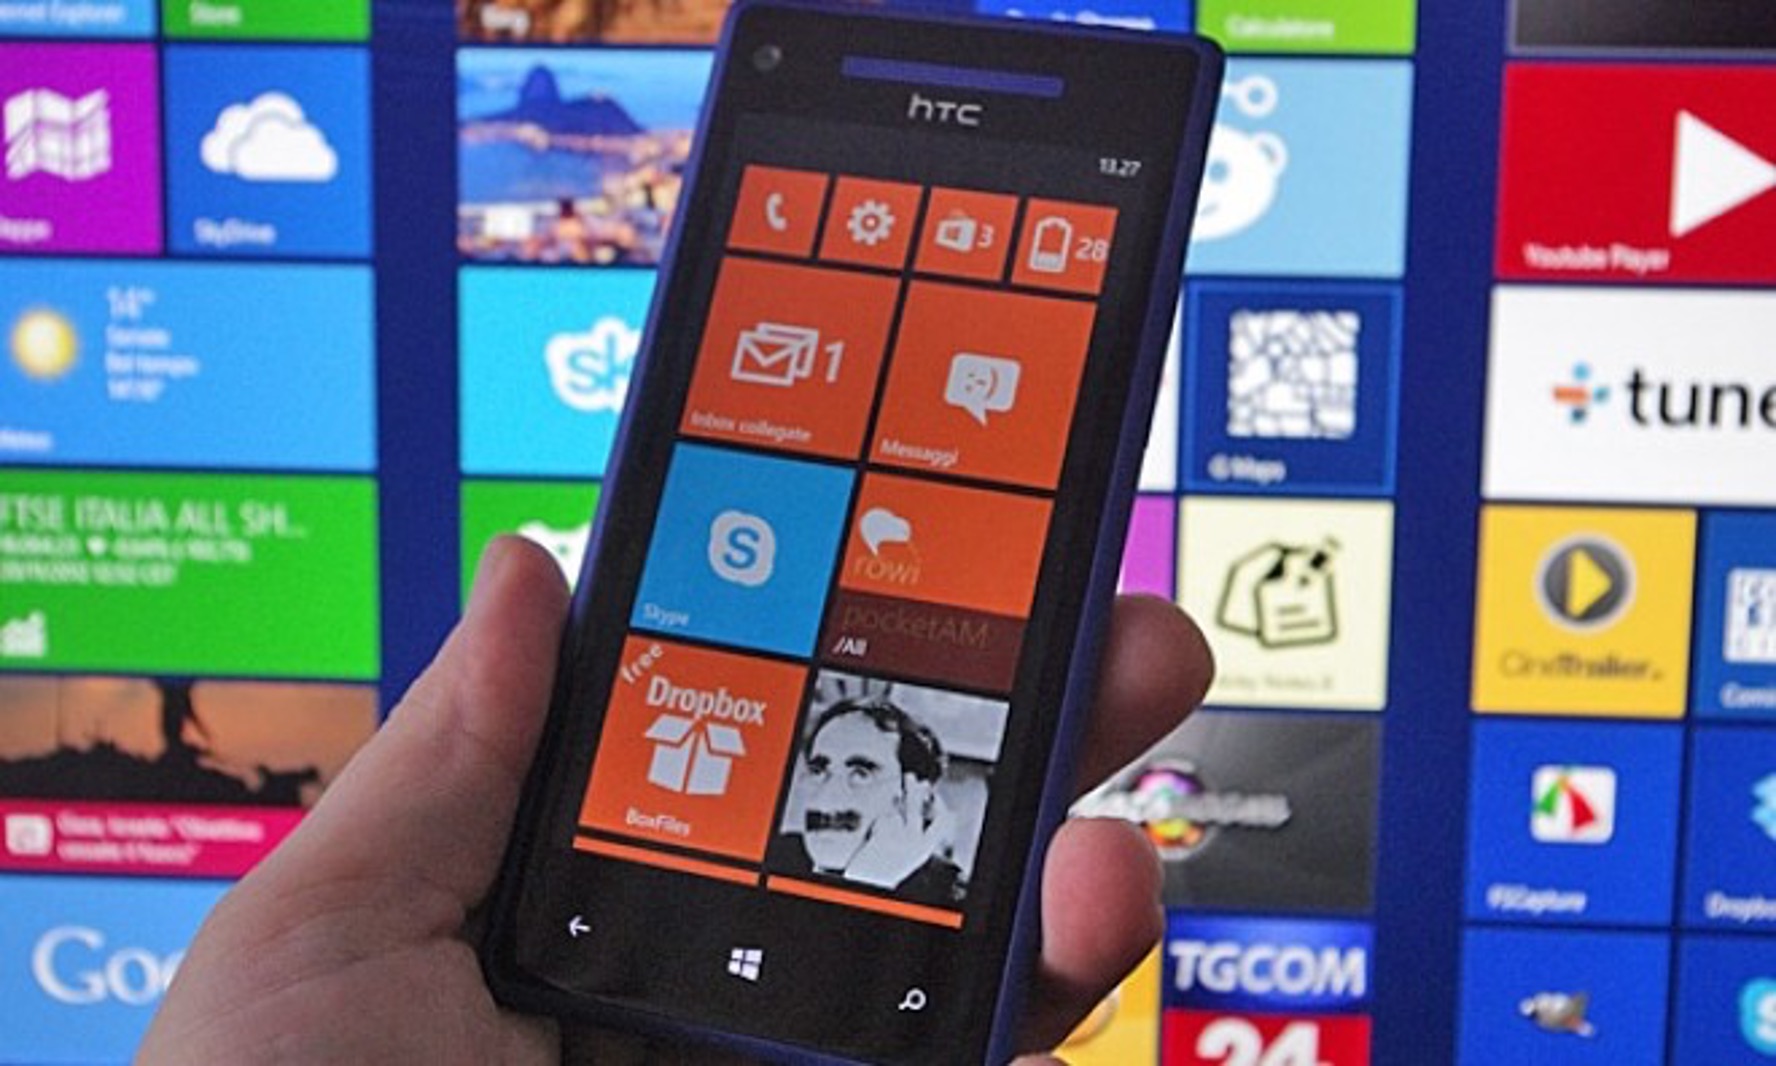
Personalizing your Windows Phone 8 Start Screen
The Start Screen on your Windows Phone 8 is where you can truly make your device feel like your own. With a range of customization options, you can tailor your Start Screen to suit your style, preferences, and needs. Whether you want to change your tile sizes, rearrange the tiles, or add a personal background image, here are 5 ways to make your Windows Phone 8 Start Screen truly yours.
1. Customizing Tile Sizes
One of the key features of the Windows Phone 8 Start Screen is the ability to resize the tiles. This allows you to prioritize the information that is most important to you and make it easily accessible. To customize the tile size, simply press and hold the tile you want to resize. A menu will appear, and you can select the desired size – either small, medium, or large. You can even make the tile larger by choosing the “resize” option.
2. Rearranging Tiles on the Start Screen
To rearrange the tiles on your Windows Phone 8 Start Screen, simply press and hold the tile you want to move. Once the tile is selected, you can drag it to your desired location. This allows you to prioritize the apps or features that you use most frequently. You can even create custom groups by dragging tiles together to create a folder-like effect. This way, you can have all your social media apps in one group, your productivity apps in another, and so on.
3. Changing the Background Image
If you want to add a personal touch to your Start Screen, you can change the background image. Simply go to the Settings menu and select “Start+Theme.” From there, you can choose a picture from your gallery or use a pre-installed background image. You can also choose a custom accent color to match your background image or personal preference. This customization option allows you to express your individuality and make your Start Screen stand out.
4. Adding or Removing Tiles
The Windows Phone 8 Start Screen is designed to be flexible and adaptable to your needs. You can easily add or remove tiles to customize your Start Screen layout. To add a new tile, swipe to the app list, press and hold the desired app icon, and select “pin to start.” The app will then appear as a tile on your Start Screen. To remove a tile, press and hold the tile you want to remove, and select “unpin from start.” This way, you can have only the tiles you need on your Start Screen, keeping it clutter-free and efficient.
Customizing Tile Sizes
One of the key features of the Windows Phone 8 Start Screen is the ability to customize the size of the tiles. This allows you to prioritize and highlight the apps and features that are most important to you. To customize a tile size, simply press and hold the tile until it becomes slightly larger. Then, release it and choose the desired size from the options that appear. You can choose from three different sizes: small, medium, and large.
The small size is ideal for less frequently used apps or for creating a neat, compact layout. The medium size provides a balance between visibility and information density, making it suitable for apps you use regularly. The large size is perfect for your favorite apps or widgets, as it allows for more information to be displayed on the tile.
Rearranging Tiles on the Start Screen
The Windows Phone 8 Start Screen offers great flexibility when it comes to arranging your tiles. To rearrange a tile, simply press and hold it until it lifts up. You can then drag and drop it to the desired position on the screen. This allows you to create a personalized layout that suits your needs and preferences.
You can also create groups of related tiles by dragging one tile on top of another. This creates a folder-like grouping, which can be expanded or collapsed by tapping on the group header. This feature helps you keep your Start Screen organized and decluttered, making it easier to find the apps and information you need.
Changing the Background Image
To add a personal touch to your Windows Phone 8 Start Screen, you can change the background image. This allows you to customize the overall look and feel of your device. To change the background image, go to Settings > Start + Theme. From there, you can choose a pre-installed image or select a photo from your gallery.
When choosing a background image, it is important to consider the visibility of the tiles and the readability of the text. Opt for images that have a subtle or uniform color palette, so that the tiles stand out and the text remains easily legible. Experiment with different images to find the perfect balance between personalization and usability.
Adding or Removing Tiles
The Windows Phone 8 Start Screen allows you to add or remove tiles according to your needs. To add a tile, swipe left from the Start Screen to access the app list. From there, locate the desired app and press and hold it. Then, choose “pin to start” from the context menu that appears. The app will now appear as a tile on your Start Screen.
To remove a tile, press and hold it until it lifts up. Then, select “unpin from start” from the options that appear. The tile will be removed from your Start Screen, but the app will still be accessible from the app list.
By customizing the tile sizes, rearranging the tiles, changing the background image, and adding or removing tiles, you can create a Windows Phone 8 Start Screen that perfectly reflects your style and preferences. Take advantage of these customization options to make your device truly yours!
Conclusion
Customizing your Windows Phone 8 Start Screen is a great way to personalize and make your device truly your own. By implementing these five strategies, you can transform your Start Screen into a visually appealing and functional hub that reflects your style and priorities.
Whether you choose to resize, rearrange, or add Live Tiles, or even change the accent color, customizing your Start Screen allows you to enhance both the aesthetics and functionality of your device. With a few simple tweaks, you can streamline your access to your favorite apps, prioritize important information, and make your Windows Phone 8 experience more enjoyable and efficient.
So go ahead and take advantage of these customization options! Get creative, have fun, and make your Windows Phone 8 Start Screen truly unique to you.
FAQs
Q: Can I change the background of my Windows Phone 8 Start Screen?
A: Yes, you can! Windows Phone 8 allows you to personalize your Start Screen background by selecting from a range of pre-installed options or using your own custom photo. Simply go to Settings, tap on Start + Theme, and choose the desired background. Don’t forget to experiment with different options to find the perfect look for your home screen!
Q: How do I change the size of Live Tiles on my Start Screen?
A: Windows Phone 8 offers you the flexibility to resize Live Tiles according to your preferences. Simply press and hold a Live Tile on your Start Screen until it enters edit mode. Then, tap the small arrow icon on the top right corner of the tile to cycle through its available size options. Experiment with different sizes to create a visually pleasing and organized Start Screen.
Q: Can I rearrange the order of Live Tiles on my Windows Phone 8 Start Screen?
A: Absolutely! Windows Phone 8 gives you the freedom to arrange your Live Tiles in any order you like. To do this, press and hold a Live Tile on your Start Screen until it enters edit mode. Then, simply drag and drop the tile to your desired position. Organize your Start Screen based on your usage patterns and preferences for a personalized and efficient experience.
Q: How can I customize the colors of Live Tiles on my Windows Phone 8 Start Screen?
A: Windows Phone 8 allows you to add a splash of color to your Start Screen by customizing the color of Live Tiles. To do this, go to Settings, tap on Start + Theme, and select the desired accent color. The accent color will be reflected on various system elements and Live Tiles, adding a touch of personalization to your device.
Q: Can I add or remove Live Tiles on my Windows Phone 8 Start Screen?
A: Yes, you can easily add or remove Live Tiles on your Start Screen. To add a Live Tile, swipe to the Apps list, locate the app you want to pin, press and hold its icon, and select “pin to Start.” To remove a Live Tile, press and hold the tile on your Start Screen until it enters edit mode, then tap the “Unpin” option. Customize your Start Screen by pinning your most frequently used apps and removing those you no longer need quick access to.