
Are you having trouble with your Windows phone and need to perform a reset? Whether you’re experiencing software glitches, freezing, or other issues, resetting your Windows phone can often help resolve these issues and restore your device to its optimal performance. In this article, we will guide you through the process of resetting your Windows phone, step by step, so you can get back to enjoying your mobile experience without any hassles. From backing up your important data to executing the reset, we will cover it all. So, if you’re ready to give your Windows phone a fresh start, let’s dive in and learn how to reset your Windows phone.
Inside This Article
- Importance of Resetting Your Windows Phone
- How to Reset Your Windows Phone
- Step 1: Backing Up Your Data
- Step 2: Accessing the Settings Menu
- Step 3: Selecting the “System” Category
- Step 4: Choosing the “About” Option
- Step 5: Tapping on the “Reset Your Phone” Button
- Step 6: Confirming the Reset Process
- Step 7: Wait for the Phone to Reset
- Step 8: Setting Up Your Phone Again
- Troubleshooting Common Issues
- Conclusion
- FAQs
Importance of Resetting Your Windows Phone
Resetting your Windows Phone can be a necessary step in maintaining its performance and functionality. Over time, your phone may accumulate unnecessary files, cache, and settings that can lead to sluggishness and decreased responsiveness. Resetting your phone allows you to start fresh and remove any accumulated clutter.
Resetting your Windows Phone can also help resolve software issues and glitches. If you notice that your phone is freezing, crashing, or experiencing frequent app crashes, a reset can often be the solution. It clears out any software conflicts and gives your phone a clean slate to work with.
Another important reason to reset your Windows Phone is to protect your privacy and personal data. When you perform a reset, all your personal information, accounts, and settings are wiped from the device. This ensures that no one can access your private information if your phone gets lost or stolen.
Moreover, resetting your Windows Phone can improve its battery life. As you use your phone, various apps and processes can drain the battery quickly. By resetting your phone, you close any background processes that might be unnecessarily consuming power, helping to extend your battery life.
Finally, resetting your Windows Phone can be beneficial if you plan to sell or give away your device. Resetting your phone ensures that your personal data is completely removed, providing peace of mind that your information won’t fall into the wrong hands.
How to Reset Your Windows Phone
Resetting your Windows Phone can be a useful solution when you encounter software issues, performance problems, or simply want to start fresh. Whether you’re using a Windows 10 Mobile device or an older Windows Phone model, the reset process is relatively straightforward. In this article, we’ll guide you through the steps to reset your Windows Phone and get it back to its original state.
Before starting the reset process, it’s essential to back up your data. This will ensure that you don’t lose any important information such as contacts, photos, or app data. You can back up your data by syncing it with your Microsoft account or using third-party backup solutions available in the Windows Store.
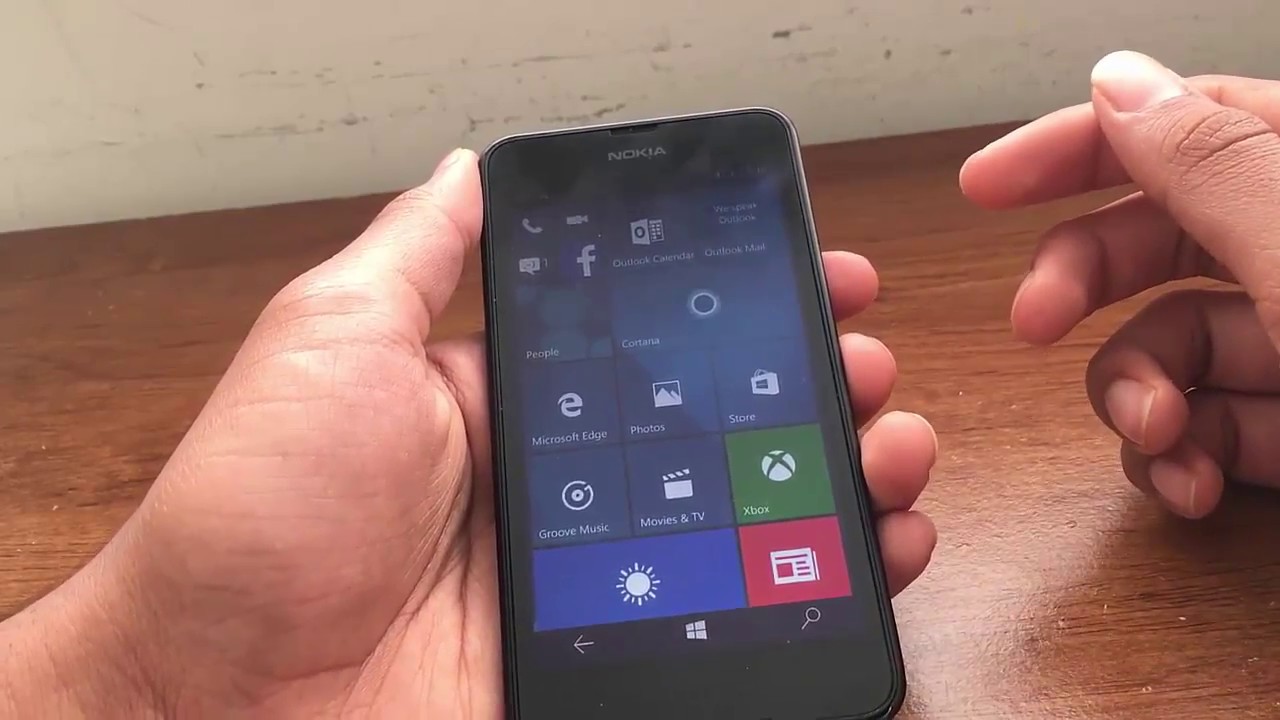
To begin the reset process, access the settings menu of your Windows Phone. You can do this by swiping down from the top of the screen and tapping on the gear icon, or by locating the settings app in the app list.
Next, navigate to the “System” category within the settings menu. This section houses various system-related options, including the ‘About’ option, which is where you can initiate the reset process.
Tap on the “About” option, and you’ll find the “Reset your phone” button. This button allows you to reset your Windows Phone to its factory default settings. It’s important to note that resetting your phone will erase all data and settings, so be sure to back up any critical information beforehand.
Confirm the reset process by tapping on the “Yes” or “Continue” button when prompted. Your Windows Phone will then start the reset process, which may take a few minutes to complete. During this time, your phone will restart and remove all apps, settings, and data.
Once the reset process is finished, your Windows Phone will restart, and you’ll be taken through the initial setup wizard. You’ll need to enter your Microsoft account credentials, select your preferred language and region, and customize various settings to personalize your phone experience.
If you encounter any issues during the reset process, such as your phone not responding or freezing, try performing a hard reset. This can be done by holding down the power button and the volume down button simultaneously for a few seconds until the phone vibrates and restarts.
Step 1: Backing Up Your Data
Before you embark on the process of resetting your Windows Phone, it is crucial to back up your data. This ensures that you don’t lose any important information, such as contacts, photos, messages, or app data. By creating a backup, you can easily restore your data once the reset is complete.
There are several ways to back up your data on a Windows Phone. One option is to use the built-in backup feature provided by Microsoft. To do this, go to the “Settings” menu on your phone and navigate to the “Update & Security” section. From there, select the “Backup” option and toggle on the “Back up my data” switch. This will automatically back up your apps, settings, and other data to your Microsoft account.
Alternatively, you can use third-party backup apps available in the Microsoft Store. These apps allow you to customize your backup and choose specific files or folders to save. Some popular backup apps include “OneDrive” and “Contacts+Message Backup.”
Remember to connect your phone to a stable Wi-Fi network before initiating the backup process. This ensures a smooth and uninterrupted backup. Also, make sure your phone is adequately charged or connected to a power source to prevent it from running out of battery during the backup.
Once the backup is complete, double-check to ensure that all your important data has been successfully backed up. It’s a good idea to check specific files or folders to guarantee their inclusion in the backup.
Backing up your data before resetting your Windows Phone is a crucial step to safeguard against any potential data loss. Take the time to ensure that your backup is complete and secure, and you’ll have peace of mind throughout the reset process.
Step 2: Accessing the Settings Menu
Once you have backed up your data, the next step is to access the settings menu on your Windows phone. The settings menu allows you to customize various aspects of your device and is where you will find the option to reset your phone.
To access the settings menu, start by unlocking your phone and navigating to the home screen. From there, swipe down from the top of the screen to reveal the notification panel. In the top right corner, you will see an icon that looks like a gear. Tap on this icon to open the settings menu.
Alternatively, you may also access the settings menu by tapping on the “Start” button on the home screen and then scrolling down to find the “Settings” option. Once you have located the settings menu, tap on it to open.
Upon opening the settings menu, you will be presented with a list of categories. These categories cover different aspects of your phone’s functionality such as network, display, apps, and more. Depending on the model and version of your Windows phone, the layout of the settings menu may vary slightly.
Take a moment to familiarize yourself with the various categories and options available in the settings menu. This will make it easier to navigate and find the reset option in the following steps.
Step 3: Selecting the “System” Category
Once you have accessed the settings menu on your Windows phone, it’s time to navigate to the “System” category. This step is crucial as it will allow you to access the options related to resetting your device.
On most Windows phone models, you can find the “System” category towards the end of the settings list. Simply scroll down until you locate it. However, the exact placement of this category may vary slightly depending on the phone model and operating system version.
When you find the “System” category, tap on it to enter into a new menu with a range of system-related options. This menu is where you’ll find the option to reset your phone, among other important settings.
Once you select the “System” category, you will be presented with various sub-categories and settings related to your phone’s system functions. Take a moment to explore these options if you’d like, but for now, let’s focus on the reset option.
Keep in mind that some Windows phone models may have a slightly different organization of their settings menu. However, regardless of the layout, you can typically find the necessary options related to resetting your phone within the “System” category.
Step 4: Choosing the “About” Option
Once you have accessed the settings menu on your Windows Phone, the next step is to choose the “About” option. This is where you can find detailed information about your phone’s software and hardware.
To select the “About” option, scroll down the settings menu until you find it. Depending on your phone model and operating system version, it may be located towards the bottom of the menu.
Tap on the “About” option to proceed. This will open a new page with detailed information about your phone, including the model name, the version of Windows Phone you are running, the serial number, and more.
It’s worth noting that some devices may have additional options within the “About” menu, such as “System Updates” or “Phone Updates.” If these options are available, make sure to update your phone’s software before proceeding with the reset.
Once you have selected the “About” option, you are one step closer to resetting your Windows Phone. The next step is to tap on the “Reset Your Phone” button, which we will cover in the next section.
Step 5: Tapping on the “Reset Your Phone” Button
After confirming your decision to reset your Windows Phone, the next step is to tap on the “Reset Your Phone” button. This button is typically located at the bottom of the screen or in a prominent position within the settings menu.
When you tap on the “Reset Your Phone” button, your device will initiate the reset process. This process may take several minutes, depending on the model of your phone and the amount of data being erased.
During the reset process, your phone will wipe all personal data, including apps, settings, and files. It is essential to understand that this action is irreversible and you will not be able to recover any data once the reset is complete.
It is advisable to keep your phone connected to a power source during the reset process, as a loss of power could potentially interrupt the reset and lead to unforeseen complications.
As the reset is being performed, you may see a progress bar or an animation indicating that the process is underway. Do not interrupt this process, as doing so could result in an incomplete reset, causing further issues with your phone’s operating system.
Once the reset is complete, your phone will restart, and you will be greeted with the initial setup screen. This screen will guide you through the process of setting up your phone again, including signing in to your Microsoft account, connecting to a Wi-Fi network, and customizing your device’s settings.
It is essential to note that after resetting your Windows Phone, all previous data, including contacts, messages, photos, and apps, will be permanently erased. Therefore, it is crucial to ensure you have backed up any essential data before initiating the reset process.
After completing the “Reset Your Phone” step, you can proceed to the next and final step, which involves setting up your phone again and restoring any necessary data from your backup.
Step 6: Confirming the Reset Process
Once you have selected the “Reset your phone” option in the previous step, your Windows Phone will prompt you to confirm the reset process. This is crucial, as resetting your phone will erase all the data and settings on your device, restoring it to its original factory state. Confirming the reset process ensures that you are aware of the consequences and have made a conscious decision to proceed.
When the confirmation message appears on your screen, carefully read through it to understand the implications. It will typically inform you that all your personal data, including apps, photos, messages, and settings, will be permanently deleted. It’s important to note that this action cannot be undone, so make sure to back up any essential data before proceeding.
If you are certain that you want to reset your Windows Phone, tap on the “Yes” or “Confirm” button to initiate the reset process. This will start the erasing and restoring procedure, which may take some time depending on the model and the amount of data on your device.
During the reset process, your phone may restart multiple times, and you may see progress indicators on the screen. It’s normal for the phone to appear inactive or display the manufacturer’s logo during this time. Avoid interrupting the process by turning off your phone or removing the battery, as it may cause further issues or prevent the reset from completing successfully.
Once the reset process is complete, your Windows Phone will be restored to its original factory settings. This means that all your personal data, apps, and settings will be removed, and your phone will be in the same state it was when you first purchased it. You will need to go through the initial setup process again to configure your phone and personalize it according to your preferences.
It’s important to emphasize that confirming the reset process is a crucial step to ensure that you fully understand the consequences of resetting your Windows Phone. Be sure to back up any important data beforehand and carefully consider if a reset is the right solution for any issues you may be facing.
Step 7: Wait for the Phone to Reset
Once you’ve confirmed the reset process on your Windows Phone, the device will begin the reset procedure. This step requires some patience as it may take a few minutes for the phone to complete the reset.
During this time, you’ll notice that the phone’s screen may turn off and then back on again. This is perfectly normal and part of the reset process. Avoid pressing any buttons or attempting to use the phone while it is resetting, as it can interfere with the procedure.
It’s important to note that the length of time it takes for the phone to reset can vary depending on the model and the amount of data stored on the device. If you have a lot of apps, photos, or other files on your phone, it may take longer to reset.
While you wait for the phone to reset, you can take a moment to ensure that you have all the necessary information and resources ready for the next step. This includes any account credentials, such as email addresses and passwords, as well as any apps or files you want to reinstall or restore after the reset.
It can be tempting to try to rush the reset process, especially if you’re eager to start using your phone again. However, it’s important to allow the phone the time it needs to complete the reset properly. Interrupting the process or turning off the device prematurely can result in incomplete reset or potential issues with the phone’s performance.
Once the phone has completed the reset, it will restart and prompt you to begin the setup process again, just like when you first got the phone. At this point, you can proceed to the next step and start setting up your phone again, including signing in with your Microsoft account and restoring any necessary data.
Step 8: Setting Up Your Phone Again
Once your Windows phone has completed the reset process, it will restart and prompt you to set it up again. Follow these steps to get your phone up and running:
- Select your preferred language: Choose the language that you want your phone to be set up in. This can be your native language or any other language that you are comfortable with.
- Connect to a Wi-Fi network: Select the Wi-Fi network you want to connect to. This is necessary to proceed with the setup and restore any previously backed-up data. If you don’t have access to Wi-Fi at the moment, you can choose to skip this step and connect later.
- Sign in with your Microsoft account: If you have a Microsoft account, sign in with your credentials. This will allow you to sync your contacts, emails, and other data across devices. If you don’t have a Microsoft account, you can create one by tapping on the “Create one” link.
- Restore from a backup: If you previously backed up your data, you can choose to restore it now. Windows Phone allows you to restore contacts, messages, apps, and settings from a backup. Simply select the backup file you want to restore from, and your phone will take care of the rest.
- Set up a PIN or password: To ensure the security of your phone, you can choose to set up a PIN or password. This will prevent unauthorized access to your device and protect your personal information.
- Customize your settings: Windows Phone offers a range of customization options to tailor your device to your preferences. You can choose your preferred theme color, adjust the display settings, and configure other options such as notifications and privacy settings.
- Install your favorite apps: Now that your phone is set up, it’s time to personalize it with your favorite apps. Visit the Microsoft Store and download the apps you need for work, entertainment, or productivity. Don’t forget to check for updates regularly to ensure you have the latest versions.
- Enjoy your reset Windows phone: With your phone all set up, you can now enjoy the refreshed experience of a reset device. Take some time to explore the features and capabilities of your phone, and make the most of its performance and functionality.
By following these steps, you can successfully set up your Windows phone again after performing a reset. Remember to keep your device updated and back up your data regularly to ensure a smooth and hassle-free mobile experience.
Troubleshooting Common Issues
While resetting your Windows Phone can resolve many issues, there are some common problems that you may encounter. Here are some troubleshooting tips to help you address these issues:
1. Battery Draining Quickly: If you notice that your Windows Phone’s battery is draining faster than usual, try closing any unnecessary applications running in the background. You can do this by opening the “Settings” menu and selecting “Battery”. From there, you can see which apps are consuming the most power and close them if necessary.
2. Phone Slow or Freezing: If your Windows Phone is slow to respond or freezes frequently, it may be due to limited storage space. Try deleting unused apps, clearing cache files, or transferring files to an external storage device to free up space. Additionally, restarting your phone can help resolve temporary performance issues.
3. Wi-Fi Connectivity Problems: If you’re experiencing issues connecting to Wi-Fi networks or staying connected, first make sure that your Wi-Fi is enabled by going to the “Settings” menu and selecting “Network & Wireless”. Restarting your phone and router can also help in resolving connectivity issues. If the problem persists, you may need to reset your network settings by selecting “Network & Wireless” and then “Wi-Fi” in the “Settings” menu.
4. App Crashes: If certain apps on your Windows Phone are crashing or not working properly, try uninstalling and reinstalling them from the Microsoft Store. It’s also a good idea to check for any available updates for both the operating system and the individual apps that are causing issues.
5. Bluetooth Connection Problems: If you’re having trouble connecting your Windows Phone to other Bluetooth devices, ensure that the devices you’re trying to connect to are within range and in pairing mode. Restarting your phone and the Bluetooth devices can also help in resolving connectivity issues. If the problem persists, you may need to reset your phone’s Bluetooth settings by going to the “Settings” menu, selecting “Devices”, and then “Bluetooth & other devices”.
6. Touchscreen Unresponsive: If your Windows Phone’s touchscreen is unresponsive, try cleaning the screen with a soft cloth to remove any dirt or residue. Restarting your phone can also help in resolving temporary touchscreen issues. If the problem persists, you may need to seek assistance from a professional technician or contact the device manufacturer for further troubleshooting.
Remember, if you’re unable to resolve the issue using these troubleshooting tips, it may be necessary to seek assistance from customer support or visit a service center for expert help with your Windows Phone.
Conclusion
Resetting your Windows Phone can be a useful solution when you encounter issues with performance, software glitches, or simply want to start fresh. By following the steps outlined in this guide, you can easily initiate a reset and restore your device to its original settings. Remember to back up your data before proceeding with the reset to avoid losing any important information.
Whether you’re experiencing slow response times, freezing apps, or other software-related problems, a reset can often resolve these issues and provide a clean slate for your Windows Phone. It’s important to note that a reset should be used as a last resort when other troubleshooting methods have failed.
By taking advantage of the built-in recovery options provided by Windows Phone, you can easily reset your device and overcome any software-related challenges you may encounter. So, don’t hesitate to give it a try and give your phone the fresh start it deserves!
FAQs
Q: How do I reset my Windows Phone to factory settings?
A: To reset your Windows Phone to factory settings, go to Settings, then select System, and tap on About. From there, choose Reset Your Phone and follow the prompts to complete the process. It’s important to note that resetting your phone will erase all data, so make sure to back up any important files before proceeding.
Q: Will resetting my Windows Phone delete all my personal data?
A: Yes, resetting your Windows Phone to factory settings will erase all your personal data, including apps, contacts, messages, and settings. It’s recommended to create a backup of your important data before performing a reset.
Q: How long does it take to reset a Windows Phone?
A: The time it takes to reset a Windows Phone can vary depending on the device and the amount of data stored on it. On average, it can take anywhere from a few minutes to half an hour to complete the reset process.
Q: Can I reset my Windows Phone without losing my apps?
A: No, resetting your Windows Phone will remove all apps installed on the device. However, if you have signed in with a Microsoft account, you can easily reinstall the apps from the Windows Store after the reset.
Q: Do I need a computer to reset my Windows Phone?
A: No, you do not need a computer to reset your Windows Phone. The reset can be done directly from the device itself. However, if you prefer, you can also use the Windows Device Recovery Tool on a computer to perform the reset.