
Recording the screen of your iPhone can be incredibly useful for a variety of reasons. Whether you want to create tutorials, demonstrate app functionality, or capture memorable moments from your favorite games, being able to record your iPhone screen is a valuable feature. But what if you don’t have a Mac? Can you still record your iPhone screen using a Windows computer?
The answer is yes! In this comprehensive guide, we will explore the methods and tools available to record your iPhone screen on both Windows and Mac operating systems. Whether you are a professional content creator or a casual user looking to capture your screen, we’ve got you covered. So grab your iPhone and get ready to unleash your recording skills on your Windows or Mac computer!
Inside This Article
- Method 1: Using QuickTime on Mac
- Method 2: Using Dr.Fone – iOS Screen Recorder on Windows and Mac
- Method 3: Using ApowerMirror on Windows and Mac
- Method 4: Using AirServer on Windows and Mac
- Conclusion
- FAQs
Method 1: Using QuickTime on Mac
If you are a Mac user, recording your iPhone screen is incredibly easy with QuickTime. QuickTime is a built-in multimedia player and screen recording tool that comes pre-installed on every Mac. Whether you want to record a tutorial, capture gameplay, or simply document a funny moment on your iPhone, QuickTime is the perfect solution.
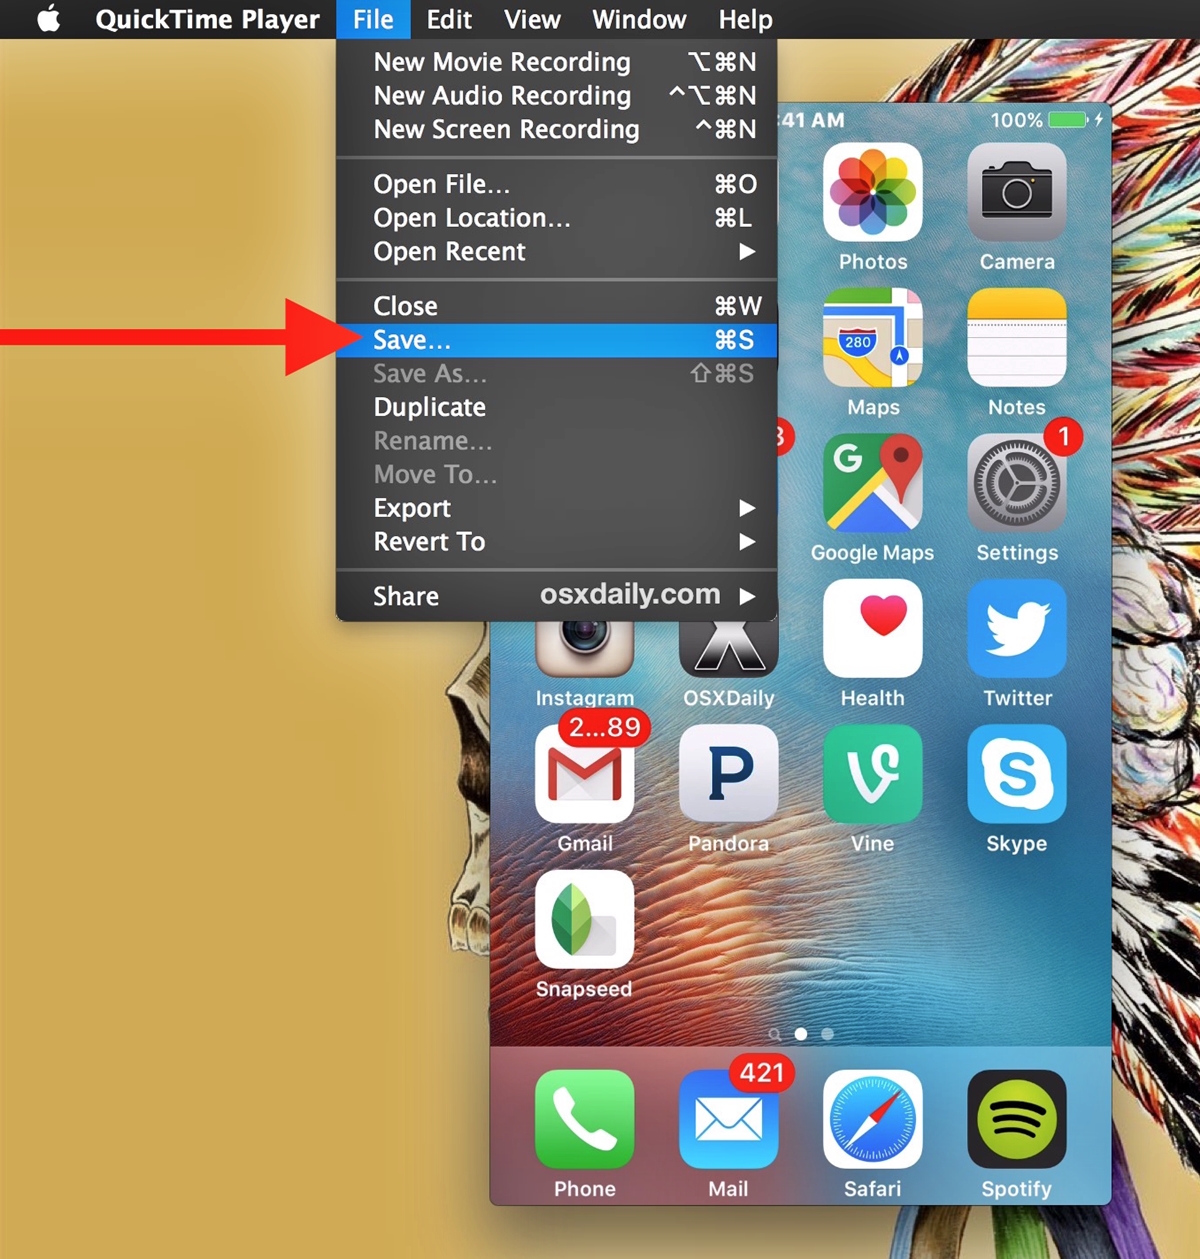
To begin, connect your iPhone to your Mac using a lightning cable. Launch QuickTime from the Applications folder (or use Spotlight to search for it). With QuickTime open, click on “File” in the menu bar and select “New Movie Recording.”
A new window will appear with a recording interface. To start recording your iPhone screen, click on the drop-down arrow next to the record button and select your iPhone from the list of available cameras and microphones. You can also choose the video quality and adjust other settings if desired.
Once you have selected your iPhone as the input source, click on the record button to start the recording. QuickTime will now begin recording the screen of your iPhone.
As you record, a red recording indicator will appear in the menu bar. To stop the recording, simply click on the stop button in the menu bar or press Command + Control + Esc on your keyboard. QuickTime will then automatically save the recorded video file to your Mac.
Now you have successfully recorded your iPhone screen using QuickTime on your Mac! You can review and edit the recorded video using video editing software, or share it with others as needed.
Method 2: Using Dr.Fone – iOS Screen Recorder on Windows and Mac
If you’re looking for a versatile and reliable option to record your iPhone screen on both Windows and Mac, Dr.Fone – iOS Screen Recorder is a fantastic choice. Developed by Wondershare, this screen recording software offers a simple and user-friendly interface, making it accessible to both beginners and advanced users.
Dr.Fone – iOS Screen Recorder provides a seamless recording experience, allowing you to capture not only the screen but also the audio from your iPhone device. Whether you want to record a gameplay session, create a tutorial, or capture a video call, this tool has got you covered.
One of the standout features of Dr.Fone – iOS Screen Recorder is its ability to record in high-quality resolution. You can choose from multiple screen resolutions, including full HD, to ensure that your recordings are crystal clear and visually appealing.
Another notable feature of Dr.Fone – iOS Screen Recorder is the option to record with or without annotations. If you want to add additional information or highlight certain elements on your screen, you can easily do so using the built-in annotation tools.
Using Dr.Fone – iOS Screen Recorder on both Windows and Mac is a straightforward process. Simply follow these steps:
- Download and install the Dr.Fone – iOS Screen Recorder software on your computer.
- Connect your iPhone to your computer using a lightning cable.
- Launch Dr.Fone – iOS Screen Recorder and click on the “iOS Screen Recorder” option.
- Click on the “Next” button to establish a connection between your iPhone and the software.
- Once the connection is established, you can customize the recording settings such as resolution, audio source, and other options.
- Click on the “Start” button to begin the recording.
- When you’re done recording, click on the “Stop” button to end the recording session.
- Finally, you can preview and save your recorded video to your desired location.
With Dr.Fone – iOS Screen Recorder, you can effortlessly record your iPhone screen and capture memorable moments, gameplay sessions, or create informative tutorials. Its versatility and user-friendly interface make it a top choice for both Windows and Mac users.
Overall, Dr.Fone – iOS Screen Recorder is a powerful tool that provides a seamless and hassle-free screen recording experience. Whether you’re a content creator, gamer, or simply want to preserve important moments on your iPhone, this software is your go-to solution.
Method 3: Using ApowerMirror on Windows and Mac
If you’re looking for a versatile screen recording solution that works seamlessly on both Windows and Mac, look no further than ApowerMirror. This powerful software allows you to mirror and record your iPhone screen directly on your computer with just a few simple steps.
ApowerMirror offers a user-friendly interface that makes it easy for even beginners to navigate. Whether you want to record a tutorial, gameplay, or capture important moments on your iPhone, ApowerMirror has got you covered.
Here’s how you can use ApowerMirror to record your iPhone screen:
- Start by downloading and installing ApowerMirror on your Windows or Mac computer. You can find the software on the official ApowerMirror website.
- Launch ApowerMirror and then connect your iPhone to your computer using a lightning cable.
- Once the connection is established, your iPhone screen will be mirrored on your computer.
- To start recording, click on the “Record” button in the ApowerMirror interface.
- Apop-up will appear, allowing you to customize the recording settings such as the output format, video quality, and audio source.
- After setting your preferences, click on the “Record” button to begin recording.
- When you’re done recording, click on the “Stop” button to finish the process.
ApowerMirror also offers additional features such as screen mirroring, screen capturing, and annotation tools, making it a comprehensive solution for all your screen recording needs.
Whether you’re a content creator, a mobile app developer, or simply someone who wants to share your iPhone screen with others, ApowerMirror provides a seamless and hassle-free recording experience.
Method 4: Using AirServer on Windows and Mac
If you are looking for a versatile screen recording solution for both Windows and Mac, AirServer is an excellent choice. This software allows you to mirror your iPhone screen to your computer and record the screen activities with ease.
To get started with AirServer, follow these simple steps:
- Download and install AirServer on your Windows or Mac computer.
- Ensure that your iPhone and computer are connected to the same Wi-Fi network.
- On your iPhone, swipe up from the bottom of the screen to open the Control Center.
- Tap on the “Screen Mirroring” option.
- Select your computer device from the list of available devices.
- Your iPhone screen will now be mirrored on your computer via AirServer.
- To start recording, click on the record button in the AirServer interface.
- You can choose to record the full screen or a specific window.
- Once you are done recording, click on the stop button.
- Your recorded video will be saved to the designated folder on your computer.
AirServer provides a seamless and reliable screen recording experience. It offers various customization options, such as adjusting the recording quality and frame rate, enabling audio recording, and selecting the output format. Whether you need to record a gameplay session, create a tutorial, or capture any other activity on your iPhone screen, AirServer has got you covered.
With AirServer’s cross-platform compatibility, you can effortlessly record your iPhone screen on both Windows and Mac computers. It eliminates the need for any additional hardware or cables, making it a convenient solution for screen recording.
So if you want a feature-rich and user-friendly screen recording solution for your iPhone on Windows or Mac, give AirServer a try. It provides a seamless and efficient way to capture your iPhone screen activities and create engaging content.
Conclusion
Recording your iPhone screen on both Windows and Mac has never been easier. Whether you want to capture a gameplay video, create tutorials, or simply showcase your app, there are plenty of options available.
For Windows users, you can rely on software like ApowerREC or OBS Studio for a seamless recording experience. These tools offer a range of features and customization options to suit your needs. On the other hand, Mac users can take advantage of the built-in screen recording feature in QuickTime Player, which is incredibly convenient and user-friendly.
No matter which operating system you use, with the step-by-step instructions above, you can now effortlessly record your iPhone screen and share your content with the world. So go ahead and start capturing those amazing moments on your iPhone today!
FAQs
1. How can I record my iPhone screen on a Windows computer?
To record your iPhone screen on a Windows computer, you can use third-party software like ApowerMirror or iTools. These applications allow you to mirror your iPhone screen onto your PC and provide screen recording functionality. Simply connect your iPhone to your Windows computer, launch the software, and follow the instructions to start recording your screen.
2. Can I record my iPhone screen on a Mac without any additional software?
Yes, you can record your iPhone screen on a Mac without any additional software. Mac computers come with a built-in screen recording tool called QuickTime Player. To use this feature, launch QuickTime Player, go to “File” and select “New Screen Recording”. A recording window will appear, and you can use it to record your iPhone screen by connecting your iPhone to your Mac and choosing it as the recording source.
3. How can I record a specific app on my iPhone screen?
To record a specific app on your iPhone screen, you need to enable screen recording and then navigate to the desired app. Once you are on the app, start the screen recording process by following the instructions mentioned in the app or using third-party screen recording software. Ensure that the desired app is active on your screen while recording.
4. Can I record audio while recording my iPhone screen?
Yes, you can record audio while recording your iPhone screen. By default, the screen recording feature on iPhone includes audio from the device’s microphone. This means that any audio playing on your iPhone during the recording will be captured. However, if you want to record external audio sources, such as voiceover or audio from an app, you may need to use additional audio recording tools or enable specific audio recording settings within the screen recording app you are using.
5. Are there any limitations to recording my iPhone screen?
While recording your iPhone screen, there are a few limitations to keep in mind. Firstly, you cannot record certain copyrighted content, such as movies or TV shows. Additionally, some apps may have restrictions on screen recording due to privacy or security reasons. Lastly, screen recording can consume a significant amount of storage space and battery life on your iPhone, so it’s important to manage your device’s resources accordingly.