
Are you curious about how to activate the Airtag on your iPhone? Look no further! In this comprehensive guide, we will walk you through the step-by-step process of activating the Airtag, Apple’s innovative tracking device. Whether you want to keep tabs on your keys, wallet, or any other important belongings, the Airtag offers a convenient and reliable solution. With its seamless integration with your iPhone, you can easily track and locate your items with just a few taps. So, if you’re ready to unleash the power of Airtag, let’s dive in and discover how to activate it on your iPhone!
Inside This Article
- Step 1: Ensure Airtag Compatibility
- Step 2: Update iOS to the Latest Version
- Step 3: Enable Find My App
- Step 4: Activate Airtag on iPhone
- Conclusion
- FAQs
Step 1: Ensure Airtag Compatibility
Before you can activate an Airtag on your iPhone, it’s crucial to ensure compatibility. Airtags are currently supported on iPhone models that run on iOS 14.5 or later. If your iPhone’s operating system is not up to date, you will need to update it before proceeding with the activation process. To check your iOS version, go to Settings, then General, and select Software Update. If an update is available, follow the prompts to install it.
Additionally, make sure that your iPhone has Bluetooth enabled. Airtags rely on Bluetooth technology to communicate with your device, so it’s important to have it switched on. To ensure Bluetooth is enabled, go to Settings, then Bluetooth, and toggle the button to the “On” position if it isn’t already.
It’s important to note that Airtags are only compatible with certain iPhone models. The following devices are Airtag-compatible:
- iPhone 11
- iPhone 11 Pro
- iPhone 11 Pro Max
- iPhone 12
- iPhone 12 Mini
- iPhone 12 Pro
- iPhone 12 Pro Max
If you have an older iPhone model, unfortunately, Airtags will not be compatible. In that case, consider upgrading your iPhone to a compatible model or explore alternative tracking options available.
Step 2: Update iOS to the Latest Version
Updating your iPhone’s operating system (iOS) to the latest version is crucial to ensure compatibility and optimal performance with your Airtag. Apple regularly releases software updates that include bug fixes, security updates, and new features. Follow the steps below to update your iOS:
- Connect your iPhone to a stable Wi-Fi network.
- Go to the “Settings” app on your iPhone’s home screen.
- Scroll down and tap on “General”.
- In the “General” settings menu, tap on “Software Update”.
- If an update is available, you will see a notification prompting you to download and install the update. Tap on “Download and Install”.
- Enter your passcode (if prompted) and agree to the terms and conditions.
- The update will begin downloading. Make sure your iPhone is connected to a power source to prevent any interruptions during the installation process.
- Once the download is complete, tap on “Install Now” to start the installation.
- Your iPhone will restart during the installation process. It may take several minutes to complete, so be patient.
- After the installation is finished, your iPhone will boot up with the latest version of iOS.
It is recommended to frequently check for iOS updates and install them as soon as they become available. This ensures that your iPhone is equipped with the latest security patches and performance improvements, providing a seamless experience when using your Airtag.
Note that updating your iOS may require a significant amount of storage space, so ensure that your iPhone has enough available storage before initiating the update process. You can check your storage capacity under the “Settings” app > “General” > “iPhone Storage”. If you are running low on storage, consider deleting unwanted apps or media files to free up space.
By ensuring that your iPhone is running the latest version of iOS, you are not only optimizing its performance but also preparing it for seamless Airtag activation and usage.
Step 3: Enable Find My App
Enabling the Find My app on your iPhone is an essential step in activating your Airtag. This feature allows you to locate your Airtag and track its movements in case it gets misplaced or lost. Follow these simple steps to enable the Find My app:
1. Open the “Settings” app on your iPhone.
2. Scroll down and tap on your Apple ID, which is usually located at the top of the Settings menu.
3. In the Apple ID menu, tap on “Find My” to access the Find My settings.
4. Ensure that the “Find My iPhone” toggle is switched on. This will enable the Find My app and allow you to locate your Airtag.
5. Optionally, you can also enable the “Send Last Location” feature. This will automatically send the last known location of your iPhone to Apple when the battery is critically low, helping you track its location even if the battery dies.
Once you have enabled the Find My app and enabled the necessary settings, you’re ready to proceed to the next step and activate your Airtag on your iPhone.
Step 4: Activate Airtag on iPhone
Activating your Airtag on your iPhone is a straightforward process. Follow these simple steps to get your Airtag up and running in no time:
1. Open the Find My App: On your iPhone, locate and open the Find My app. This app allows you to track your Airtag and other Apple devices.
2. Tap on the “Items” Tab: Once you’re in the Find My app, tap on the “Items” tab located at the bottom of the screen. This will allow you to view and manage all your connected items, including your Airtag.
3. Tap on “Add Item”: After selecting the “Items” tab, tap on the “Add Item” button located in the top right corner of the screen. This will initiate the process of activating your Airtag.
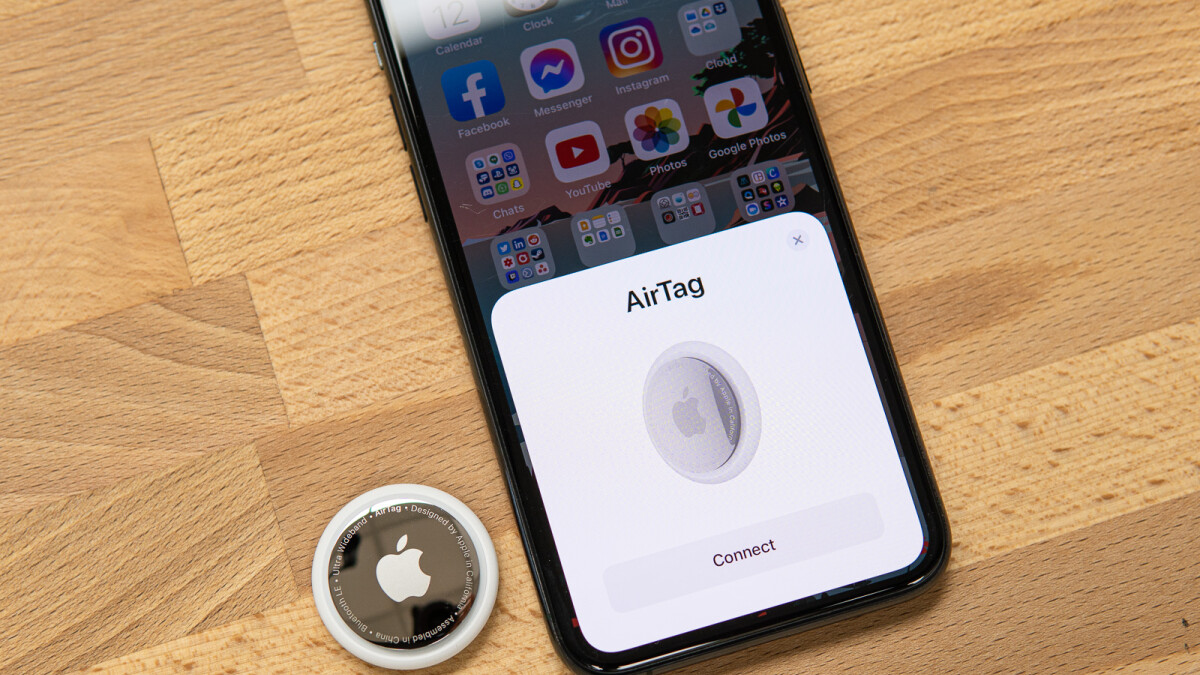
4. Scan the Airtag: Hold your Airtag near your iPhone and follow the on-screen instructions to scan the Airtag’s unique QR code or enter the serial number manually. This is necessary to pair and activate your Airtag with your iPhone.
5. Assign a Name to Your Airtag: Once your Airtag is successfully scanned and recognized by your iPhone, you can assign a name to it. This will help you easily identify your Airtag when tracking items.
6. Choose a Customizable Emoji: Additionally, you have the option to select a customizable emoji to represent your Airtag. This can add a touch of personalization to your device and make it more fun to use.
7. Complete the Setup: After assigning a name and selecting an emoji, tap on the “Done” button to complete the setup process. Your Airtag is now activated and ready to use on your iPhone!
By following these simple steps, you can activate your Airtag on your iPhone and start tracking your belongings with ease. Make sure to keep your Find My app updated, as it provides you with real-time location information and helps you locate your Airtag and other Apple devices whenever needed.
Conclusion
Activating the Airtag on your iPhone is a straightforward process that ensures you can easily keep track of your belongings. By following the steps outlined in this guide, you can seamlessly integrate the Airtag into your everyday life, utilizing its impressive features and functionalities.
The Airtag offers a convenient and reliable way to locate your misplaced items, and its integration with the Find My app makes it even more efficient. Whether you’re constantly misplacing your keys, wallet, or any other essential item, the Airtag can be a game-changer in simplifying your daily routine.
With its compact design and long-lasting battery life, the Airtag is a valuable addition to the Apple ecosystem. Its compatibility with Siri and the intuitive interface of the Find My app make it a breeze to set up and use.
So, don’t fret over misplaced items any longer. Activate your Airtag on your iPhone today and enjoy the peace of mind that comes with knowing you can easily track and locate your belongings.
FAQs
1. How do I activate the Airtag on my iPhone?
To activate an Airtag on your iPhone, follow these steps:
- Make sure your iPhone is running the latest version of iOS.
- Open the Find My app on your iPhone.
- Tap on the “Items” tab located at the bottom of the screen.
- Select “Add item” and follow the on-screen instructions.
- Place the Airtag near your iPhone and wait for it to be recognized.
- Once detected, you’ll see instructions on the screen to complete the activation process.
2. Can I activate an Airtag without an iPhone?
No, you cannot activate an Airtag without an iPhone. The Airtag relies on the Find My app, which is exclusive to iPhones. Additionally, the Airtag setup requires the use of Bluetooth technology, which is only available on iPhones.
3. Do I need an Apple ID to activate an Airtag?
Yes, you will need an Apple ID to activate an Airtag. The Airtag is tightly integrated with Apple’s ecosystem and requires you to sign in with your Apple ID during the setup process. If you don’t have an Apple ID, you will need to create one before you can activate an Airtag.
4. Can I activate multiple Airtags on one iPhone?
Yes, you can activate multiple Airtags on one iPhone. The Find My app allows you to manage and track multiple Airtags simultaneously. Simply follow the activation process for each Airtag individually, and they will all be accessible through the app.
5. What features are available once the Airtag is activated?
Once the Airtag is activated, you can enjoy various features, including:
- Locating your Airtag on a map using the Find My app.
- Playing a sound on the Airtag to help you locate it.
- Enabling the Lost Mode, which notifies you when someone else finds your Airtag and allows them to contact you.
- Using the Precision Finding feature on certain iPhones to guide you directly to the Airtag’s location.