
Welcome to our guide on how to clear search history on the Samsung S20! Your smartphone stores a wealth of information, including your search history. Clearing your search history not only helps protect your privacy, but it also ensures that your phone runs smoothly by freeing up storage space. The Samsung S20 comes packed with powerful features, and knowing how to navigate its settings can make a significant difference in managing your device effectively. In this article, we will walk you through the step-by-step process of clearing your search history on the Samsung S20. Whether you want to erase embarrassing searches or simply maintain a clutter-free browsing experience, we have got you covered. So, let’s dive in and explore how you can easily clear your search history on the Samsung S20!
Inside This Article
- Why Clear Search History on Samsung S20?
- Methods to Clear Search History on Samsung S20
- Method 1: Clearing Search History in Settings
- Method 2: Clearing Search History in Google Chrome Browser
- Method 3: Using a Third-Party App Cleaner
- Conclusion
- FAQs
Why Clear Search History on Samsung S20?
Clearing your search history on your Samsung S20 is a good practice to maintain privacy and keep your personal information secure. Here are a few reasons why you should consider clearing your search history:
- Privacy: Clearing your search history helps protect your privacy by removing any record of the websites you’ve visited and the searches you’ve made. This can prevent others from accessing your browsing habits and personal information.
- Security: By clearing your search history, you reduce the risk of sensitive information being accessed by others. This is especially important if you share your device with family members or friends.
- Storage Space: Over time, your search history can accumulate and take up storage space on your device. By periodically clearing it, you can free up space and improve the overall performance of your Samsung S20.
- Browsing Experience: Clearing your search history can improve your browsing experience by providing a fresh start. It allows for a cleaner and more organized search history, making it easier to find specific websites or revisit previous searches.
Overall, clearing your search history on your Samsung S20 is a simple and effective way to maintain privacy, enhance security, free up storage space, and optimize your browsing experience. Now, let’s explore the methods to clear search history on your Samsung S20.
Methods to Clear Search History on Samsung S20
Clearing your search history on a Samsung S20 is a straightforward process that can help protect your privacy and free up storage space on your device. In this section, we will explore three different methods to clear the search history on your Samsung S20.
Method 1: Clearing Search History in Settings
The first method involves navigating through the settings of your Samsung S20 to clear your search history. Here’s how you can do it:
- Go to the home screen of your Samsung S20 and swipe down from the top of the screen to open the notification panel.
- Tap on the gear-shaped Settings icon to access the device settings.
- Scroll down and tap on the “Privacy” option.
- Select “Clear Search History” and confirm your action when prompted.
- Your search history will now be cleared.
Method 2: Clearing Search History in Google Chrome Browser
If you primarily use the Google Chrome browser on your Samsung S20 for internet searches, you can clear your search history directly within the browser. Follow these steps:
- Open the Google Chrome browser on your Samsung S20.
- Tap on the three-dot menu icon in the top-right corner of the browser.
- Select “History” from the menu that appears.
- Tap on “Clear Browsing Data.
- Choose the time range for which you want to clear the search history.
- Check the “Browsing history” option and any other data you want to clear.
- Tap on “Clear data” to confirm and clear your search history.
Method 3: Using a Third-Party App Cleaner
If you prefer a more comprehensive approach to clearing your search history and other unnecessary data, you can use a third-party app cleaner. These apps are designed to analyze your device, identify temporary files, cache, and search history, and provide a simple way to clear them. Search for app cleaner tools on the Google Play Store, choose a highly-rated one, and follow the instructions to clear your search history.
By following any of these methods, you can easily clear your search history on your Samsung S20 and enjoy a clutter-free browsing experience while maintaining your privacy. Choose the method that suits your preferences and start clearing your search history today!
Method 1: Clearing Search History in Settings
Clearing your search history on the Samsung S20 is a straightforward process that can be done directly in the phone’s settings. Follow these steps to clear your search history:
1. Open the “Settings” app on your Samsung S20.
2. Scroll down and tap on “Privacy.”
3. In the Privacy menu, tap on “Clear browsing data.”
4. You will see a list of options such as “Browsing history,” “Cookies and site data,” and “Cached images and files.” Select “Browsing history” to clear your search history.
5. If you want to delete other browsing data like cookies and cached files as well, you can select those options.
6. Tap on “Clear data” or “Clear” to confirm and delete your search history.
7. After clearing your search history, you can exit the Settings menu.
By following these steps, you can easily clear your search history on your Samsung S20. It’s a good practice to regularly clear your search history to maintain your privacy and keep your device running smoothly.
Method 2: Clearing Search History in Google Chrome Browser
Google Chrome browser is one of the most popular web browsers used on the Samsung S20. If you frequently use Chrome to search the internet, it’s important to clear your search history regularly to maintain privacy and free up space on your device. Here’s how you can do it:
1. Open Chrome Browser: Launch the Google Chrome app on your Samsung S20 by tapping on its icon on the home screen or app drawer.
2. Access the Menu: Once Chrome is open, tap on the three dots located on the top right corner of the screen. This will open a drop-down menu with various options.
3. Go to Settings: Scroll down the drop-down menu and tap on “Settings”. This will take you to the settings page of the Chrome browser.
4. Clear Browsing Data: In the settings page, scroll down until you find the “Privacy” section. Tap on “Privacy” to expand the options.
5. Clear Search History: Under the “Privacy” section, you will find the option “Clear browsing data”. Tap on it to proceed.
6. Select Time Range: In the next screen, you can choose the time range for which you want to clear the browsing history. You can select options like “Last hour,” “Last 24 hours,” “Last 7 days,” or “All time.” Select your preferred time range.
7. Check Browsing History: Make sure the checkbox next to “Browsing history” is selected. If you want to clear other data as well, such as cookies or cached images, you can select those options too.
8. Clear Data: Once you have selected the desired time range and cleared the checkboxes for the data you want to delete, tap on the “Clear data” button. Confirm your action if prompted.
9. Confirmation: After tapping “Clear data,” Chrome will erase the selected browsing history from your Samsung S20. A confirmation message will appear once the process is complete.
10. Done: Congratulations! You have successfully cleared your search history in the Google Chrome browser on your Samsung S20.
It’s important to note that clearing your search history in Chrome will only remove the data from your local device and not from your synced Google account. To remove the search history from your Google account, you may need to access your account settings on a desktop or visit the Google My Activity page.
By regularly clearing your search history, you can keep your browsing habits private and ensure a smoother browsing experience on your Samsung S20.
Method 3: Using a Third-Party App Cleaner
If you’re looking for a more convenient way to clear search history on your Samsung S20, you can consider using a third-party app cleaner. These apps are specifically designed to help you optimize your device’s performance by clearing unnecessary files, including search history.
There are several third-party app cleaner options available on the Google Play Store, but one highly recommended app is CCleaner. CCleaner is a trusted app that not only clears cache and junk files but also allows you to easily delete your search history on your Samsung S20.
To use CCleaner to clear search history, follow these steps:
- First, download and install CCleaner from the Google Play Store.
- Open the CCleaner app on your Samsung S20.
- Navigate to the “Privacy” section or “Cleaning” section, depending on the app version.
- Select the option to clear your “Search History.”
- Review the list of items that will be deleted, ensuring that search history is included.
- Tap on the “Clean” or “Start” button to initiate the process.
CCleaner will then scan your device for search history data and delete it accordingly. It’s important to note that using a third-party app cleaner like CCleaner may also clear other data like app cache or browser cache, so make sure to review the list of items before proceeding with the cleaning process.
Using a third-party app cleaner can be a quick and efficient way to clear search history on your Samsung S20. These apps often offer additional features to optimize your device’s performance, making it an excellent option for those who want a comprehensive cleaning solution.
However, it’s always a good idea to research and choose a reputable app with positive reviews and ratings before installing any third-party apps on your device.
Conclusion
Clearing your search history on the Samsung S20 is a simple and important step to protect your privacy and maintain the performance of your device. By following the methods described in this article, you can easily delete your search history from the browser, as well as from the Google app and Samsung Internet app.
Regularly clearing your search history not only keeps your browsing habits private but also helps optimize your phone’s performance by reducing the amount of data stored. It’s a good habit to get into, especially if you use your Samsung S20 for various online activities.
The convenience of having a search history feature often comes with a trade-off in terms of privacy, so taking control of your search history is important. Clearing it regularly ensures that unwanted information doesn’t linger on your device and helps maintain a smooth and efficient browsing experience on your Samsung S20.
So, take a moment to clear your search history today and enjoy a more private and secure browsing experience on your Samsung S20!
FAQs
1. How do I clear the search history on my Samsung S20?
To clear the search history on your Samsung S20, follow these steps:
– Open the internet browser on your phone.
– Tap on the three-dot menu icon located at the top-right corner of the screen.
– Select “Settings” from the drop-down menu.
– Scroll down and tap on “Privacy.”
– Tap on “Clear browsing data.”
– Choose the desired time range for which you want to clear the search history.
– Check the box next to “Browsing history” and any other types of data you want to delete.
– Finally, tap on “Clear data” to remove the search history from your Samsung S20.
2. Will clearing the search history on my Samsung S20 affect my saved passwords or bookmarks?
No, clearing the search history on your Samsung S20 will not affect your saved passwords or bookmarks. The search history is a separate entity from your saved data, such as passwords or bookmarks. When you clear the search history, it only removes the record of the websites you have visited.
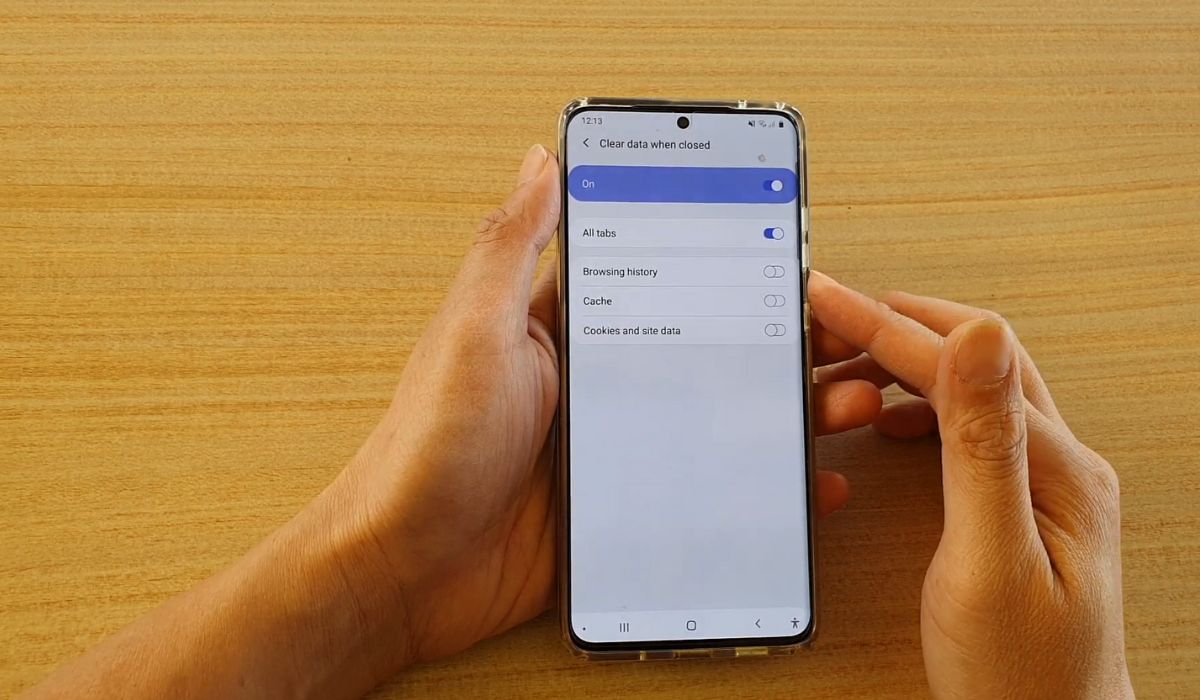
3. Can I set my Samsung S20 to automatically clear the search history?
Yes, you can set your Samsung S20 to automatically clear the search history. Here’s how:
– Open the internet browser on your phone.
– Tap on the three-dot menu icon at the top-right corner of the screen.
– Select “Settings” from the drop-down menu.
– Scroll down and tap on “Privacy.”
– Tap on “Clear browsing data.”
– Enable the toggle button next to “Clear history on exit.
– From now on, every time you close the browser, it will automatically clear the search history.
Note: Be aware that enabling this feature will also clear other data like cookies and cached files.
4. Can I recover a deleted search history on my Samsung S20?
Once you clear the search history on your Samsung S20, it cannot be recovered. Clearing the history permanently deletes the records from your device, and there is no option to restore them. Therefore, it is essential to be sure before clearing your search history.
5. Are there any third-party apps that can help clear the search history on my Samsung S20?
Yes, there are several third-party apps available on the Google Play Store that can help you clear the search history on your Samsung S20. These apps offer additional features like clearing cache, managing app data, and enhancing privacy. Some popular options include CCleaner, AVG Cleaner, and Norton Clean. However, it is crucial to research and choose reputable apps to ensure your data’s safety.