
Welcome to our guide on how to create a new home screen on your iPhone! Your home screen is the gateway to all the apps and features on your device, and personalizing it can make your iPhone feel truly unique and tailored to your preferences. Whether you want to organize your apps in a specific way, add widgets to keep important information at a glance, or simply change the look and feel of your home screen, we’ve got you covered. In this article, we will walk you through step-by-step instructions on how to create a new home screen on your iPhone. So, let’s dive in and unleash the full potential of your device’s home screen!
Inside This Article
- Overview
- Step 1: Open the Settings App
- Step 2: Tap on Display & Brightness
- Step 3: Tap on Home Screen Layout
- Step 4: Select the App Library Only Option
- Step 5: Customize Your App Library
- Step 6: Use the Search Bar to Find Apps
- Step 7: Drag and Drop Apps to the Home Screen
- Step 8: Create App Stacks or Folders
- Step 9: Edit Your Home Screen
- Step 10: Reset to Default Home Screen Layout
- Conclusion
- FAQs
Overview
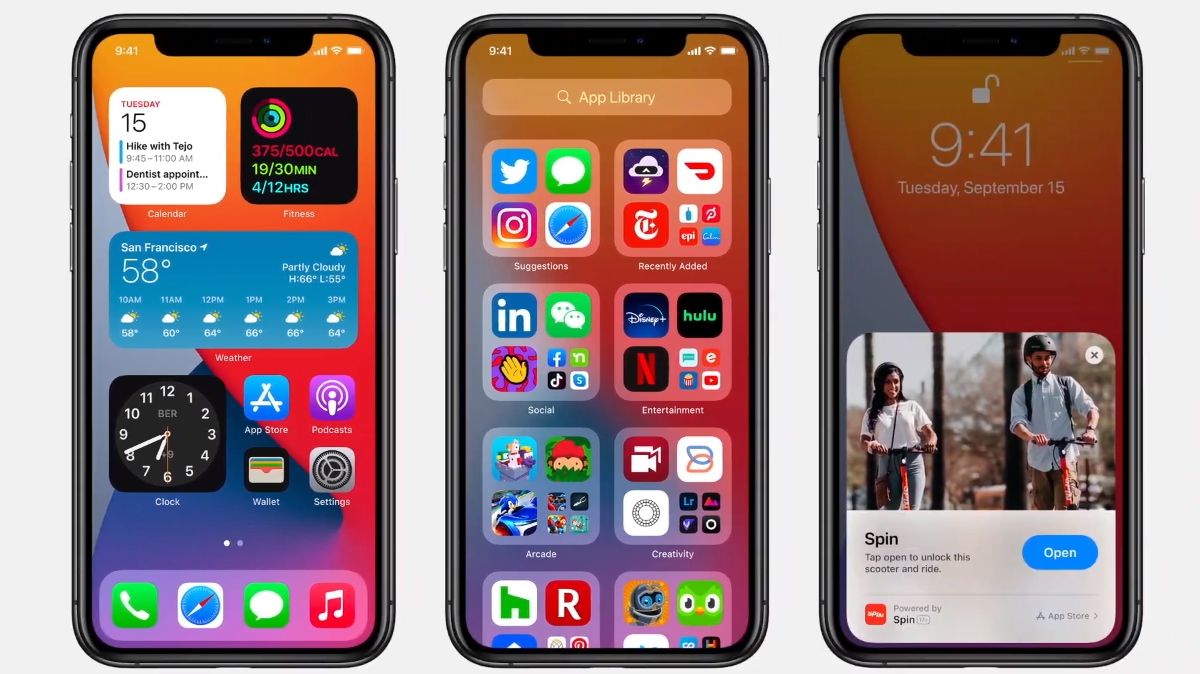
Are you tired of scrolling through endless pages of apps on your iPhone’s home screen? Luckily, there is a solution! With the latest iOS update, Apple introduced a new feature that allows you to create a new home screen layout on your iPhone. This revolutionary feature enables you to customize your app organization and design a home screen that suits your needs and preferences.
By following a few simple steps, you can create a more organized and efficient home screen that enables you to quickly access your most frequently used apps. Whether you want to group related apps together, create an app library, or simply rearrange your icons, the possibilities are endless when it comes to customizing your iPhone’s home screen.
In this article, we will guide you through the process of creating a new home screen on your iPhone. From rearranging apps to creating app stacks or folders, we will cover all the necessary steps to help you transform your home screen into a powerful tool that enhances your productivity and user experience.
Step 1: Open the Settings App
To create a new home screen on your iPhone, the first step is to open the Settings app. The Settings app is a central hub for customizing various aspects of your iPhone’s functionality. It allows you to personalize your device according to your preferences.
To open the Settings app, locate the app icon on your home screen. It is represented by a gray gear symbol. Tap on the icon to launch the app.
Alternatively, you can swipe down from the top right corner of the screen (on iPhone X and later models) or swipe up from the bottom of the screen (for earlier iPhone models) to access the Control Center. From the Control Center, tap on the “Settings” icon to open the app.
Once you have successfully opened the Settings app, you are ready to proceed to the next step in creating a new home screen on your iPhone.
Step 2: Tap on Display & Brightness
Once you have opened the Settings app on your iPhone, the next step is to tap on “Display & Brightness.” This option is usually located towards the top of the Settings menu, so you may not need to scroll down too far to find it.
Tapping on “Display & Brightness” will open a new screen where you can adjust various settings related to the display of your iPhone. This includes the brightness level, the text size, and the appearance of the screen. It’s a crucial step if you want to customize your home screen and make it visually appealing to your liking.
In the “Display & Brightness” settings, you’ll find options to adjust the brightness level of your iPhone. You can slide the brightness slider to the left to decrease the brightness or slide it to the right to increase it. It’s a good idea to set it to a level that is comfortable for your eyes and suits your surroundings.
Additionally, you can also enable the “Auto-Brightness” feature. When enabled, your iPhone’s screen brightness will automatically adjust based on the surrounding lighting conditions. This can help optimize battery life and ensure a comfortable viewing experience.
Apart from brightness settings, you can also adjust the text size on your iPhone. By tapping on “Text Size,” you’ll be able to choose from different font sizes that suit your preference. This can be useful for individuals with visual impairments or those who simply prefer larger or smaller text.
Furthermore, in the “Display & Brightness” settings, you can change the appearance of your iPhone’s screen by selecting either the Light mode or the Dark mode. The Light mode features a white background with black text, while the Dark mode has a black background with white text. You can choose the one that best suits your style and reduces eye strain.
Step 3: Tap on Home Screen Layout
Once you have opened the Settings app on your iPhone, it’s time to dive into the Home Screen Layout settings. This is where you can choose how your home screen will appear and organize your apps.
To access the Home Screen Layout settings, scroll down until you find the “Display & Brightness” option. Tap on it to proceed.
Within the Display & Brightness settings, scroll down once again until you see the “Home Screen Layout” option. This is where the magic happens!
Tap on the “Home Screen Layout” option to open the menu. Here, you will find different options to customize your home screen according to your preferences.
Once you tap on the Home Screen Layout option, you will be presented with three choices: “App Library Only,” “Home Screen Only,” and “Home Screen and App Library.”
For the purpose of this tutorial, we will focus on the “App Library Only” option. Tap on it to select it as your preferred home screen layout.
After selecting “App Library Only,” you will notice that your home screen is now empty, with all your apps moved to the App Library. Don’t worry, they are not gone, just a swipe away!
The App Library is a convenient way to access and organize your apps. To find a specific app, simply swipe to the rightmost screen of your home screen, and you will see the App Library.
From the App Library, you can use the search bar at the top to quickly find the app you want. Just type the app’s name, and the search results will automatically update accordingly.
If you want to move an app from the App Library to your home screen, simply long-press on the app icon until it starts jiggling, and then drag and drop it onto your desired home screen page.
With the “App Library Only” layout, you can also create app stacks or folders to further organize your apps. Just drag one app icon onto another, and a stack will automatically be created.
To edit your home screen and customize it to your liking, simply long-press on any app icon until they start jiggling. You can then move and organize them freely across your home screen pages.
If at any point you want to go back to the default home screen layout, simply repeat the steps above and select the “Home Screen Only” or “Home Screen and App Library” option in the Home Screen Layout settings.
By following these steps, you’ll be able to create a new home screen layout on your iPhone, tailor-made to suit your organizational preferences and app accessibility needs.
Step 4: Select the App Library Only Option
Once you have accessed the Display & Brightness settings, the next step is to tap on the “Home Screen Layout” option. This will allow you to choose your preferred home screen setup. In this step, we’ll guide you through selecting the “App Library Only” option.
By choosing the “App Library Only” option, you are essentially removing all app icons from your home screen and only displaying the App Library. This provides a clutter-free home screen experience, with all your apps neatly organized and easily accessible in the App Library.
To select the “App Library Only” option, tap on the respective toggle or button provided in the “Home Screen Layout” settings. Once selected, you will immediately notice that your home screen is now devoid of any app icons, leaving a clean and streamlined look.
It’s worth noting that even though the app icons are no longer visible on your home screen, they are not removed from your device. They are simply relocated to the App Library, where you can still search for and access them whenever needed.
This option is particularly suitable for users who prefer a minimalist approach, as it eliminates the visual clutter that can come with having numerous app icons on the home screen. Instead, the App Library becomes the central hub for accessing all your apps, making it easier to find and launch them quickly and efficiently.
Step 5: Customize Your App Library
Once you have set your home screen layout to the App Library Only option, you can begin customizing your App Library to suit your needs and preferences. Here are a few ways you can personalize your App Library:
Organize Apps by Categories: With the App Library, you have the option to categorize your apps automatically or manually. To organize apps automatically, tap on the search bar at the top of the App Library and then select a category, such as Social, Productivity, or Entertainment. The App Library will arrange your apps into folders based on their classification. If you prefer to organize apps manually, simply drag and drop an app onto another app to create a folder.
Customize App Library Pages: You can also customize the number of pages in your App Library. To do this, pinch your fingers on the App Library screen, and the Edit Pages interface will appear. From there, you can add or remove pages by tapping on the ‘+’ or ‘-‘ buttons. You can even rearrange the order of the pages by dragging them to the desired position.
Hide Apps in the App Library: If there are certain apps that you don’t want to see in your App Library, you have the option to hide them. Long-press on an app until the context menu appears, then select “Remove App” and choose “Move to App Library.” The app will be hidden from your home screen but will still be accessible in the App Library.
Prioritize Recently Added Apps: By default, your App Library will display apps in alphabetical order. However, if you prefer to see the most recently added apps at the top, you can change the sorting option. To do this, go to Settings > Home Screen > App Library and select “Sort by Recency.” This will ensure that the apps you use frequently and have recently downloaded are easily accessible.
Search for Apps: Lastly, the App Library comes with a robust search feature that allows you to quickly find apps. Simply swipe down on the App Library screen, and the search bar will appear. You can then enter the name of the app you are looking for, and the App Library will display the matching results.
With these customization options, you can make your App Library more organized and tailored to your preferences. Take some time to explore and experiment with different configurations to create a personalized and efficient home screen experience on your iPhone.
Step 6: Use the Search Bar to Find Apps
One of the most convenient features of the iPhone is its powerful search functionality. With just a few taps, you can easily find and access any app on your device. Whether you have a large number of apps or a cluttered home screen, using the search bar can save you time and frustration.
To use the search bar, simply swipe down on your home screen or swipe right from the first home screen. This action will reveal the search bar at the top of the screen. Tap on the search bar, and the on-screen keyboard will appear, ready for you to start typing.
Start typing the name of the app you want to find. As you type, the search bar will start showing relevant results. It will not only search for app names but also look for matches in app descriptions and other content on your device.
Once you see the app you’re looking for in the search results, you can tap on it to open it directly. If you have multiple results, you can swipe left or right to navigate through them. It’s a quick and intuitive way to launch an app without having to manually search through your home screen pages.
This search feature is not limited to finding apps. You can also use it to search for contacts, messages, emails, and even content within apps, such as songs in your music library or documents in a file management app.
Furthermore, the search bar on the iPhone allows you to perform quick web searches. After typing your search query, you’ll see suggestions and results from the web as well. It’s a useful tool for looking up information without having to open a browser separately.
Overall, the search bar on your iPhone is a powerful tool that can help you quickly find apps, content, and information on your device. Whether you have a cluttered home screen or you simply want a faster way to launch apps, using the search bar is a time-saving feature that shouldn’t be overlooked.
Step 7: Drag and Drop Apps to the Home Screen
Once you have organized your apps in the App Library, it’s time to bring your most frequently used apps to the home screen. The process is simple and intuitive. Just follow these steps:
- Tap and hold on any app icon in the App Library or swipe to search for the app you want to bring to the home screen.
- As you continue to hold the app icon, it will start to jiggle, indicating that you can now move it.
- Drag the app icon to the desired location on the home screen. You can place it next to other apps or create a new space for it.
- If you want to move the app to a different page on the home screen, drag it to the edge of the screen and hold until the page starts to scroll.
- Release your finger to drop the app in its new location.
By dragging and dropping apps, you can arrange them in a way that makes sense to you. You can group similar apps together, create folders, or have your most frequently used apps easily accessible on the main home screen.
Remember, you have the flexibility to rearrange your apps at any time. If you decide to change the layout or move an app to a different page, simply repeat the process of dragging and dropping the app icon.
Organizing your home screen by dragging and dropping apps allows for a personalized and efficient user experience. You can customize your app layout to fit your workflow and access your favorite apps with ease.
Now that you know how to drag and drop apps to the home screen, go ahead and start organizing your apps to create a home screen that reflects your unique style and preferences.
Step 8: Create App Stacks or Folders
One of the great features of the iPhone is the ability to organize your apps into folders or stacks, making it easier to navigate your home screen. Creating app stacks or folders not only helps streamline your app collection, but it also allows you to declutter and keep your home screen tidy. Here’s how you can do it:
1. Long-press on an app icon until it starts to jiggle. This will activate the edit mode on your iPhone’s home screen.
2. Drag one app icon onto another app icon. This action will automatically create a folder or stack. You can release your finger once the icons are merged into a single folder or stack.
3. To give the folder or stack a name, tap on the text field above the icons. This will open the keyboard, allowing you to type in a custom name for the folder or stack.
4. Once you have entered the desired name, tap anywhere outside the folder or stack. This will save the name and exit the edit mode.
5. To add more apps to the folder or stack, simply drag and drop them into it. You can rearrange the order of the apps by dragging them within the folder or stack.
6. If you want to remove an app from the folder or stack, enter the edit mode again by long-pressing on the folder or stack. Then, drag the app out of the folder or stack and release it onto the home screen.
7. If you have multiple apps within a folder or stack, you can swipe left or right on the folder or stack to access additional pages of apps.
Having the ability to create app stacks or folders on your iPhone homescreen gives you greater control over your app organization. Whether you want to group apps by category, usage, or preference, creating stacks or folders is an efficient way to keep things organized.
Take advantage of this feature to customize your home screen and make it tailored to your needs. Experiment with different folder arrangements and find a system that works best for you.
Stay organized and maximize the potential of your iPhone’s home screen by creating app stacks or folders today!
Step 9: Edit Your Home Screen
After you have organized your apps and created a new home screen, you may want to further customize it to your liking. Editing your home screen allows you to rearrange or remove apps, add widgets, and personalize the appearance of your iPhone. Follow these steps to edit your home screen:
- Tap and hold on any app icon on your home screen until all the icons start to jiggle.
- You will notice that a small “X” button appears on the top left corner of the app icons. Tap on the “X” button to delete an app, or drag it to a different position to rearrange the app icons on your home screen.
- When you tap on an app icon and hold it, you can also enter the edit mode. From there, you can select “Edit Home Screen” to access additional customization options.
- To add a widget to your home screen, swipe to the rightmost page and tap the “+” button in the top left corner. Choose a widget from the available options and select “Add Widget”. You can then drag the widget to the desired position on your home screen.
- If you want to remove a widget, tap on it and select “Remove Widget.”
- For more advanced customization, you can create app stacks or folders. To create a stack, drag one app icon on top of another app icon. This will create a stack that you can tap to expand and access the apps within it. To create a folder, drag one app icon on top of another and hold until a folder is created. You can then add more apps to the folder by dragging and dropping them onto it.
Take your time to experiment with different layouts, widgets, and app arrangements to find what works best for you. Don’t be afraid to get creative and have fun with it!
Step 10: Reset to Default Home Screen Layout
After customizing your home screen layout on your iPhone, you may decide to revert back to the default setup. Whether you miss the organized simplicity of the default layout or simply want to start fresh, resetting your home screen is a straightforward process.
To reset your home screen to the default layout on your iPhone, follow these steps:
- Open the Settings app on your iPhone.
- Scroll down and tap on “Display & Brightness”.
- Tap on “Home Screen Layout”.
- Select the “Reset Home Screen Layout” option.
Once you tap on “Reset Home Screen Layout,” a confirmation prompt will appear. It will inform you that your current home screen layout will be replaced with the original default arrangement.
If you’re certain about resetting to the default home screen layout, tap on “Reset Home Screen” to proceed.
Keep in mind that when you reset your home screen layout, all the customizations you made, such as rearranged apps, folders, and widgets, will be wiped out. Your iPhone’s home screen will be restored to the default configuration set by Apple.
By default, Apple arranges the built-in and downloaded apps in a structured and user-friendly manner. The essential apps will appear on the first page, and subsequent pages will contain additional apps categorized in folders.
If you want a clean slate or if you prefer the default organization, this reset option is the way to go.
Remember that resetting your home screen layout will not delete any apps or data from your iPhone. It only reverses the visual customizations you made to your home screen.
So, if you ever want to switch back to your personalized layout in the future, you can easily do so by following the steps to customize your home screen again.
Resetting the home screen layout is a useful feature that allows you to start anew or restore the familiar setup that you are accustomed to. Whether you’re a minimalist or prefer a clutter-free interface, the choice is yours.
Creating a new home screen on your iPhone can bring a fresh and personalized experience to your device. With simple steps, you can rearrange and customize your app icons, create folders, and add widgets to fit your preferences and make accessing your favorite apps easier than ever. Whether you want to streamline your productivity or express your creativity, the ability to create a new home screen provides endless possibilities.
By following the instructions in this article, you can transform your iPhone’s home screen into a reflection of your personality, enhancing both the aesthetics and functionality of your device. So don’t be afraid to get creative and experiment with different layouts, wallpapers, and customization options to truly make your iPhone home screen uniquely yours.
With the power to fully personalize your iPhone’s home screen, you can make your device a true representation of your style, interests, and needs. So go ahead, unleash your creativity, and enjoy the customized experience that a new home screen brings to your iPhone!
FAQs
Q: Can I change the layout of my iPhone’s home screen?
A: Yes, you can customize the layout of your iPhone’s home screen by rearranging the app icons, creating folders, and even adding widgets for a more personalized experience.
Q: How do I rearrange app icons on my iPhone’s home screen?
A: To rearrange app icons on your iPhone’s home screen, long-press on any app until it starts to jiggle. Then, drag and drop the app icons to your desired position. You can also move apps between different home screen pages by dragging them to the edges of the screen or create new app folders by dragging one app icon on top of another.
Q: Can I change the wallpaper on my iPhone’s home screen?
A: Absolutely! You can change the wallpaper on your iPhone’s home screen by going to the Settings app, selecting “Wallpaper,” and then choosing a new wallpaper from the available options. You can select from Apple’s pre-installed wallpapers or use your own photos.
Q: What are widgets, and how can I add them to my iPhone’s home screen?
A: Widgets are interactive app previews that provide quick access to information and app features right from your home screen. To add a widget to your iPhone’s home screen, long-press on any empty space on the screen, tap the “+” button in the top-left corner, and select the desired widget from the widget gallery. You can customize the size and position of the widget as well.
Q: Is it possible to hide app icons on my iPhone’s home screen?
A: Yes, you can hide app icons on your iPhone’s home screen by using the App Library feature introduced in iOS 14. Simply swipe left on your home screen until you reach the App Library, which organizes all your apps into categorized folders. You can still access hidden apps by swiping down on the home screen and using the search feature.