
Welcome to the digital era, where capturing photos on our smartphones has become an inherent part of our daily lives. With the ever-increasing storage capacity of mobile devices, it’s easy for our photo galleries to become cluttered with countless pictures. Eventually, the time comes when we need to declutter and delete photos from our iPhone to free up space or organize our collection.
But deleting photos from our iPhones can be a bit tricky if we aren’t familiar with the process. That’s where this guide comes in, providing you with step-by-step instructions on how to delete photos from your iPhone seamlessly. Whether you want to remove multiple photos at once or selectively delete specific images, we’ve got you covered. So let’s dive in and learn how to effortlessly clear out your photo library and make the most of your iPhone’s storage space.
Inside This Article
- Introduction
- Step 1: Open the Photos App
- Step 2: Select the Photos to Delete
- Step 3: Delete Individual Photos
- Step 4: Delete Multiple Photos at Once
- Step 5: Delete Photos Permanently from the “Recently Deleted” Album
- Conclusion
- Conclusion
- FAQs
Introduction
Taking photos with our iPhones has become an integral part of our lives. Whether it’s capturing precious moments, documenting important events, or simply snapping away to capture the beauty around us, our iPhones have become our trusted companions in preserving memories. However, as we continue to fill up our photo libraries, it’s essential to learn how to manage our photo collection to free up storage space and keep our iPhones running smoothly.
Deleting photos from your iPhone may seem like a straightforward task, but there are a few things to keep in mind to ensure you delete them properly and effectively. In this guide, we will walk you through the steps to delete photos from your iPhone, whether you want to delete individual photos or multiple photos at once. We will also show you how to permanently delete photos from the “Recently Deleted” album, so you can free up storage space on your device.
Before we begin, it’s important to note that deleting photos from your iPhone is a permanent action, and once deleted, these photos cannot be recovered unless you have a backup. So, make sure to backup any important photos before proceeding with any deletions.
Now, let’s dive into the steps to delete photos from your iPhone and reclaim some valuable storage space!
Step 1: Open the Photos App
Deleting unwanted photos from your iPhone is a great way to free up storage space and organize your camera roll. To begin the process, you’ll need to open the Photos app on your device. The Photos app is a built-in application that allows you to view, edit, and manage your photo library.
To open the Photos app, simply locate and tap on the app icon on your iPhone’s home screen. The icon resembles a multicolored flower, and it should be easy to spot among your various app icons. Once you tap on the Photos app icon, the app will launch, and you’ll be taken to the main photo library screen.
On the main photo library screen, you’ll have access to all of the photos and albums stored on your iPhone. From here, you can browse through your photos, organize them into albums, and perform various actions such as deleting, editing, or sharing.
If you have a large photo library, it may take a few moments for the app to load all of your photos. Once the app is fully loaded, you can proceed to the next step to start deleting photos from your iPhone.
Step 2: Select the Photos to Delete
Now that you have opened the Photos app on your iPhone, it’s time to select the photos that you want to delete. Here’s how you can do it:
- Tap on the “Photos” tab at the bottom of the screen. This will take you to the main photos library.
- Navigate through your photo albums or scroll through the main library to find the photos you wish to delete.
- Once you find a photo you want to delete, tap on it to open it.
- In the bottom left corner, you will see a trash can icon. Tap on it to delete the selected photo. A confirmation message will appear asking if you want to delete the photo.
- If you want to delete multiple photos at once, you can tap on the “Select” button in the top right corner of the screen. This will allow you to select multiple photos by tapping on them. Once you have selected all the photos you want to delete, tap on the trash can icon in the bottom left corner to delete them.
Remember that deleting photos from your iPhone will also delete them from your iCloud account if you have iCloud Photos enabled. If you want to keep a backup of the photos before deleting them, make sure to back them up first.
Once you have selected the photos you want to delete and tapped on the trash can icon, the photos will be moved to the “Recently Deleted” album. They will remain there for 30 days before being permanently deleted. If you change your mind and want to recover a deleted photo, you can restore it from the “Recently Deleted” album within this time frame.
Step 3: Delete Individual Photos
Deleting individual photos from your iPhone is a straightforward process. Once you have opened the Photos app and selected the desired album, follow the steps below:
- Locate the photo you want to delete.
- Tap on the photo to open it.
- Once the photo is open, you will see various options at the bottom of the screen.
- Look for the trash can icon, usually found in the bottom-right corner, and tap on it.
- A confirmation message will appear, asking you to confirm the deletion. If you are certain, tap on “Delete Photo”.
After completing these steps, the individual photo will be permanently deleted from your iPhone, and you will no longer see it in your Photos app or any related albums.
It is important to note that deleting individual photos does not free up storage space on your device immediately. The deleted photo will be moved to the “Recently Deleted” album, where it remains for a specified period of time, typically 30 days. During this time, you have the option to recover the deleted photo if needed. We will cover the process of permanently deleting photos from the “Recently Deleted” album in the next step.
Step 4: Delete Multiple Photos at Once
If you have a large number of photos you want to delete at once, there’s an easy way to do it on your iPhone. Just follow these steps:
- Open the Photos app on your iPhone.
- Navigate to the album or folder that contains the photos you want to delete.
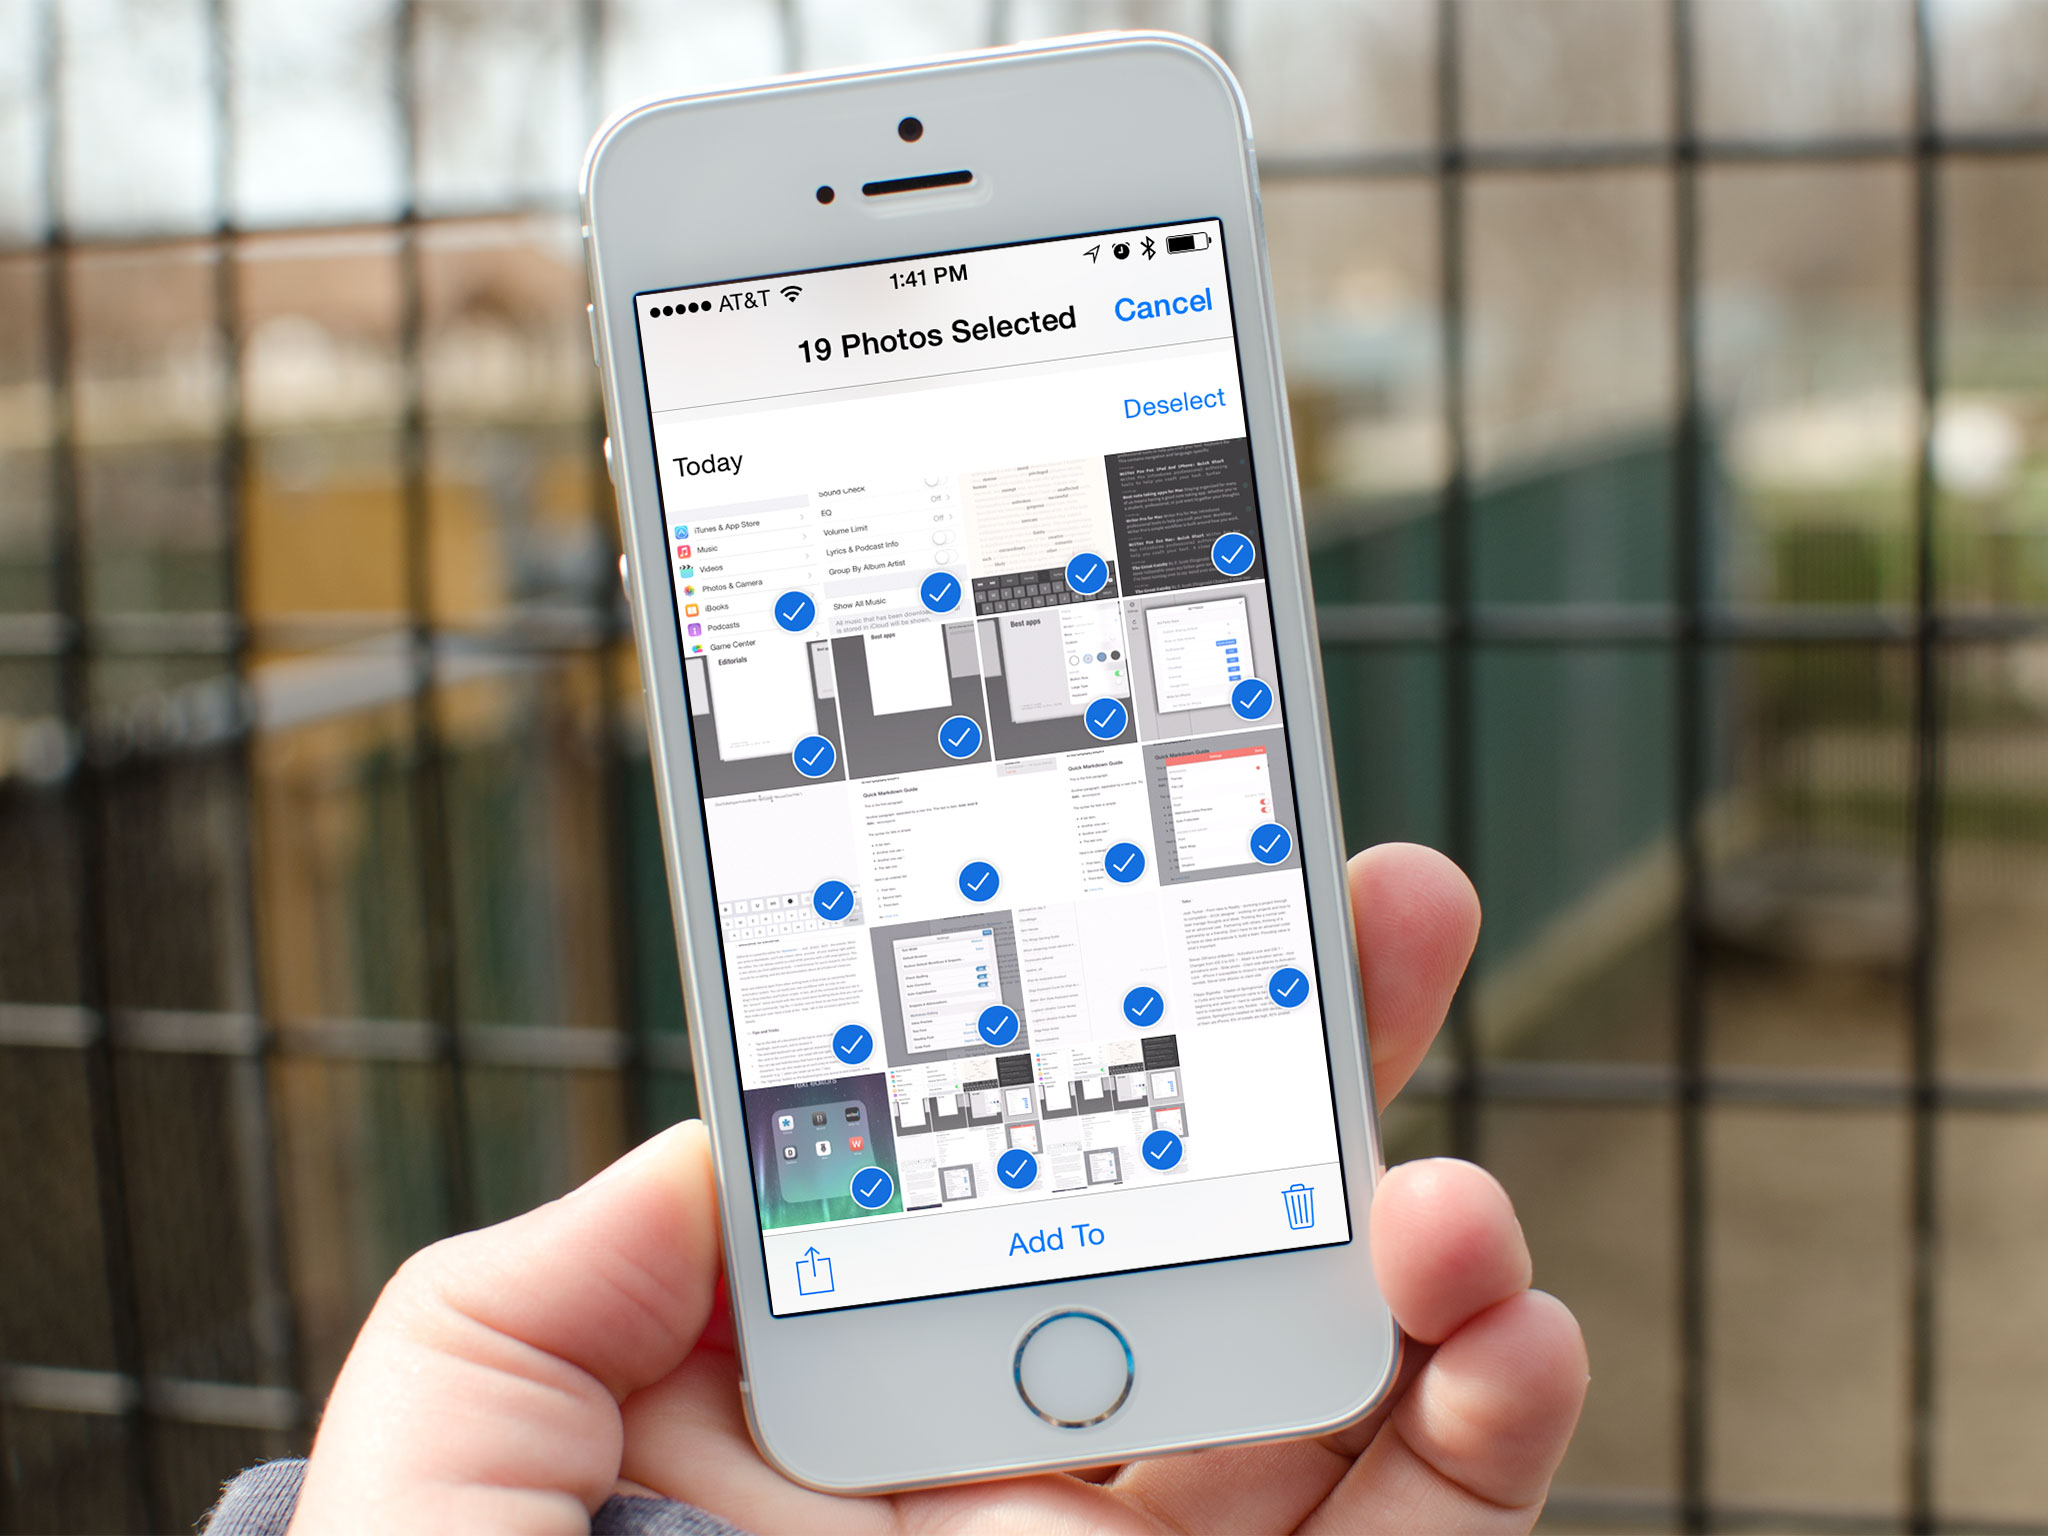
- Tap on the “Select” option located at the top right corner of the screen.
- Tap on each photo that you want to delete. You will notice a blue checkmark appearing on the selected photos.
- If you want to select multiple photos at once, you can drag your finger across the screen to easily select a batch of photos.
- Once you have selected all the desired photos, tap on the “Delete” option located at the bottom right corner of the screen. It looks like a trash can icon.
- A confirmation message will appear asking if you want to delete the selected photos. Tap on “Delete photos” to proceed.
By following these steps, you can quickly and efficiently delete multiple photos from your iPhone without having to delete them one by one. This is especially useful when you have a large number of photos to remove, saving you time and effort.
Step 5: Delete Photos Permanently from the “Recently Deleted” Album
After deleting photos, they are not immediately removed from your iPhone. Instead, they are moved to the “Recently Deleted” album, where they stay for 30 days before being permanently deleted. However, if you want to free up space on your device immediately, you can manually delete photos from the “Recently Deleted” album. Follow these steps:
- Open the Photos app on your iPhone.
- Tap on the “Albums” tab at the bottom of the screen.
- Scroll down and select the “Recently Deleted” album. This album contains all the photos that you have recently deleted.
- Tap on the “Select” button in the top right corner.
- Select the photos you want to permanently delete by tapping on them.
- Once you have selected the photos, tap on the “Delete” button or the trash bin icon at the bottom right corner of the screen.
- A confirmation message will appear asking if you want to delete the photos. Tap on “Delete Photos” to permanently remove them from your iPhone.
It’s important to note that once you delete photos from the “Recently Deleted” album, they cannot be recovered. So be sure to double-check your selection before proceeding with the deletion.
By following these steps, you can permanently remove photos from your iPhone and create more storage space for new memories. Keep in mind that deleting photos from the “Recently Deleted” album is irreversible, so it’s essential to be cautious and selective with your choices.
Now that you know the process of deleting photos from your iPhone, you can easily manage your photo collection and free up storage space whenever needed.
Conclusion
Deleting photos from your iPhone is a simple and straightforward process. By following the steps outlined in this guide, you can free up valuable storage space and ensure that your photo library remains organized. Here’s a quick recap of what we covered:
- Open the Photos app on your iPhone to access your photo library.
- Select the photos you want to delete by tapping on them.
- To delete individual photos, tap the trash can icon and confirm your decision.
- If you want to delete multiple photos at once, use the “Select” option and then tap on the trash can icon.
- Deleted photos are initially moved to the “Recently Deleted” album, where they remain for 30 days before being permanently deleted.
- To permanently delete photos from the “Recently Deleted” album, go to the album, tap “Select,” and then tap “Delete All” or manually select the photos and tap “Delete” to remove them permanently.
Remember to exercise caution when deleting photos, as the process is irreversible once the photos are permanently deleted. Double-check your selection before confirming the deletion to avoid any accidental loss of important memories.
By regularly deleting unnecessary photos from your iPhone, you can keep your device running smoothly and ensure that you always have enough space to capture new moments. So, why wait? Give it a try and enjoy a clutter-free photo library!
If you have any further questions or need assistance, feel free to refer back to this guide or consult your device’s user manual. Happy deleting!
Conclusion
In conclusion, deleting photos from your iPhone is a simple and straightforward process that can help you free up valuable storage space and keep your device running smoothly. Whether you want to delete individual photos, delete entire albums, or remove all photos at once, there are multiple methods and options available to suit your preferences.
By following the step-by-step instructions provided in this article, you can confidently delete photos from your iPhone without fear of losing any important memories. Remember to take advantage of iCloud and other backup options to securely store your photos before deleting them.
Regularly cleaning up your photo library not only helps you organize your device but also ensures that you have space for new memories and experiences. So go ahead and start decluttering your iPhone today!
FAQs
-
Q: How do I delete photos from my iPhone?
A: To delete photos from your iPhone, follow these steps:
- Open the Photos app on your iPhone.
- Navigate to the album or folder where the photos you want to delete are located.
- Tap on the “Select” option at the top right corner of the screen.
- Select the photos you want to delete by tapping on them. You will see a blue checkmark indicating the selection.
- Once you have selected all the photos you want to delete, tap on the trash can icon at the bottom right corner of the screen.
- A confirmation message will appear asking if you want to delete the selected photos. Tap on “Delete [number] Photos” to confirm.
- The selected photos will be moved to the “Recently Deleted” album, where they will be stored for 30 days before being permanently deleted. To immediately remove them, navigate to the “Recently Deleted” album and tap on “Select” followed by “Delete All”.
-
Q: Can I recover deleted photos from my iPhone?
A: Yes, you can recover deleted photos from your iPhone within a certain time frame. When you delete a photo, it is moved to the “Recently Deleted” album, where it will be stored for 30 days before being permanently deleted. To recover deleted photos:
- Open the Photos app on your iPhone.
- Navigate to the “Recently Deleted” album.
- Tap on “Select” at the top right corner of the screen.
- Select the photos you want to recover by tapping on them.
- Tap on “Recover” at the bottom right corner of the screen.
- The selected photos will be restored to their original location.
-
Q: Can I permanently delete photos from my iPhone without storing them in the “Recently Deleted” album?
A: Yes, you can permanently delete photos from your iPhone without storing them in the “Recently Deleted” album. To do this:
- Select the photos you want to delete in the Photos app.
- Instead of tapping on the trash can icon, swipe left on the selected photos.
- A red “Delete” button will appear. Tap on it to permanently delete the photos without moving them to the “Recently Deleted” album.
-
Q: Can I delete all photos from my iPhone at once?
A: Yes, you can delete all photos from your iPhone at once by following these steps:
- Open the Photos app on your iPhone.
- Navigate to the “Photos” tab.
- Tap on “Select” at the top right corner of the screen.
- While holding down the “Select” button, use your other hand to scroll to the very bottom of the screen.
- Release the “Select” button.
- A pop-up will appear with the option to select all photos. Tap on “Select All”.
- Tap on the trash can icon at the bottom right corner of the screen to delete all selected photos.
- Confirm the deletion by tapping on “Delete [number] Photos”.
-
Q: Will deleting photos from my iPhone also delete them from iCloud?
A: If you have iCloud Photos enabled, deleting photos from your iPhone will also delete them from iCloud. However, deleted photos will still be available in the “Recently Deleted” album within iCloud for a limited time before being permanently deleted.