
Are you wondering how to erase an iPhone? Whether you’re looking to sell your old device, hand it down to a family member, or simply want to start fresh, erasing your iPhone is a crucial step to protect your data and ensure your privacy. Fortunately, Apple provides a built-in feature that allows you to securely erase all your personal information from your iPhone.
In this article, we will guide you through the process of erasing an iPhone. From backing up your important data to performing a factory reset, we’ll cover everything you need to know to ensure a smooth and secure deletion. Follow the steps below to erase your iPhone and get ready to pass it on to its next owner or enjoy a clean slate for yourself.
Inside This Article
- Precautions before erasing an iPhone
- Method 1: Factory reset through settings
- Method 2: Erase an iPhone using iTunes
- Method 3: Use iCloud to erase an iPhone remotely
- Method 4: Erase an iPhone with a third-party tool
- Conclusion
- FAQs
Precautions before erasing an iPhone
Before proceeding with the process of erasing an iPhone, it is important to take certain precautions to ensure a smooth and hassle-free experience. These precautions will help you avoid any potential data loss or issues during the erasing process. Below are some important precautions to keep in mind:
1. Backup your iPhone: Before initiating the erasing process, it is crucial to create a backup of your iPhone data. This will ensure that all your important data, including contacts, photos, videos, and apps, are safely stored and can be restored later if needed.
2. Sign out of iCloud and iTunes: Before erasing your iPhone, make sure to sign out of your iCloud and iTunes accounts. This will prevent any future issues related to account synchronization and data retrieval.
3. Disable Find My iPhone: To ensure a smooth erasing process, it is recommended to disable the “Find My iPhone” feature. This can be done by going to Settings > [Your Name] > Find My > Find My iPhone, and toggle off the switch.
4. Remove SIM card and external storage: Before erasing your iPhone, it is advisable to remove the SIM card and any external storage devices connected to it. This will help prevent any accidental data loss or damage during the erasing process.
5. Check the battery level: It is important to ensure that your iPhone has sufficient battery level before initiating the erasing process. A low battery level may cause the process to fail or interrupt, leading to potential data loss or device functionality issues.
Following these precautions will help you avoid any potential data loss or issues during the erasing process. By taking the necessary steps to backup your data and sign out of your accounts, you can confidently proceed with erasing your iPhone and starting fresh.
Method 1: Factory reset through settings
If you’re looking for a quick and easy way to erase your iPhone, the factory reset option within the settings is your best bet. Follow these steps to perform a factory reset on your iPhone:
- Open the “Settings” app on your iPhone.
- Scroll down and tap on “General”.
- Scroll down again and tap on “Reset”.
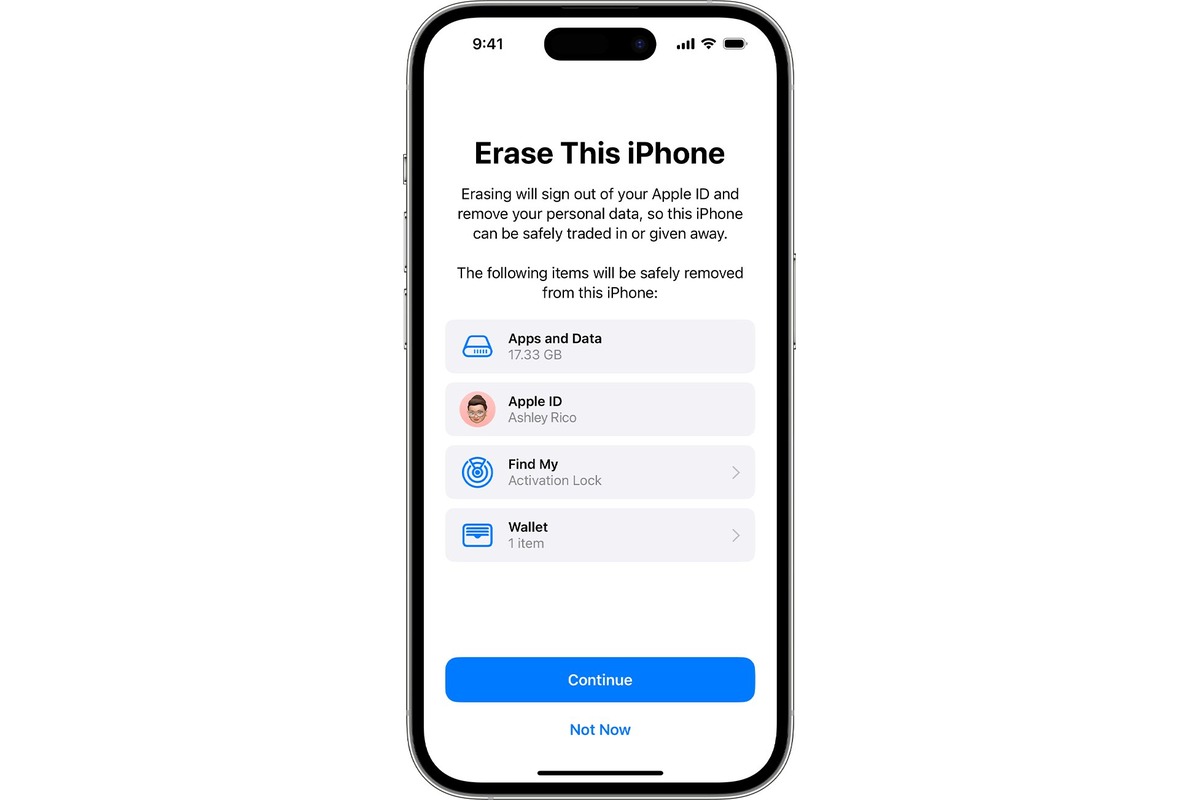
- Tap on “Erase All Content and Settings”.
- You may be prompted to enter your passcode.
- Tap on “Erase iPhone” to confirm the reset.
Keep in mind that performing a factory reset will delete all the data on your iPhone, including apps, photos, contacts, and settings. It will also remove all the accounts associated with the device, such as iCloud and iTunes. Therefore, it is crucial to back up your data before proceeding with the factory reset.
After the reset is complete, your iPhone will restart and display the initial setup screen. You can then set up your device as new or restore it from a backup, depending on your preferences.
It’s worth noting that this method is only suitable if you have access to your iPhone and can unlock it. If your iPhone is lost or stolen, or if you’re unable to unlock it, you may need to resort to other methods, such as using iCloud or iTunes to erase your device remotely.
Method 2: Erase an iPhone using iTunes
If you’re looking for a reliable and effective way to completely erase your iPhone, using iTunes is a great option. iTunes is a software developed by Apple that allows you to manage and sync your iPhone with your computer. By utilizing iTunes’ features, you can easily erase all the data on your device and restore it to its factory settings.
Before proceeding with this method, make sure you have the latest version of iTunes installed on your computer. Also, keep in mind that using iTunes to erase your iPhone will permanently remove all data on the device. It’s crucial to back up any important information beforehand to prevent data loss.
Here’s a step-by-step guide on how to erase your iPhone using iTunes:
- Connect your iPhone to your computer using a USB cable. Launch iTunes if it doesn’t open automatically.
- Select your iPhone when it appears in iTunes, and click on the “Summary” tab.
- Scroll down to the “Options” section and click on the “Restore iPhone” button.
- A pop-up window will appear, asking if you want to back up your device. Choose whether you want to create a backup or proceed without one.
- Click on the “Restore” button to initiate the erasing process. iTunes will download the latest iOS software, erase all data on your iPhone, and restore it to its original state.
- Once the process is complete, your iPhone will restart, and you will be greeted with the “Hello” screen, indicating that your device has been successfully erased.
It’s important to note that the time it takes to complete the erasing process may vary depending on the size of your device and the speed of your internet connection. Additionally, make sure your iPhone stays connected to your computer throughout the whole process to prevent any interruptions.
By following these steps, you can confidently erase your iPhone using iTunes and have the peace of mind that all your personal data has been securely removed. This method is especially useful if you’re planning to sell or give away your iPhone and want to ensure that no trace of your information is left behind.
Method 3: Use iCloud to erase an iPhone remotely
Using iCloud, Apple’s cloud-based storage and syncing service, you can remotely erase your iPhone if it is lost or stolen. This method ensures that your personal data remains secure and inaccessible to unauthorized users. Here’s how you can do it:
1. Access iCloud: Open a web browser on your computer and go to the iCloud website (www.icloud.com). Sign in with your Apple ID and password.
2. Select Find iPhone: Once logged in, you will see various options. Click on “Find iPhone” to proceed.
3. Locate your device: In the Find iPhone window, you will see a map displaying the location of all your devices linked to your iCloud account. Select your iPhone from the list, and its location will be highlighted on the map.
4. Erase your iPhone: On the right-hand side of the screen, you will find a panel with options for the selected device. Click on “Erase iPhone.”
5. Confirm the erase: A pop-up window will appear, asking you to confirm the erasure of your iPhone. Make sure you have a backup of your important data as erasing will permanently delete everything on the device. Click “Erase” to proceed.
6. Enter your Apple ID password: To ensure that no one else can erase your iPhone without your permission, you will be prompted to enter your Apple ID password. Provide the required information and click “Erase” once again.
7. Wait for the process to complete: The erasure process will begin, and it may take a few minutes to complete. Your iPhone will be restored to its factory settings, and all your data will be erased permanently.
8. Set up as a new device or restore from backup: After the erasure is successful, you can set up your iPhone as a new device or restore your data from a backup. Follow the on-screen instructions to proceed with the desired option.
Using iCloud to erase your iPhone remotely is a convenient and secure method. It ensures that your data remains protected, even if your device falls into the wrong hands.
Method 4: Erase an iPhone with a third-party tool
If you want to completely erase your iPhone and ensure that none of your personal data can be recovered, you can consider using a third-party tool. There are several reputable software options available that offer secure and thorough erasure of your device.
One popular tool is dr.fone – Data Eraser. This software is specifically designed to erase data from iOS devices, including iPhones. With dr.fone, you can confidently wipe all data from your device, including contacts, messages, photos, videos, and more.
To use dr.fone – Data Eraser, follow these simple steps:
- Download and install dr.fone on your computer.
- Launch the software and connect your iPhone to the computer using a USB cable.
- Select the “Data Eraser” option from the main menu.
- Choose the erasure level (Low, Medium, or High) based on your preference for security.
- Click on the “Start” button to initiate the erasure process.
- Wait for the software to erase all data from your iPhone. This may take some time depending on the size of your device.
- Once the process is complete, you will receive a confirmation message.
It is important to note that using a third-party tool like dr.fone – Data Eraser will permanently erase all data from your iPhone. Therefore, it is crucial to make sure you have backed up any important files or data before proceeding with the erasure.
Additionally, be cautious when choosing a third-party tool and ensure that it comes from a reputable and trustworthy source. Always read reviews and user feedback before making a decision.
By following the steps outlined above, you can effectively erase your iPhone using a third-party tool, providing an added layer of security and peace of mind.
In conclusion, understanding how to erase an iPhone is crucial for protecting your privacy and ensuring the proper disposal or sale of your device. Whether you’re upgrading to a new iPhone, selling your current one, or simply wanting to start fresh, knowing how to erase your iPhone completely is essential.
By following the steps outlined in this article, you can confidently wipe all of your personal data from your iPhone, prevent unauthorized access to your information, and restore it to factory settings. Remember to back up your data before performing a factory reset and double-check that you’ve signed out of all accounts.
Keep in mind that erasing an iPhone is irreversible, so it’s important to take the necessary precautions before proceeding. By doing so, you can safeguard your personal information and ensure a smooth transition to your next iPhone or the sale of your device.
So, if you’re ready to part ways with your iPhone or start with a clean slate, follow the steps outlined in this article and erase your iPhone with confidence.
FAQs
1. How do I erase an iPhone?
To erase an iPhone, go to the “Settings” app, then tap on “General,” and scroll down to find “Reset.” Tap on “Reset” and then select “Erase All Content and Settings.” Confirm your action by entering your passcode and Apple ID password if prompted. Finally, tap on “Erase iPhone” to initiate the process.
2. Will erasing my iPhone delete all my data?
Yes, erasing your iPhone will delete all the data stored on it, including apps, photos, videos, messages, contacts, settings, and more. It is essential to create a backup of your data before performing a factory reset to ensure you don’t lose any important information.
3. Can I erase an iPhone remotely?
Yes, you can erase an iPhone remotely using the “Find My” feature. Open the “Find My” app on another Apple device or visit iCloud.com on a computer. Sign in with your Apple ID and select your iPhone from the list of devices. Click on “Erase iPhone” to remotely wipe all data from your device.
4. How long does it take to erase an iPhone?
The time it takes to erase an iPhone can vary depending on the device’s model, storage capacity, and the amount of data stored on it. In general, the process usually takes a few minutes to complete. However, larger storage capacities or devices with significant amounts of data may take longer.
5. Will erasing an iPhone remove the activation lock?
Yes, erasing an iPhone will remove the activation lock if you have already turned off the “Find My” feature and signed out of your Apple ID before performing the reset. However, if the activation lock is still enabled, you will need to enter your Apple ID and password to complete the erasure process.