
In today’s digitally connected world, virtual private networks (VPNs) have become increasingly popular tools to enhance online privacy and security. However, there may come a time when you no longer need or want to use a VPN on your iPhone. Whether you’ve found an alternative solution or simply don’t require the added layer of protection, learning how to get rid of a VPN on your iPhone is essential.
This comprehensive guide will walk you through the steps to remove a VPN from your iPhone, ensuring that you can easily revert to your regular internet connection. Whether you’re a seasoned tech-savvy user or just starting with your iPhone, we’ve got you covered with easy-to-follow steps and expert tips to make the process hassle-free.
So, let’s dive in and discover how you can bid farewell to your VPN on your beloved iPhone.
Inside This Article
- Why Remove VPN on iPhone?
- Method 1: Removing VPN through Settings
- Method 2: Deleting VPN App from iPhone
- Method 3: Removing VPN Configuration Profile
- Conclusion
- FAQs
Why Remove VPN on iPhone?
There may be several reasons why you would want to remove a VPN (Virtual Private Network) on your iPhone. Here are a few common ones:
- Switching VPN providers: If you are changing your VPN provider and want to set up a new one, you should first remove the existing VPN configuration.
- Troubleshooting network issues: If you are experiencing connectivity issues or slow internet speeds, removing the VPN can help identify if the VPN is causing the problem.
- Reducing battery consumption: VPNs can consume a significant amount of battery power, especially if they are constantly running in the background. Removing the VPN when not needed can help extend your iPhone’s battery life.
- Enhancing internet speed: VPNs encrypt your internet traffic, which can sometimes result in slower connection speeds. By removing the VPN, you can potentially improve your browsing and streaming experience.
- Addressing privacy concerns: While VPNs are designed to enhance privacy and security, some individuals may have concerns about the level of data encryption or the logging policies of the VPN provider. Removing the VPN can alleviate these concerns.
Now that you understand some of the reasons why you might want to remove a VPN from your iPhone, let’s explore the different methods you can use to accomplish this.
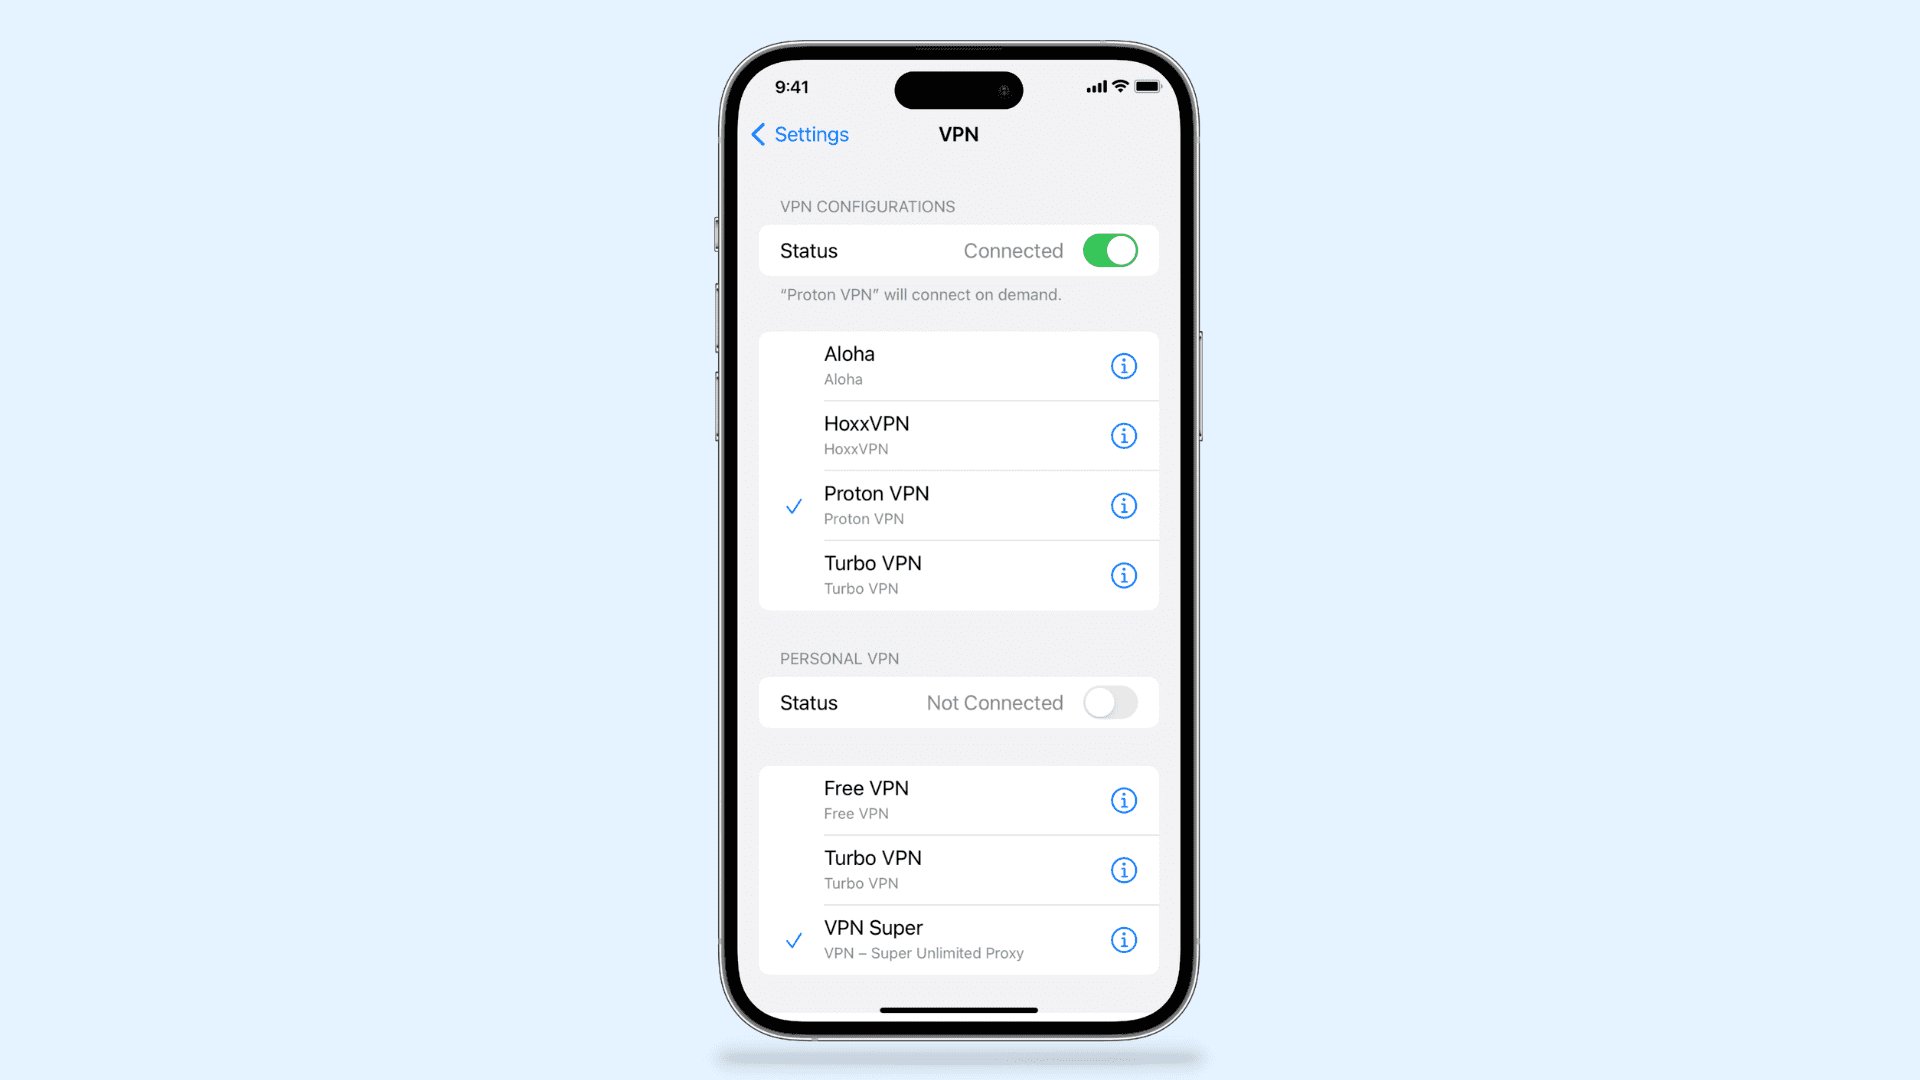
Method 1: Removing VPN through Settings
If you want to remove a VPN from your iPhone, you can do so easily by following a few simple steps through the Settings menu. Here’s how:
- Go to your iPhone’s home screen and tap on the “Settings” app.
- Scroll down and tap on the “General” option.
- In the General settings, scroll down and tap on “VPN.”
- You will see a list of VPN configurations on your iPhone. Tap on the one you want to remove.
- On the next screen, you will see the details of the VPN configuration. At the top of the screen, you will find a toggle switch next to “Status.” Tap on the switch to turn off the VPN.
- A confirmation message will appear. Tap on “Disconnect” to turn off the VPN.
- Now, to remove the VPN configuration completely, tap on the “Delete VPN” option at the bottom of the screen.
- A confirmation message will appear again. Tap on “Delete” to remove the VPN configuration from your iPhone.
That’s it! The VPN has been successfully removed from your iPhone. You can verify this by going back to the VPN settings screen and checking that the configuration is no longer listed.
Remember that this method of removing VPNs only applies to VPN configurations set up through the Settings app. If you have installed a VPN app from the App Store, you will need to use Method 2, which we will cover next.
Method 2: Deleting VPN App from iPhone
If you have installed a VPN app on your iPhone and want to get rid of it, the process is relatively straightforward. Deleting the VPN app will remove all associated settings and configurations, ensuring that your device is no longer connected to any VPN servers. Here’s how you can delete a VPN app from your iPhone:
1. Locate the VPN app icon on your iPhone’s home screen. It is typically represented by a small padlock or VPN logo.
2. Press and hold the app icon until all the icons on your screen start jiggling and a small ‘x’ appears on the top left corner of the VPN app icon.
3. Tap on the ‘x’ icon to delete the VPN app. A pop-up window will appear, asking if you want to delete the app.
4. Confirm the deletion by tapping on the ‘Delete’ option in the pop-up window. The VPN app will be permanently removed from your iPhone.
5. After deleting the VPN app, it’s a good idea to restart your iPhone to ensure that all remnants of the app are completely removed from your device.
By following these steps, you can effectively delete a VPN app from your iPhone and ensure that your device is no longer connected to any VPN networks. Removing unnecessary VPN apps can help free up storage space on your device and optimize its overall performance.
Method 3: Removing VPN Configuration Profile
If you have installed a VPN configuration profile on your iPhone, you’ll need to remove it to completely get rid of the VPN. Here’s how you can remove a VPN configuration profile:
Step 1: Open the Settings app on your iPhone.
Step 2: Scroll down and tap on “General”.
Step 3: Tap on “Profile” or “Profiles & Device Management”.
Step 4: Look for the VPN configuration profile that you want to remove and tap on it.
Step 5: Tap on “Remove Profile”. A confirmation prompt will appear.
Step 6: Tap on “Remove” again to confirm the removal of the VPN configuration profile.
Once you have completed these steps, the VPN configuration profile will be removed from your iPhone, and you won’t have any VPN connection associated with your device anymore.
It’s important to note that removing a VPN configuration profile may also remove any settings or restrictions that were applied to your device through that profile. Therefore, if you had any specific settings or restrictions configured, you may need to set them up again after removing the VPN configuration profile.
This method is particularly useful if you have installed a VPN configuration profile from a third-party source or organization and want to completely eliminate its presence from your iPhone.
Now that you know how to remove a VPN configuration profile, you can confidently take control of your iPhone’s network connections and customize them according to your preferences.
Conclusion
Removing a VPN from your iPhone is a simple process that can be done in a few easy steps. Whether you no longer need VPN protection or you want to switch to a different service, the process is straightforward and doesn’t require any technical expertise.
By following the steps outlined in this article, you can easily remove a VPN app from your iPhone. Simply head to the Settings menu, navigate to the VPN section, and delete the VPN configuration. Remember to also remove any VPN profiles from your iPhone’s general settings.
Removing a VPN from your iPhone allows you to regain control over your internet connection and enjoy seamless browsing without any VPN-related restrictions. It’s important to note that removing a VPN does not compromise your data security, as long as you are connected to a trusted network.
So, if you’ve decided to no longer use a VPN on your iPhone, follow these steps to remove it and enjoy a faster and unrestricted browsing experience.
FAQs
1. Why would I want to get rid of VPN on my iPhone?
Getting rid of a VPN on your iPhone may be necessary if you no longer require its functionality or if you’re experiencing any issues with its performance. VPNs can sometimes slow down your internet connection or cause conflicts with other networking apps. Removing a VPN can help resolve these issues and optimize your device’s performance.
2. How do I remove a VPN from my iPhone?
To remove a VPN from your iPhone, follow these steps:
a. Go to the “Settings” app.
b. Tap on “General” and then “VPN”.
c. Find the VPN configuration you want to remove and tap on the “i” button next to it.
d. At the bottom of the VPN details page, tap on “Delete VPN”.
e. Confirm the removal by tapping on “Delete” once again in the pop-up window.
The VPN configuration will then be removed from your iPhone.
3. Will removing the VPN affect my internet security?
Removing a VPN from your iPhone will disable the VPN’s encrypted tunnel, which can impact your internet security. Without a VPN, your internet traffic will not be encrypted and may be susceptible to interception or monitoring by third parties. If you have concerns about internet security, consider using other security measures like HTTPS browsing or using a trusted VPN alternative.
4. Can I re-install a VPN on my iPhone after removing it?
Yes, you can re-install a VPN on your iPhone after removing it. To install a VPN, you’ll need to download a VPN app from the App Store and follow the app’s instructions for setup and configuration. Make sure to choose a reputable VPN provider that offers a secure and reliable service.
5. Are there any free VPN options available for iPhone?
Yes, there are free VPN options available for iPhone. Many VPN providers offer free plans, although these often come with limitations such as restricted data usage or slower speeds. Some popular free VPN options for iPhone include ProtonVPN, TunnelBear, and Windscribe. However, keep in mind that paid VPN services usually offer better security, performance, and additional features compared to free alternatives.