
In today’s digital age, our mobile phones have become much more than just communication devices. They are our cameras, our organizers, and our means of staying connected with the world. And when it comes to capturing and preserving memories, there’s no better companion than the iPhone.
The iPhone’s advanced camera capabilities, coupled with its seamless integration with Apple’s ecosystem, make it the perfect tool for creating and preserving cherished moments. Whether it’s a family vacation, an intimate gathering with friends, or a milestone celebration, the iPhone offers a multitude of features and apps to capture, edit, and share these precious memories for years to come.
In this article, we will explore some of the best tips and tricks for capturing stunning photos and videos on your iPhone, as well as utilizing the various apps and features available to enhance and immortalize your memories. So grab your iPhone and get ready to embark on a journey of capturing and creating unforgettable moments!
Inside This Article
- Setting Up iCloud Photo Library
- Using the Memories Feature in the Photos App
- Creating Shared Albums for Collaborative Memories
- Customizing Memories on iPhone
- Conclusion
- FAQs
Setting Up iCloud Photo Library
One of the most convenient ways to make memories on your iPhone is by setting up iCloud Photo Library. This feature allows you to automatically back up and sync your photos and videos across all of your Apple devices.
To get started, open the “Settings” app on your iPhone and tap on your name at the top. Next, select “iCloud” and then “Photos”. Here, you will find the option to enable iCloud Photo Library. Make sure the toggle switch is turned on.
Once you have enabled iCloud Photo Library, the photos and videos you capture will be uploaded to your iCloud account, making them accessible from any device that is signed in with the same Apple ID.
It’s important to note that enabling iCloud Photo Library may require additional storage space, especially if you have a large photo and video library. If you find that you need more space, you can upgrade your iCloud storage plan by going to “Settings” > “Apple ID” > “iCloud” > “Manage Storage”.
By setting up iCloud Photo Library, you can ensure that your precious memories are safely stored and easily accessible, no matter where you are or which device you’re using.
Using the Memories Feature in the Photos App
Our smartphones have become our personal galleries, storing countless memories captured through the lens of our iPhone cameras. While scrolling through the Photos app can take us down memory lane, there is a feature that takes reminiscing to a whole new level – Memories.
Memories is a powerful feature of the Photos app that automatically curates your photos and videos into beautiful collections, complete with music, transitions, and effects. It transforms your scattered moments into visually stunning slideshows that capture the essence of an event or a period of time.
Here’s how you can make the most of the Memories feature on your iPhone:
- Launch the Photos app: Open the Photos app on your iPhone by tapping on the Photos icon on your home screen.
- Navigate to the Memories tab: At the bottom of the screen, you’ll see several tabs. Tap on the “Memories” tab to access all your curated collections.
- Browse through your memories: You’ll be greeted with beautifully crafted memories featuring images and videos from specific events or time periods. Scroll through to find a collection that sparks your interest.
- Play a Memory: Tap on a Memory to open it. Press the play button to experience your photos and videos come to life, accompanied by an automatic selection of music and transitions. Sit back, relax, and relive the moments.
- Edit your Memory: If you want to customize your Memory, tap on the pencil icon to access the editing options. Here, you can change the title, duration, music, and even re-order the photos and videos.
- Share your Memory: Once you’re satisfied with your Memory, it’s time to share it with others. Tap on the share icon and choose your preferred method of sharing, such as AirDrop, Messages, or social media platforms.
- Save your Memory: To keep your Memory stored on your device, tap on the share icon and select “Save Video.” This will save the Memory as a video file in your Photos app, allowing you to access it whenever you want.
Whether you want to relive a vacation, celebrate a birthday, or simply showcase your favorite moments, the Memories feature in the Photos app is the perfect tool to bring your photos and videos to life. So start exploring your curated collections and make memories never to be forgotten!
Creating Shared Albums for Collaborative Memories
Creating and sharing memories with friends and family is a wonderful way to relive and cherish special moments. With your iPhone, you can easily create shared albums that allow you to collaborate and collect memories together. Whether it’s a family vacation, a graduation ceremony, or a wedding, shared albums make it convenient for everyone to contribute their photos and videos, ensuring that no moment is left undocumented.
To create a shared album:
- Open the Photos app on your iPhone.
- Tap on the “Albums” tab at the bottom of the screen.
- Scroll down and select “New Shared Album.”
- Give your album a name – something catchy and memorable.
- Add the people you want to invite to the album by entering their email addresses or selecting from your contacts.
- Choose whether you want to allow contributors to add photos, videos, or both.
- Tap on “Create” to finalize the shared album.
Once the shared album is created, you and your invited contributors can start adding photos and videos. The beauty of shared albums is that they are not restricted to iPhone users; anyone with a compatible device or access to iCloud can contribute and view the content.
In addition to adding content, you can also comment and like photos within the shared album, fostering interaction and conversation among the contributors. This way, everyone can share their thoughts and memories in real time, making the experience even more engaging and meaningful.
Furthermore, shared albums offer a great way to collaborate on a visual storytelling project. Imagine planning a surprise video montage for a loved one’s birthday or creating a collective photo album for a friend’s baby shower. With a shared album, everyone can contribute their creative ideas and content, resulting in a memorable and collaborative keepsake.
Managing a shared album is also effortless. You can control who can view and contribute to the album, add or remove contributors, and even customize the settings to allow notifications when new photos or comments are added. This ensures that you stay connected and updated as the album evolves over time.
So, start creating shared albums on your iPhone today and witness the beauty of collaborative memories. Capture every precious moment, involve your loved ones, and together, create a digital collection of heartfelt memories that will last a lifetime.
Customizing Memories on iPhone
Memories on your iPhone are a collection of photos and videos automatically organized and presented in a beautiful montage. While this feature is incredibly convenient and visually stunning, you might want to add your personal touch to make the memories even more special. Customizing memories allows you to curate and shape them according to your preferences. Here’s how you can customize memories on your iPhone:
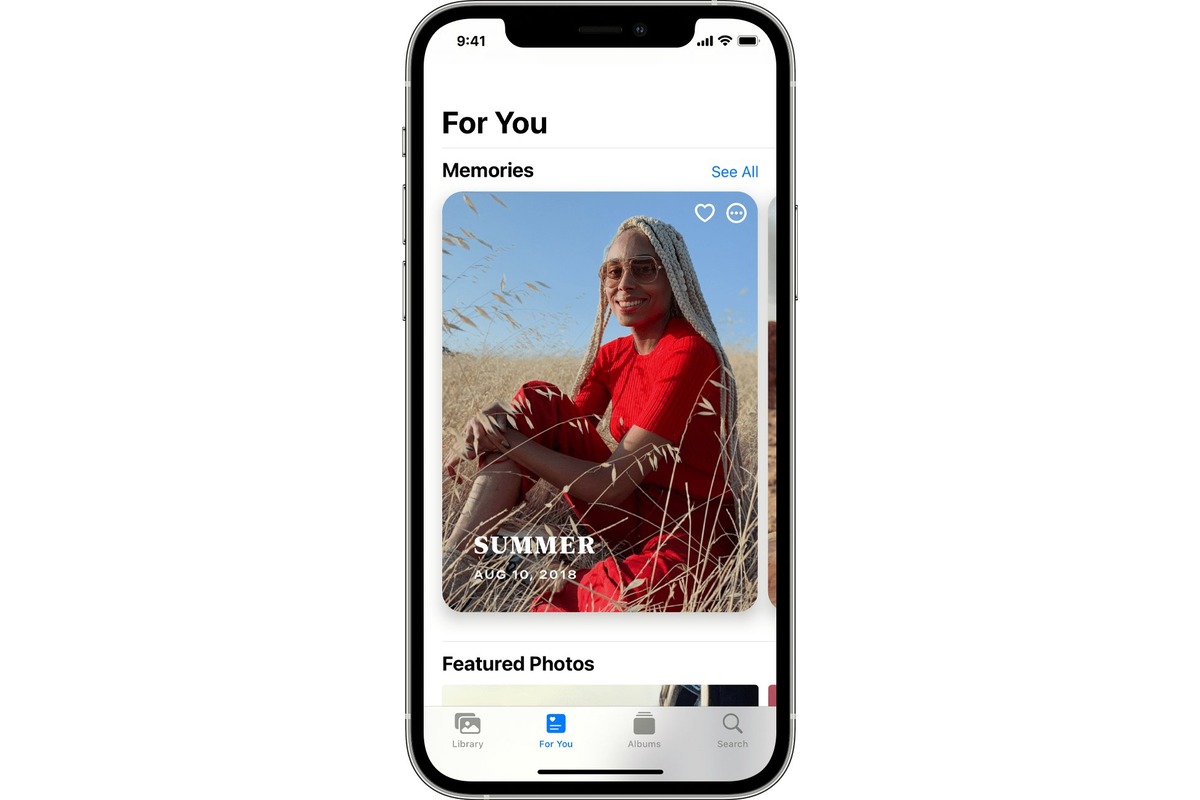
1. Selecting a Memory: Launch the Photos app and tap on the “For You” tab. Scroll down to the Memories section and tap on a memory that you want to customize.
2. Edit Title: By default, iPhone assigns a title to each memory based on the content. However, you can change the title to something more meaningful. Tap on the title field at the top and enter a new title for the memory.
3. Change Duration: Memories automatically play for a specific duration. If you want to adjust the playback duration, tap on the memory and then tap on the play button. Next, tap on the screen and you will see the duration slider. Slide it left or right to shorten or lengthen the memory playback duration according to your preference.
4. Customize Music: Memories are accompanied by music that sets the mood. To change the music, tap on the memory, then tap on the play button, and finally tap on the music note icon. This will allow you to select a different soundtrack from the available options or use your own music from the iTunes library.
5. Reorder and Remove Photos/Videos: Memories are created using a collection of photos and videos. If you’re not happy with the order or want to remove certain media files, tap on the memory, then tap on the play button, and finally tap on the ellipsis icon (three dots). From the options presented, you can manually rearrange the order of photos/videos or remove them by tapping on the “Remove” option.
6. Change Memory Type: Memories have different themes and styles such as Highlight, Movie, or Memory Mix. If you want to change the memory type, tap on the memory, then tap on the play button, and finally tap on the ellipsis icon (three dots). From the options, select “Change Type” and choose a new style for your memory.
7. Add Favorite Memories: Memories can evoke strong emotions and sentimental value. If you have a particular memory that holds significance, you can mark it as a favorite. Tap on the memory, then tap on the heart icon to add it to your favorites. This will make it easier to access your cherished memories in the future.
8. Share Your Customized Memories: Once you have personalized and perfected your memories, it’s time to share them with your friends and family. Tap on the memory, then tap on the share icon. You can choose to share via AirDrop, Messages, or social media platforms like Facebook, Instagram, or Twitter.
By following these steps, you can customize your memories on your iPhone and transform them into precious keepsakes. Whether you want to change the title, duration, music, order, or style, the Photos app provides you with the tools to create unique and tailor-made memories that you can cherish for years to come.
Conclusion
In conclusion, the iPhone is not just a mobile phone; it is a device that allows us to capture and preserve our most cherished memories. With its advanced camera capabilities, easy-to-use editing tools, and wide range of storage options, the iPhone offers an all-in-one solution for creating and preserving memories.
Whether it’s snapping a stunning landscape, capturing a candid moment with loved ones, or recording a special milestone, the iPhone empowers us to document our lives in vivid detail. The seamless integration of hardware and software ensures that every photo or video is captured with exceptional quality and clarity.
Furthermore, the iPhone’s intuitive interface and robust app ecosystem provide endless opportunities for creativity and storytelling. With features like Live Photos, Portrait mode, and advanced editing tools, users can elevate their memories from ordinary to extraordinary.
So whether you’re a professional photographer or simply someone who loves capturing life’s beautiful moments, the iPhone is the ultimate tool to make memories that can be cherished for years to come.
FAQs
1. Can I use my iPhone as a personal hotspot?
Yes, you can use your iPhone as a personal hotspot to share your cellular data connection with other devices such as laptops, tablets, or other smartphones. Simply go to your iPhone’s settings, select “Personal Hotspot,” and toggle the switch to enable it. You can also set a Wi-Fi password to secure your hotspot.
2. How can I optimize my iPhone’s battery life?
To optimize your iPhone’s battery life, you can take several steps. These include reducing screen brightness, disabling unnecessary push notifications, closing unused background apps, and enabling low power mode when the battery is running low. Additionally, regularly updating your iPhone’s software and avoiding extreme temperature exposure can help extend battery life.
3. How do I transfer data from my old phone to my new iPhone?
Transferring data from your old phone to a new iPhone can be done in multiple ways. The most common methods include using iCloud, which allows you to back up your old phone’s data and restore it on the new iPhone, or using the Quick Start feature to transfer data wirelessly between devices. You can also use iTunes or third-party software for more specific data transfer needs.
4. How can I improve the security of my iPhone?
To improve the security of your iPhone, you can take several precautions. These include enabling a passcode or Touch ID/Face ID for device unlock, regularly updating your iPhone’s software, being cautious of suspicious apps or phishing attempts, and enabling two-factor authentication for your Apple ID. It’s also a good idea to enable “Find My iPhone” as a security measure against theft or loss.
5. What should I do if my iPhone gets water damaged?
If your iPhone gets water damaged, it’s important to act quickly. First, turn off the device and disconnect it from any power source. Do not attempt to charge the phone or turn it on. Then, gently wipe off any visible water and place the iPhone in a bowl of uncooked rice or silica gel packets to absorb moisture. Leave it there for at least 24 hours before attempting to turn it on again. If the issue persists, consult an authorized Apple service center for further assistance.