
Do you find yourself struggling to create enough memory space on your iPhone? With the fast-paced world we live in, our smartphones have become essential tools for storing precious memories, from photos and videos to important documents and apps.
In this comprehensive guide, we will explore some effective strategies to help you optimize the memory on your iPhone. Whether you’re dealing with a low storage warning or simply want to make the most out of your device’s capacity, we’ve got you covered.
From clearing out unnecessary files to utilizing cloud storage services and optimizing your app usage, by the end of this article, you’ll be equipped with the knowledge to create ample memory on your iPhone and never miss out on capturing those special moments again.
Inside This Article
- Overview of iPhone Memory
- Clearing Storage Space on iPhone
- Backing Up and Restoring iPhone Data
- Managing and Organizing iPhone Photos and Videos
- Conclusion
- FAQs
Overview of iPhone Memory
When it comes to storing and managing data on your iPhone, understanding the concept of memory is crucial. The term “iPhone memory” refers to the internal storage capacity of your device, which is used to store various types of data, including apps, photos, videos, documents, and more.
Apple offers different storage options for iPhones, ranging from 16GB to a whopping 512GB, depending on the model. The more storage space you have, the more data you can store on your device. However, it is important to note that not all of the advertised storage capacity is available for user data, as a portion is used by the operating system and pre-installed apps.
There are two types of iPhone memory: RAM (Random Access Memory) and internal storage. RAM is responsible for temporarily storing data that is actively being used by apps, while internal storage is where your files and apps are permanently stored.
Managing iPhone memory is essential to keep your device running smoothly and efficiently. When your device’s storage is almost full, it can slow down performance and affect the overall user experience. That’s why it’s important to clear storage space, optimize settings, and take advantage of data backup and organization methods.
In the next sections, we will explore various techniques to clear storage space, back up and restore iPhone data, and effectively manage and organize your photos and videos.
Clearing Storage Space on iPhone
As technology continues to advance, the need for more storage space on our devices becomes increasingly important. Running out of storage on your iPhone can not only affect its performance but also limit your ability to download new apps, take photos, and save important files. Fortunately, there are several ways to clear storage space on your iPhone and optimize its storage capacity. In this article, we will explore some effective methods to help you create more memory on your iPhone.
1. Delete Unnecessary Apps: Start by reviewing the apps on your iPhone and identify those that you no longer use. Simply tap and hold on an app icon until it starts wiggling, then tap the “x” symbol to delete it. This will not only free up storage space but also declutter your home screen.
2. Remove Large Files: Go through your photo gallery and delete any large videos or high-resolution images that are taking up significant space. You can also check your “Recently Deleted” folder, as files in this folder still consume storage until they are permanently deleted.
3. Clear Safari Cache: Over time, Safari accumulates cached data, cookies, and browsing history. These files can take up a considerable amount of storage space. To clear them, go to Settings > Safari > Clear History and Website Data.
4. Manage Message Attachments: Messages often contain media files like photos, videos, and audio recordings. To free up space, delete unnecessary message threads or configure your iPhone to automatically delete old messages by going to Settings > Messages > Keep Messages and selecting a shorter duration.
5. Offload Unused Apps: If you want to keep your app data but free up space, you can offload unused apps. Offloading removes the app itself but keeps the data intact. To offload an app, go to Settings > General > iPhone Storage, select the app, and tap “Offload App.”
6. Use iCloud Photo Library: Consider using iCloud Photo Library to store your photos and videos in the cloud, freeing up space on your iPhone. This feature allows you to access your media from any device while keeping them securely backed up.
7. Optimize Storage: Enable the “Optimize Storage” feature in the Photos settings. This option automatically manages your photo library, keeping smaller file sizes on your device and storing the original, high-quality versions in the cloud.
8. Clear Cache for Apps: Some apps accumulate cache, which can take up a substantial amount of space. Go to Settings > General > iPhone Storage and select an app to clear its cache.
9. Remove Unused Downloads: Check your downloads folder, particularly if you frequently download files, images, or documents. Delete any old and unnecessary downloads to create more space.
10. Reset Settings: If you have tried all the previous steps and still need more space, you can try resetting your iPhone’s settings. This will remove personalized preferences, but it can free up storage and potentially resolve any software-related storage issues.
By following these methods, you can successfully clear storage space on your iPhone and create more memory for important files and applications. Regularly maintaining your iPhone’s storage will not only optimize its performance but also help you stay organized and make the most of your device’s capabilities.
Backing Up and Restoring iPhone Data
Backing up your iPhone data is crucial to ensure that your valuable photos, videos, contacts, and other important files are safe and easily recoverable in case of unforeseen circumstances. Apple provides a seamless backup and restore process through its iCloud and iTunes services. Let’s dive into how you can back up and restore your iPhone data.
1. iCloud Backup:
iCloud provides a convenient way to automatically back up your iPhone data wirelessly. To enable iCloud backup, go to Settings on your iPhone, click on your Apple ID, and select iCloud. From there, tap on iCloud Backup and toggle the switch to enable the feature. Your iPhone will now back up your data to iCloud whenever it is connected to a Wi-Fi network and charging.
2. iTunes Backup:
If you prefer to back up your iPhone data to your computer, you can use iTunes. Connect your iPhone to your computer using a USB cable and open iTunes. Select your device and click on the Summary tab. Under the Backups section, choose the “This Computer” option and click on Back Up Now. iTunes will create a backup of your iPhone data, including apps, settings, and media files.
3. Restoring from iCloud Backup:
To restore your iPhone from an iCloud backup, ensure that you have a stable Wi-Fi connection. During the initial setup or after a factory reset, choose the option to restore from an iCloud backup. Sign in with your Apple ID and select the desired backup file. Your iPhone will then retrieve the backed-up data from iCloud and restore it to your device.
4. Restoring from iTunes Backup:
If you have backed up your iPhone data to iTunes, you can easily restore it using the same computer. Connect your iPhone to the computer and open iTunes. Select your device and click on the Summary tab. Under the Backups section, click on Restore Backup and choose the relevant backup file. iTunes will then restore your iPhone with the selected backup data.
By regularly backing up your iPhone data and knowing how to restore it when needed, you can safeguard your precious memories and valuable information. Whether you choose iCloud or iTunes, the process is simple and effective, ensuring that your iPhone data remains secure and easily accessible.
Managing and Organizing iPhone Photos and Videos
With the ever-increasing quality of iPhone cameras, our devices have become a go-to tool for capturing precious moments in the form of photos and videos. However, as our collections grow, it can be challenging to manage and organize these media files effectively. In this article, we will explore some tips and tricks for managing and organizing your iPhone photos and videos, ensuring that your memories are well-preserved and easily accessible whenever you need them.
Start by creating folders or albums on your iPhone to categorize your photos and videos. This simple step can help you quickly locate specific files and keep your media organized. To create a new album, open the Photos app, go to the Albums tab, and tap the “+” icon. Give your album a name, and you can then manually add photos and videos to it.
Decluttering your photo library is essential to keep it organized. Regularly go through your collection and delete any unwanted or duplicate images. To do this, open the Photos app, select the album or All Photos tab, and tap the Select button. Go through your images and mark the ones you want to delete by tapping on them. Once done, tap the Trash can icon to remove them permanently.
Utilize the “Favorites” feature on your iPhone to mark your most cherished photos and videos. To mark an image or video as a favorite, open it in the Photos app and tap the Heart icon. Once marked as a favorite, these files will be easily accessible in the Favorites album, giving you quick access to your most beloved memories.
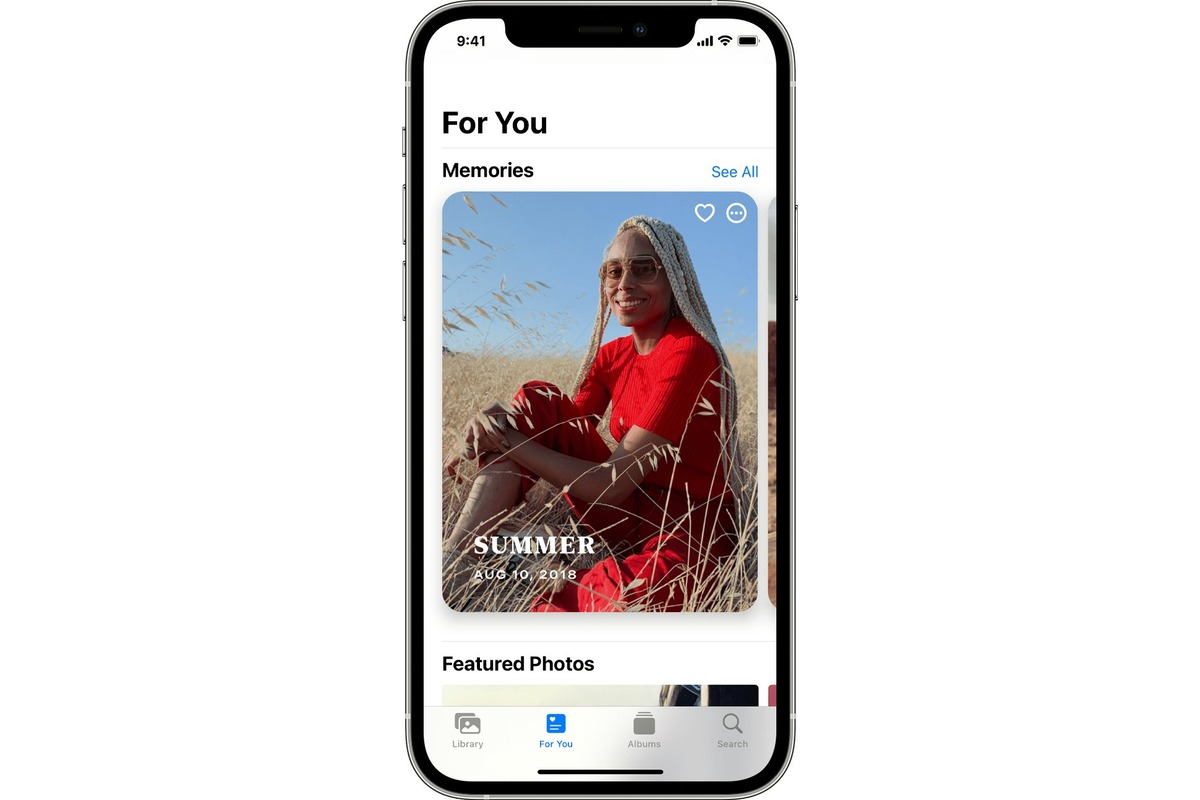
Take advantage of the built-in “Memories” feature on your iPhone to automatically create compilations of your photos and videos. This feature uses machine learning algorithms to recognize important events, places, and people, and generates beautiful slideshows with background music. To access Memories, open the Photos app and go to the For You tab. Here, you will find a collection of automatically generated Memories that you can edit, save, or share.
Consider using third-party photo management apps to further enhance the organization of your iPhone photos and videos. These apps provide advanced features like tagging, sorting, and searching, allowing you to easily find specific files. Some popular options include Google Photos, Adobe Lightroom, and Microsoft OneDrive.
Backing up your iPhone photos and videos is crucial to ensure their safety and preservation. Use the iCloud Photo Library or a cloud storage service like Google Drive or Dropbox to automatically back up your media files. This way, even if something were to happen to your device, your memories would still be securely stored in the cloud.
Lastly, consider printing out your favorite photos and creating physical photo albums or frames. While digital organization is convenient, holding and displaying physical prints can bring a whole new level of joy to reliving your memories.
Conclusion
In conclusion, creating a memory on your iPhone is a simple and effective way to preserve and cherish special moments. Whether it’s capturing photos, recording videos, or saving important documents, your iPhone provides a range of tools and features to help you create lasting memories.
By utilizing the camera app, organizing your photos into albums, and using iCloud or other cloud storage services, you can easily access and share your memories with friends and family. Additionally, taking advantage of apps like iMovie and GarageBand allows you to edit and enhance your videos and recordings, adding a personal touch to your memories.
Remember to regularly back up your iPhone, either through iCloud or by connecting it to your computer, to ensure the safety of your memories. With the ability to store a multitude of photos, videos, and documents, your iPhone is a powerful tool for capturing, preserving, and reliving precious moments.
So go ahead, start creating memories on your iPhone and treasure them for years to come!
FAQs
1. How do I create a new contact on my iPhone?
To create a new contact on your iPhone, follow these steps:
- Open the Contacts app on your iPhone.
- Tap the “+” symbol in the top-right corner to add a new contact.
- Enter the contact’s details, including their name, phone number, email address, and any additional information you want to include.
- Tap “Done” to save the contact.
2. Can I sync my iPhone contacts with other devices?
Yes, you can sync your iPhone contacts with other devices by using iCloud. Here’s how:
- Go to the “Settings” app on your iPhone.
- Tap your name at the top of the screen.
- Select “iCloud” and make sure the “Contacts” toggle is turned on.
- On your other device, such as an iPad or Mac, go to the respective settings and turn on the iCloud sync for contacts.
- Your contacts will now be synced across all your devices.
3. How do I take a screenshot on my iPhone?
To take a screenshot on your iPhone, follow these steps:
- Press the side button (power button) on the right side of your iPhone.
- At the same time, press the volume up button on the left side of your iPhone.
- Release both buttons quickly.
- You will see a preview of the screenshot in the bottom left corner of the screen. You can tap on it to edit or share the screenshot immediately.
4. How can I extend the battery life of my iPhone?
To extend the battery life of your iPhone, you can try the following tips:
- Turn on the “Low Power Mode” in the Settings app. This reduces power consumption by disabling background app refresh, automatic downloads, and visual effects.
- Reduce the screen brightness or enable auto-brightness to optimize power usage.
- Close unused apps running in the background by double-clicking the home button (or swiping up from the bottom on iPhone X or newer) and swiping them away.
- Disable push email and fetch new data less frequently.
- Limit location services and background app refresh for apps that don’t require constant access to your location.
- Disable unnecessary notifications.
- Turn off Wi-Fi, Bluetooth, and cellular data when not in use.
- Avoid extreme temperatures, as they can affect battery performance.
5. Can I customize the home screen layout on my iPhone?
Yes, you can customize the home screen layout on your iPhone by following these steps:
- Long-press on any app icon on the home screen until the icons start jiggling.
- Drag and drop the app icons to rearrange them as desired.
- To create a folder, drag one app icon on top of another. Give the folder a suitable name.
- To delete an app, tap the “X” icon that appears on the app icon while in jiggle mode.
- You can also customize the home screen by adding widgets. Swipe right on the home screen to access the “Today View,” and tap on “Edit” at the bottom. Add or remove widgets according to your preference.
- Tap on the home button (or swipe up from the bottom on iPhone X or newer) when you’re finished customizing to exit jiggle mode.