
Do you love capturing memories on your phone but find your storage space constantly running out? If so, you’re not alone. With the increasing quality of smartphone cameras, photos and videos can quickly fill up your device’s internal storage. The good news is that you can easily transfer your pictures to an SD card to free up space on your phone and keep your precious memories safe.
In this article, we will guide you through the process of putting pictures on an SD card from your phone. Whether you have an Android or iOS device, we have you covered. We will provide step-by-step instructions, tips, and recommendations to ensure a smooth and hassle-free transfer. So, grab your phone and let’s get started on liberating that precious storage space!
Inside This Article
- Preparing Your SD Card and Phone
- Connecting the SD Card to Your Phone
- Transferring Photos from Your Phone to the SD Card
- Safely Ejecting the SD Card
- Conclusion
- FAQs
Preparing Your SD Card and Phone
Your SD card is a crucial accessory when it comes to expanding the storage capacity of your phone. It allows you to store additional photos, videos, and files without crowding the internal memory of your device. Before you can start transferring pictures to your SD card, there are a few steps to ensure it is properly prepared.
First, make sure you have an SD card that is compatible with your phone. Check your phone’s user manual or search online to determine the specific type of SD card it supports. Common types include MicroSD, MiniSD, and SDHC. Purchase an SD card that matches the required specifications of your phone.
Once you have your SD card, ensure that it is formatted correctly. Formatting the card will erase any existing data and prepare it for use with your phone. To format the SD card, insert it into a computer or use a card reader and follow the instructions provided by your operating system. Alternatively, you can also format the SD card directly from your phone by going to the settings menu and selecting the storage option.
After formatting the SD card, it is recommended to create a separate folder specifically for storing your pictures. This will help you keep your photos organized and easily accessible. You can create a folder on your computer and transfer it to the SD card or create one directly on the SD card using your phone’s file manager app.
Another important step is to ensure that your phone is set to save new photos to the SD card by default. This can usually be done by going to the camera settings on your phone and selecting the option to save photos to the SD card. By doing this, you can avoid the hassle of manually transferring pictures to the SD card each time.
Lastly, it is recommended to keep your SD card and phone in good condition. Avoid exposing them to extreme temperatures or moisture, as this can damage the storage components. Regularly clean the SD card and phone’s memory card slot to prevent dust or debris buildup, which can affect the card’s performance.
By following these steps, you can ensure that your SD card and phone are properly prepared for transferring pictures. It’s time to move on to the next step and connect the SD card to your phone.
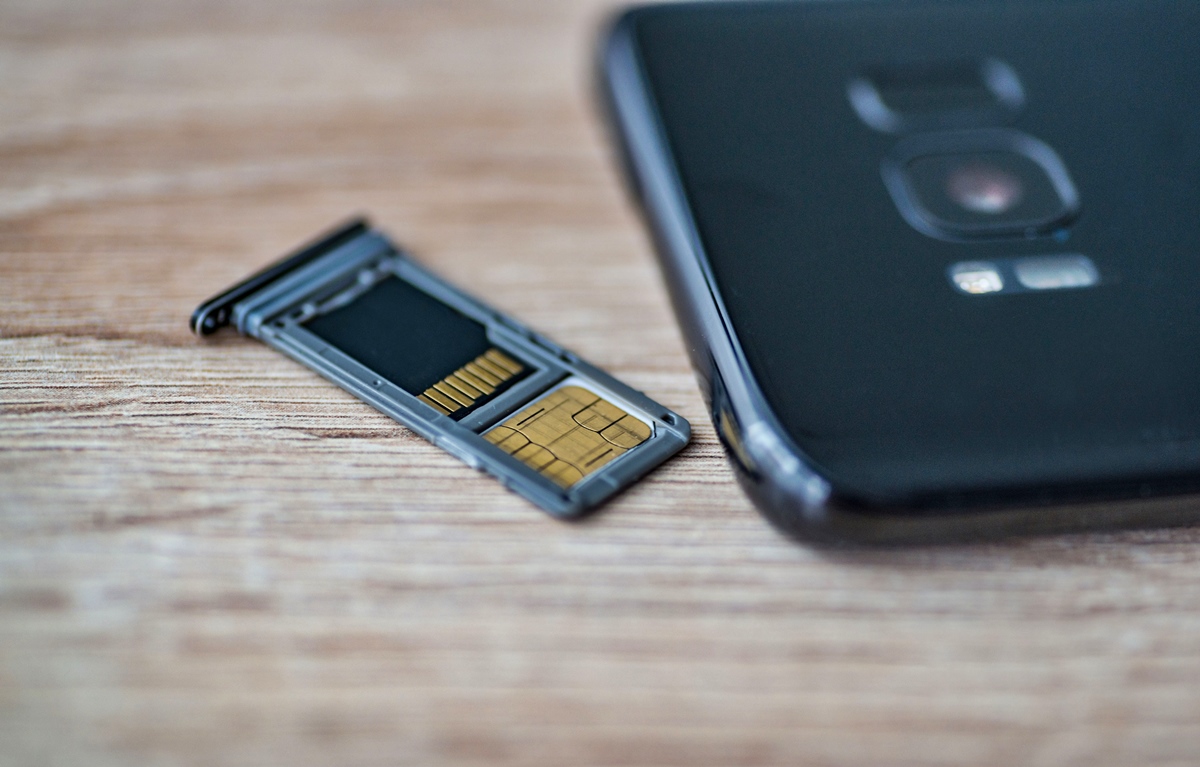
Connecting the SD Card to Your Phone
Before you can transfer photos from your phone to an SD card, you first need to connect the SD card to your phone. The process may vary slightly depending on your phone model, but here are the general steps to follow:
1. Power off your phone: Before inserting or removing the SD card, it’s important to power off your phone. This ensures that the card is inserted or removed safely without causing any damage.
2. Locate the SD card slot: Most modern smartphones have a dedicated slot for the SD card. This slot is usually located on the side or the top of the phone. Consult your phone’s user manual or do a quick search online to find the exact location of the SD card slot on your phone.
3. Remove the phone’s back cover (if necessary): Some phones have a removable back cover that gives you access to the internal components, including the SD card slot. If your phone has a removable back cover, gently remove it to expose the SD card slot.
4. Insert the SD card: Take your SD card and carefully align it with the SD card slot. Ensure that the gold contact pins on the card are facing down and match the orientation indicated on the phone. Gently push the card into the slot until it is securely in place.
5. Replace the back cover (if applicable): If you had to remove the phone’s back cover, carefully place it back and ensure that it snaps into place. This will protect the SD card and keep it securely in the slot.
6. Power on your phone: Once the SD card is securely inserted, power on your phone. It may take a moment for the phone to recognize the new storage device.
7. Check SD card recognition: To ensure that your phone has successfully recognized the SD card, go to your phone’s settings and navigate to the storage or memory section. Here, you should see the SD card listed as an available storage option.
Now that you have successfully connected the SD card to your phone, you are ready to transfer your photos from the phone’s internal storage to the SD card. Continue reading to learn how to complete this process.
Transferring Photos from Your Phone to the SD Card
If you’re running out of storage space on your phone or simply want to keep your precious photos safe, transferring them to an SD card can be a lifesaver. Here’s a step-by-step guide on how to transfer photos from your phone to an SD card.
Step 1: Insert the SD card into your phone’s SD card slot. Most phones have a dedicated slot for SD cards, usually located on the side or the top of the device. If you can’t find the slot, consult your phone’s user manual or search online for specific instructions.
Step 2: Once the SD card is inserted, go to your phone’s gallery or photo app. Select the photos you want to transfer by tapping on each photo or using the select all option.
Step 3: With the desired photos selected, look for the share or export option. It may be represented by a share icon or three dots. Tap on this option to reveal the available sharing methods.
Step 4: From the sharing options, select the “Save to SD card” or “Move to SD card” option. This will prompt your phone to transfer the selected photos to the SD card.
Step 5: Depending on the file size and the number of photos selected, the transfer may take a few moments or a couple of minutes. Be patient and avoid interrupting the process to ensure all your photos are successfully transferred.
Step 6: Once the transfer is complete, you can safely remove the SD card from your phone. Go to your phone’s settings and find the option to eject or unmount the SD card. Follow the prompts to safely remove the card without causing any data loss or damage.
That’s it! Your photos have been successfully transferred from your phone to the SD card. You can now insert the SD card into another device, such as a computer or a digital photo frame, to access and enjoy your pictures.
Remember to periodically check your SD card and ensure there is enough available space for further transfers. If needed, you can also organize your photos into folders on the SD card for better organization and easier browsing.
Keep in mind that the exact steps may vary slightly depending on your phone’s make and model, as well as the version of its operating system. Always refer to your phone’s user manual or consult the manufacturer’s website for detailed instructions specific to your device.
Safely Ejecting the SD Card
Once you have transferred your photos from your phone to the SD card, it is important to safely eject the card to prevent any data corruption or loss. Safely ejecting the SD card ensures that all the data is written and saved properly before removing it from your phone.
To safely eject the SD card from your phone, follow these steps:
- Make sure that all the photo transfer processes are complete and that there are no ongoing data transfers.
- Locate the SD card icon or option on your phone’s interface. This may vary depending on the phone model and operating system.
- Select the option to eject or remove the SD card.
- Wait for the phone to display a notification indicating that it is safe to remove the SD card.
- Gently push the SD card out of its slot using your finger or a SIM card ejector tool.
It is crucial to be patient during the ejection process and not to force the card out of the slot. Forcing the card can potentially damage the card or the phone’s SD card slot.
Once the SD card is safely ejected, you can now remove it from your phone. Remember to store the SD card in a safe place to prevent loss or damage. If you plan to use the SD card in other devices or transfer the photos to a computer, make sure to handle it with care and avoid exposing it to moisture or extreme temperatures.
Ejecting the SD card properly not only safeguards your data but also ensures the longevity of both your SD card and phone. By following these steps, you can confidently and safely remove the SD card from your phone after transferring your valuable photos.
In conclusion, transferring pictures from your phone to an SD card is a convenient and efficient way to free up space on your device and ensure your precious memories are safely stored. Whether you’re looking to back up your photos, share them with others, or simply create more storage space on your phone, the process is simple and straightforward.
By following the steps outlined in this article, you can easily transfer your pictures to an SD card and enjoy the benefits of having extra storage capacity. Remember to choose a high-quality SD card with sufficient capacity to accommodate your photo collection. Additionally, regularly backing up your pictures to multiple devices or cloud storage is always a good idea to ensure their long-term preservation.
So go ahead, grab your phone, and start organizing your pictures with the help of an SD card. You’ll have more room for new memories and peace of mind knowing that your cherished photos are safely stored.
FAQs
1. Can I transfer pictures from my phone to an SD card?
Yes, you can easily transfer pictures from your phone to an SD card. The process may vary slightly depending on the make and model of your phone, but generally, you can do so by using the built-in file manager or a dedicated file transfer app.
2. How do I transfer pictures to an SD card on an Android phone?
To transfer pictures to an SD card on an Android phone, follow these steps:
- Insert the SD card into your phone’s SD card slot.
- Open the file manager app on your phone.
- Navigate to the folder where your pictures are stored.
- Select the pictures you want to transfer.
- Tap on the options menu (usually represented by three dots) and select “Move” or “Copy”.
- Navigate to the SD card folder and select the destination folder for your pictures.
- Tap on “Move” or “Copy” to initiate the transfer.
3. How do I transfer pictures to an SD card on an iPhone?
iPhones do not have expandable storage options like SD cards. However, you can still transfer pictures from your iPhone to an external storage device, such as a portable hard drive or a USB flash drive, using an adapter like the Apple Lightning to USB Camera Adapter. Simply connect the adapter to your iPhone, plug in the storage device, and use the Files app to transfer the pictures.
4. Can I set my phone to automatically save pictures to the SD card?
The ability to set your phone to automatically save pictures to an SD card depends on the manufacturer and the specific Android version running on your device. In some cases, you can change the default storage location for photos and choose the SD card as the primary option. To do this, go to your phone’s settings, locate the Storage or Storage & USB option, and look for the option to set the default storage location for photos or camera. Keep in mind that this feature may not be available on all devices.
5. What should I do if my phone doesn’t have an SD card slot?
If your phone does not have an SD card slot, you can still transfer your pictures to external storage options like cloud storage services or USB OTG (On-The-Go) devices. Cloud storage services allow you to upload and access your pictures from anywhere with an internet connection, while USB OTG devices enable you to connect USB drives directly to your phone using a compatible adapter.