
Are you the proud owner of a Sony Xperia Z3? If so, you may be looking to unlock its full potential by rooting your device. Rooting your Sony Xperia Z3 grants you administrative access and control over your smartphone’s operating system, allowing you to personalize and optimize it according to your preferences.
In this comprehensive guide, we will walk you through the step-by-step process of how to root your Sony Xperia Z3. Whether you want to install custom ROMs, remove bloatware, or enable advanced features, rooting your device is the key.
So, grab your Xperia Z3, put on your tech cap, and let’s dive into the world of rooting and unleashing the true power of your Sony smartphone!
Inside This Article
- Preparing for Rooting
- Unlocking the Bootloader
- Installing a Custom Recovery
- Rooting the Sony Xperia Z3
- Conclusion
- FAQs
Preparing for Rooting
Before starting the rooting process for your Sony Xperia Z3, it’s essential to take some preparatory steps to ensure a smooth and successful rooting experience. Following these precautions will help minimize potential risks and maximize the chances of a successful outcome.
Step 1: Backup Your Data
Rooting your phone involves modifying the system files, which could potentially result in data loss. Therefore, it is crucial to back up all your important files and data before proceeding with the rooting process. You can use various backup methods, such as cloud storage, external storage devices, or specialized backup apps, to safeguard your photos, videos, contacts, and other essential files.
Step 2: Check Battery Level
Ensure that your Sony Xperia Z3 has a sufficient battery level before initiating the rooting process. A drained battery can lead to interruptions or even a failed rooting attempt. It is recommended to have at least 50% battery charge to complete the rooting process smoothly.
Step 3: Enable USB Debugging
To allow your computer to communicate with your Sony Xperia Z3 during the rooting process, enable USB debugging mode. To do this, go to your phone’s settings, navigate to the “Developer options” or “Developer settings” menu, and activate the “USB debugging” option.
Step 4: Gather Necessary Files and Tools
Before moving forward, make sure you have all the required files and tools readily available. This includes the necessary rooting software, a compatible USB cable, and any additional files or drivers required for the rooting process. It’s recommended to download these files from reputable sources to ensure their authenticity and compatibility with your device.
Step 5: Educate Yourself
Lastly, it is essential to educate yourself about the rooting process for the Sony Xperia Z3. Familiarize yourself with the specific steps involved, the potential risks, and the benefits of rooting. This knowledge will help you make informed decisions and troubleshoot any issues that may arise during the process.
By undertaking these preparatory steps, you can ensure a smoother and more efficient rooting process for your Sony Xperia Z3. Taking the time to back up your data, charge your device, enable USB debugging, gather necessary files, and educate yourself will greatly increase the chances of a successful root.
Unlocking the Bootloader
Unlocking the bootloader is the first step in the process of rooting your Sony Xperia Z3. By unlocking the bootloader, you gain access to the system files, allowing you to make changes and install custom software on your device.
Before you proceed with unlocking the bootloader, it’s important to note that this process will void your device’s warranty and may result in data loss. Additionally, it’s crucial to backup all your important data to ensure you don’t lose any valuable information.
To unlock the bootloader of your Sony Xperia Z3, you need to follow these steps:
- Enable Developer Options: Go to Settings > About Phone and tap on the Build Number several times until you see a message that says “You are now a developer.
- Enable USB Debugging: In the Developer Options menu, enable USB Debugging by toggling the switch.
- Download and Install ADB and Fastboot: ADB (Android Debug Bridge) and Fastboot are essential tools for unlocking the bootloader. Download the ADB and Fastboot drivers for your specific operating system and install them on your computer.
- Boot your Xperia Z3 into Fastboot Mode: Power off your device and then hold the Volume Up button while connecting it to your computer via a USB cable.
- Open a Command Prompt or Terminal: Navigate to the folder where you installed ADB and Fastboot, then open a Command Prompt or Terminal window.
- Check Device Connectivity: In the Command Prompt or Terminal, type “fastboot devices” and press Enter. If your device is listed, it means it’s connected successfully.
- Unlock the Bootloader: To unlock the bootloader, enter the command “fastboot oem unlock” and press Enter. You will see a warning message on your device; use the Volume Up button to select “Yes” and press the Power button to confirm.
- Wait for the Bootloader to Unlock: The bootloader unlocking process may take a few minutes. Once it’s complete, your device will reboot.
- Finish Setup: After your device restarts, go through the initial setup process and reconfigure your settings.
It’s important to note that unlocking the bootloader may expose your device to potential security risks and can result in system instability if not done properly. Proceed with caution and follow the instructions carefully.
With the bootloader unlocked, you’re now ready to move on to the next step: Installing a Custom Recovery.
Installing a Custom Recovery
When it comes to customizing your Sony Xperia Z3, installing a custom recovery is a crucial step. A custom recovery is a bootable partition on your device that allows you to perform various advanced operations and modifications.
With a custom recovery installed, you can easily flash custom ROMs, create and restore full device backups, and even tweak system settings to enhance performance. Here’s a step-by-step guide on how to install a custom recovery on your Sony Xperia Z3:
1. Unlock the Bootloader:
The first step in installing a custom recovery is to unlock the bootloader of your Sony Xperia Z3. Unlocking the bootloader allows you to modify the device’s system partition, which is necessary for installing custom recoveries and ROMs. You can unlock the bootloader by following Sony’s official instructions or by using third-party tools specifically designed for Sony devices.
2. Download the Custom Recovery:
Once the bootloader is unlocked, you need to download the custom recovery file that is compatible with your Sony Xperia Z3. The two most popular custom recoveries for Sony devices are TWRP (Team Win Recovery Project) and CWM (ClockworkMod Recovery). You can find the latest version of these recoveries on their respective websites.
3. Enable USB Debugging:
Before you can proceed with the installation of the custom recovery, you need to enable USB debugging on your Sony Xperia Z3. To enable USB debugging, go to Settings > Developer options, and toggle the USB debugging option.
4. Connect Your Device to the Computer:
Using a USB cable, connect your Sony Xperia Z3 to your computer. Make sure you have the necessary USB drivers installed on your computer for a smooth connection. Ensure that your device is detected by your computer.
5. Install ADB and Fastboot:
To install the custom recovery, you need to have ADB (Android Debug Bridge) and Fastboot tools installed on your computer. These tools allow you to communicate with your device and execute various commands. You can find ADB and Fastboot as part of the Android SDK, or you can download minimal versions of ADB and Fastboot separately.
6. Boot Your Xperia Z3 into Fastboot Mode:
Now it’s time to boot your Sony Xperia Z3 into Fastboot mode. To do this, turn off your device completely, and then press and hold the Volume Up button while connecting it to your computer via USB cable. Keep holding the Volume Up button until you see the Fastboot mode screen on your device.
7. Flash the Custom Recovery:
With your Sony Xperia Z3 in Fastboot mode and connected to your computer, open a command prompt or terminal window on your computer and navigate to the folder where you have the custom recovery file. Use the appropriate Fastboot command to flash the custom recovery onto your device.
8. Confirm the Installation:
After flashing the custom recovery, you can reboot your Sony Xperia Z3. Once the device has booted up, you can confirm the successful installation of the custom recovery by booting into recovery mode. Simply turn off your device, and then press and hold the Volume Up and Power buttons until the recovery mode menu appears.
Congratulations! You have successfully installed a custom recovery on your Sony Xperia Z3. Now you can take full control of your device and explore a whole new world of custom ROMs, mods, and tweaks. Remember to always proceed with caution and thoroughly research any modifications before applying them to avoid any potential issues.
Rooting the Sony Xperia Z3
Rooting your Sony Xperia Z3 can give you access to a world of customization and control over your device. It allows you to unlock the operating system’s full potential and install applications and modifications that are not available on a regular, unrooted device. Here’s a step-by-step guide on how to root your Sony Xperia Z3.
Before you proceed with rooting your Sony Xperia Z3, it is important to note that rooting your device will void the warranty and may even brick your phone if not done correctly. Therefore, it is crucial to follow the instructions carefully and ensure you are comfortable with the risks involved.
1. Back up your data: Before you start the rooting process, make sure to back up all your important data, including contacts, photos, and documents. This will help safeguard your information in case anything goes wrong during the rooting process.
2. Enable USB debugging and OEM unlocking: To root your Sony Xperia Z3, you need to enable USB debugging and OEM unlocking. To do this, go to the device’s settings, navigate to “Developer options,” and enable both USB debugging and OEM unlocking. If you cannot find the “Developer options,” go to “About phone” and tap on the “Build number” seven times to unlock the developer options.
3. Unlock the bootloader: The next step is to unlock the bootloader of your Sony Xperia Z3. This can be done by connecting your device to a computer via USB and using specific software tools provided by Sony or third-party developers. Unlocking the bootloader will allow you to install custom recoveries and custom ROMs, which are essential for rooting.
4. Install a custom recovery: Once the bootloader is unlocked, you need to install a custom recovery on your Sony Xperia Z3. Custom recoveries, such as TWRP (Team Win Recovery Project), provide advanced features for backing up and restoring your device, flashing custom ROMs, and gaining root access. You can download the custom recovery image and flash it using the fastboot mode on your device.
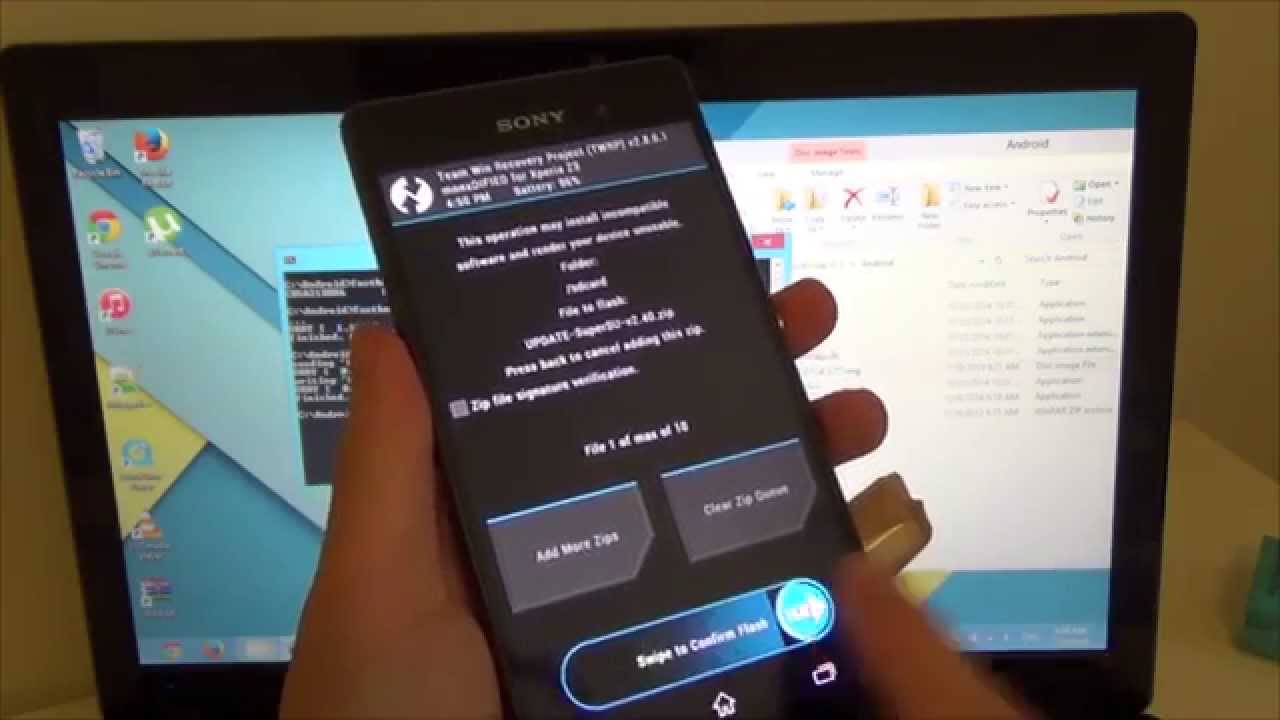
5. Flash the root package: After successfully installing the custom recovery, you can now flash the root package onto your Sony Xperia Z3. The root package contains the necessary files and scripts to gain root access on your device. You can usually find the root package on reliable websites and forums dedicated to Android rooting. Simply transfer the root package to your device, boot into the custom recovery, and flash the package.
6. Reboot your device: Once the root package is flashed, you can reboot your Sony Xperia Z3. Congratulations! Your device is now rooted, and you have full control over the operating system. You can now install root-only apps, customize the user interface, and enjoy a wide range of possibilities that were previously restricted.
Frequently Asked Questions
1. Does rooting void the warranty on my Sony Xperia Z3?
Yes, rooting your Sony Xperia Z3 will void the warranty. It is important to understand the risks involved and proceed with caution.
2. Can I unroot my Sony Xperia Z3 after rooting?
Yes, it is possible to unroot your device after rooting. This can be done by flashing the original firmware or using specific unrooting tools. Keep in mind that unrooting may not reinstate the warranty if it has been voided.
3. Are there any risks involved in rooting my Sony Xperia Z3?
Rooting your device comes with certain risks, such as bricking your phone or voiding the warranty. It is crucial to follow the instructions carefully, perform backups, and research thoroughly before attempting to root your device.
4. Can I still receive software updates after rooting my Sony Xperia Z3?
Rooting your device may prevent you from receiving official software updates from the manufacturer. However, you can still install custom ROMs based on the latest Android versions to enjoy new features and security updates.
5. Will my apps and data be erased during the rooting process?
While rooting itself does not erase your apps and data, it is always recommended to perform a backup before proceeding. There is a possibility of data loss if something goes wrong during the rooting process.
Conclusion
The Sony Xperia Z3 is a powerful and feature-packed smartphone that can be further enhanced by rooting. Rooting your device gives you the freedom to customize and optimize its performance, access advanced features, and enjoy a wider range of apps and modifications. However, it’s important to approach rooting with caution, as it can void your warranty and potentially lead to security risks if not done correctly.
By following the step-by-step guide outlined in this article, you can safely root your Sony Xperia Z3 and unlock its full potential. Remember to back up your data, use reputable rooting tools, and be aware of the risks involved. With a rooted Xperia Z3, you can enjoy a personalized user experience, improved battery life, and the ability to uninstall bloatware.
So, if you’re ready to take your Sony Xperia Z3 to the next level, go ahead and root it. Unleash the true power of your device and enjoy a whole new level of customization and functionality.
FAQs
1. What does it mean to root a Sony Xperia Z3?
Rooting a Sony Xperia Z3 refers to the process of gaining privileged access to the device’s operating system. By doing so, you can make changes and modifications that are otherwise restricted by the manufacturer. It allows you to customize and optimize your device, install custom ROMs, remove bloatware, and access features not available to non-rooted devices.
2. Is rooting my Sony Xperia Z3 safe?
Rooting your Sony Xperia Z3 can come with some risks. It can potentially void your device’s warranty, and there is a small chance of damaging your device if the rooting process is not performed correctly. It is crucial to follow trusted guides and use reputable rooting tools to minimize the risk. Additionally, gaining root access can expose your device to security vulnerabilities if you install unauthorized or malicious apps. Proceed with caution and make sure to research and understand the process thoroughly before attempting to root your device.
3. Will rooting my Sony Xperia Z3 delete all my data?
Rooting your Sony Xperia Z3 does not inherently delete your data. However, it is essential to create backups of your data before starting the rooting process. During the rooting process, there is a slight possibility of data loss if something goes wrong. Therefore, having a backup ensures that you can restore your data if needed.
4. Can I unroot my Sony Xperia Z3?
Yes, it is possible to unroot your Sony Xperia Z3. There are various methods to unroot your device, depending on how you rooted it. Some rooting tools provide an option to unroot, while others require you to flash the device with the original firmware to remove root access. It is advisable to follow a trusted unrooting guide specific to your device model to ensure a successful unrooting process.
5. Will rooting my Sony Xperia Z3 affect system updates?
Rooting your Sony Xperia Z3 can affect system updates. In most cases, once the device is rooted, you may need to manually install system updates rather than receiving them over-the-air (OTA). This is because the rooting process modifies the device’s system partition, making it incompatible with official OTA updates. However, with a rooted device, you can still manually install custom ROMs that incorporate the latest Android updates, providing you with the latest features and security patches.