
Are you tired of seeing your photos in the wrong orientation on your iPhone? Fear not, because in this article, we’ll show you how to easily rotate your photos on your iPhone. Whether you accidentally snapped a photo in landscape mode or received an image that’s upside down, we’ve got you covered. With the latest updates and features, rotating photos on your iPhone has never been easier. We’ll guide you through the step-by-step process, so you can effortlessly adjust the orientation to match your desired view. Say goodbye to sideways photos and hello to a beautifully organized camera roll. Let’s dive right in and get your photos in the correct position!
Inside This Article
- Understanding the Photos App
- Using the Photos editing tools
- Rotating photos in the Photos app
- Saving and sharing the rotated photos
- Conclusion
- FAQs
Understanding the Photos App
The Photos app on your iPhone is a powerful tool for managing, organizing, and editing your photos. It comes pre-installed on all iOS devices and provides a seamless way to capture, store, and share your memories. With its user-friendly interface and robust features, the Photos app has become a go-to application for both amateur and professional photographers.
One of the key aspects of understanding the Photos app is learning how it integrates with your device’s camera. Every time you take a photo with your iPhone, it automatically gets saved in the Photos app. This makes it convenient to access, edit, and share your photos without having to navigate through multiple folders or applications.
Additionally, the Photos app organizes your photos in a chronological order, making it easier to locate specific images based on the date and time they were captured. This feature comes in handy when you are looking for that perfect snapshot from a recent vacation or a memorable family gathering.
Besides its organizational capabilities, the Photos app also provides a range of editing tools to enhance your photos. From adjusting brightness and contrast to applying filters and cropping images, you can unleash your creativity and transform your ordinary photos into stunning visual masterpieces.
Furthermore, the Photos app seamlessly integrates with other iOS applications, such as iMessage and social media platforms. This allows you to instantly share your edited photos with friends and family or upload them to your favorite social networks, right from within the app.
Understanding the features and functionality of the Photos app is essential for unlocking its full potential. Whether you’re a photography enthusiast or just want to make your photos look their best, mastering the Photos app will empower you to capture, edit, and share your memories with ease.
Using the Photos editing tools
The Photos app on your iPhone is equipped with a set of powerful editing tools that allow you to make various adjustments to your photos, including rotating them. These tools are designed to be user-friendly and accessible, making it easy for anyone to rotate their photos with just a few taps.
To access the editing tools, open the Photos app on your iPhone and select the photo you want to rotate. Once you have opened the photo, tap on the “Edit” button located in the upper-right corner of the screen.
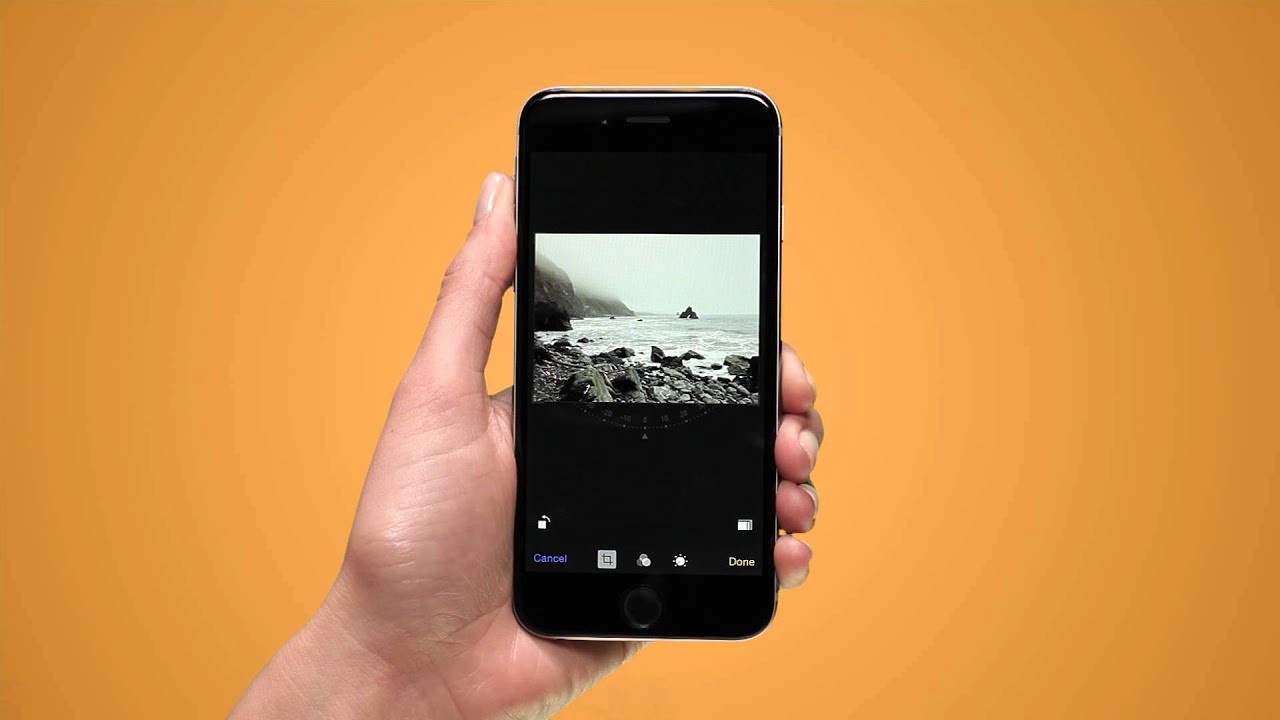
When you enter the editing mode, you will see a range of editing options at the bottom of the screen. To rotate the photo, tap on the crop and rotate icon, which looks like a square with arrows forming a circle. It is usually located on the right side of the editing tools bar.
Once you have selected the crop and rotate tool, you will see a rotation dial or handle at the bottom of the screen. To rotate the photo, simply drag the dial clockwise or counterclockwise until the photo is in the desired orientation. As you rotate the photo, the changes will be reflected in real-time on the screen.
Keep in mind that you can rotate the photo by 90-degree increments or rotate it freely, depending on your preference. The rotation dial offers a seamless and intuitive way to make precise adjustments to the angle of your photo.
If you’re not satisfied with the result, you can always tap the reset button to undo the rotation and start again. This button is usually represented by a circle with an arrow and is located next to the rotation dial.
Once you are happy with the rotation, you can tap on the “Done” button in the lower-right corner to apply the changes and save the rotated photo. The edited photo will replace the original version in your Photos app, but don’t worry – the app keeps a copy of the original photo, allowing you to revert back if needed.
Furthermore, the Photos app also allows you to enhance and fine-tune your photos with other editing tools such as adjusting brightness, contrast, and saturation, applying filters, and more. Exploring these tools can help you take your photo editing skills to the next level.
Now that you know how to use the Photos editing tools on your iPhone, you can easily rotate your photos and enhance them to create stunning visual memories. Let’s move on to the next section to learn how to rotate photos directly in the Photos app.
Rotating photos in the Photos app
Now that you understand the basic functionality of the Photos app and how to access the editing tools, it’s time to learn how to rotate your photos. Whether you accidentally captured a photo in the wrong orientation or simply want to change the angle for a better composition, the Photos app makes it incredibly easy to rotate your images.
To get started, open the Photos app on your iPhone and navigate to the photo you wish to rotate. Once you have the photo selected, tap on the “Edit” button located at the top right corner of the screen.
Upon entering the editing mode, you will see a variety of editing tools at the bottom of the screen. Look for the “Crop and Rotate” icon, which resembles a square with an arrow circling it. Tap on this icon to access the rotation options.
Once you have entered the rotation mode, you will notice a dial at the bottom of the screen. This dial represents the degree of rotation. Simply slide your finger along the dial in the desired direction to rotate your photo. You can rotate it to the left or right, depending on your preference.
As you rotate the photo, you will see it automatically adjust in real-time. This allows you to preview the changes before applying them. You can continue to rotate the photo until you have it aligned exactly the way you want it.
Additionally, if you only need to make slight adjustments to the rotation, you can use two fingers to rotate the photo in a more precise manner. This technique is especially useful if you want to align the photo to a specific angle.
Once you are satisfied with the rotation, tap on the “Done” button in the bottom right corner to save your changes. The Photos app will automatically update the rotated version of the photo in your library.
It’s important to note that rotating a photo does not result in any loss of image quality. The Photos app uses a non-destructive editing process, which means your original photo remains intact and only the rotated version is saved separately.
Now that you know how to rotate photos in the Photos app, you can easily correct any orientation issues or add a creative twist to your images. Whether you’re capturing breathtaking landscapes or memorable moments with friends, the ability to rotate photos on your iPhone gives you even more flexibility and control over your photography.
Saving and sharing the rotated photos
Once you have successfully rotated your photos on your iPhone using the Photos app, the next step is to save and share them. Here’s how you can do it:
1. Saving the rotated photos: After you have made the necessary rotations to your photos, tap on the “Done” button located at the top right corner of the screen. This will save the changes you made to the photo. The rotated photo will replace the original orientation in your photo library.
2. Sharing the rotated photos: There are several ways to share your rotated photos with others:
– Share directly from the Photos app: Open the Photos app and locate the rotated photo. Tap on the share icon, which looks like a square with an upward arrow. You will then be presented with various sharing options. Choose the method you prefer, such as sending it via Messages, Email, or sharing it on social media platforms like Instagram or Facebook.
– Use AirDrop: If you have other Apple devices nearby and they are connected to the same Wi-Fi network, you can use AirDrop to share your rotated photos wirelessly. Simply open the Photos app, select the rotated photo, tap on the share icon, and choose the device to which you want to send the photo via AirDrop.
– Upload to cloud storage: You can also upload your rotated photos to cloud storage services like iCloud, Dropbox, or Google Drive. This allows you to easily share access to the photos with others by sending them a link or granting them permission to view or download the photos.
– Print your rotated photos: If you prefer tangible copies of your photos, you can print them directly from your iPhone. Tap on the share icon, select the “Print” option, and follow the prompts to print your rotated photo using a compatible printer.
Remember, when sharing your rotated photos, be mindful of the privacy settings. Make sure you are only sharing them with intended recipients and respecting the privacy of others.
By following these steps, you can easily save and share your rotated photos from your iPhone. Whether you want to showcase your photography skills or simply share memorable moments with friends and family, the Photos app makes it convenient to manage and distribute your rotated photos with ease.
Conclusion
In conclusion, learning how to rotate photos on your iPhone is a simple yet essential skill that can greatly enhance your photography experience. Whether you want to correct the orientation of a sideways photo or add a unique twist to your snapshots, the built-in rotation feature makes it quick and easy.
By following the steps outlined in this guide, you can effortlessly rotate your photos directly on your iPhone without the need for any external editing apps. This not only saves you time and effort but also ensures that you can instantly share your perfectly aligned pictures with friends and family.
With the ability to rotate photos, you have the power to transform ordinary shots into captivating masterpieces. So, don’t let a wrong orientation hinder your creativity. Embrace the convenience and versatility of rotating photos on your iPhone and unlock a whole new level of photography enjoyment.
FAQs
Q: Can I rotate photos on my iPhone?
A: Absolutely! Rotating photos on your iPhone is a breeze. Here’s how you can do it:
- Open the Photos app on your iPhone.
- Tap on the photo you wish to rotate.
- Tap on the Edit button on the top-right corner of the screen.
- Locate the Rotate icon, usually a circular arrow, and tap on it
- Tap again until the photo is rotated to your desired position.
- Tap on Done to save the changes.
Q: Will rotating a photo on my iPhone affect the quality?
A: No, rotating a photo on your iPhone does not affect its quality. The rotation process is non-destructive, meaning it does not degrade the image or cause any loss in resolution. Your photo will retain its original quality even after rotation.
Q: Can I rotate multiple photos at once?
A: Yes, you can rotate multiple photos simultaneously on your iPhone. Here’s how:
- Open the Photos app and select the “Albums” tab at the bottom.
- Tap on the “Select” button on the top-right corner.
- Choose the photos you want to rotate by tapping on them.
- Tap on the Share button, usually represented by a square with an arrow.
- Scroll down and select the “Rotate” option.
- Tap on the direction you want to rotate the photos.
- The selected photos will be rotated accordingly.
Q: Will rotating a photo affect its orientation in other apps?
A: No, rotating a photo on your iPhone will not affect its orientation in other apps or when sharing it with others. The rotation is applied within the Photos app only and does not alter the original image file. When you share or export the photo, it will be in its original orientation.
Q: Can I revert the rotation and restore the original orientation of a photo?
A: Yes, you can revert the rotation and restore the original orientation of a photo on your iPhone. Here’s how:
- Open the Photos app and navigate to the rotated photo.
- Tap on the Edit button on the top-right corner.
- Locate the Crop and Rotate icon, usually represented by a square with curved arrows.
- Tap on it and select the Reset option.
- The photo will be restored to its original orientation.
- Tap on Done to save the changes.