
Have you ever received an important voice message on your iPhone that you wish to save and refer back to later? Whether it’s a heartfelt message from a loved one or crucial information from a business contact, it can be frustrating to not have a way to store these voice messages for future reference.
But fear not, as I’m here to guide you on how to save voice text messages on your iPhone. With just a few simple steps, you’ll be able to preserve those valuable voice messages and access them whenever you need to. Whether you want to keep sentimental messages for nostalgia or store important information for professional purposes, this article will provide you with the necessary instructions to save voice text messages on your iPhone.
So, let’s dive in and discover how you can store and cherish those voice messages on your iPhone!
Inside This Article
- How to Save Voice Text Messages on iPhone
- Method 1: Using the Voice Memo App
- Method 2: Using a Third-Party Voice Recording App
- Method 3: Using a Screen Recording
- Method 4: Forwarding the Voice Text Message
- Conclusion
- FAQs
How to Save Voice Text Messages on iPhone
Are you receiving important voice text messages on your iPhone that you want to save? Whether it’s a memorable voice memo, an important business message, or a sentimental message from a loved one, there are several methods you can use to preserve these voice text messages on your device. In this article, we will walk you through four different methods to save voice text messages on your iPhone. Let’s get started!
Method 1: Using the Voice Memo App
If you want to save a voice text message quickly and conveniently, the Voice Memo app on your iPhone is a great option. Here’s how you can do it:
- Step 1: Open the Voice Memo app on your iPhone.
- Step 2: Tap on the red record button to start recording.
- Step 3: Record the voice text message you want to save.
- Step 4: Tap on the stop button to end the recording.
- Step 5: Tap on the share button to save the voice memo.
Method 2: Using a Third-Party Voice Recording App
If you prefer more control over your voice recordings or want additional features, you can use a third-party voice recording app available on the App Store. Follow these steps:
- Step 1: Download and install a voice recording app from the App Store.
- Step 2: Open the app and grant necessary permissions.
- Step 3: Tap on the record button to start recording the voice text message.
- Step 4: Tap on the stop button to end the recording.
- Step 5: Save the voice memo within the app or export it to your desired location.
Method 3: Using a Screen Recording
If the voice text message is part of a larger audio or video conversation, you can use the screen recording feature on your iPhone to capture and save it. Here’s how:
- Step 1: Open the Control Center on your iPhone.
- Step 2: Tap on the screen recording button to start recording.
- Step 3: Access the voice text message and play it out loud.
- Step 4: Tap on the red status bar or the stop button to end the recording.
- Step 5: Save the recorded screen video to your Photos app.
Method 4: Forwarding the Voice Text Message
If you want to save the voice text message within the Messages app itself, you can forward it to another contact or to yourself. Follow these steps:
- Step 1: Open the Messages app on your iPhone.
- Step 2: Find the voice text message you wish to save.
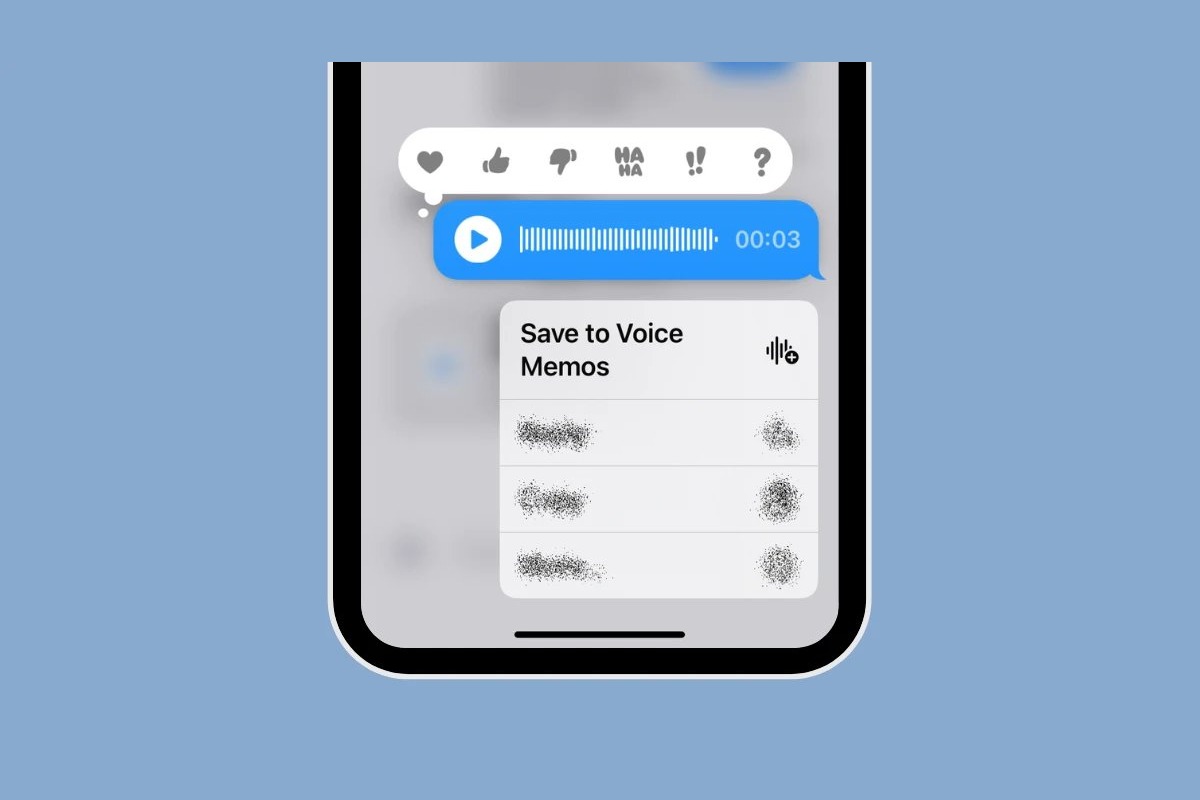
- Step 3: Press and hold the message bubble until the menu appears.
- Step 4: Tap on “More” and select the voice message.
- Step 5: Tap on the forward button and choose a destination to save the message.
Method 1: Using the Voice Memo App
Step 1: Open the Voice Memo app on your iPhone
Step 2: Tap on the red record button to start recording
Step 3: Record the voice text message you want to save
Step 4: Tap on the stop button to end the recording
Step 5: Tap on the share button to save the voice memo
If you want to save voice text messages on your iPhone, you can use the Voice Memo app, which comes pre-installed on all iPhones. This easy-to-use app allows you to record and save audio files, making it a convenient option for saving voice text messages. Here is how you can use the Voice Memo app to save your voice text messages.
First, open the Voice Memo app on your iPhone. You can find this app on your home screen or by using the search function. Once you have located the app, tap on it to open it.
Next, you will see a red record button at the bottom center of the screen. Tap on this button to start recording. Make sure to position your iPhone’s microphone near the sound source for optimal recording quality.
While the recording is in progress, speak out the voice text message that you want to save. Take your time and ensure that your message is clear and audible. The Voice Memo app provides a visual interface that displays the recording duration, allowing you to keep track of the length of your voice text message.
Once you have finished recording your voice text message, tap on the stop button, which is located to the right of the record button. This will end the recording and save the audio file.
To save the voice memo, tap on the share button, which is represented by a square with an arrow pointing upward. This will open various options for sharing and saving the voice memo. You can choose to save it to your Files app, send it via email or messaging apps, or even upload it to cloud storage services like iCloud or Dropbox.
By following these simple steps, you can easily save voice text messages using the Voice Memo app on your iPhone. This method allows you to capture and retain important voice information for future reference or sharing with others.
Method 2: Using a Third-Party Voice Recording App
Step 1: Download and install a voice recording app from the App Store. There are several popular voice recording apps available, such as Voice Memos, AudioShare, and Evernote. Choose the one that best suits your needs and preferences.
Step 2: Open the app and grant necessary permissions. When you launch the voice recording app for the first time, it may require certain permissions, such as access to the microphone or storage. Follow the on-screen prompts to grant these permissions to the app.
Step 3: Tap on the record button to start recording the voice text message. In the voice recording app, you will typically see a prominent record button. Tap on it to begin the recording process. Make sure you are in a quiet environment and speak clearly for optimal results.
Step 4: Tap on the stop button to end the recording. Once you have finished recording the voice text message, locate the stop button within the app’s interface. Tap on it to stop the recording. Some apps may automatically stop the recording after a certain duration or when there is a pause in the audio.
Step 5: Save the voice memo within the app or export it to your desired location. After stopping the recording, the app will usually prompt you to save the voice memo. You can choose to save it within the app’s storage or export it to other destinations, such as your iPhone’s Files app, cloud storage services like Dropbox or Google Drive, or even send it via email or messaging apps.
Using a third-party voice recording app gives you more control and flexibility in managing your voice text messages on your iPhone. These apps often offer additional features such as editing, trimming, and organizing recordings, making it easier to keep your voice memos organized and easily accessible.
Remember to explore different voice recording apps available in the App Store to find the one that aligns with your preferences and provides the functionality you require. Additionally, regularly backing up your voice memos is important to prevent any accidental loss of your valuable recordings.
Method 3: Using a Screen Recording
Step 1: Open the Control Center on your iPhone
Step 2: Tap on the screen recording button to start recording
Step 3: Access the voice text message and play it out loud
Step 4: Tap on the red status bar or the stop button to end the recording
Step 5: Save the recorded screen video to your Photos app
Screen recording is a great way to save voice text messages on your iPhone. With this method, you can capture both the audio and visual content of the message in a video format. Follow the steps below to use a screen recording to save your voice text messages:
Step 1: Open the Control Center on your iPhone. To access the Control Center, swipe down from the top-right corner of the screen on iPhone X and newer models, or swipe up from the bottom of the screen on iPhone 8 and earlier models.
Step 2: Once you have opened the Control Center, look for the screen recording button. It appears as a circular icon with a filled-in or hollow white circle inside it. Tap on this button to start the screen recording.
Step 3: After you have started the screen recording, navigate to the voice text message that you want to save. Make sure the audio is playing out loud on your iPhone.
Step 4: When you have finished playing the voice text message, tap on the red status bar at the top of the screen or the stop button in the Control Center. This will end the screen recording.
Step 5: The screen recording will be automatically saved to your Photos app. You can access it by opening the Photos app on your iPhone and navigating to the “Recents” or “Albums” tab.
Once the screen recording is saved in your Photos app, you can share it, edit it, or transfer it to another device if needed. Remember to delete any unnecessary screen recordings to free up storage space on your iPhone.
Using a screen recording is a convenient way to save voice text messages, especially if you want to preserve both the audio and visual elements of the message. Give this method a try and start saving your important voice text messages on your iPhone today.
Method 4: Forwarding the Voice Text Message
Step 1: Open the Messages app on your iPhone
Step 2: Find the voice text message you wish to save
Step 3: Press and hold the message bubble until the menu appears
Step 4: Tap on “More” and select the voice message
Step 5: Tap on the forward button and choose a destination to save the message
Method 4 offers a simple and convenient way to save voice text messages on your iPhone. By following these steps, you can easily forward the message to another destination and keep it for future reference.
To start, open the Messages app on your iPhone. This app is typically represented by a green speech bubble icon on your home screen.
Next, navigate to the voice text message you want to save. Scroll through your conversations or use the search bar at the top to find the specific message.
Once you’ve located the message, press and hold the message bubble. After a moment, a menu will appear with various options.
In the menu, tap on the “More” option. This will allow you to select multiple messages if desired, but for now, focus on the voice text message you want to save.
Select the voice message by tapping on it. You may see a blue checkmark indicating that it has been selected.
After selecting the voice text message, tap on the forward button. This button is typically represented by a right-facing arrow and can be found at the bottom of your screen.
Choose a destination to save the message. You can select another messaging thread, an email recipient, or even save it to a note-taking app. Select the appropriate option to proceed.
Once you’ve chosen the destination, the voice text message will be forwarded and saved accordingly. You can access it later by referring to the chosen destination and locating the forwarded message.
Note that this method allows you to save the voice message as a separate entity from the original conversation. It provides a practical and organized way to keep important voice text messages easily accessible.
Remember to regularly backup your iPhone to ensure that your saved voice text messages are secure. By following these steps, you can have peace of mind knowing that your important messages are safely stored.
So, if you want to save a voice text message on your iPhone, consider using the straightforward method of forwarding the message to the desired destination. It’s a reliable way to ensure you have access to those important voice messages whenever you need them.
Conclusion
In conclusion, learning how to save voice text messages on iPhone can be incredibly useful for preserving important conversations or sentimental moments. Whether it’s a heartwarming message from a loved one or an important business discussion, knowing how to save these voice messages gives you the ability to revisit and cherish them whenever you want.
By using various methods such as the Voice Memo app or third-party applications like iExplorer or AnyTrans, you can easily save and manage your voice text messages. Remember to choose the method that best suits your needs, taking into consideration factors such as ease of use, compatibility, and storage capacity.
So, don’t let those precious voice text messages disappear into the digital void. Take the time to save and protect them, ensuring that the memories and conversations captured within them are preserved for years to come. Unlock the full potential of your iPhone and preserve those special moments with just a few simple steps.
FAQs
FAQ 1: Can I save voice text messages on my iPhone?
Yes, you can save voice text messages on your iPhone. Apple introduced a feature called Voice to Text which allows you to dictate messages and convert them into text. These transcriptions can be saved and accessed later.
FAQ 2: How do I save voice text messages on iPhone?
To save voice text messages on your iPhone, follow these steps:
- Open the Messages app and go to the conversation containing the voice text message you want to save.
- Press and hold on the message containing the voice text.
- In the menu that appears, tap on “Copy.”
- Open the Notes app or any other app where you want to save the voice text message and create a new note or open an existing one.
- Tap and hold in the note field, then select “Paste” to insert the voice text message into the note.
- Now you have saved the voice text message on your iPhone.
FAQ 3: Can I access the saved voice text messages offline?
Yes, the saved voice text messages can be accessed offline. Once you have copied and pasted the voice text message into a note, it will be stored locally on your iPhone, allowing you to access it even without an internet connection.
FAQ 4: How long can I save voice text messages on iPhone?
The length of time you can save voice text messages on your iPhone depends on the available storage capacity. As long as you have enough storage space, the saved voice text messages will remain on your device until you delete them manually.
FAQ 5: Can I share the saved voice text messages with others?
Yes, you can share the saved voice text messages with others on your iPhone. Simply open the note or app where you have saved the voice text message, select the message, and tap on the sharing icon. From there, you can choose to send it via messaging apps, email, or other platforms.