
The iPhone 13 is known for its incredible features and capabilities. One notable feature that many users appreciate is the ability to send voice messages. With just a few taps, you can convey your thoughts and emotions effortlessly through voice recordings. This feature provides a convenient and personalized way to communicate with your friends, family, and colleagues. Whether you want to share a quick update, express your enthusiasm, or simply have a more personal interaction, sending voice messages on the iPhone 13 is a fantastic option. In this article, we will explore the step-by-step process of sending voice messages on your iPhone 13, as well as provide answers to some frequently asked questions about this feature. So, let’s dive in and uncover the exciting world of sending voice messages on your iPhone 13!
Inside This Article
- Enabling Voice Messages on iPhone 13
- Recording a Voice Message
- Sending a Voice Message
- Managing Voice Messages on iPhone 13
- Conclusion
- FAQs
Enabling Voice Messages on iPhone 13
Voice messaging is a convenient way to communicate on your iPhone 13, allowing you to send audio messages to your contacts. To start using this feature, follow the steps below to enable voice messages on your iPhone 13:
1. Open the Settings app on your iPhone 13.
2. Scroll down and tap on “Messages”.
3. In the Messages settings, locate “Audio Messages” and tap on it.
4. Toggle the switch next to “Audio Messages” to turn it on.
5. A prompt will appear asking if you want to keep audio messages for two minutes or forever. Choose the option that suits your preference.
6. Once enabled, you can exit the Settings app and start sending voice messages to your contacts.
By following these simple steps, you can easily enable voice messages on your iPhone 13 and start using this convenient feature. Now, let’s move on to the next section to learn how to record and send voice messages on your device.
Recording a Voice Message
Recording a voice message on your iPhone 13 is a quick and straightforward process. Follow the steps below to start recording:
- Open the Messages app on your iPhone 13.
- Select the conversation or contact you want to send the voice message to.
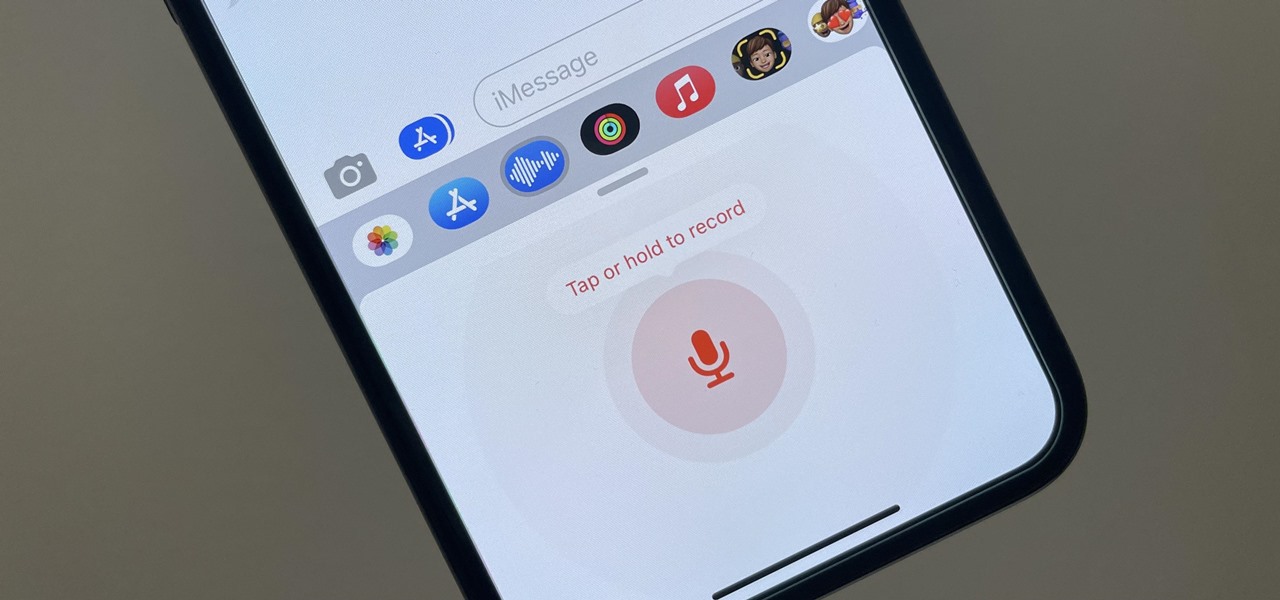
- Tap and hold the microphone icon next to the text input field.
- While holding the microphone icon, start speaking your message. You have up to 34 seconds to record your voice message.
- Release the microphone icon when you are finished recording.
Your voice message will be automatically sent to the recipient. If you change your mind and want to cancel the voice message before sending, simply swipe left on the recording and tap “Delete.”
It’s important to note that both you and the recipient should have an active cellular or Wi-Fi connection to send and receive voice messages. If either you or the recipient has a weak or unstable internet connection, the voice message may not be sent or received properly.
Additionally, you can also enhance your voice messages by using various features available in the Messages app. For example, you can add effects like echo, pitch, or even use the “Loud” feature to amplify your voice. These features can help you add a fun and unique touch to your voice messages.
Now that you know how to record a voice message, unleash your creativity and start sending personalized and expressive messages to your friends and loved ones using your iPhone 13!
Sending a Voice Message
Sending a voice message on your iPhone 13 is a convenient way to communicate with your contacts when you’re unable or prefer not to type. With just a few simple steps, you can record and send a voice message in no time.
To send a voice message on your iPhone 13, follow these steps:
- Open the Messages app on your iPhone 13.
- Select the conversation you want to send a voice message to.
- Tap and hold the microphone icon located to the right of the text input field.
- While holding the microphone icon, start speaking your message.
- Release the microphone icon when you’re finished recording.
- The voice message will now appear as a waveform in the conversation.
- To send the voice message, simply tap the arrow icon next to the waveform.
It’s important to note that voice messages on the iPhone 13 have a time limit of one minute. If your message exceeds this time limit, it will automatically be sent as multiple voice messages.
When sending a voice message, it’s also possible to add additional context or clarify your message by typing a text reply alongside the voice message. This can be helpful in providing more information or answering any questions that may arise from the voice message.
Additionally, if you make a mistake while recording, you can simply swipe left on the waveform and tap the “Delete” button to start over. This allows you to ensure that you send a clear and concise voice message without any errors or unnecessary pauses.
Once the voice message is sent, it will be delivered to the recipient’s iPhone, where they can listen to it by tapping on the waveform. If the recipient is not using an iPhone, they will receive the voice message as a regular audio file, which can be played on their device.
Sending voice messages can add a personal touch to your conversations and make it easier to convey your thoughts and emotions. It’s a versatile feature that can be particularly useful in situations where typing a message is not feasible or when you want to add a more personal touch to your communication.
So go ahead and give it a try! Send your friends and family entertaining voice messages or convey important information with ease using the voice messaging feature on your iPhone 13.
Managing Voice Messages on iPhone 13
Once you have recorded and sent voice messages on your iPhone 13, you may want to manage and organize them effectively. Fortunately, the iPhone 13 provides convenient options to help you keep your voice messages in check. Here’s how you can manage your voice messages:
1. Accessing Voice Messages: To access your voice messages, open the Phone app and navigate to the Voicemail tab located at the bottom of the screen. Tap on a voice message to listen to it.
2. Deleting Voice Messages: If you want to delete a voice message, swipe left on the message and tap on the “Delete” button. Alternatively, you can tap on the “Edit” button in the top-right corner, select the messages you want to delete, and then tap on the “Delete” button.
3. Saving Voice Messages: To save a voice message, tap on the message to open it, and then tap on the “Save” button. The message will be saved to your device, allowing you to access it even if it gets deleted from your voicemail.
4. Sharing Voice Messages: If you want to share a voice message with someone else, tap on the message to open it, and then tap on the “Share” button. You can choose to share the message via messaging apps, email, or other compatible platforms.
5. Managing Storage: Voice messages can take up storage space on your device. To manage your storage, go to Settings, tap on General, select iPhone Storage, and then scroll down to find the Voicemail option. Here, you can view and manage the storage taken by your voice messages.
6. Setting Voice Message Greetings: You can customize the greeting message that callers hear when they reach your voicemail. To change your voicemail greeting, go to the Phone app, navigate to the Voicemail tab, tap on “Greeting” in the top-right corner, and set your desired greeting.
7. Transcribing Voice Messages: The iPhone 13 offers the ability to transcribe voice messages into text. While listening to a voice message, tap on the “Transcript” button to view a transcription of the message. Please note that transcriptions may not be 100% accurate.
By effectively managing your voice messages on the iPhone 13, you can stay organized and easily access important messages whenever you need them. Whether it’s deleting, saving, or sharing voice messages, the process is simple and user-friendly, ensuring a seamless voicemail experience on your device.
Conclusion
In conclusion, sending voice messages on the iPhone 13 has never been easier. With the intuitive Voice Message feature, users can effortlessly communicate in a more personal and expressive way. Whether you are using the Messages app, WhatsApp, or other messaging platforms, the process is simple and efficient.
The convenience of sending voice messages allows you to easily convey your tone and emotions, making conversations more engaging and meaningful. With just a few taps, you can record and send voice messages to your friends, family, or colleagues, saving time and providing a more immersive communication experience.
The iPhone 13 continues to impress with its advanced features, and the ability to send voice messages is just one of the many tools that enhance the user experience. So, give it a try and enjoy the freedom to express yourself effortlessly with voice messages on your iPhone 13!
FAQs
1. How do I send a voice message on iPhone 13?
2. Can I send a voice message to someone who doesn’t have an iPhone?
3. Do voice messages use cellular data?
4. Can I send a voice message to multiple recipients?
5. How long can a voice message be on iPhone 13?