
Are you looking to slow down a video on your iPhone? Whether you want to create a slow-motion effect or simply want to savor a moment in more detail, the iPhone offers a convenient way to do so. With its powerful capabilities and user-friendly interface, slowing down a video on your iPhone is easier than ever.
In this article, we will guide you through the step-by-step process of slowing down a video on your iPhone. We will explore the built-in features and third-party apps that can help you achieve the desired effect. Whether you have an iPhone XS, iPhone 11, or any other model, you’ll be able to effortlessly slow down your videos and unleash your creativity.
So, if you’re ready to take your videos to the next level and create captivating slow-motion shots, let’s dive in and discover how to slow down a video on your iPhone.
Inside This Article
- Overview
- Method 1: Using the built-in slow motion feature
- Method 2: Using third-party video editing apps
- Method 3: Using online video editing tools
- Method 4: Using video editing software on a computer
- Conclusion
- FAQs
Overview
Do you have a video on your iPhone that you want to slow down for a dramatic effect or to capture a specific moment in detail? Look no further! In this article, we will explore different methods to slow down a video on your iPhone. Whether you are a professional videographer or just someone who loves creating and editing videos, these methods will help you achieve the desired slow-motion effect effortlessly.
With advancements in technology and the popularity of shooting videos on smartphones, the iPhone offers built-in features and apps that make video editing a breeze. You can slow down a video on your iPhone using the iMovie app, the Slow Motion feature, or third-party video editing apps available on the App Store. Each method has its own advantages and can cater to different levels of expertise and editing needs.
Let’s dive into the details of each method and discover how you can slow down your videos on your iPhone.
Method 1: Using the built-in slow motion feature
One of the easiest ways to slow down a video on your iPhone is by using the built-in slow motion feature. This feature allows you to capture videos at a higher frame rate, giving you the option to play them back at a slower speed.
To use this feature, follow these simple steps:
- Open the Camera app on your iPhone.
- Swipe right on the screen to switch to the “Slo-Mo” mode. You can also tap on the “Slo-Mo” option at the bottom to switch directly.
- Tap the record button to start recording your video.
- While recording, focus on the subject you want to capture in slow motion.
- Once you’re done recording, tap the record button again to stop the recording.
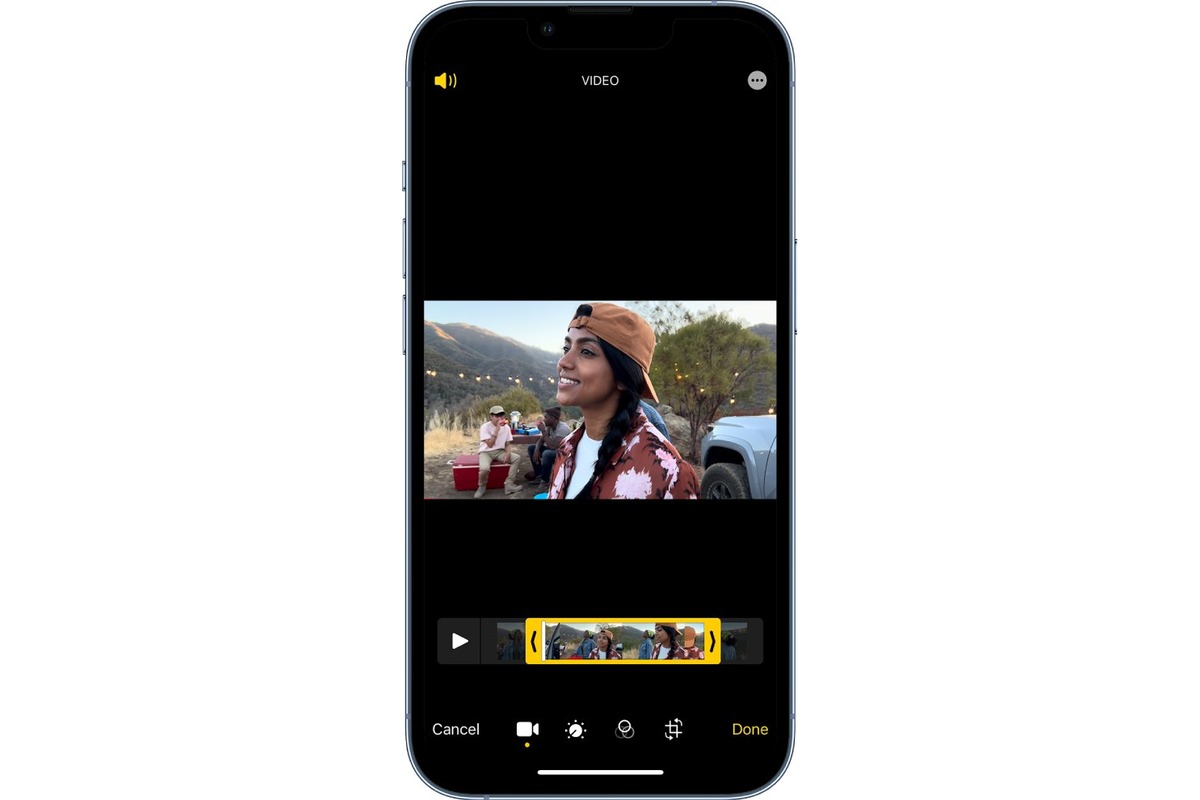
After capturing the video, you can view it in the Photos app. To access the slow motion controls, open the video and tap on the “Edit” button. Then, you’ll see a timeline at the bottom of the screen with a vertical yellow line representing the slow motion segment.
To adjust the slow motion intensity, drag the edges of the yellow line inward or outward. Moving them closer together will make the slow motion effect more pronounced, while moving them apart will make it less noticeable.
Once you’re satisfied with the slow motion effect, tap “Done” to save your changes. You can now enjoy your video with the slowed-down segments.
The built-in slow motion feature on the iPhone provides a simple and intuitive way to slow down your videos without the need for any additional apps or software. Additionally, it gives you the flexibility to adjust the intensity of the slow motion effect according to your preferences.
Method 2: Using third-party video editing apps
If you’re looking for more advanced video editing features and greater control over the slow-motion effect on your iPhone, using third-party video editing apps is a fantastic option. These apps provide a wide array of editing tools and options, allowing you to create professional-looking slow-motion videos with ease. Here are a few popular third-party apps that you can use:
- 1. FilmoraGo: FilmoraGo is a powerful video editing app that offers various features, including the ability to slow down video footage. Simply import your video into the app, select the portion you want to slow down, and adjust the speed settings to your preference. FilmoraGo also provides other editing options like adding filters, transitions, and music to enhance your video.
- 2. Splice: Developed by GoPro, Splice is an excellent choice for slow-motion video editing. This app allows you to import videos, adjust the speed, and even add text overlays and sound effects. You can also choose from a variety of pre-set slow-motion speeds or customize it according to your preference.
- 3. Adobe Premiere Rush: Adobe Premiere Rush is a professional-grade video editing app that offers various editing tools, including the ability to slow down video footage. With this app, you can easily control the speed of your video, add transitions, and apply effects. It also seamlessly syncs your projects across multiple devices, allowing you to continue editing on your desktop or tablet.
These apps are just a few examples of the many third-party video editing apps available for iPhone. Each app has its own unique features and interface, so feel free to explore and find the one that suits your needs best.
Once you’ve chosen and installed a third-party video editing app, simply import the video you want to edit, locate the speed adjustment tool, and slow down the footage to your desired speed. Be sure to preview your video before exporting it to ensure the slow-motion effect is applied correctly.
Remember, using third-party video editing apps may require a bit of learning and experimentation to master the features and achieve the desired results. However, with practice, you’ll be able to create stunning slow-motion videos that capture every moment in mesmerizing detail.
Method 3: Using online video editing tools
If you don’t want to download any apps or software on your iPhone, you can also slow down a video using online video editing tools. These tools allow you to upload your video file and make adjustments to the playback speed without the need for additional installation.
Here is a step-by-step guide on how to use online video editing tools to slow down a video on your iPhone:
- Select an online video editing tool: There are several online video editing tools available, such as Kapwing, Clideo, and FlexClip. Choose one that suits your needs and preferences.
- Upload your video: Once you’ve selected an online tool, navigate to the website and look for the option to upload your video file. Typically, you’ll find an “Upload” or “Choose file” button to initiate the process.
- Trim and adjust the speed: After uploading your video, you’ll have the option to trim it if needed. Use the provided tools to select the portion of the video you wish to slow down. Then, look for the speed adjustment feature and choose a lower playback speed to slow down the video.
- Preview and download: Once you’ve made the necessary adjustments, preview the edited video to ensure it meets your expectations. If everything looks good, proceed to download the slowed-down video to your iPhone.
Using online video editing tools gives you the flexibility to adjust the playback speed of your videos without the need for additional apps or software. However, it’s important to note that the functionality and user interface may vary between different online tools.
By following these steps, you can easily slow down a video on your iPhone using online video editing tools. Explore different tools and find the one that suits your needs, and start adding a slow-motion effect to your videos.
Method 4: Using video editing software on a computer
If you’re looking for more advanced options and greater control over the slow-motion effect, using video editing software on a computer is a fantastic option. Not only do you have access to a wide range of features and tools, but you can also achieve professional-level results.
There are numerous video editing software available for both Windows and Mac platforms. Some popular choices include Adobe Premiere Pro, Final Cut Pro, and Sony Vegas Pro. These software programs offer comprehensive editing capabilities and allow you to slow down videos with ease.
Here is a step-by-step guide on how to slow down a video using video editing software on a computer:
- First, import the video file into your chosen video editing software. This can usually be done by clicking on the “Import” or “Add Media” button and selecting the file from your computer.
- Once the video is imported, drag and drop it onto the timeline or storyboard of the software.
- Locate the speed adjustment tool or feature in your chosen software. This is typically represented by a slider or percentage value.
- Depending on the software, you may have the option to adjust the speed of the entire video or specific segments. Select the desired portion of the video that you want to slow down.
- Use the speed adjustment tool to decrease the speed of the selected portion. This can be done by dragging the slider to the left or entering a lower percentage value.
- Preview the video to ensure that the slow-motion effect is applied correctly. Make any necessary adjustments until you are satisfied with the result.
- Once you are happy with the slow-motion effect, it’s time to export the video. Choose the desired output format and settings, and then click on the “Export” or “Render” button. Depending on the length and complexity of the video, this process may take some time.
- Once the export is complete, you will have a new video file with the slow-motion effect applied. You can now save, share, or further edit the video as desired.
Using video editing software on a computer gives you the flexibility to experiment with different effects, transitions, and audio enhancements to create captivating slow-motion videos. It’s a great choice for users who want to take their video editing skills to the next level and produce high-quality content.
In conclusion, being able to slow down a video on your iPhone is a valuable skill that can enhance your video-watching experience and allow you to focus on specific details or moments. Whether you’re trying to catch every detail in a fast-paced sports clip or want to savor the beauty of a slow-motion scene, the ability to slow down videos offers a new level of control and enjoyment.
With the built-in video editing features on your iPhone, you can easily slow down a video without the need for external software or apps. By following simple steps, such as using iMovie, you can adjust the speed of your videos and create stunning visual effects.
So, go ahead and experiment with slowing down videos on your iPhone! Whether you’re a professional videographer or just an avid mobile user, mastering this technique will open up a world of possibilities for your videos.
Discover the joy of slowing down and relishing the details with your iPhone. Start exploring the exciting world of video editing and unleash your creativity today!
FAQs
Q: Can I slow down a video on my iPhone?
A: Yes, you can slow down a video on your iPhone using various methods and apps available. There are built-in options in the Photos app as well as third-party apps that offer more advanced features for video editing.
Q: How can I slow down a video using the Photos app on my iPhone?
A: To slow down a video using the Photos app, open the video and tap on the Edit option. Then, tap on the speedometer icon and drag the slider to adjust the speed. Moving the slider towards the tortoise icon will slow down the video. Once you are satisfied with the speed, tap Done to save the changes.
Q: Are there any third-party apps available to slow down videos on iPhone?
A: Yes, there are several third-party apps available on the App Store that offer advanced video editing features, including the ability to slow down videos. Some popular options include iMovie, LumaFusion, and Adobe Premiere Rush.
Q: Can I control the specific parts of the video that I want to slow down?
A: Yes, with the help of more advanced video editing apps like iMovie or LumaFusion, you can precisely control the parts of the video that you want to slow down. These apps allow you to trim the video and apply speed adjustments to specific segments of the footage.
Q: Are there any limitations to consider when slowing down a video on iPhone?
A: When slowing down a video, it’s important to keep in mind that the quality of the slowed-down footage might not be as smooth as the original. Some frames may appear distorted or choppy, depending on the extent of the speed reduction. Additionally, slowing down a video may increase the file size, so make sure you have enough storage space on your iPhone.