
In the digital era, capturing and editing photos has become an integral part of our everyday lives. Thanks to advanced technology, we now have powerful cameras right in our pockets. And when it comes to mobile phones, there’s no denying that the iPhone reigns supreme.
Apple’s flagship device, the iPhone, is renowned for its stunning camera capabilities. Whether you’re an amateur photographer or a social media enthusiast, the iPhone provides an incredible platform for capturing breathtaking moments. But what about the editing process? How can you touch up your photos and make them truly stand out?
In this article, we will delve into the world of photo editing on the iPhone and explore various techniques and tools to enhance your pictures. From basic adjustments to advanced editing features, we’ll cover it all. So grab your iPhone and let’s dive into the art of touching up photos!
Inside This Article
- Understanding the Photo Editing Tools on iPhone
- Adjusting Exposure and Brightness
- Enhancing Colors and Saturation
- Applying Filters and Presets
- Conclusion
- FAQs
Understanding the Photo Editing Tools on iPhone
When it comes to editing photos on your iPhone, Apple has equipped its devices with a robust set of built-in tools that allow you to transform your images with just a few taps. Understanding these photo editing tools will enable you to enhance your pictures and create stunning visual effects.
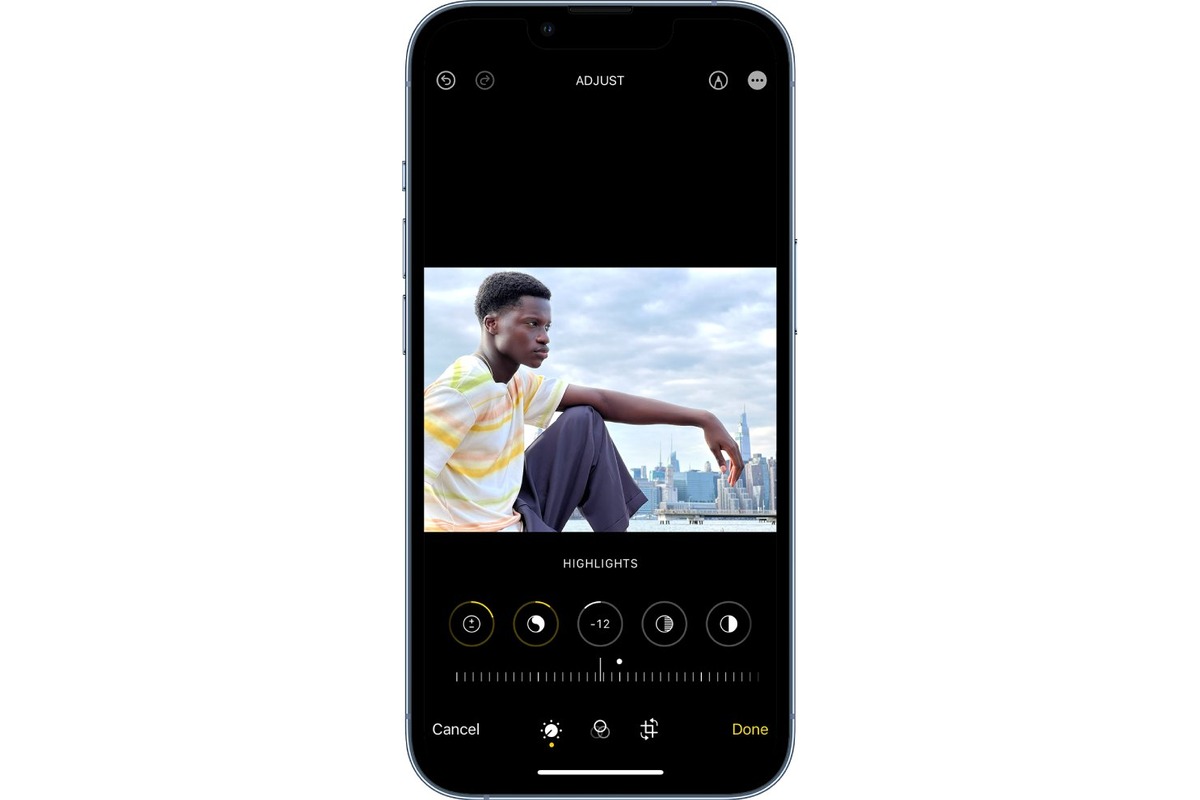
One of the fundamental photo editing tools on iPhone is the “Adjust” feature, accessed through the editing menu in the Photos app. This tool allows you to fine-tune various settings, such as exposure, brightness, contrast, shadows, and highlights. With these controls, you can effortlessly balance the lighting of your images, bringing out the details in both the dark and bright areas.
Another essential tool is the “Crop” feature, which allows you to trim and frame your photos to remove unwanted elements or to achieve a specific composition. With the cropping tool, you can easily adjust the aspect ratio, straighten horizons, and even rotate your images to create a visually pleasing composition.
The “Filters” tool is an incredibly popular feature among iPhone users, providing a quick and easy way to apply artistic effects to your photos. From vibrant and saturated looks to vintage and black-and-white tones, the filters feature allows you to instantly transform the mood and style of your images, giving them a unique and personalized touch.
In addition to filters, the “Presets” tool is another powerful option for editing photos on your iPhone. Presets are pre-defined editing adjustments that can be applied to your images with a single tap. Apple provides a collection of presets, each designed to enhance specific aspects of your photos, such as portrait, landscape, nature, or black and white. Experimenting with different presets can give your images a professionally edited look in no time.
The “Retouch” tool is yet another handy feature that lets you remove blemishes and imperfections from your photos. With just a swipe of your finger, you can get rid of unwanted spots, eliminate stray hairs, and erase distracting elements, resulting in a cleaner and more polished final image.
Lastly, the “Adjustments” tool allows you to fine-tune your edits even further. With controls for hue, saturation, and warmth, you can precisely adjust the colors in your photos to create a specific mood or to correct any color imbalances. Additionally, you can use the “Sharpen” feature to enhance the details and make your images appear sharper and crisper.
Understanding and utilizing these photo editing tools on your iPhone will take your photography skills to the next level. Whether you are a beginner or a seasoned photographer, these powerful features will help you transform ordinary snapshots into stunning masterpieces right in the palm of your hand.
Adjusting Exposure and Brightness
Adjusting exposure and brightness is a crucial aspect of photo editing, as it can dramatically enhance the overall look and feel of your images. Luckily, the iPhone offers intuitive and easy-to-use tools to help you achieve the desired results.
One of the primary tools you can use is the “Exposure” slider, which allows you to control the overall brightness of your photo. By moving the slider to the right, you can increase the exposure and make the image brighter. Conversely, sliding it to the left will decrease the exposure, resulting in a darker image.
Besides adjusting exposure, you can also fine-tune the brightness using the “Brightness” slider. This tool allows you to control the brightness levels in specific areas of your photo, giving you more precision and control over the final result.
When adjusting exposure and brightness, it’s important to achieve a balance that doesn’t wash out the highlights or make the shadows too dark. Experimenting with these sliders until you find the optimal settings for your photo is key to achieving a visually appealing and well-exposed image.
Additionally, keep in mind that the iPhone’s photo editing tools also offer the option to automatically adjust exposure and brightness. This can be useful if you’re looking for a quick fix, as the device will analyze the image and make adjustments accordingly.
Remember, the goal when adjusting exposure and brightness is to create an image that is visually pleasing and accurately represents the scene you captured. By using the available tools on your iPhone, you can easily enhance the exposure and brightness of your photos to make them truly stand out.
Enhancing Colors and Saturation
One of the key aspects of editing photos on your iPhone is enhancing the colors and saturation to make your images really pop. With the powerful editing tools available on your device, you can easily adjust the color balance, vibrancy, and intensity to create visually stunning results.
First, start by opening the photo you want to edit in the Photos app on your iPhone. Then, tap on the Edit option at the top right corner of the screen. This will bring up a range of editing tools, including the options for enhancing colors and saturation.
Once you’re in the editing mode, you’ll find several sliders that allow you to make precise adjustments to the colors and saturation of your photo. The most common sliders you’ll come across are:
- Saturation: This slider controls the overall intensity of colors in your photo. By increasing the saturation, you can make the colors more vibrant and intense. Conversely, reducing the saturation will make the colors appear more muted and desaturated.
- Brilliance: This slider enhances the luminance and vibrancy of the colors in your photo. It can add a subtle glow and depth to your images, making them more visually appealing.
- Color Balance: This tool allows you to adjust the balance between the primary colors (red, green, and blue) in your photo. You can make fine-tuned adjustments to create a warmer or cooler look, depending on your preference.
To make adjustments, simply slide your finger across the screen on the respective sliders. As you move the slider, you’ll see the changes taking effect in real-time on your photo. This allows you to find the perfect balance and saturation level that suits your liking.
Remember, the key to enhancing colors and saturation is to find a balance. Over-saturating the colors can result in an artificial and unrealistic look, while under-saturating can make your photos appear dull and lifeless. Experiment with different settings and trust your artistic eye to achieve the desired effect.
Once you’re satisfied with the changes, tap on the Done button to save your edited photo. The edited version will be saved as a separate copy, preserving the original image untouched.
With the ability to enhance colors and saturation directly on your iPhone, you can take your photos from ordinary to extraordinary with just a few simple adjustments. Whether you’re capturing a vibrant sunset, a colorful bouquet of flowers, or a stunning landscape, experimenting with the color and saturation settings will bring out the true beauty of your images.
Applying Filters and Presets
Filters and presets are a great way to instantly enhance the look and feel of your photos on your iPhone. With just a few taps, you can completely transform the mood and tone of your image. Whether you want to create a vintage look, add a dramatic effect, or make your colors pop, the filters and presets on your iPhone provide a wide variety of options to choose from.
To apply a filter to your photo, simply open the editing tools in your Photos app and select the “Filters” option. You’ll be presented with a selection of different filters, each with its own unique style and characteristics. Some filters may add a warm and nostalgic tone, while others may enhance the vibrancy and contrast of your image.
When selecting a filter, it’s important to consider the overall composition and subject of your photo. Some filters may work well for landscapes, while others may be more suitable for portraits or still life. Experiment with different filters to find the one that best complements your photo.
In addition to filters, the Photos app on your iPhone also offers presets that allow you to quickly adjust specific aspects of your photo’s appearance. These presets include options like “Vivid,” “Dramatic,” “Black and White,” and more. Each preset is designed to enhance a particular attribute of the photo, such as contrast, saturation, or sharpness.
Applying a preset is as easy as selecting it from the preset menu and seeing the instant impact it has on your photo. If you’re not satisfied with the results, you can always fine-tune the adjustments further using the other editing tools available on your iPhone.
One of the advantages of using filters and presets on your iPhone is that they allow you to quickly and easily apply professional-looking effects to your photos without the need for extensive editing knowledge or software. Whether you’re sharing your photos on social media or printing them out for display, filters and presets can add an extra touch of style and flair to make your images stand out.
Remember, filters and presets are not meant to completely replace the editing process. They are tools that can enhance your photos and add artistic elements, but it’s important to always keep the original composition and intent of your photo in mind. Use filters and presets to create unique and eye-catching photos that reflect your personal style and vision.
Conclusion
The ability to touch up photos on an iPhone has revolutionized the way we capture and share memories through mobile photography. With a wide range of powerful editing tools and user-friendly apps, anyone can transform their photos into stunning masterpieces with just a few simple taps. Whether it’s adjusting brightness and contrast, applying filters, removing blemishes, or enhancing colors, the iPhone offers a convenient and accessible platform for photo editing on the go.
From beginners to professionals, the iPhone provides a seamless experience that caters to all skill levels. Its intuitive interface, combined with advanced features and technologies, ensures that users can achieve their desired results effortlessly. With the ever-evolving world of mobile photography, the iPhone continues to push the boundaries and empower individuals to unleash their creativity and artistic vision.
So, whether you’re a casual photographer or an aspiring artist, don’t hesitate to explore the world of photo editing on your iPhone. With a little practice and experimentation, you’ll be amazed at the incredible results you can achieve.
FAQs
1. Can I touch up photos on my iPhone?
Yes, you can easily touch up photos on your iPhone using various photo editing apps available in the App Store. These apps offer a range of features and tools to enhance your photos, such as adjusting brightness, contrast, saturation, and applying filters to give your images a professional look.
2. Which photo editing apps are recommended for touch-ups on iPhone?
There are several excellent photo editing apps for iPhone that you can use to touch up your photos. Some popular options include Adobe Photoshop Express, Snapseed, VSCO, and Lightroom. These apps provide intuitive interfaces and powerful tools to enhance your images.
3. Can I remove blemishes or imperfections in photos with these apps?
Absolutely! The photo editing apps available for iPhone offer tools specifically designed to remove blemishes and imperfections. You can use features like the healing brush tool or spot removal tool to erase unwanted marks or imperfections on your photos.
4. Are there any preset filters or effects available in these apps?
Yes, most photo editing apps provide a wide range of preset filters and effects that you can apply to your photos with just a tap. These filters can help to quickly enhance the overall look and mood of your images, giving them a unique and professional touch.
5. Can I adjust the brightness, contrast, and saturation of my photos using these apps?
Yes, photo editing apps for iPhone offer robust tools to adjust the brightness, contrast, and saturation of your photos. You can easily fine-tune these settings to make your images appear more vibrant, balanced, and visually appealing.