
Transferring your cellular plan to a new iPhone may seem like a daunting task, but with the right knowledge and guidance, it can be a seamless process. Whether you’re upgrading to a newer model or switching carriers, transferring your cellular plan ensures that you can continue to enjoy uninterrupted service on your new device.
In this article, we will dive into the step-by-step process of transferring your cellular plan to a new iPhone. From backing up your old device to activating your new one, we will cover all the essential details to make your transition smooth and hassle-free. So, if you’re ready to make the switch and enjoy all the benefits of a new iPhone without any disruptions, let’s get started!
Inside This Article
- Step 1: Check Compatibility
- Step 2: Backup Your Old iPhone
- Step 3: Activate Your New iPhone
- Step 4: Contact Your Cellular Provider
- Step 5: Transfer Cellular Plan to New iPhone
- Step 6: Test and Verify Connectivity
- Conclusion
- FAQs
Step 1: Check Compatibility
Before you transfer your cellular plan to your new iPhone, it’s important to ensure compatibility between your old and new devices. This step will ensure a smooth transition and prevent any issues with your service.
The first thing you need to check is the cellular network technology used by your old iPhone and your new iPhone. This information can usually be found in the specifications of your devices. Make sure that both devices support the same cellular network technology, such as 4G LTE or 5G.
Next, verify that your new iPhone is unlocked or compatible with your current cellular provider. If you purchased the new iPhone directly from your cellular provider, it is likely already compatible. However, if you bought it from a third-party retailer or another country, double-check with your provider to ensure compatibility.
Additionally, you should also check if your new iPhone uses the same SIM card size as your old iPhone. Most modern iPhones use Nano-SIM cards, but it’s always a good idea to confirm this before proceeding. If your new iPhone requires a different SIM card size, you may need to contact your cellular provider to obtain the appropriate size.
Lastly, make sure that your new iPhone is running the latest version of iOS. This will ensure compatibility with your cellular provider’s network and any specific features they offer. You can check for updates by going to Settings > General > Software Update on your iPhone.
By taking the time to check compatibility before transferring your cellular plan, you can avoid any unforeseen issues and ensure a seamless transition to your new iPhone.
Step 2: Backup Your Old iPhone
Before transferring your cellular plan to a new iPhone, it is crucial to backup your old iPhone to ensure that none of your valuable data is lost in the process. Creating a backup will allow you to seamlessly transfer your settings, apps, contacts, and other important information to your new device.
To backup your old iPhone, you have two options: using iCloud or using iTunes. Let’s explore both options:
Option 1: Using iCloud:
1. Connect your old iPhone to a stable Wi-Fi network.
2. Go to the “Settings” app and tap on your Apple ID at the top.
3. Tap on “iCloud” and then “iCloud Backup.”
4. Ensure that the “iCloud Backup” toggle is enabled.
5. Tap on “Back Up Now” to start the backup process. It may take a while depending on the size of your data and the speed of your internet connection.
Option 2: Using iTunes:
1. Connect your old iPhone to your computer using a USB cable.
2. Launch the latest version of iTunes on your computer.
3. Click on the iPhone icon that appears in the top-left corner of the iTunes window.
4. Under the “Backups” section, select “This Computer.”
5. Click on “Back Up Now” to begin the backup process. Ensure that the process is completed successfully.
Regardless of the method you choose, it is essential to wait until the backup process is finished before proceeding to the next steps. Once the backup is complete, you can proceed to activate your new iPhone and transfer your cellular plan.
Step 3: Activate Your New iPhone
Once you have your new iPhone in hand, it’s time to activate it. Activating your new iPhone is a crucial step in the process of transferring your cellular plan. It ensures that your new device is registered with your cellular provider and ready to make calls, send texts, and access the internet.
To activate your new iPhone, follow these steps:
- Make sure your new iPhone is charged. Connect it to a power source if needed.
- Turn on your new iPhone by pressing and holding the power button.
- Follow the on-screen prompts to select your language, Wi-Fi network, and set up Face ID or Touch ID.
- When prompted, choose the option to restore from a backup or set up as a new device. If you want to transfer your data from your old iPhone to your new one, selecting the option to restore from a backup is the way to go.
- If you choose to restore from a backup, connect your new iPhone to your computer using the USB cable and open iTunes (if using a Mac or PC) or open the Finder (if using a Mac with macOS Catalina or later).
- Follow the on-screen instructions in iTunes or Finder to restore your new iPhone from the backup of your old iPhone. This will transfer your settings, apps, photos, and other data to your new device.
- After the restore process is complete, disconnect your new iPhone from your computer.
Once you have completed the activation process, your new iPhone will be ready to use with your cellular plan. You can proceed to the next step to transfer your cellular plan from your old iPhone to the new one.
Step 4: Contact Your Cellular Provider
Once you have backed up your old iPhone and activated your new iPhone, the next step is to contact your cellular provider. Your provider will assist you in transferring your cellular plan from your old device to your new iPhone.
Contacting your cellular provider is important because they have all the necessary information about your account and can guide you through the process of transferring your plan. They will have the ability to update your account information and make the necessary changes to ensure a smooth transition.
To contact your cellular provider, you can reach out to their customer support through various channels. Most providers have a dedicated customer service line that you can call. It is advisable to have your account information, such as your phone number and account PIN, readily available as they may require this information to verify your identity.
During the conversation, let the customer support representative know that you have purchased a new iPhone and would like to transfer your cellular plan from your old device to the new one. They will then guide you through the necessary steps and may ask for some additional information, such as the new device’s IMEI or SIM card number.
It is worth mentioning that the process of transferring a cellular plan may vary based on your provider. Some providers may require you to visit one of their retail stores to complete the transfer, while others may offer the option to do it remotely. Regardless of the method, your provider will assist you in ensuring that your cellular plan is seamlessly transferred to your new iPhone.
Keep in mind that during this process, there might be a brief period where your cellular service is temporarily disrupted. This is normal and should be resolved once the transfer is complete. If you experience any extended downtime or issues with connectivity after the transfer, it is recommended to contact your cellular provider again for assistance.
By contacting your cellular provider and initiating the transfer process, you can continue using your existing cellular plan on your new iPhone without any interruptions. Take advantage of their expertise and ensure that your plan is transferred smoothly, allowing you to enjoy all the features and benefits of your new device right away.
Step 5: Transfer Cellular Plan to New iPhone
After completing the previous steps, you’re now ready to transfer your cellular plan to your new iPhone. This process will ensure that your new device is connected to your existing phone number and service provider. Follow the steps outlined below to seamlessly transfer your cellular plan:
1. Start by ensuring that both your old and new iPhones are connected to Wi-Fi. This will facilitate a smooth transition of your cellular plan.
2. Open the Settings app on your new iPhone. Scroll down and tap on “Cellular” or “Mobile Data,” depending on your device’s settings.
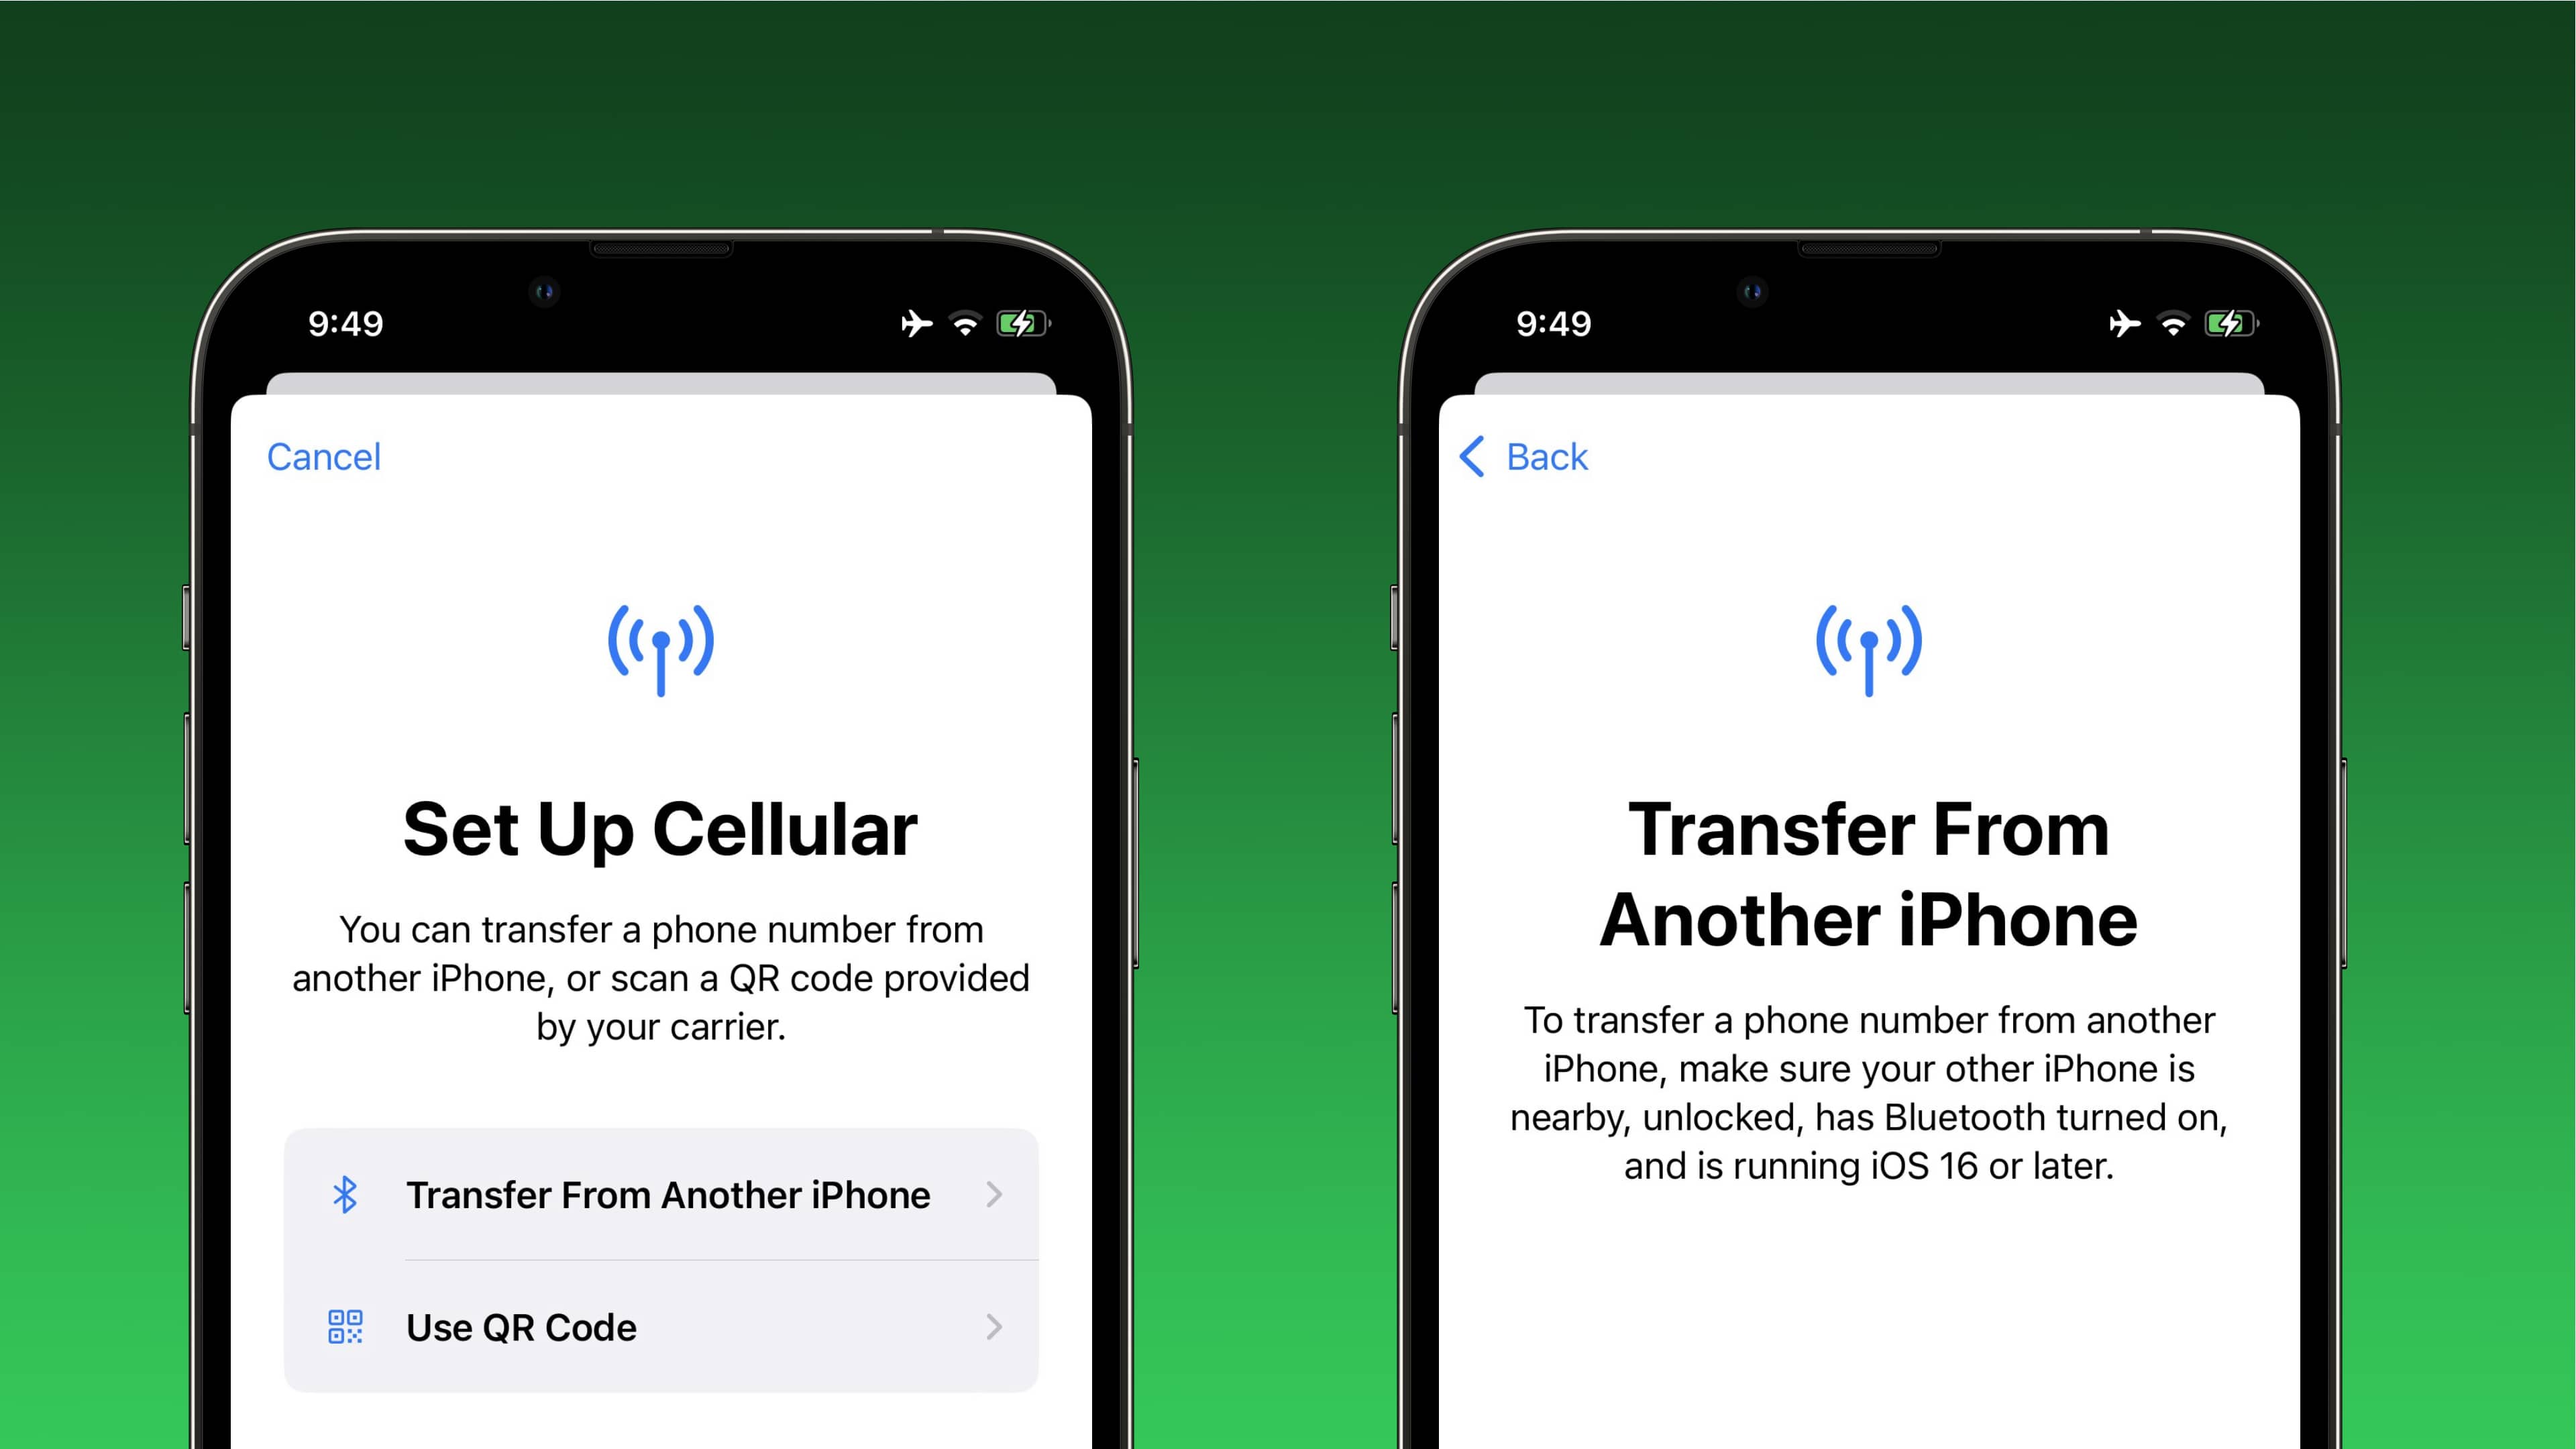
3. Look for the option “Add Cellular Plan.” Tap on it to begin the transfer process.
4. On your old iPhone, navigate to the Settings app and open “Cellular” or “Mobile Data.”
5. Select the option “Transfer Cellular Plan.” Your old iPhone will now generate a unique QR code.
6. Hold your new iPhone’s camera up to the QR code displayed on your old iPhone. Ensure that the entire QR code is within the frame.
7. Your new iPhone will automatically read the QR code and begin the cellular plan transfer process. This may take a few moments, so be patient.
8. Once the process is complete, a confirmation message will appear on your new iPhone. This signifies that your cellular plan has been successfully transferred.
9. Test the connectivity on your new iPhone by making a call or browsing the internet. Ensure that you can access mobile data and that your phone number is displayed correctly.
10. If you encounter any issues during the transfer process or notice any anomalies with your cellular plan, contact your service provider for assistance. They will be able to troubleshoot and resolve any issues.
By following these steps, you can effortlessly transfer your cellular plan to your new iPhone, preserving your phone number and ensuring uninterrupted service. Enjoy all the features and benefits of your new device while staying connected to your preferred service provider.
Step 6: Test and Verify Connectivity
After transferring your cellular plan to your new iPhone, it’s crucial to test and verify the connectivity to ensure that everything is functioning properly. Here are a few steps to follow:
1. Insert your SIM card: Make sure you have properly inserted your SIM card into your new iPhone. The SIM card is usually located on the side or top of the device. Insert it carefully and ensure that it is securely in place.
2. Check signal strength: Once the SIM card is inserted, check the signal strength indicator on your new iPhone. Ideally, you should see a strong signal, indicating that you are connected to your cellular network. If the signal is weak or non-existent, try moving to a different location to see if it improves.
3. Make a test call: Dial a number or call a friend to test the call quality on your new iPhone. Check if you can hear the other person clearly and if they can hear you without any issues. If the call quality is poor, try restarting your device or contacting your cellular provider for assistance.
4. Send and receive messages: Send a text message or two to ensure that you can send and receive texts without any problems. Check if the messages are delivered promptly and if you can receive messages from others as well.
5. Test data connectivity: Open a web browser or any app that requires an internet connection to test data connectivity. Try loading web pages, streaming videos, or downloading apps to ensure that you have a stable and fast data connection. If you experience any issues, try toggling the Airplane mode on and off or resetting your network settings.
6. Check for other features: Test additional features like FaceTime, GPS navigation, and mobile hotspot, if supported by your cellular plan. Make sure these features are functioning properly on your new iPhone.
7. Troubleshoot if necessary: If you encounter any issues with connectivity or any other cellular functions, try troubleshooting by restarting your iPhone, updating the software, or contacting your cellular provider for further assistance.
By following these steps, you can ensure that your new iPhone is properly connected to your cellular network and that all the essential features are working seamlessly. If you encounter any persistent issues, don’t hesitate to reach out to your cellular provider for support and guidance.
The process of transferring a cellular plan to a new iPhone can be a seamless and straightforward task. By following a few simple steps, you can ensure that your new device is activated and ready to go with your existing plan. Remember to contact your carrier and backup your data before initiating the transfer process.
With advancements in technology, the transfer process has become more efficient and user-friendly. Whether you are upgrading to a newer model or simply want to switch devices, transferring your cellular plan is now easier than ever. Take advantage of the resources available, such as carrier support and online guides, to ensure a smooth transition.
Remember, your cellular plan is an essential part of your smartphone experience. Taking the time to transfer your plan properly will save you from any unnecessary interruptions in service. So, go ahead and enjoy your new iPhone, knowing that your cellular plan is up and running seamlessly.
FAQs
Q: Can I transfer my cellular plan to a new iPhone?
A: Absolutely! Transferring your cellular plan to a new iPhone is a straightforward process. With a few simple steps, you can seamlessly migrate your plan to your new device.
Q: Why would I want to transfer my cellular plan to a new iPhone?
A: There are various reasons why you might want to transfer your cellular plan to a new iPhone. Some common reasons include upgrading to a newer model, replacing a lost or damaged device, or simply wanting to switch to a different iPhone.
Q: How do I transfer my cellular plan to a new iPhone?
A: First, ensure that your new iPhone is compatible with your cellular carrier. Next, back up the data from your old iPhone, either through iCloud or iTunes. Then, activate your new iPhone and follow the prompts to restore the data and settings from your backup. Finally, insert your SIM card into the new iPhone and activate it with your carrier. You may need to contact your carrier to transfer your plan to the new device.
Q: Can I transfer my cellular plan from one carrier to another?
A: In most cases, it is possible to transfer your cellular plan from one carrier to another. However, this process may vary depending on the carriers involved and any contractual obligations you may have. It is recommended to contact both your current carrier and the new carrier for guidance on transferring your plan.
Q: Are there any additional fees or charges associated with transferring my cellular plan to a new iPhone?
A: While the process of transferring your cellular plan to a new iPhone itself does not typically incur additional fees or charges, there may be costs associated with upgrading to a new iPhone or changing carriers. These costs can include device purchase fees, activation fees, or early termination fees, depending on your specific circumstances. It is important to review the terms and conditions of your current plan and consult with your carrier to understand any potential costs involved.