
Are you looking to share your latest video creation with the world? Wondering how to upload a video on YouTube using your mobile phone? Well, you’ve come to the right place! In this article, we will guide you through the step-by-step process of uploading a video to YouTube directly from your mobile device.
YouTube has become the go-to platform for sharing videos of all kinds, whether it’s capturing a memorable moment, showcasing your creative talents, or building an audience for your vlogs. With the convenience of mobile phones, it has never been easier to record, edit, and upload videos on the go.
So, whether you’re an aspiring content creator or simply want to share a video with your friends and family, we’ve got you covered. Let’s jump into the details and learn how to upload a video on YouTube using your mobile phone!
Inside This Article
- How To Upload A Video On YouTube Mobile
- # Step 1: Open the YouTube app – How to locate and launch the YouTube app on your mobile device
- Step 2: Sign in to your YouTube account – Instructions on how to log in to your YouTube account from the mobile app
- # Step 3: Tap on the camera icon – How to locate and click on the camera icon to start the upload process
- # Step 4: Select the video you want to upload – Guidance on choosing the video file from your mobile device’s library
- # Step 5: Add details and customize settings- How to provide a title, description, and other relevant information for your video- Explanation of additional settings, such as privacy and monetization options
- # Step 6: Choose an appropriate thumbnail – Instructions on selecting or creating a thumbnail image to represent your video
- # Step 7: Add tags and categorize your video – How to assign tags and choose a category that best describes your video
- Step 8: Set video visibility and publish – Guidance on selecting the desired visibility settings for your video – Steps to publish your video on YouTube
- # Step 9: Manage and share your uploaded video – Overview of options to edit, share, or delete your video after it has been uploaded
- Troubleshooting and Tips
- Conclusion
- FAQs
How To Upload A Video On YouTube Mobile
YouTube is a platform that allows you to share and showcase your videos with the world. Whether you’re filming a vlog, uploading a tutorial, or promoting your business, uploading videos on YouTube is a simple and convenient process. In this article, we’ll guide you through the step-by-step process of uploading a video on YouTube using your mobile device.
Step 1: Open the YouTube app
To get started, you need to have the YouTube app installed on your mobile device. If you don’t have it, you can download it for free from the App Store (for iOS devices) or the Google Play Store (for Android devices). Once you have the app, open it by tapping on the YouTube icon.
Step 2: Sign in to your YouTube account
If you haven’t already signed in, tap on the profile icon located on the top right corner of the app’s interface. Then, enter your YouTube credentials and click on the “Sign In” button to access your account.
Step 3: Tap on the camera icon
On the bottom navigation bar of the YouTube app, you will find a camera icon. Tap on it to initiate the upload process.
Step 4: Select the video you want to upload
The YouTube app will prompt you to choose the video you want to upload. Tap on the desired video from your device’s library. You can select videos from your camera roll, albums, or any other location where your videos are stored.
Step 5: Add details and customize settings
Once you’ve selected your video, you will be directed to the video editing screen. Here, you can add important details such as the video title, description, and tags that will help viewers find your video. You can also customize additional settings like privacy options, allowing or disabling comments, and monetization preferences.
Step 6: Choose an appropriate thumbnail
A thumbnail is a small image that represents your video. YouTube automatically generates some options, but you can also choose to upload a custom thumbnail. Select an image that is visually appealing and accurately represents the content of your video.
Step 7: Add tags and categorize your video
Tags play a crucial role in helping YouTube understand what your video is about and suggest it to relevant viewers. Use relevant keywords or phrases as tags to make your video more discoverable. Additionally, you’ll be asked to choose a category that best fits your video’s theme.
Step 8: Set video visibility and publish
Before publishing your video, you need to decide its visibility settings. You can make it public, private, or unlisted. Public videos can be searched and viewed by anyone, private videos are only accessible to you and selected users, while unlisted videos can only be accessed if someone has a direct link. Once you’ve made your selection, click on the “Publish” button to make your video live on YouTube.
Step 9: Manage and share your uploaded video
After uploading your video, you can manage it using the YouTube app. You can edit the video details, change the thumbnail, update the tags, or even delete the video if needed. Additionally, you can share your video on various social media platforms or embed it on your website to reach a wider audience.
Troubleshooting and Tips
Occasionally, you may encounter some issues while uploading videos on YouTube mobile. Here are some common troubleshooting tips:
- Ensure you have a stable internet connection to avoid interruptions during the upload process.
- Check the file format and size of your video. YouTube supports a variety of file formats, but it’s recommended to use MP4 for optimal compatibility.
- If your video is taking too long to upload, try compressing the file size using video editing software or apps.
- If you’re facing any technical difficulties, consider updating your YouTube app to the latest version or reinstalling it.
By following these steps and troubleshooting tips, you can successfully upload a video on YouTube using your mobile device. Happy uploading!
# Step 1: Open the YouTube app – How to locate and launch the YouTube app on your mobile device
Opening the YouTube app on your mobile device is the first step towards uploading a video to YouTube. Follow the steps below to locate and launch the YouTube app:
- Unlock your mobile device and go to the home screen.
- Look for the YouTube app icon among your installed apps. It usually has a red play button in the shape of a white triangle inside a red rectangle.
- If you can’t find the app on your home screen, swipe left or right to access your app library or app drawer. You might need to swipe multiple pages to find it.
- If you still can’t locate the YouTube app, you can use the search function on your device. On Android devices, swipe down from the top of the screen to reveal the search bar, and on iOS devices, swipe down from the middle of the home screen to access the search bar. Type “YouTube” in the search bar and look for the app in the search results.
- Once you find the YouTube app, tap on it to open it. The app will launch, and you will be directed to the YouTube home screen.
Now that you have successfully located and launched the YouTube app on your mobile device, you are ready to move on to the next step of uploading your video.
Step 2: Sign in to your YouTube account – Instructions on how to log in to your YouTube account from the mobile app
Signing in to your YouTube account is essential to access your personalized features and upload videos from the mobile app. Here’s how you can log in:
1. Open the YouTube app on your mobile device.
2. On the YouTube homepage, locate the sign-in button at the top-right corner of the screen. It typically appears as an icon of a person or a silhouette.
3. Tap on the sign-in button and enter your YouTube account credentials. This includes your email address or phone number associated with your account, and your password. If you have enabled two-factor authentication, you may need to provide the verification code as well.
4. Once you have entered your login information, tap the “Sign In” button to access your YouTube account.
5. If you have multiple Google accounts linked to your device, you may need to select the appropriate account associated with your YouTube channel.
6. After selecting the account, the YouTube app will verify your credentials and sign you in to your YouTube account.
It’s important to note that signing in to your YouTube account allows you to access your personalized recommendations, subscriptions, playlists, and other features. It also enables you to manage your channel, interact with your videos, and stay connected with your audience.
If you don’t have a YouTube account, you can create one by tapping on the “Sign Up” button on the login screen and following the instructions provided. Once you have created an account, you can use the same login process to access your account from the mobile app.
Now that you are signed in to your YouTube account, you can proceed with uploading your videos and sharing them with the world. Let’s move on to the next step!
# Step 3: Tap on the camera icon – How to locate and click on the camera icon to start the upload process
Uploading videos on YouTube using the mobile app is a convenient way to share your content with the world. To begin the upload process, you need to tap on the camera icon within the YouTube app. Here’s a step-by-step guide on how to locate and click on the camera icon:
1. Open the YouTube app on your mobile device. If you haven’t already installed the app, you can download it from the App Store (for iOS users) or the Google Play Store (for Android users).
2. Once the app is open, sign in to your YouTube account. You can either enter your login credentials or use the “Sign in with Google” option if you have a Google account.
3. Once signed in, you will be directed to the home screen of the YouTube app. Look for the camera icon, usually located at the top or bottom of the screen. It resembles a small video camera or a “+” sign inside a circle.
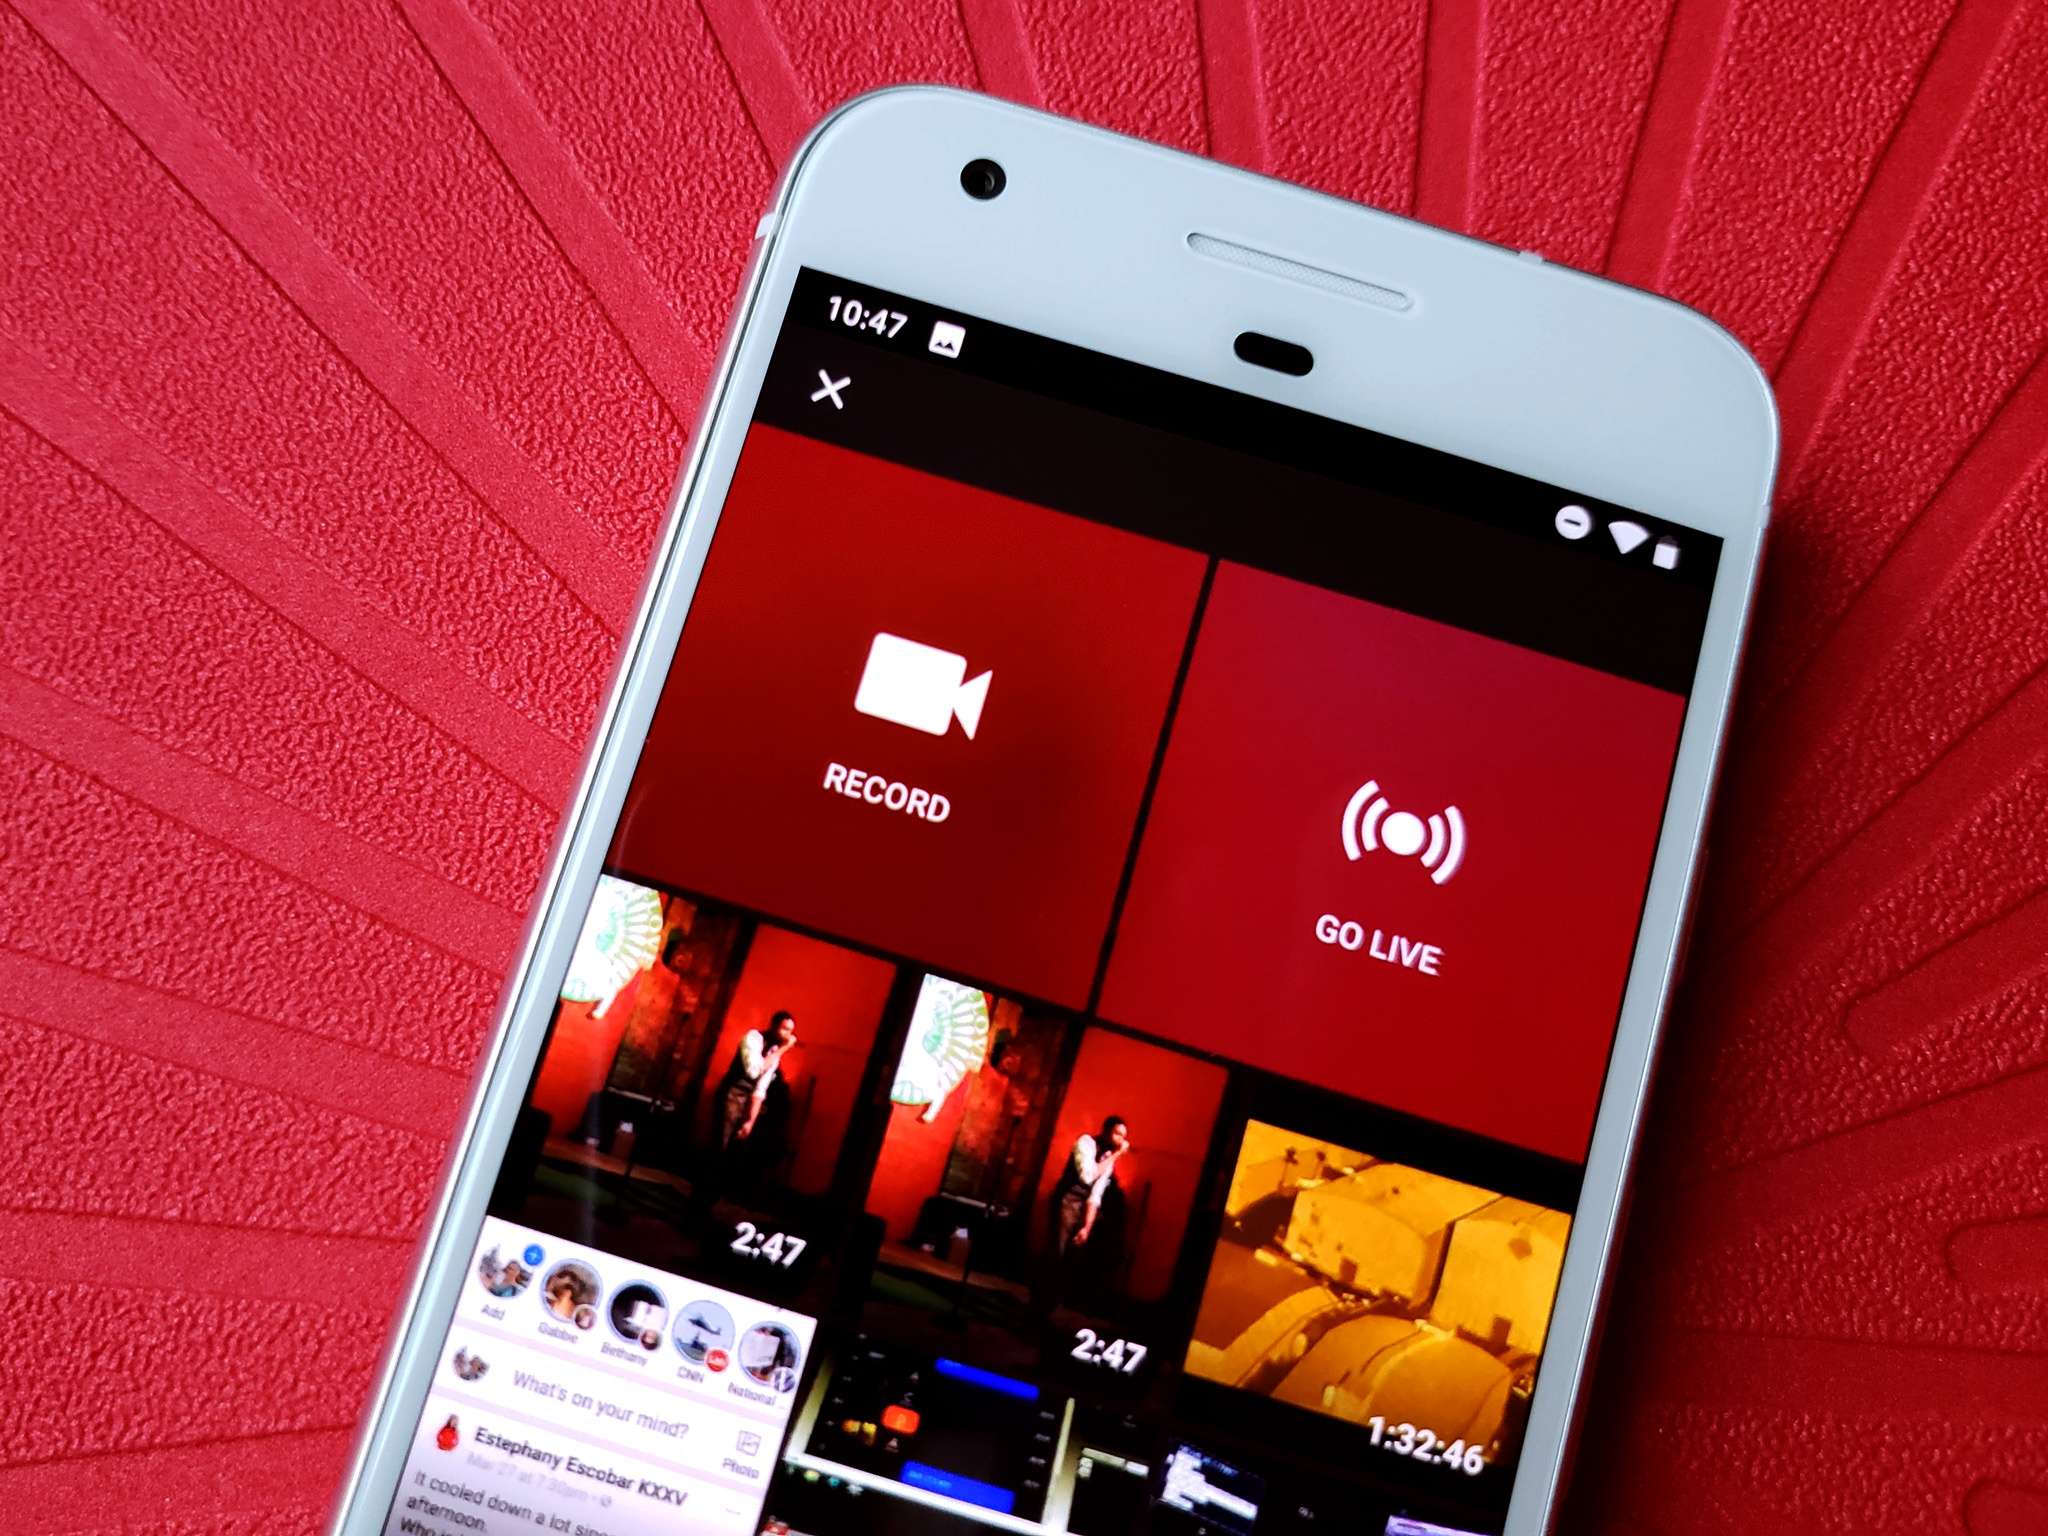
4. Tap on the camera icon to access the upload options. This will bring up a menu with various upload options such as recording a new video, selecting a video from your device’s gallery, or going live.
5. If you already have a video you want to upload, choose the “Select from Gallery” option. This will allow you to browse your mobile device’s library and select the desired video for upload. Alternatively, you can choose the “Record” option to capture a new video with your device’s camera.
6. After selecting the video, you will be prompted to add details and customize settings such as the video title, description, privacy settings, and more. Fill in the required fields and adjust the settings according to your preferences.
7. Once you have completed adding the necessary details, tap on the “Next” or “Upload” button, depending on the YouTube app version you are using. This will initiate the upload process, and you can monitor the progress through a progress bar or percentage indicator.
8. After the video is uploaded, you can add additional tags, choose a category, and set a thumbnail image for your video. These options can help improve the discoverability and visual appeal of your content.
9. Finally, click on the “Publish” button to make your video live on YouTube. Depending on your privacy settings, the video may be public and accessible to everyone, or it can be set to private or unlisted for specific viewers.
That’s it! You have successfully tapped on the camera icon and started the upload process on YouTube using your mobile app. Now you can share your videos with the YouTube community and potentially reach a wider audience.
# Step 4: Select the video you want to upload – Guidance on choosing the video file from your mobile device’s library
After launching the YouTube app and signing in to your account, the next step in uploading a video is selecting the video file you want to upload from your mobile device’s library. Here’s a step-by-step guide to help you through the process:
1. Tap on the camera icon: Once you have opened the YouTube app, you will see a camera icon at the top-right corner of the screen. Tap on it to proceed with the upload.
2. Access your device’s library: You will be presented with various options for uploading a video. To select an existing video from your mobile device’s library, tap on the “Library” option. This will take you to your device’s media files, where you can browse through your videos.
3. Locate the video you want to upload: Scroll through the list of videos until you find the one you wish to upload to YouTube. You can use the search bar or filter options to quickly find the desired video.
4. Tap on the video: Once you have identified the video you want to upload, simply tap on it to select it. You will see a checkmark or indicator confirming that the video has been chosen.
5. Preview and make adjustments: Before proceeding with the upload, you have the option to preview the selected video. This allows you to ensure that it is the correct file and make any necessary edits or adjustments to the video before uploading it to YouTube.
6. Confirm the selection: Once you are satisfied with the video you’ve chosen, tap on the “Next” button or a similar option to confirm your selection and move on to the next step of the upload process.
By following these steps, you can easily select the video you want to upload from your mobile device’s library and proceed with the upload process. Remember to choose a video that meets YouTube’s guidelines and policies to ensure a smooth uploading experience.
# Step 5: Add details and customize settings- How to provide a title, description, and other relevant information for your video- Explanation of additional settings, such as privacy and monetization options
Once you have selected the video you want to upload, it’s time to add important details and customize the settings for your video on the YouTube mobile app.
The first step is to provide a title for your video. This is the name that will appear to viewers when they search for or come across your content. Make sure to choose a catchy and descriptive title that accurately represents the content of your video.
Next, you will need to write a compelling description for your video. This is your opportunity to provide more information about what viewers can expect to see in the video. Use keywords and phrases that are relevant to your video’s content to help users find it when searching on YouTube.
In addition to the title and description, you can also add tags to your video. These are words or phrases that further describe the content and help YouTube categorize and recommend your video to relevant viewers. Choose tags that are specifically related to the content of your video.
As you proceed with adding details, you’ll come across additional settings. One crucial setting is privacy. You can choose whether your video should be public, private, or unlisted. Public videos can be searched for and viewed by anyone, private videos are only accessible to you, and unlisted videos can only be accessed via a direct link.
Monetization is another setting you can customize. If your channel is eligible for monetization, you can enable ads on your video to generate revenue. You can also choose to use YouTube’s content ID system to identify and manage any copyrighted content included in your video.
Furthermore, you can specify the category that best represents your video, such as music, gaming, or education. This helps YouTube better understand the context of your video and recommend it to users with similar interests.
Once you have provided all the necessary details and customized the settings according to your preferences, you are ready to publish your video on YouTube. Review all the information one last time to ensure accuracy, and then proceed to share your content with the world.
Remember that you can always go back and edit these details and settings after your video has been uploaded. This allows you to fine-tune or make changes to optimize the discoverability and reach of your video.
Now that your video is uploaded with all the relevant details and customized settings, you can move on to the next steps of managing and sharing your content on YouTube.
# Step 6: Choose an appropriate thumbnail – Instructions on selecting or creating a thumbnail image to represent your video
Choosing the right thumbnail for your YouTube video is crucial as it can significantly impact the click-through rate and the overall success of your video. A compelling thumbnail helps viewers understand the content of your video at a glance and entices them to click and watch.
Here are the instructions on how to select or create an appropriate thumbnail for your video:
- Review automatic thumbnail options: YouTube automatically generates three thumbnail options for your video. These options are usually snapshots taken at different intervals. Review these options and choose the one that best represents your video.
- Upload a custom thumbnail: If you want more control over the appearance of your thumbnail, you can upload a custom image. This allows you to choose an eye-catching and relevant image that will entice viewers to click. To upload a custom thumbnail, click on the “Upload thumbnail” option and browse for the image on your mobile device.
- Create a custom thumbnail: If you don’t have a suitable image for your video, you can create a custom thumbnail using image editing tools. There are numerous free or paid graphic design tools available that you can utilize to create an appealing and professional-looking thumbnail. Once you have designed your thumbnail, save it to your mobile device and follow the steps to upload it as a custom thumbnail.
- Ensure readability: When choosing or creating a thumbnail, make sure the text, if any, is clear and readable. Viewers should be able to understand what your video is about at a glance.
- Avoid click-bait thumbnails: It’s essential to strike a balance between creating an enticing thumbnail and not misleading viewers. Avoid using click-bait thumbnails that are unrelated to your video’s content, as this can lead to negative user experiences and engagement.
Selecting or creating the right thumbnail might take some trial and error. Experiment with different images and designs to see what works best for your video. Remember, a visually appealing and relevant thumbnail can greatly increase the chances of your video getting noticed and clicked by viewers.
# Step 7: Add tags and categorize your video – How to assign tags and choose a category that best describes your video
Tags and categorization play a crucial role in helping viewers discover and find your video on YouTube. By adding relevant tags and selecting an appropriate category, you can increase the visibility and reach of your video. Here’s how you can assign tags and choose a category that best describes your video:
1. Assigning Tags:
Tags are keywords or phrases that describe the content of your video. They help YouTube’s search algorithm understand what your video is about and match it to relevant search queries. To assign tags to your video when uploading:
- After entering the video details, scroll down to the “Tags” section.
- Think about the main topics or themes covered in your video.
- Add relevant tags that accurately represent the content. For example, if your video is about gardening tips, some suitable tags could be “gardening,” “garden maintenance,” and “plant care.”
- Separate each tag with a comma. You can add up to a maximum of 500 characters for tags.
- Ensure that the tags you choose are specific and reflect the most important aspects of your video.
2. Choosing a Category:
Selecting the right category for your video helps YouTube categorize and recommend it to relevant users. To choose a category:
- After entering the tags, scroll further down to the “Category” section.
- Click on the dropdown menu to see the available categories.
- Review the categories and select the one that best aligns with the subject matter of your video.
- Choose the most specific category whenever possible to ensure accurate categorization.
Remember, both tags and categories should be chosen with the aim of accurately representing your video’s content. Using relevant and specific tags and selecting the appropriate category will increase the chances of your video being discovered by users interested in your niche.
Additionally, it’s worth noting that you should avoid using misleading tags or selecting unrelated categories for your video. Such practices can lead to a poor user experience and may result in penalties from YouTube.
Take some time to brainstorm and research popular tags related to your video’s topic. By utilizing effective tags and selecting the right category, you can significantly improve the visibility and discoverability of your video on YouTube.
Step 8: Set video visibility and publish – Guidance on selecting the desired visibility settings for your video – Steps to publish your video on YouTube
Once you have entered all the necessary details and customized your video to your satisfaction, it’s time to determine the visibility settings for your video. YouTube provides various options to choose from, allowing you to control who can view your video. Follow these steps to set the visibility and publish your video on YouTube:
- Login to your YouTube account: Open the YouTube app on your mobile device and sign in to your YouTube account, if you haven’t already done so.
- Select your uploaded video: Locate the video you want to set the visibility for from the list of your uploaded videos. Tap on the video to open its settings.
- Tap on the “Visibility” option: Within the video settings, you will find the “Visibility” option. Tap on it to access the different visibility settings.
- Choose your visibility option: YouTube offers three main visibility options for your video:
- Public: Selecting the “Public” option will make your video accessible to anyone who visits your YouTube channel or comes across your video on YouTube’s search results. This is the default setting for most videos.
- Unlisted: If you choose the “Unlisted” option, only people who have the direct link to your video can view it. It won’t be listed on your channel or appear in YouTube’s search results.
- Private: The “Private” option restricts access to your video to only the people you invite. Users will need to have a Google account and be logged in to view the video.
- Select your preferred visibility: Choose the visibility option that best suits your needs by tapping on it.
- Tap on “Save” or “Publish”: After selecting the desired visibility, tap on the “Save” or “Publish” button to apply the changes and finalize the visibility settings for your video.
- Your video is now published: Congratulations! Your video is now published on YouTube with the chosen visibility settings. It will be accessible to viewers according to the visibility option you selected.
Keep in mind that you can always edit the visibility settings later if you change your mind or want to adjust who can view your video. Additionally, YouTube may take some time to process and make your video available to viewers, so be patient if you don’t see immediate results.
Now that you have successfully set the visibility and published your video on YouTube, you can share it with your friends, family, or the wider YouTube community to enjoy!
# Step 9: Manage and share your uploaded video – Overview of options to edit, share, or delete your video after it has been uploaded
Once you have successfully uploaded your video on YouTube using your mobile device, it’s essential to know how to manage and share your content effectively. YouTube provides a range of options to help you edit, share, or delete your uploaded videos. Let’s explore these options:
Edit your video:
After your video is uploaded, you may want to make some adjustments or improvements. YouTube offers a built-in video editor that allows you to trim, crop, add music, or apply filters to your video. To access the video editor, go to your Video Manager, select the video you want to edit, and click on the “Edit” button. From there, you can make the desired changes to enhance your video.
Share your video:
Sharing your video with others is a great way to increase its exposure and gain more views. YouTube makes it straightforward for you to share your videos on various platforms. Simply go to your Video Manager, select the video you want to share, and click on the “Share” button. You can choose to share the video through social media platforms such as Facebook, Twitter, or Instagram, or you can generate a unique link to share via email or other messaging apps.
Delete your video:
If you decide that you no longer want a video to be available on your YouTube channel, you have the option to delete it. To delete your video, go to your Video Manager, select the video you want to remove, and click on the “Delete” button. You will be prompted to confirm the deletion, and once confirmed, the video will be permanently removed from your channel.
Privacy settings:
YouTube allows you to control the privacy settings of your uploaded videos. You can choose whether your video is public, private, or unlisted. Public videos can be seen by anyone, private videos are only visible to you and the users you specifically select, and unlisted videos can be viewed by those with the proper link. To adjust your video’s privacy settings, go to your Video Manager, select the video, and click on the “Edit” button. From there, you can change the privacy settings to your preference.
Monetization options:
If you meet the eligibility requirements, you can monetize your videos on YouTube and earn revenue from ads. YouTube offers various monetization options, such as running ads on your videos or participating in the YouTube Partner Program. To explore and enable monetization options for your uploaded videos, go to your YouTube Studio, navigate to the “Monetization” section, and follow the instructions provided.
Managing and sharing your uploaded videos on YouTube mobile allows you to have complete control over your content. Whether you want to edit, share, or delete a video, YouTube offers a user-friendly interface to make these tasks simple and convenient. Take advantage of these options to optimize your video’s performance and engage with your audience effectively.
Troubleshooting and Tips
Uploading videos on YouTube through a mobile app can sometimes come with its own set of challenges. In this section, we will explore some common issues that users face and provide helpful tips to resolve them. Additionally, we will share some optimization tips to enhance your video upload experience on the YouTube mobile app.
Common issues with uploading videos on YouTube mobile and how to resolve them
1. Slow upload speeds: If you find that your video is taking an unusually long time to upload, check your internet connection. Make sure you have a strong and stable Wi-Fi or mobile data connection. You can also try closing other apps running in the background that might be consuming bandwidth.
2. Video format compatibility: YouTube supports various video formats, but if you encounter issues with uploading a specific format, consider converting your video to a more widely accepted format like MP4. There are numerous online video converters available that can help with this.
3. App crashes or freezing: If the YouTube app crashes or freezes while uploading a video, try restarting your device and relaunching the app. Also, ensure that you have the latest version of the YouTube app installed on your device.
4. Failed uploads: If your video fails to upload, double-check the file size. YouTube has limitations on the size of videos that can be uploaded, especially for users with a standard account. Trim the video or reduce its quality if necessary. If the issue persists, try uploading the video from a different device or using the desktop version of YouTube.
5. Upload error messages: If you receive an error message during the upload process, note down the specific error code or message. Visit the YouTube Help Center and search for the error message to find relevant troubleshooting steps or contact YouTube support for assistance.
Useful tips to optimize your video upload experience on the mobile app
1. Trim your videos: Before uploading, consider trimming unnecessary portions of your video to reduce its file size and enhance the viewer’s experience. Most mobile video editing apps allow you to do this easily.
2. Shoot videos horizontally: To ensure optimal playback on different devices, it’s best to shoot videos in landscape mode. This way, your video will fill the entire screen without any black bars on the sides.
3. Use appropriate video resolution: Balance the quality and file size of your video by choosing the appropriate resolution. Higher resolutions provide better clarity but result in larger file sizes. Consider your target audience and the capabilities of their devices when selecting the resolution.
4. Provide accurate metadata: Fill in the video title, description, and tags accurately to help users discover your content. Use relevant keywords related to your video to improve its visibility in search results.
5. Engage with your audience: Once your video is uploaded, make an effort to respond to comments and engage with your viewers. Building a rapport with your audience can help you grow your channel and encourage viewers to keep coming back for more.
By following these tips and troubleshooting steps, you can overcome common uploading issues and optimize your video upload experience on the YouTube mobile app. Happy uploading!
Conclusion
In conclusion, uploading a video on YouTube using your mobile phone is a simple and convenient process that allows you to share your content with the world. With the YouTube mobile app, you can effortlessly capture, edit, and upload videos directly from your device, without the need for a computer. By following the steps outlined in this article, you can ensure a seamless and successful upload experience.
Remember to optimize your video title, description, and tags to improve its discoverability on YouTube. Additionally, take advantage of the different privacy settings and video thumbnail options available to customize your video’s visibility and appearance. With these tools at your disposal, you can create engaging and shareable content that captivates your audience.
So why wait? Start uploading your videos on YouTube using your mobile phone today and join the ever-growing community of content creators and viewers worldwide. Happy uploading!
FAQs
1. How do I upload a video on YouTube using my mobile phone?
To upload a video on YouTube using your mobile phone, follow these steps:
- Open the YouTube app on your mobile device.
- Sign in to your YouTube account, or create one if you don’t have it.
- Tap on the “Camera” icon, typically located at the top-right corner of the screen.
- Select the video you want to upload from your device’s gallery.
- Add a title, description, and tags for your video. This helps users find your content easily.
- Choose the privacy settings for your video – public, unlisted, or private.
- If desired, apply any additional editing options provided by the app.
- Tap the “Upload” button to start the upload process. The time it takes to upload will depend on the size of the video and your internet connection speed.
- Once the upload is complete, you can add any final touches, such as adding a thumbnail or annotations, before making it public.
2. Are there any restrictions on the length or size of the video I can upload using my mobile?
Yes, there are certain restrictions on the length and size of the video you can upload using your mobile. The maximum file size for a video upload on YouTube is 128 GB or 12 hours, whichever is less. However, depending on your device’s capabilities, you may encounter practical limitations, such as available storage space or battery life, which could impact the length and size of the video you can upload.
3. Can I upload videos in different resolutions using my mobile?
Yes, you can upload videos in different resolutions using your mobile device. YouTube supports a wide range of resolutions, including SD (480p), HD (720p, 1080p), and 4K (2160p). The resolution options available may vary depending on your device’s capabilities and the quality of the video you are uploading. It’s always recommended to upload videos in the highest resolution available to ensure the best viewing experience for your audience.
4. Can I edit my video after uploading it on YouTube using my mobile?
Yes, you can edit your video after uploading it on YouTube using your mobile device. YouTube provides basic editing tools that allow you to trim, add music, and apply filters to your video. To access these editing options, go to your video’s page on the YouTube app, tap on the “Edit” button, and make the desired changes. Keep in mind that any modifications made to your video may affect its views, comments, and other engagement metrics.
5. Can I upload videos on YouTube using my mobile without an internet connection?
No, you cannot upload videos on YouTube using your mobile without an internet connection. An active internet connection is required to upload videos to YouTube. However, if you have limited or unstable internet connectivity, you can use offline upload feature offered by the YouTube app. This feature allows you to select videos from your device’s gallery and queue them for uploading once you regain internet access.