
Want to share a video with the world but not sure how to do it from your phone? You’ve come to the right place! With the rise of mobile technology, uploading videos to YouTube from your phone has become more accessible and convenient than ever before. Whether you have a funny cat video, a vlog you want to share, or a tutorial you’ve created, this article will guide you through the step-by-step process of uploading a video to YouTube right from your phone. Don’t worry if you’re not tech-savvy, we’ll break it down in simple terms so that you can confidently showcase your videos to a global audience. So, grab your phone and let’s get started on the exciting journey of sharing your videos with the world!
Inside This Article
- Overview
- Step 1: Download and Install the YouTube App
- Step 2: Sign in to Your YouTube Account
- Step 3: Tap on the Camera Icon
- Step 4: Select the Video from Your Phone’s Gallery
- Step 5: Make the Desired Edits to Your Video
- Step 6: Add a Title, Description, and Tags to Your Video
- Step 7: Choose Privacy Settings for Your Video
- Step 8: Select the Appropriate Category for Your Video
- Step 9: Tap on the Upload Button
- Step 10: Monitor the Upload Progress
- Step 11: Share Your Uploaded Video
- Step 12: Manage and Customize Your Video Settings
- Conclusion
- FAQs
Overview
Uploading a video to YouTube directly from your phone is a convenient way to share your content with friends, family, and the wider online community. With the YouTube app installed on your mobile device, you can quickly and easily upload videos on the go.
In this article, we will guide you through the step-by-step process of uploading a video to YouTube from your phone. Whether you want to share a fun vacation video or showcase your creative talents, this guide will help you get your video online and ready to be seen by the world.
Before diving into the specific steps, it’s important to note that the process may vary slightly depending on the type of phone you have and the version of the YouTube app you’re using. However, the core steps outlined here should be applicable to most smartphones.
So, let’s get started and learn how to share your videos with the world using your phone and the YouTube app!
Step 1: Download and Install the YouTube App
Before you can upload a video to YouTube from your phone, you’ll need to have the YouTube app installed on your device. The YouTube app is available for both iOS and Android platforms, and you can easily find it in the respective app stores.
To download and install the YouTube app, follow these simple steps:
1. Open the App Store (for iOS) or Google Play Store (for Android) on your phone.
2. In the search bar, type “YouTube” and tap on the search icon.
3. Look for the official YouTube app icon, which is a red play button inside a white square.
4. Tap on the app icon to open its description page.
5. Click on the “Install” or “Get” button, depending on your device.
Once you’ve initiated the installation process, your phone will start downloading the YouTube app. The time it takes to download and install the app will depend on your internet connection speed.
Once the installation is complete, you’ll find the YouTube app on your device’s home screen or in the app drawer. Now you’re ready to move on to the next step and sign in to your YouTube account.
Step 2: Sign in to Your YouTube Account
Now that you have downloaded and installed the YouTube app on your phone, the next step is to sign in to your YouTube account. Signing in is important as it allows you to access your personal space, upload videos, and engage with your subscribed channels.
To sign in, open the YouTube app on your phone and locate the sign-in option. On most devices, you will find it in the top-right corner of the screen, represented by a silhouette icon. Tap on this icon to proceed.
If you already have a Google account, you can use those credentials to sign in. Simply enter your email address or phone number associated with your Google account, followed by your password. Tap on the “Next” button to continue.
If you do not have a Google account, you will need to create one. Tap on the “Create account” option and follow the prompts to set up your Google account. Once you have created your account, return to the YouTube app and sign in using the newly created credentials.
After entering your email address and password, tap on the “Next” button. If the entered information is correct, you will be signed in to your YouTube account. You may also be prompted to allow access to your account and grant permissions for the app to sync with your YouTube activity. Make sure to grant these permissions for a seamless experience.
Signing in to your YouTube account is essential to upload videos, view your subscribed channels, and connect with the YouTube community. Make sure you sign in every time you use the YouTube app on your phone to fully benefit from all its features.
Step 3: Tap on the Camera Icon
Once you have successfully signed in to your YouTube account, the next step is to tap on the camera icon. This icon is usually located in the center or bottom of the screen, depending on the version of the YouTube app you have installed on your phone.
By tapping on the camera icon, you are initiating the process of uploading a video from your phone to your YouTube channel. This icon represents the option to create and upload content directly from your device.
When you tap on the camera icon, a menu will appear with various options related to creating and uploading videos. These options may include recording a video using your phone’s camera, uploading an existing video file, or going live on YouTube.
For the purpose of uploading a video from your phone, select the option that allows you to upload an existing video file. This will open your phone’s gallery, enabling you to choose the video you want to upload onto YouTube.
It’s important to note that the exact layout and options within the YouTube app may vary depending on your device and the version of the app you have installed. However, the general process of tapping on the camera icon and selecting the upload option should remain consistent.
Step 4: Select the Video from Your Phone’s Gallery
Once you have launched the YouTube app and signed in to your account, it’s time to select the video you want to upload. Follow these steps to easily access and select a video from your phone’s gallery:
- Tap on the camera icon: On the YouTube app’s main screen, you’ll find a camera icon at the top right corner. Tap on it to proceed.
- Select the video option: From the menu that appears, choose the “Video” option. This will open up your phone’s gallery, displaying all the videos available.
- Browse through your videos: Scroll through your gallery to browse the available videos. You can use the scroll bar or swipe up and down to navigate through the list.
- Select the desired video: Once you find the video you want to upload, tap on it to select it. You’ll notice a checkmark or a highlight indicating that the video has been selected.
- Confirm your selection: After selecting the video, you can preview it to make sure it’s the correct one. If you’re satisfied, tap on the “Next” or “Confirm” button to proceed.
Keep in mind that the available options and interface may vary slightly depending on the device and operating system you’re using. However, the general process remains the same.
Now that you have successfully selected the video from your phone’s gallery, you’re ready to move on to the next step and make any necessary edits to your video before uploading it to YouTube.
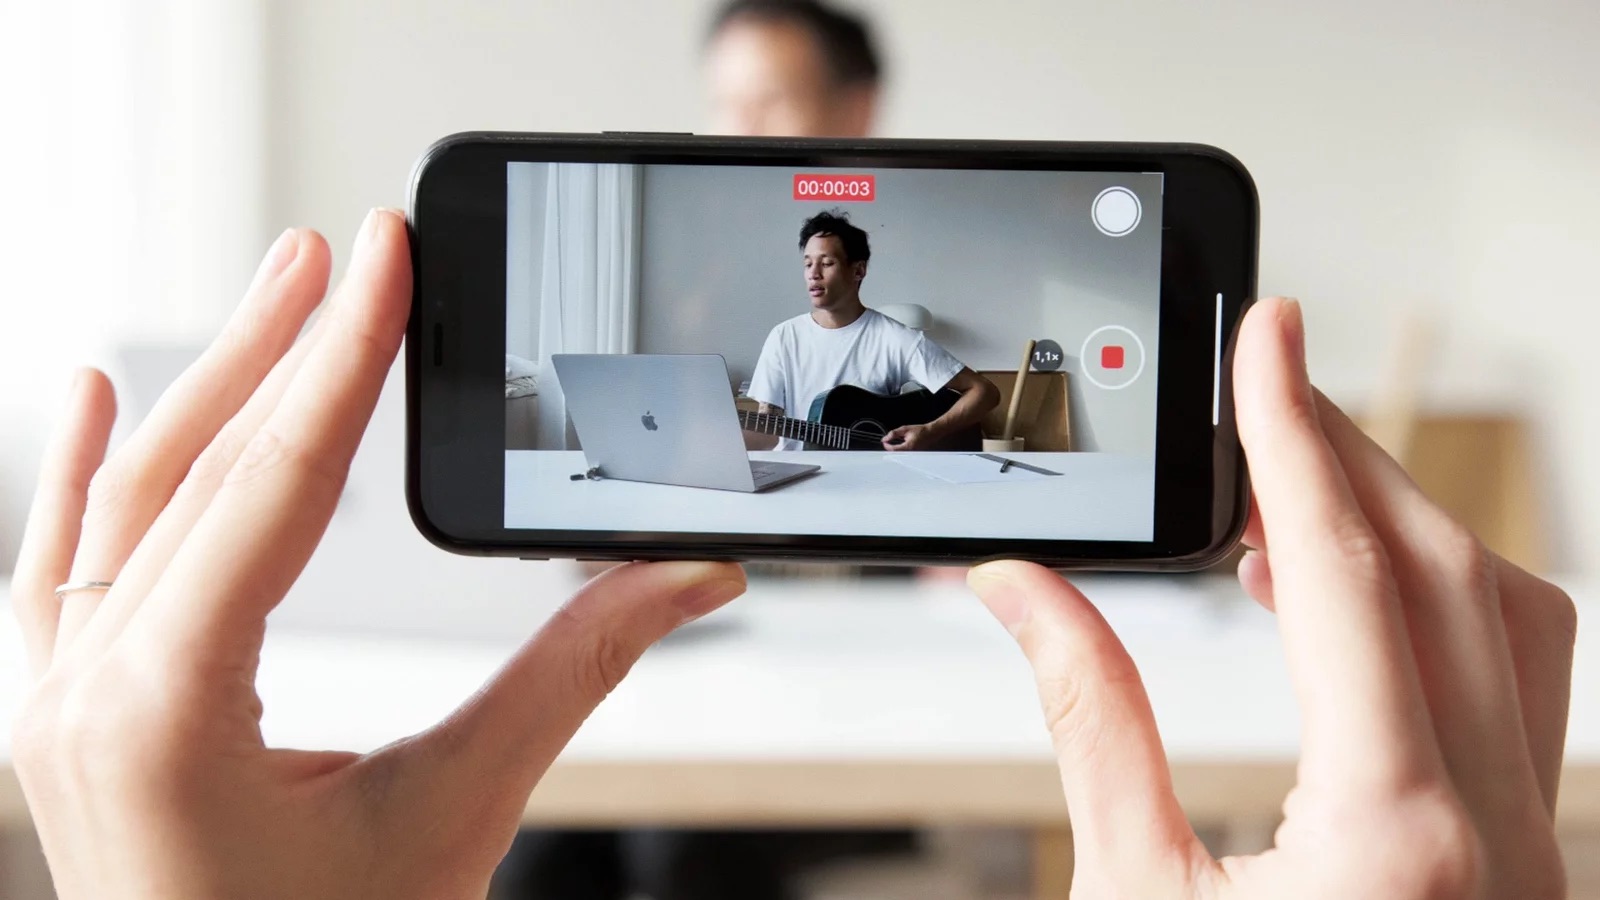
Step 5: Make the Desired Edits to Your Video
Now that you have selected the video you want to upload to YouTube, it’s time to make any necessary edits to enhance its quality or add a personal touch. The YouTube app provides various editing features that allow you to trim, crop, apply filters, and add music or text to your videos.
To begin editing your video, open the YouTube app and navigate to the video you have selected. Tap on the “Edit” button, which will open up a range of editing options for you to choose from.
One of the most common editing features is trimming, which allows you to remove any unwanted sections from your video. Simply drag the handles on the timeline to select the portion you want to keep and tap on “Trim” to save the changes.
If you want to adjust the video’s orientation or remove any black bars, use the cropping feature. You can manually adjust the frame or select a preset aspect ratio to fit your desired format.
Additionally, you can apply filters to give your video a specific look or mood. Experiment with different filters until you find the one that best suits your content.
If you want to add a personal touch or emphasize certain moments in your video, consider adding text or captions. YouTube offers a range of font styles, sizes, and colors to choose from, allowing you to customize the appearance of your text.
Moreover, you can enhance the audio experience by adding background music to your video. Choose from the library of royalty-free tracks provided by YouTube or import your own music to add a unique touch.
Once you are satisfied with the edits you have made to your video, tap on “Save” or “Done” to apply the changes. The edited version of your video will now be ready for upload to YouTube.
Remember, editing is an essential step to ensure that your video stands out and captures the attention of viewers. Take your time and make the necessary adjustments to present your content in the best possible way.
Step 6: Add a Title, Description, and Tags to Your Video
After selecting the video you want to upload, it’s time to give it a compelling title, write a descriptive description, and add relevant tags. These elements play a crucial role in helping users discover and understand your video. Here’s how you can add a title, description, and tags to your YouTube video from your phone:
1. Start by tapping on the video you selected in the previous step. This will open up the video details page.
2. Look for the “Title” field, which is usually located at the top of the page. Tap on it to enter a catchy and concise title for your video. Make sure the title accurately represents the content of your video and includes relevant keywords.
3. Move on to the “Description” field. Tap on it and start writing a detailed description of your video. This is your opportunity to provide viewers with more information about what they can expect from your video. Be creative, informative, and engaging while incorporating relevant keywords to improve visibility.
4. Next, it’s time to add tags. Tags are keywords or phrases that are directly related to your video’s content. They help YouTube understand what your video is about and improve its discoverability. Tap on the “Tags” field and enter relevant keywords that accurately describe your video. You can separate tags with commas for better organization.
5. As you write the title, description, and tags, keep in mind the SEO optimization aspect. Use keywords naturally and avoid keyword stuffing. Aim to provide valuable information to users while making your content search-engine friendly.
6. Once you have added the title, description, and tags, preview them to ensure they look and read well. Make any necessary edits or adjustments before proceeding.
7. Congratulations! You have successfully added a title, description, and tags to your video. These elements will play a significant role in helping users discover and engage with your content.
Remember, the title, description, and tags should accurately represent your video’s content and appeal to your target audience. Invest time in crafting captivating titles and informative descriptions to attract viewers’ attention and increase your video’s visibility in search results.
Step 7: Choose Privacy Settings for Your Video
Once you’ve selected and edited your video, it’s essential to consider the privacy settings before uploading it to YouTube from your phone. Privacy settings determine who can view and interact with your video. Here are the available options:
Public: Selecting the “Public” option allows anyone on YouTube to view your video. It may also appear in searches and recommendations. Keep in mind that once you publish your video as public, it will be accessible to a wide audience.
Unlisted: Choosing the “Unlisted” option means your video won’t appear in search results or on your YouTube channel. However, anyone with the video link can view it. This is useful when you want to share the video with a specific audience without making it public.
Private: If you select the “Private” option, only specific YouTube accounts that you’ve invited can watch the video. This provides a higher level of privacy and is ideal when you want to limit the viewership to a select few.
Scheduled: This feature allows you to choose a specific date and time for your video to go live. Until the scheduled time, the video will remain private. This is handy when you want to plan the release of your video ahead of time.
Consider the nature of your video and the intended audience when deciding on the privacy settings. It’s crucial to ensure that the settings align with your objectives and preferences.
Once you have selected the desired privacy setting, you can proceed to the next step of categorizing your video to make it easier for viewers to discover and enjoy.
Step 8: Select the Appropriate Category for Your Video
Choosing the right category for your video on YouTube is crucial for ensuring that your content reaches the right audience. The category you select helps YouTube understand the context of your video and recommend it to users who have shown interest in similar content.
To select the appropriate category for your video, follow these simple steps:
- After adding a title, description, and tags to your video, you’ll find the “Category” option below the description box.
- Click on the drop-down menu to view the available categories.
- YouTube offers a wide range of categories, including Entertainment, Music, Travel, Gaming, Education, and many more.
- Choose the category that best describes the content of your video. Consider the main theme or topic, and select the category that aligns with it.
- If you are unsure about which category to choose, you can search for similar videos on YouTube to see which category they have been placed in.
- Remember, categorizing your video correctly is essential for visibility and discoverability. It ensures that your content appears in relevant search results and gets recommended to users interested in similar content.
By selecting the appropriate category for your video, you increase the chances of reaching your target audience and gaining more views and engagement. It helps YouTube’s algorithm understand your content better and deliver it to the right viewers at the right time.
Take your time to analyze your video’s content and choose the most relevant category. Don’t rush through this step, as it plays a vital role in the performance and discoverability of your video on YouTube.
Step 9: Tap on the Upload Button
Once you have finished adding the necessary information and making any desired edits to your video, it’s time to finally upload it to YouTube. This is done by tapping on the upload button, which will initiate the process of transferring your video from your phone to the YouTube platform.
After tapping on the upload button, you may be prompted to allow YouTube to access your phone’s storage. This is necessary to access the video file and upload it successfully. Simply grant the necessary permissions to proceed with the upload.
Once the upload process begins, you will see a progress bar indicating the status of the upload. Depending on the size of the video file and your internet connection speed, this process may take a few moments to complete. It’s important to ensure that you have a stable internet connection during this time to avoid interruptions.
While the upload is in progress, it’s best to refrain from closing the YouTube app or switching to other apps to ensure a smooth and uninterrupted upload. You can monitor the progress of the upload by keeping an eye on the progress bar.
Once the upload is complete, you will receive a notification confirming the successful upload of your video. At this point, you can proceed to the next steps or choose to share your video directly from the notification.
Remember, uploading a video to YouTube from your phone may consume a significant amount of data, especially if you are uploading large video files. It’s advisable to connect to a stable Wi-Fi network whenever possible to avoid exceeding your mobile data limits.
Now that you have successfully uploaded your video, it’s time to move on to the next steps, including managing and customizing your video settings, optimizing your video for search visibility, and sharing your video with others.
Step 10: Monitor the Upload Progress
Once you have tapped on the upload button, you will be directed to a screen where you can monitor the progress of your video upload. It is essential to keep an eye on this screen to ensure that your video is successfully being uploaded to YouTube from your phone.
During the upload process, you will see a progress bar that indicates how much of the video has been uploaded. This bar will fill up as the upload progresses, giving you a visual representation of the process. In addition, you will also see the estimated remaining time for the upload to complete.
While the video is being uploaded, it is important to remain patient and avoid any interruptions that may disrupt the process. It is recommended to have a stable internet connection throughout the upload to ensure a smooth and uninterrupted uploading experience.
If, for any reason, the upload process gets interrupted or fails, you can retry the upload by tapping on the “Retry” button. This will initiate the upload process again and resume from where it left off.
Once the upload is complete, you will receive a notification confirming the successful upload of your video. At this point, you can proceed to the next step of sharing your uploaded video with your desired audience.
Step 11: Share Your Uploaded Video
Once your video has been successfully uploaded to YouTube, it’s time to share it with the world! Sharing your video will allow others to view, like, comment, and subscribe to your channel. Here are a few ways to share your uploaded video:
1. Share on Social Media: One of the most effective ways to promote your video is by sharing it on social media platforms like Facebook, Twitter, Instagram, and LinkedIn. You can either directly post the video link or use the sharing options provided by the YouTube app.
2. Embed on Websites or Blogs: If you have a website or a blog, you can embed your YouTube video within your content. This not only increases your video’s exposure but also enhances the engagement on your website.
3. Send the Video Link: You can share your video by sending the direct video link to your contacts, friends, or family through messaging apps, emails, or even SMS. Personalized messages accompanying the link can help create a sense of curiosity and increase the chances of getting more views.
4. Collaborate with Others: Collaborating with other YouTubers or content creators in your niche can be a great way to expand your audience. You can collaborate by featuring each other’s videos, mentioning each other in the video description, or even creating a joint video project.
5. Utilize YouTube’s Sharing Features: YouTube provides built-in sharing options that allow you to share your video directly from the YouTube app. You can share the video on various platforms, such as WhatsApp, Telegram, or even in YouTube’s community tab.
6. Optimize Video Title and Description: To attract more viewers, make sure your video’s title and description are engaging and optimized with relevant keywords. This will help your video rank higher in search results and attract organic traffic.
7. Promote within YouTube Communities: Joining relevant YouTube communities and actively participating in discussions can help you gain visibility within your niche. By providing valuable insights and sharing your video within these communities, you can drive targeted traffic to your video.
8. Engage with Your Audience: Once your video is shared, make sure to respond to comments, engage with your viewers, and encourage them to like, subscribe, and share your video. Building a strong and active community around your channel will help increase the visibility of your videos.
Remember: Sharing your video is crucial for gaining exposure and increasing views. Don’t be afraid to be creative and think outside the box when it comes to promoting your content. Experiment with different strategies and analyze the results to refine your approach.
Step 12: Manage and Customize Your Video Settings
Once you have successfully uploaded a video to YouTube from your phone, you’ll have the option to manage and customize various settings for your video. These settings allow you to enhance the visibility, accessibility, and overall experience for your viewers. Here are some important aspects to consider when managing and customizing your video settings:
1. Thumbnail: YouTube automatically generates a thumbnail for your video, but you can also choose a custom thumbnail. A compelling and eye-catching thumbnail can significantly increase the click-through rate and attract more viewers.
2. Tags: Tags are keywords that help YouTube understand the content of your video. Include relevant tags that accurately describe your video to improve its discoverability in search results.
3. Description: The video description allows you to provide additional information, context, and links related to your video. Use relevant keywords in your description to optimize it for search engines.
4. Closed Captions: Adding closed captions to your videos makes them more accessible to a wider audience, including those who are hearing impaired or non-native speakers. YouTube offers automatic captioning, but it’s recommended to review and edit them for accuracy.
5. End Screens and Annotations: End screens and annotations are interactive elements that appear towards the end of your video. They can be used to promote other videos, playlists, or encourage viewers to subscribe to your channel.
6. Cards: Cards are small, interactive elements that you can add to your video to engage viewers and promote your content. They can be used to direct viewers to related videos, merchandise, crowdfunding campaigns, or external websites.
7. Privacy Settings: YouTube allows you to choose the privacy settings for your video, such as public, unlisted, or private. Public videos are visible to anyone, unlisted videos can be accessed by anyone with the link, and private videos can only be seen by people you explicitly invite.
8. Monetization: If you meet YouTube’s monetization requirements, you can enable ads on your videos and earn revenue from them. Additionally, you can explore other monetization options like sponsorships, merchandise shelf, and channel memberships.
9. Analytics: YouTube provides detailed analytics for your videos, allowing you to track metrics such as views, watch time, engagement, and audience demographics. Use these insights to make data-driven decisions and optimize your content strategy.
By managing and customizing these video settings, you can take full advantage of YouTube’s features and tools to maximize the reach and impact of your videos. Experiment with different settings and strategies, and keep an eye on your analytics to continuously improve your video content.
Conclusion
Uploading a video to YouTube from your phone is a simple and convenient process that allows you to share your moments, ideas, and creativity with the world. With the advancements in mobile technology, it has become easier than ever to capture and share high-quality videos directly from your phone.
By following the steps outlined in this article, you can effortlessly upload your videos to YouTube in just a few taps. Make sure to optimize your video’s title, description, and tags to increase its visibility and reach. Remember to consider privacy settings and copyright issues before uploading any content.
Whether you’re an aspiring content creator, a social media enthusiast, or someone looking to share memorable moments with loved ones, uploading videos to YouTube from your phone opens up a world of possibilities. So grab your phone, unleash your creativity, and start sharing your videos with the world!
FAQs
Q: Can I upload a video to YouTube directly from my phone?
A: Yes, you can upload a video to YouTube directly from your phone. YouTube has a mobile app that allows you to upload videos directly from your phone’s camera roll or capture a new video and upload it instantly.
Q: Is there a file size limit for uploading videos to YouTube from a phone?
A: Yes, there is a file size limit for uploading videos to YouTube from a phone. Currently, the maximum file size allowed is 128GB or 12 hours, whichever comes first. However, keep in mind that larger file sizes may take longer to upload depending on your internet connection.
Q: What are the recommended video formats for uploading to YouTube from a phone?
A: YouTube supports a wide range of video formats, but it is recommended to upload videos in MP4 or MOV format for optimal compatibility. These formats provide a good balance between file size and video quality.
Q: How can I edit my video before uploading it to YouTube from my phone?
A: There are several video editing apps available for both iOS and Android devices. You can use these apps to trim, add effects, adjust brightness and contrast, and make other edits to your video before uploading it to YouTube. Some popular video editing apps for mobile phones include iMovie, Adobe Premiere Rush, and FilmoraGo.
Q: Do I need a YouTube account to upload videos from my phone?
A: Yes, you need a YouTube account in order to upload videos from your phone. If you don’t already have an account, you can create one for free by visiting the YouTube website or downloading the YouTube app and following the sign-up process.