
Welcome to our comprehensive guide on how to upload a YouTube video directly from your phone! In this tech-savvy world, mobile phones have become the go-to device for capturing and sharing precious moments with friends, family, or even a wider audience. YouTube, being the largest video-sharing platform, offers the perfect opportunity to showcase your creativity and connect with viewers worldwide.
Whether you’re a budding content creator, a vlogger, or simply want to share memorable experiences, knowing how to upload a YouTube video from your phone can make the process quick and hassle-free. In this article, we’ll walk you through the step-by-step process, highlighting the different methods that you can use to upload your videos with ease. So grab your phone, get ready to unleash your inner filmmaker, and let’s dive into the world of mobile video uploading on YouTube!
Inside This Article
- Step 1: Sign in to Your YouTube Account
- Step 2: Tap the Upload Icon
- Step 3: Select the Video to Upload
- Step 4: Add Video Details and Settings
- Step 5: Start the Upload
- Step 6: Edit Video Information (Optional)- Edit video details: If needed, you can edit the video title, description, or other settings after the upload is completed.
- Step 7: Publish your Video – Publish the video: Once you’re satisfied with the video details, choose the “Publish” or “Finish” option to make your video live on YouTube.
- Step 8: Share your Video – Share your uploaded video: Utilize the share feature to distribute your video through various platforms or social media channels.
- Step 9: Manage and Track your Uploaded Videos- Access the YouTube Studio: Use the YouTube Studio app or web interface to manage, track, and analyze the performance of your uploaded videos.
- Conclusion
- FAQs
Step 1: Sign in to Your YouTube Account
Before you can start uploading a YouTube video on your phone, you’ll need to sign in to your YouTube account. Follow these simple steps to access your account:
- Opening the YouTube app: Launch the YouTube app on your phone. You can usually find the app on your home screen or in the app drawer.
- Sign in: Once you have the YouTube app open, look for the sign-in option. It is typically located in the top right corner of the screen. Tap on it to proceed.
- Enter your YouTube account credentials: You will now be prompted to enter your YouTube account credentials. This includes your email address or username and your password. Type in your information carefully to ensure accuracy.
Once you have entered your account credentials, tap on the “Sign In” button to access your YouTube account. If you have successfully signed in, you will now have access to all the features and functionalities of your YouTube account.
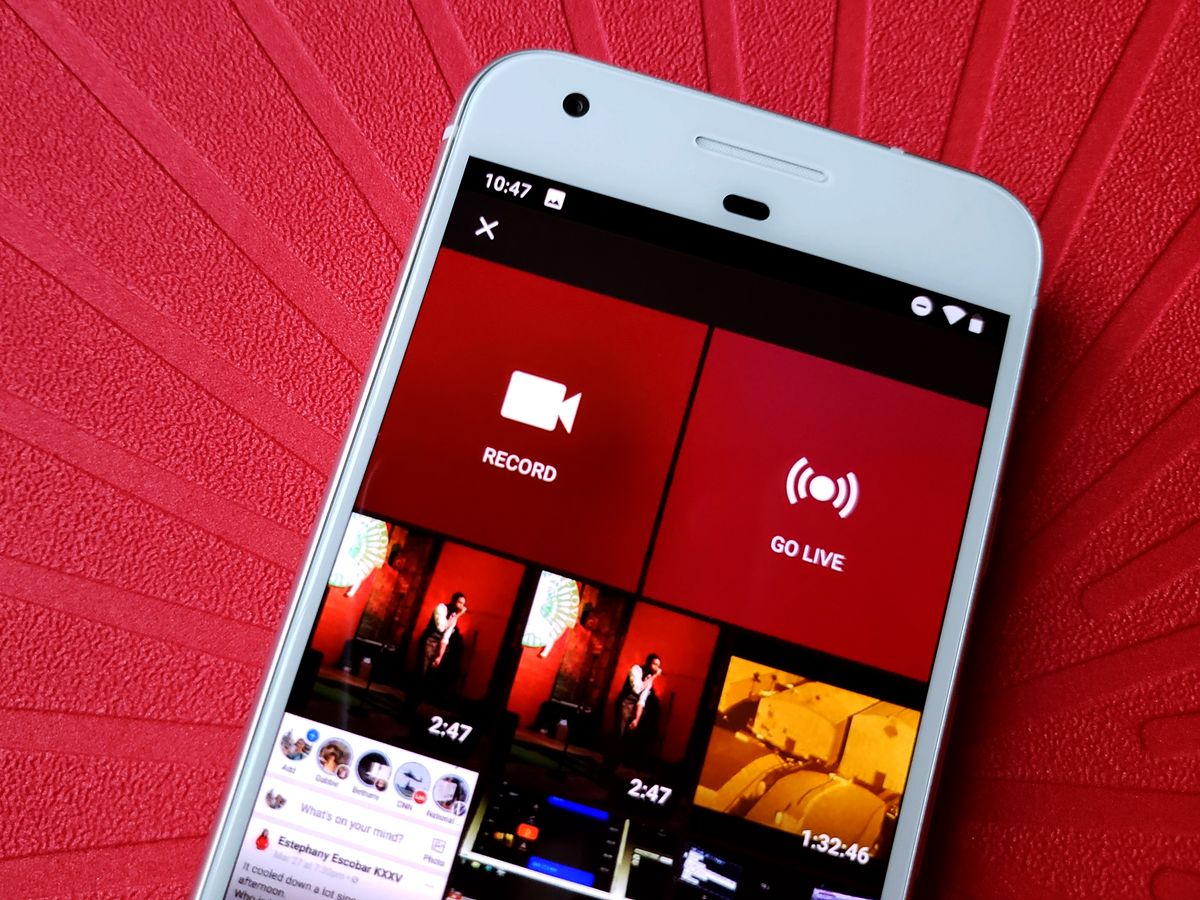
Step 2: Tap the Upload Icon
Locate the upload icon: When you open the YouTube app on your phone, you’ll need to look for the upload icon. This icon is usually represented by a video camera or a plus sign, and it is a key part of starting the video uploading process.
Tap the upload icon: Once you’ve found the upload icon, simply tap on it to select it. This action will trigger the video uploading process to begin. It’s important to note that the specific placement of the upload icon may vary slightly depending on the version of the YouTube app you are using, but it is typically located prominently at the top or bottom of the screen.
By tapping the upload icon, you are initiating the process of selecting and uploading your video. This step paves the way for the next stages, where you’ll choose the video you want to upload and fine-tune its details before making it live on YouTube.
Step 3: Select the Video to Upload
Browsing through your phone’s gallery is the crucial step to select the video you want to upload on YouTube. Here’s how you can do it:
Browse your phone’s gallery: Launch your phone’s gallery app and navigate through your folders to locate the video you wish to upload. You can typically find the gallery app on your home screen or within the app drawer.
Select the video: Once you’ve found the desired video, tap on it to select it for uploading. You may see a checkmark or a border around the selected video to indicate your choice. If you want to select multiple videos for upload, simply tap on each one you want to include.
It’s essential to choose a video that meets YouTube’s community guidelines and content policies. Ensuring that your video follows these guidelines will prevent any potential issues and ensure a seamless uploading process.
Step 4: Add Video Details and Settings
Once you have selected the video you want to upload, it’s time to add important details and customize the settings for your video. This step is crucial as it helps viewers understand what your video is about and allows you to control the visibility and interactivity of your video.
Entering video details is the first aspect of this step. You will need to provide a title, description, and relevant tags for your video. The title should be concise yet catchy, capturing the essence of your video. The description allows you to elaborate on the content, providing additional information or context. Lastly, adding relevant tags will help users discover your video based on specific keywords.
Next, you need to decide on the privacy settings for your video. YouTube offers three options: public, unlisted, and private. If you want your video to be visible to everyone, choose the public setting. This makes your video accessible by anyone who searches for it or visits your YouTube channel. If you prefer a more limited audience, select the unlisted setting. This allows people with the video link to view it, but it will not appear in search results or on your channel. Finally, if you want to restrict access to your video, choose the private setting. Only users you specifically invite will be able to watch it.
In addition to privacy settings, there are various other adjustments you can make. One key setting allows you to disable or enable comments on your video. If you want to encourage engagement and discussion, leaving comments enabled is valuable. However, if you prefer to limit interactions or avoid potential spam, you can disable comments. Additionally, you can specify the location associated with your video. This can be useful for videos related to specific places or events. Lastly, you can adjust the visibility of your video to ensure it is easily found in YouTube search results or recommended to viewers.
Take the time to carefully input the video details and customize the settings according to your preferences. These elements play a crucial role in attracting and engaging viewers, as well as determining the visibility and accessibility of your video.
Step 5: Start the Upload
Once you have selected the video you want to upload, it’s time to start the upload process. This is where your video will be transferred from your phone to the YouTube servers. To get started, simply tap the “Upload” or “Start Upload” button, depending on the interface of the YouTube app you are using.
After initiating the upload, you’ll need to be patient and wait for the process to complete. During this time, you will see an upload progress bar that indicates the status of your video upload. The progress bar will show you how much of the video has been uploaded, as well as the estimated time remaining for the upload to finish.
It’s important to note that the upload time can vary depending on factors such as the length and size of your video, as well as the speed of your internet connection. Larger files or slower internet speeds may result in a longer upload time, so it’s best to ensure you have a stable and fast internet connection before starting the upload process.
While waiting for the upload to complete, it’s a good idea to refrain from closing the YouTube app or switching to other apps, as this may interrupt the upload process. Instead, let the upload continue in the background while avoiding any actions that could potentially affect it.
Once the upload is finished, you will receive a notification or see a message confirming that your video has been successfully uploaded to your YouTube account. At this point, you can proceed to the next step of the process, where you can edit the video details or publish it directly.
Step 6: Edit Video Information (Optional)- Edit video details: If needed, you can edit the video title, description, or other settings after the upload is completed.
Once you have successfully uploaded your video to YouTube from your phone, you have the option to edit the video details if necessary. This step is entirely optional but can be beneficial if you want to make changes to the video’s title, description, or other settings.
To edit the video information, you can follow these simple steps:
1. Open the YouTube app on your phone and navigate to the “My Videos” section or the video itself if you are still on the upload screen.
2. Locate the video you want to edit and tap on it to open the video details page.
3. On the video details page, you will see various options for editing the video information. This includes the title, description, tags, playlist placement, thumbnail selection, and more.
4. To edit the video title, tap on the existing title and make the desired changes. You can also add or remove hashtags if necessary.
5. If you want to edit the video description, tap on the description field and update the text accordingly. You can include additional information, links, or any other relevant details.
6. Additionally, you can modify the video’s tags to improve its searchability on the platform. Confirm that the tags accurately represent the content of the video.
7. If you wish to change the thumbnail image, YouTube provides options for selecting a custom thumbnail from your phone’s gallery or choosing from a range of auto-generated thumbnails.
8. Once you have made the desired changes, don’t forget to save your edits by tapping the “Save” or “Apply” button.
It’s important to note that any edits you make will take effect immediately. This means that viewers will see the updated video title, description, and other changes you have made.
Editing video information after the upload can be especially helpful if you realize you made a mistake or want to improve the visibility and engagement of your video. By refining the title, description, and other settings, you can attract more viewers and enhance the overall impact of your video on YouTube.
Remember, while editing the video details is optional, taking the time to optimize your video’s information can significantly contribute to its success on the platform.
Step 7: Publish your Video – Publish the video: Once you’re satisfied with the video details, choose the “Publish” or “Finish” option to make your video live on YouTube.
After putting in the effort to create a compelling video and adding all the necessary details, it’s time to share your masterpiece with the world. In this final step, you’ll publish your video on YouTube, making it available for viewers to watch, like, comment, and share.
Once you’ve reviewed your video details and made any necessary adjustments, locate the “Publish” or “Finish” button. This button may be prominently displayed at the bottom of the screen or within the video settings. Pressing this button will officially make your video live on YouTube. It will be accessible to anyone with the link, and it will also appear in search results and recommendations.
Before hitting the publish button, take a moment to ensure that you’re completely satisfied with the video you’re about to share. Double-check the title, description, and any tags or keywords you’ve included. These details will help viewers find your video in search results and understand its content.
Consider watching your video one final time to ensure everything is as you intended. Check for any last-minute edits or improvements you may want to make. Once you’re confident in the quality and presentation of your video, go ahead and click the “Publish” or “Finish” button.
Once your video is published, it may take some time for YouTube to process and optimize it for different devices and platforms. During this processing period, your video may appear in lower resolutions initially. Don’t worry, as YouTube will automatically provide higher-quality versions once processing is complete.
Keep in mind that once your video is live on YouTube, you still have the ability to make changes if needed. You can edit the video details, update the thumbnail, or adjust the privacy settings. Simply navigate to your video in the YouTube Studio app or go to the YouTube website on your computer, sign in to your account, and access the video’s settings.
Now that your video is published on YouTube, it’s time to promote it and get it in front of your target audience. Share your video on social media platforms, embed it on your website or blog, and engage with your viewers through comments and interactions. Regularly monitor your video’s performance and make any necessary adjustments to improve visibility and engagement.
Congratulations! You have successfully published your video on YouTube. Enjoy the thrill of reaching viewers and building your YouTube presence. Remember to continue creating valuable and engaging content to keep your audience coming back for more.
Step 8: Share your Video – Share your uploaded video: Utilize the share feature to distribute your video through various platforms or social media channels.
Once you have successfully uploaded your video to YouTube, it’s time to share it with the world! By utilizing the share feature, you can distribute your video across various platforms and social media channels, maximizing its reach and potential for engagement.
Sharing your uploaded video is a crucial step in gaining visibility and attracting a wider audience. Here are some tips on how to effectively share your video:
- Copy the video link: YouTube provides a default video link for every uploaded video. Simply copy the link to share it with others.
- Utilize social media platforms: Share your video on popular social media platforms such as Facebook, Twitter, Instagram, and LinkedIn. These platforms provide an excellent opportunity to reach a broad audience.
- Create eye-catching captions: Craft engaging captions that entice viewers to watch your video. Use keywords, emojis, and compelling descriptions to grab attention.
- Engage with relevant communities: Identify online communities, forums, or groups that align with your video’s topic or niche. Post your video there to increase its visibility among target audiences.
- Collaborate with influencers: Reach out to influencers or content creators who have a substantial following in your niche. Collaborating with them can expose your video to their audience and generate more views.
- Email newsletters: If you have an email list or newsletter, include a link to your video in your next email blast. Encourage your subscribers to watch and share the video with others.
- Embed on your website or blog: If you have a personal blog or website, embed the video in relevant blog posts or pages. This allows visitors to watch the video directly on your site.
- Create a video teaser: Generate curiosity by creating a short teaser for your video. Post the teaser on social media with a link to the full video, enticing viewers to watch the entire content.
- Engage with comments and shares: When people comment on or share your video, take the time to respond and express gratitude. Building a connection with your audience encourages future engagement.
Remember, sharing your video is not a one-time task. Continuously promote your video through different channels, repost it periodically, and engage with your audience to keep the momentum going.
Step 9: Manage and Track your Uploaded Videos- Access the YouTube Studio: Use the YouTube Studio app or web interface to manage, track, and analyze the performance of your uploaded videos.
Once you have uploaded your videos to YouTube, it’s crucial to efficiently manage and track their performance. YouTube Studio provides you with a comprehensive toolset to analyze and optimize your videos. Whether you’re using the YouTube Studio app on your phone or the web interface on your computer, you can easily access the essential features to monitor your video’s success.
With YouTube Studio, you can dive deep into various analytics, including views, watch time, engagement, and more. Understanding these metrics will help you gain insights into your audience’s preferences and behavior, allowing you to tailor your content to maximize its performance.
The YouTube Studio app offers the convenience of managing and tracking your videos on the go. You can easily navigate through your video library, access important statistics, and even make changes to your video details. This level of control ensures that you can stay connected to your YouTube channel no matter where you are.
On the other hand, if you prefer a larger screen and more features, you can access YouTube Studio using the web interface. This interface provides a more comprehensive and detailed overview of your video performance. From analyzing traffic sources to understanding audience demographics, the web interface allows you to make data-driven decisions to optimize your content strategy.
One of the key benefits of YouTube Studio is the ability to manage your video details. With just a few clicks, you can edit video titles, descriptions, tags, and even thumbnails. This flexibility is especially useful if you want to make updates or improvements to your videos based on audience feedback or changing trends.
In addition to managing your videos, YouTube Studio also lets you interact with your audience. You can respond to comments, engage in discussions, and even moderate your video’s comment section. This level of engagement with your audience fosters a sense of community and encourages viewer loyalty.
Furthermore, YouTube Studio provides valuable insights on how your videos are discovered. You can review search terms, traffic sources, and suggested video data to understand how users are finding and engaging with your content. Armed with this information, you can optimize your video titles, descriptions, and tags to increase visibility and attract a larger audience.
Lastly, YouTube Studio offers advanced features for creators who are looking to monetize their videos. You can access revenue information, track ad performance, and explore opportunities for additional income streams such as channel memberships and merchandise shelf integration. These monetization features allow you to turn your YouTube channel into a sustainable income source.
Conclusion
Uploading a YouTube video from your phone is a simple process that can open up a world of possibilities for content creators. With the advancements in technology and the availability of powerful smartphones, anyone can create and share their videos with just a few taps on the screen. Whether you want to showcase your talent, educate others, or simply share your experiences with the world, YouTube provides a platform to reach a global audience.
By following the steps outlined in this article, you can confidently upload your videos to YouTube using your mobile phone. Remember to optimize your videos for search engines, promote your content through social media channels, and engage with your viewers to build a loyal audience. Leverage the power of video to make your mark on the digital landscape and explore the endless opportunities that YouTube has to offer.
FAQs
- 1. Can you upload a YouTube video directly from your phone?
- 2. What are the requirements for uploading a YouTube video on your phone?
- 3. Can I edit the video before uploading it?
- 4. How long does it take to upload a YouTube video from a phone?
- 5. What should I do if my YouTube video fails to upload from my phone?
Yes, you can upload a YouTube video directly from your phone. YouTube has made it easy for users to share their videos by providing a mobile app that supports video uploading. With the app installed on your phone, you can simply select the video you want to upload from your device’s gallery and follow the on-screen instructions to upload it to your YouTube channel.
To upload a YouTube video from your phone, there are a few requirements you need to meet. First, make sure you have a stable internet connection to upload the video smoothly. Next, ensure that your video meets YouTube’s guidelines and policies regarding content. Finally, you may need to sign in to your YouTube account or create one if you don’t have an existing account to upload the video.
Yes, you can edit the video before uploading it to YouTube. Many smartphones come with built-in video editing tools, allowing you to trim, crop, add effects, and make other adjustments to your video. Alternatively, you can also use third-party video editing apps available on your phone’s app store to enhance your video before uploading it to YouTube.
The time it takes to upload a YouTube video from your phone depends on various factors, including the length and size of the video, as well as the speed of your internet connection. Generally, shorter videos will upload faster than longer ones. Additionally, a faster and more stable internet connection will expedite the uploading process. It’s recommended to connect your phone to a Wi-Fi network when uploading large videos to ensure a smoother and quicker upload.
If your YouTube video fails to upload from your phone, there could be several reasons for the issue. First, check your internet connection and make sure it’s stable. If the problem persists, force close the YouTube app and restart your phone before attempting to upload again. If the issue continues, you can also try clearing the cache and data of the YouTube app or updating the app to the latest version. If none of these solutions work, you can try uploading the video from a different device or reach out to YouTube support for further assistance.