
When it comes to accessing the settings of your wireless router, understanding how to navigate through its configuration interface is essential. Whether you need to set up a new network, troubleshoot connectivity issues, or make adjustments to security settings, accessing your router’s settings is the first step towards managing your home or office network effectively.
In this article, we will provide you with a comprehensive guide on how to access and navigate your wireless router’s settings. We will walk you through the process step by step, ensuring that you have a clear understanding of how to access these crucial settings. So, whether you’re a tech-savvy individual or a novice in the world of networking, read on to discover how easy it is to access and modify your wireless router’s settings.
Inside This Article
- Why Accessing Wireless Router Settings is Important
- Step 1: Connecting to the Router
- Step 2: Opening the Router Settings Page
- Step 3: Logging into the Router
- Step 4: Navigating the Router Settings
- Step 5: Making Changes to the Router Settings
- Step 6: Saving and Applying the Changes
- Troubleshooting Tips
- Conclusion
- FAQs
Why Accessing Wireless Router Settings is Important
Accessing your wireless router settings is crucial for ensuring a smooth and secure internet connection. By accessing these settings, you gain control over several important aspects of your network, allowing you to optimize performance, enhance security, and customize your network settings to your specific needs.
Here are a few reasons why accessing your wireless router settings is important:
- Network Security: One of the primary reasons to access your wireless router settings is to strengthen the security of your network. By accessing the settings, you can change the default administrator password, enable encryption protocols, and set up a unique network name (SSID) to make your network more secure and less vulnerable to cyber attacks.
- Optimizing Performance: Accessing your router settings allows you to optimize your network performance. You can adjust the channel settings, select the appropriate wireless frequency band, and even prioritize certain devices or applications to ensure smooth streaming, faster download speeds, and a lag-free online gaming experience.
- Device Management: Through the router settings, you can manage the devices connected to your network. You can view the list of connected devices, prioritize bandwidth for specific devices, and even set up parental controls to restrict access to certain websites or limit internet usage for specific devices.
- Troubleshooting: When you access your router settings, it becomes easier to troubleshoot network-related issues. You can check the status of your internet connection, monitor network traffic, and diagnose potential problems that may be affecting your network performance. This allows you to take appropriate actions and resolve issues efficiently.
Step 1: Connecting to the Router
Before you can access the wireless router settings, you need to ensure that your device is connected to the router. This can be done by following a few simple steps:
1. First, make sure your device (such as a laptop or smartphone) is within range of the wireless signal emitted by the router.
2. Open the Wi-Fi settings on your device and look for the list of available networks.
3. Locate your router’s network name (also known as SSID) in the list and select it.
4. If prompted, enter the password for the network. This password is usually printed on a sticker on the router or provided by the network administrator.
5. Once the correct password is entered, your device will establish a connection with the router. You should now be connected to the router’s network.
By connecting your device to the router, you can now proceed to access the router settings page and make any necessary changes.
Step 2: Opening the Router Settings Page
Once you have successfully connected to your wireless router, the next step is to open the router settings page. This is where you can access and customize various configurations and options to optimize your network performance.
To open the router settings page, you will need to launch a web browser on your device. It can be any browser of your choice, such as Google Chrome, Mozilla Firefox, or Microsoft Edge.
Type the default IP address of your router in the address bar of the browser. The default IP address is usually mentioned on the router itself or in the user manual. It can be something like “192.168.1.1” or “192.168.0.1”. Enter the IP address exactly as provided, without any spaces or additional characters.
Press the Enter key or click on the Go button. This will direct the browser to the router settings page.
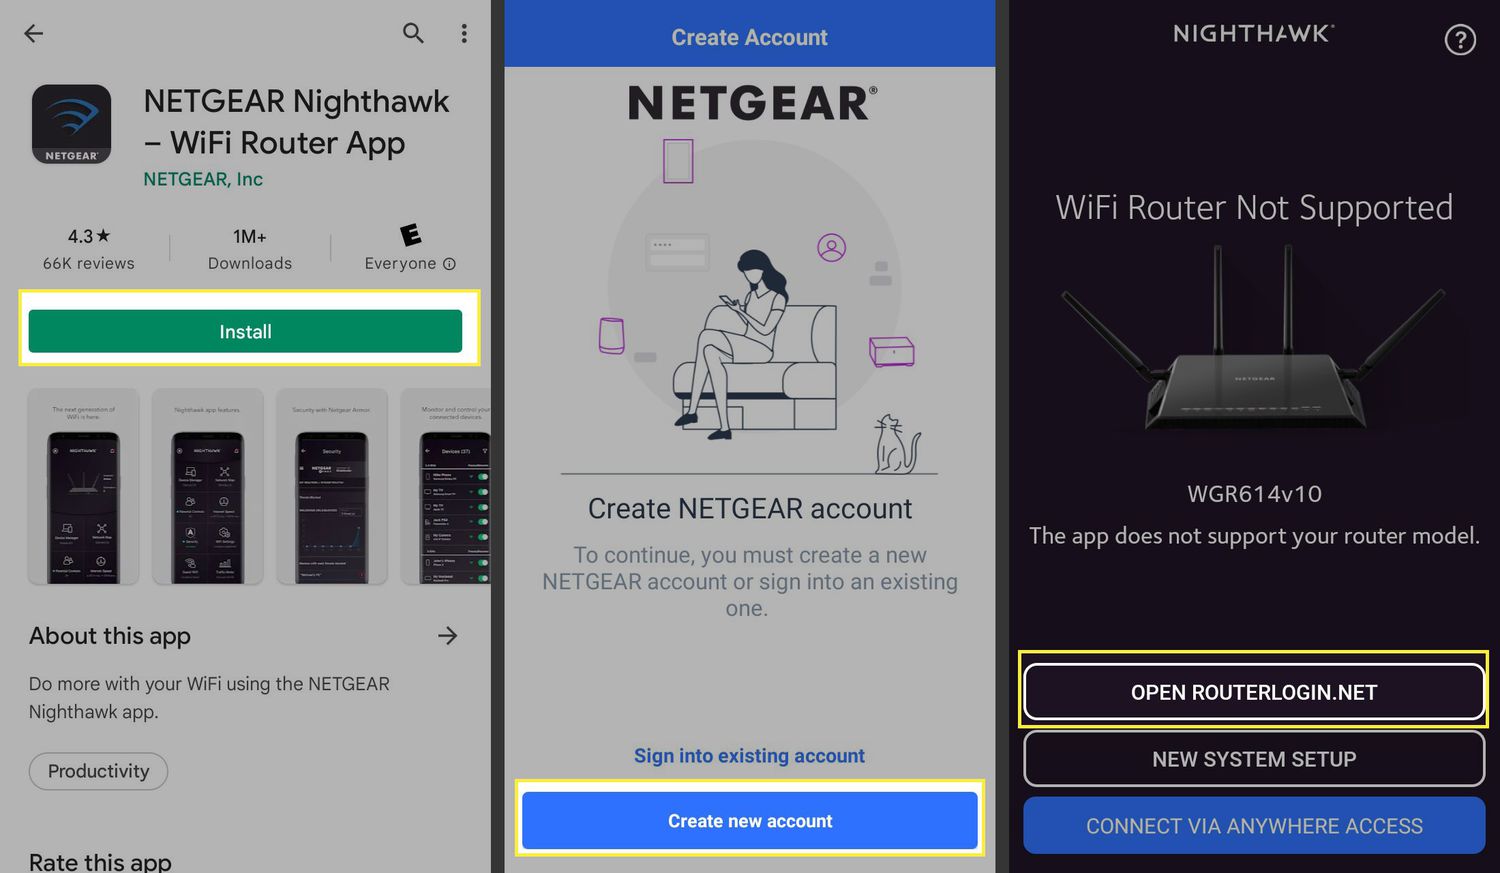
Alternatively, you can also use the router’s domain name instead of the IP address. Some routers have a customized domain name that can be used to access the settings page. For example, if your router’s domain name is “routerlogin.net”, you can type “routerlogin.net” in the address bar and press Enter. The browser will automatically redirect you to the router settings page.
Once you have entered the IP address or domain name, the web browser will establish a connection with the router and display the login page. This page is where you will need to enter the login credentials to access the router settings. The login credentials are usually provided in the user manual or can be found on a sticker on the router itself. Enter the username and password correctly to proceed.
If you have not changed the default login credentials, you can refer to the documentation or the router manufacturer’s website to find the default username and password. It is highly recommended to change the default credentials for security purposes.
After entering the correct login credentials, click on the Login or Submit button. The browser will authenticate your credentials and grant access to the router settings page.
Voila! You have successfully opened the router settings page. Now you can explore the various options and configurations available to customize your wireless network settings according to your preferences.
Step 3: Logging into the Router
After connecting to your wireless router, the next step is to log into its settings page. Logging in allows you to access and modify various configuration options to customize your network settings. Here’s how to do it:
1. Open your web browser, such as Google Chrome or Mozilla Firefox.
2. In the address bar, type in the IP address of your wireless router. Common addresses include 192.168.0.1 or 192.168.1.1. If you’re not sure of the exact address, you can refer to the router’s user manual or check the manufacturer’s website for assistance.
3. Press Enter or click the Go button to load the router’s login page.
4. On the login page, you will be prompted to enter your username and password. If you haven’t changed these credentials before, check the router’s label or manual for the default username and password. It’s crucial to change the default login information for security purposes.
5. Once you’ve entered the correct username and password, click the Login or Submit button to access the router’s settings page.
6. Congratulations! You have successfully logged into the router. Now you can explore and modify various settings to suit your network requirements.
It’s important to note that the login process can vary slightly depending on your router’s make and model. Some routers may require additional steps, such as entering a captcha or providing a security code.
Remember to log out of the router’s settings page once you’re done making changes to prevent unauthorized access.
Now that you’ve mastered logging into the router, let’s move on to the next step: navigating the router settings page.
Step 4: Navigating the Router Settings
Once you have successfully logged into your wireless router, you will be able to navigate through its settings to customize and control various aspects of your network. Navigating the router settings can give you access to features such as network security, port forwarding, parental controls, and quality of service (QoS) settings.
To begin navigating the router settings, you will typically see a menu or navigation bar on the side or top of the router’s settings page. This menu will provide you with different categories or sections of settings that you can explore.
Some common sections that you may find in the router settings include:
- Wireless Settings: This section allows you to configure the wireless network name (SSID), wireless encryption method (WPA/WPA2), and password. You can also adjust the wireless channel for improved performance.
- Security: In this section, you can enable or disable features like firewall protection, MAC filtering, and DMZ (Demilitarized Zone) settings. These features help enhance the security of your network.
- Network Settings: Here, you can configure the IP address settings of your router, such as DHCP (Dynamic Host Configuration Protocol) and DNS (Domain Name System) settings. You can also enable or disable IPv6 if supported.
- Advanced Settings: This section offers more advanced options, including port forwarding, static routing, VPN (Virtual Private Network) settings, and remote management. These settings are typically used by advanced users or for specific networking requirements.
- Administration: In this section, you can change the router’s login credentials, perform firmware updates, and manage user access and permissions.
By clicking on each section or category, you will be presented with a list of options and settings relating to that particular category. You can then explore each option and make changes as required.
It’s important to mention that the layout and terminology of the router settings page may vary depending on the brand and model of your router. If you’re unsure about any specific settings or options, consult the router’s user manual or the manufacturer’s website for detailed instructions.
As you navigate the router settings, make sure to familiarize yourself with each section and option available. Take your time to understand the purpose of each setting before making any changes. This will help ensure that you make the right configuration adjustments without causing any disruptions to your network.
Once you have explored and made the desired changes to the router settings, you can proceed to the next step of saving and applying those changes. This will allow the new settings to take effect and optimize your wireless network according to your preferences.
Step 5: Making Changes to the Router Settings
Once you have accessed the router settings page and logged in successfully, you can start making changes to the various settings based on your preferences. Here are a few key steps to follow:
- Identify the Settings Categories: On the router settings page, you will typically find different categories or tabs for various settings such as network, security, wireless, firewall, and more. Take some time to familiarize yourself with these categories to understand where the specific settings you want to change might be located.
- Navigate to the Desired Setting: Within each category or tab, look for the specific setting you want to change. For instance, if you want to modify the Wi-Fi password, you would need to go to the wireless settings tab and locate the password field.
- Modify the Setting: Once you have found the desired setting, you can make the necessary changes. For example, if you want to change the Wi-Fi password, enter the new password in the designated field.
- Save the Changes: After making the desired changes, it is crucial to save the modifications. Look for a “Save” or “Apply” button on the router settings page and click on it to ensure that the changes are saved and applied to the router.
- Confirm the Changes: To ensure that the changes have been implemented successfully, you can restart the router or try connecting a device using the new settings. This will help you verify if the modifications have taken effect.
Note: It is important to exercise caution while making changes to the router settings. Incorrect configurations can lead to network issues or even leave your network vulnerable to security threats. If you are unsure about a particular setting or its impact, it is recommended to refer to the router’s documentation or seek assistance from technical support.
Step 6: Saving and Applying the Changes
After making the necessary changes to your wireless router settings, it is important to save and apply the changes for them to take effect. This step ensures that all the modifications you have made are properly implemented and your network operates according to your preferences. Here’s how you can save and apply the changes:
1. Look for the “Save” or “Apply” button on the router settings page. This button is usually located at the bottom or top of the page.
2. Once you’ve located the “Save” or “Apply” button, click on it. This action will trigger the process of saving and applying the changes you have made.
3. As the changes are being saved and applied, it is important to remain patient and avoid interrupting the process. This may take a few seconds or even a couple of minutes, depending on the complexity of the modifications.
4. Once the changes have been successfully applied, you will usually receive a confirmation message or be redirected to a new page indicating that the changes have been saved. This serves as a reassurance that your modifications have been implemented successfully.
5. It is a good practice to verify that the changes have been applied correctly. You can do this by checking if the new settings are reflected in the router’s interface or by testing the functionality of the network based on the changes you have made.
6. If you encounter any issues after saving and applying the changes, it is recommended to refer back to the troubleshooting tips or consult the user manual of your wireless router for further assistance.
Remember to always keep a record of the changes you have made for future reference. This can be helpful in case you need to revert to previous settings or troubleshoot any issues that may arise in the future.
By following these steps to save and apply the changes to your wireless router settings, you can ensure that your network operates according to your preferences and that any modifications you make are properly implemented.
Troubleshooting Tips
If you encounter any issues while accessing your wireless router settings, don’t worry, we have some troubleshooting tips that can help you resolve common problems. Follow these steps to troubleshoot and get your router settings page up and running smoothly again:
1. Check the physical connections: Ensure that all cables, including the power cord and Ethernet cables, are properly connected to the router. Sometimes, loose or disconnected cables can cause connection issues.
2. Restart your router/modem: Power cycling your router or modem can often resolve connectivity problems. Simply unplug the power cord, wait for a few seconds, and then plug it back in. Allow a few minutes for the device to restart and establish a connection.
3. Clear your browser cache: Your browser’s cache may contain outdated or corrupted files that can interfere with accessing the router settings page. Clear your browser cache and try accessing the settings page again.
4. Disable firewall or antivirus software temporarily: Sometimes, firewall or antivirus settings can prevent access to certain websites or pages, including the router settings page. Temporarily disable these security programs and check if you can access the settings page.
5. Try a different browser or device: If you’re still unable to access the router settings page, try using a different web browser or device. Sometimes, compatibility issues between the browser and the router settings page can cause difficulties. Switching to a different browser or device can help determine if that’s the problem.
6. Reset your router: If all else fails, you can try resetting your router to factory settings. Keep in mind that this will erase any custom settings you’ve made, and you’ll need to set up your router from scratch. Consult your router’s user manual for instructions on how to perform a reset.
Remember, troubleshooting steps can vary slightly depending on your specific router model and firmware version. If you’re unsure about any steps or encounter specific error messages, consult your router’s user manual or reach out to the manufacturer’s support team for assistance.
By following these troubleshooting tips, you should be able to overcome most common issues and access your wireless router settings page without any problems.
Conclusion
Accessing your wireless router settings is essential for managing and optimizing your home network. Whether you need to change the Wi-Fi password, adjust security settings, or troubleshoot network issues, having access to the router settings is crucial. By following the steps outlined in this article, you can easily access your wireless router settings and make any necessary changes.
Remember to always protect your router with a strong password and enable necessary security measures to keep your network safe from unauthorized access. Additionally, familiarize yourself with the different settings available in the router’s interface to fully utilize its capabilities and improve your overall internet experience.
Now that you understand how to access your wireless router settings, you can confidently take control of your network and ensure it runs smoothly, securely, and to your desired specifications.
FAQs
1. How do I access the wireless router settings?
Accessing the wireless router settings is fairly simple. Follow these steps:
- Connect your computer or device to the wireless network.
- Open a web browser (such as Google Chrome, Mozilla Firefox, or Internet Explorer).
- Type the IP address of your router into the address bar. The most common IP addresses are 192.168.0.1 or 192.168.1.1. If you are unsure of the IP address, you can find it in the router’s manual or by visiting the manufacturer’s website.
- Press Enter to access the login page of the router.
- Enter the admin username and password for your router. If you haven’t changed it, the default credentials can typically be found in the router’s manual or by performing a quick online search for your router model.
- Once logged in, you will have access to the router settings where you can configure various options such as network name (SSID), password, security settings, and more.
2. Can I access the wireless router settings from a mobile device?
Yes, it is possible to access the wireless router settings from a mobile device. However, it may be more convenient to access the settings from a computer, as the mobile interface may not provide all the advanced configuration options that are available on the desktop version. To access the settings from a mobile device, simply follow the same steps as mentioned earlier, but use a web browser app on your mobile device instead of a computer.
3. What should I do if I forgot the router’s admin password?
If you forgot the router’s admin password, don’t worry; there are a few steps you can take to regain access to the wireless router settings:
- Reset the router to its factory default settings. This can be done by locating the reset button on the router (usually a small pinhole) and pressing and holding it for about 10 seconds. Note that this will erase all custom settings and revert the router to its default configuration.
- Once the router has been reset, you can access the settings using the default admin username and password, which can usually be found in the router’s manual or by performing an online search for your router model.
- After logging in, make sure to change the default admin password to a secure and unique one to prevent unauthorized access in the future.
4. How can I improve the security of my wireless router?
To enhance the security of your wireless router, you can take the following steps:
- Change the default network name (SSID) to something unique.
- Create a strong and complex password for your Wi-Fi network. Avoid using common phrases or personal information.
- Enable network encryption, preferably using WPA2 or WPA3, to protect your wireless communications.
- Keep the router’s firmware up to date by regularly checking for updates from the manufacturer and installing them promptly.
- Disable remote management access to the router settings, unless absolutely necessary.
- Regularly monitor the connected devices list in the router settings to ensure there are no unauthorized devices accessing your network.
5. Can I access the router settings even if I don’t have an internet connection?
Yes, it is possible to access the router settings even if you don’t have an internet connection. The router settings page can be accessed by typing the IP address of the router into the address bar of a web browser, as mentioned earlier. Keep in mind that some advanced features or configurations may require an active internet connection to fully utilize, but the basic settings can usually be accessed without an internet connection.