
Are you tired of dealing with tangled wires and limited mobility when using your computer? The good news is that you can easily connect a wireless keyboard and mouse to your computer for a more seamless and convenient experience. By eliminating the need for physical cables, you can enjoy the freedom to move around your workspace without worrying about tripping over cords or being constrained by their length.
In the following article, we will provide you with step-by-step instructions on how to connect a wireless keyboard and mouse to your computer. Whether you’re using a desktop or a laptop, the process is relatively simple and can be completed in just a few minutes. Say goodbye to wires and hello to increased productivity and flexibility as we walk you through the setup process.
Inside This Article
- Overview
- Step 1: Check for compatibility
- Step 2: Insert batteries
- Step 3: Connect the wireless receiver
- Step 4: Connect the keyboard and mouse
- Troubleshooting tips
- Conclusion
- FAQs
Overview
Connecting a wireless keyboard and mouse to your computer can greatly enhance your productivity and eliminate the hassle of dealing with tangled cables. Whether you want to enjoy a clutter-free workspace or have the flexibility to control your computer from a distance, this guide will walk you through the process step-by-step.
If you’re tired of being tethered to your computer desk or struggling with limited mobility when using a wired keyboard and mouse, switching to a wireless setup is the perfect solution. With the advancements in technology, wireless keyboards and mice have become more reliable and responsive, offering a seamless user experience.
By utilizing wireless connectivity, you can enjoy the freedom of movement and flexibility to work from anywhere within the range of your computer. Whether you need to work comfortably on your couch, make a presentation from a distance, or execute precise movements for gaming, a wireless keyboard and mouse will empower you to do so.
This guide will provide you with the necessary steps to connect your wireless keyboard and mouse to your computer. We will cover compatibility checks, battery insertion, wireless receiver connection, and pairing the devices. Additionally, we will offer troubleshooting tips to address common issues that you may encounter during the setup process.
So, let’s dive in and learn how to connect your wireless keyboard and mouse to your computer for a productive and hassle-free computing experience.
Step 1: Check for compatibility
Before connecting your wireless keyboard and mouse to your computer, it is important to check for compatibility. Not all devices are compatible with every computer system, so it’s essential to ensure that the devices you have are meant to work together.
Start by checking the system requirements of your keyboard and mouse. Look for any specific operating system requirements or compatibility with certain computer models. This information can usually be found on the packaging or in the product description.
Additionally, make sure that your computer has the appropriate ports or connectivity options to support wireless peripherals. If your computer does not have built-in Bluetooth or USB wireless receiver capabilities, you may need to purchase an adapter or additional hardware to enable the connection.
Another important aspect to consider is the distance the keyboard and mouse can operate from the computer. Some wireless peripherals may have limited range, so be sure to check if the distance will work well for your setup.
Lastly, it’s a good idea to check for any software requirements or drivers needed for the proper functioning of your wireless keyboard and mouse. These can usually be obtained from the manufacturer’s website and will ensure that your devices work seamlessly with your computer.
Step 2: Insert batteries
Now that you have checked the compatibility of your wireless keyboard and mouse with your computer, it’s time to insert the batteries. Most wireless keyboards and mice require batteries to function properly.
Here’s how to insert the batteries:
1. Locate the battery compartment: Look for a small compartment on the underside of the keyboard and mouse. It is usually secured with a latch or slide mechanism.
2. Open the battery compartment: Use your fingers or a small tool to open the battery compartment. Ensure that you follow the instructions provided by the manufacturer, as different models may have varied battery compartments.
3. Insert the batteries: Check the polarity markings (+ and -) inside the battery compartment and align them with the corresponding markings on the batteries. Insert the batteries according to these markings, ensuring they fit snugly into the slots.
4. Close the battery compartment: Once the batteries are inserted, close the battery compartment securely. Ensure that it is properly locked or latched to prevent the batteries from falling out during use.
5. Test the keyboard and mouse: After inserting the batteries, turn on the keyboard and mouse. You may need to press the power button or switch on both devices. If the devices have LED indicators, they should light up to indicate that they are receiving power.
Remember, the battery life of your wireless keyboard and mouse depends on various factors such as usage, battery type, and the keyboard/mouse settings. It’s always a good idea to keep spare batteries handy in case they need to be replaced.
Once you have inserted the batteries and ensured that the keyboard and mouse are powered on, you are ready to move on to the next step of connecting the wireless receiver to your computer.
Step 3: Connect the wireless receiver
Once you have inserted the batteries into your wireless keyboard and mouse, it’s time to connect the wireless receiver. The wireless receiver is a small device that plugs into one of the USB ports on your computer. It acts as the intermediary between your computer and the wireless peripherals.
To connect the wireless receiver, locate an available USB port on your computer. It’s typically found on the front or back of the CPU, but it can also be located on the side or top of your laptop. Once you find the port, gently insert the wireless receiver into the USB slot.
Upon connecting the receiver, your computer will automatically detect the new device and install any necessary drivers. This process may take a few seconds or minutes, depending on your computer’s speed. You may also receive a notification on your screen confirming the successful connection of the wireless receiver.
It’s important to note that some wireless receivers require you to press a pairing button on the device to establish a connection with the keyboard and mouse. If this is the case, refer to the manufacturer’s instructions to locate the pairing button and follow the specific steps to complete the pairing process.
Once the connection is established, the wireless receiver will communicate with the keyboard and mouse, allowing you to use them with your computer. If the connection is successful, you should see the cursor move on the screen when you move the mouse and be able to type on the keyboard without any issues.
If you are unable to establish a connection between the wireless receiver and the keyboard and mouse, refer to the troubleshooting tips section for assistance in resolving common connectivity issues.
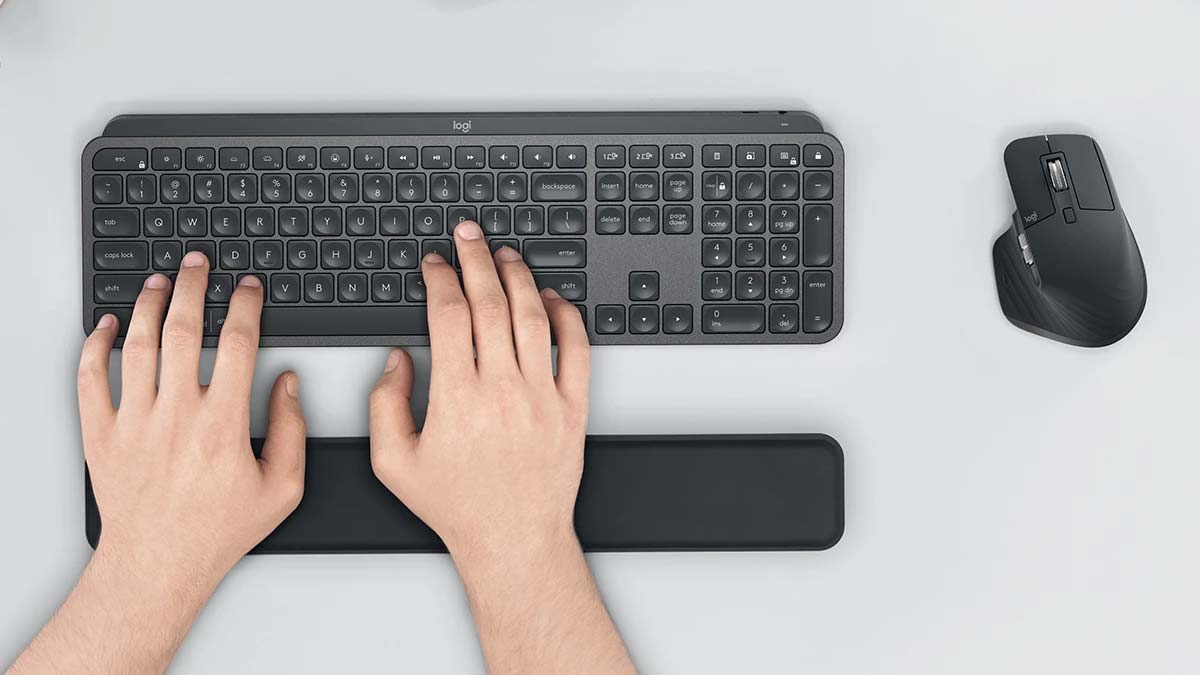
Step 4: Connect the keyboard and mouse
Now that you have successfully inserted the batteries and connected the wireless receiver to your computer, it’s time to connect the wireless keyboard and mouse. Follow these simple steps:
- Step 4.1: Turn on your wireless keyboard and mouse by toggling the power switch located on the back or underside of each device.
- Step 4.2: Locate the “Connect” button on the wireless receiver. This button is usually small and may be recessed. Press and hold it until the LED indicator starts flashing.
- Step 4.3: On the wireless keyboard, locate the “Connect” button. It is typically found on the bottom or side of the keyboard. Press and hold it until the LED indicator starts flashing.
- Step 4.4: On the wireless mouse, look for the “Connect” button, usually located on the bottom of the device. Press and hold it until the LED indicator starts flashing.
- Step 4.5: Once the LED indicators on the wireless receiver, keyboard, and mouse are flashing, it means they are in pairing mode and searching for each other.
- Step 4.6: Wait for a few seconds until the LEDs on all the devices stop flashing and remain steady. This indicates that the wireless keyboard and mouse have successfully connected to the wireless receiver.
- Step 4.7: Test the connection by typing on the keyboard and moving the mouse. If everything is working properly, congratulations! Your wireless keyboard and mouse are now connected to your computer.
It’s important to note that the specific steps to connect the keyboard and mouse may vary slightly depending on the brand and model you are using. However, most wireless keyboards and mice follow a similar pairing process as outlined above.
If you encounter any issues during the connection process, refer to the troubleshooting section or consult the user manual that came with your wireless keyboard and mouse.
Troubleshooting tips
Connecting a wireless keyboard and mouse to your computer should be a straightforward process. However, if you encounter any issues during the setup, here are some troubleshooting tips to help you resolve them:
1. Check the batteries: Ensure that you have inserted fresh batteries into your keyboard and mouse. Weak or depleted batteries can cause connectivity problems. Replace them if necessary.
2. Restart your computer: Sometimes, a simple restart can fix connectivity issues. Close all open applications and reboot your computer. After the restart, attempt to connect the wireless keyboard and mouse again.
3. Check the wireless receiver: Make sure the wireless receiver is properly connected to your computer. Ensure that it is securely plugged into a USB port. If you have multiple USB ports, try different ones to see if the issue persists.
4. Install manufacturer’s software (if applicable): Some wireless keyboards and mice require specific software or drivers to be installed for proper functionality. Check the manufacturer’s website and download any necessary software or drivers. Follow the installation instructions provided.
5. Verify compatibility: Double-check that your wireless keyboard and mouse are compatible with your computer. Ensure that they support the same wireless technology (e.g., Bluetooth, USB receiver) and that your computer meets the system requirements.
6. Reset the devices: If the keyboard and mouse are not responding, you can try resetting them. Look for a reset button on the devices or refer to the manufacturer’s instructions on how to perform a reset. After resetting, follow the setup process again.
7. Interference issues: Wireless signals can be disrupted by other electronic devices. Keep your wireless keyboard and mouse away from sources of interference such as cordless phones, Wi-Fi routers, and other wireless devices. Additionally, ensure that there are no obstacles obstructing the signal between the keyboard/mouse and the receiver.
8. Test with a different computer: If possible, try connecting the wireless keyboard and mouse to a different computer. This can help determine if the issue is specific to your computer or if there is a problem with the devices themselves.
9. Contact customer support: If you’ve exhausted all troubleshooting steps and are still unable to connect your wireless keyboard and mouse, reach out to the manufacturer’s customer support. They can provide further assistance and help pinpoint the problem.
Remember, troubleshooting steps may vary depending on the brand and model of your wireless keyboard and mouse. Always refer to the manufacturer’s instructions and support resources for specific guidance.
Conclusion
In conclusion, connecting a wireless keyboard and mouse to your computer is a simple and convenient way to enhance your computing experience. Whether you prefer a clutter-free workspace, improved mobility, or increased comfort, a wireless keyboard and mouse offer the freedom and flexibility you need.
By following the steps outlined in this article, you can easily pair your devices, ensuring a seamless connection and optimal performance. Remember to check for compatibility, enable Bluetooth or use the USB receiver, and follow the manufacturer’s instructions for a smooth setup process.
Once your wireless keyboard and mouse are successfully connected, you can enjoy the benefits of improved productivity, reduced cable clutter, and enhanced comfort. Whether you’re working, gaming, or simply browsing the web, the versatility and convenience of a wireless setup will undoubtedly enhance your computing experience.
So don’t hesitate to explore the world of wireless technology by connecting a wireless keyboard and mouse to your computer. Embrace the freedom, flexibility, and ease-of-use that these devices offer, and elevate your computing experience to new heights.
FAQs
1. Can I connect a wireless keyboard and mouse to my computer?
Yes, most modern computers have built-in Bluetooth capabilities that allow you to connect wireless peripherals such as keyboards and mice. However, if your computer does not have Bluetooth, you can use a USB receiver that comes with the wireless keyboard and mouse.
2. How do I connect a wireless keyboard and mouse to my computer?
To connect a wireless keyboard and mouse to your computer, follow these steps:
- Make sure your computer has Bluetooth capabilities or obtain a USB receiver for the wireless keyboard and mouse.
- Turn on the wireless keyboard and mouse and put them in pairing mode.
- On your computer, go to the Bluetooth settings and click on “Add a device” or “Pair a new device.”
- Select the wireless keyboard and mouse from the list of available devices.
- Follow the on-screen prompts to complete the pairing process.
3. Can I connect multiple wireless keyboards and mice to one computer?
In general, most computers can only connect to one wireless keyboard and mouse at a time. However, some advanced models or specialized software may allow you to connect multiple wireless peripherals simultaneously. Check the specifications of your computer and the documentation of your wireless peripherals for more information.
4. Can I use a wireless keyboard and mouse with a laptop?
Yes, you can use a wireless keyboard and mouse with a laptop. Laptops typically have built-in Bluetooth capabilities, allowing you to connect wireless peripherals directly. Alternatively, you can use a USB receiver that comes with the wireless keyboard and mouse to connect them to your laptop.
5. Do I need to install any software or drivers to use a wireless keyboard and mouse?
In most cases, you do not need to install any additional software or drivers to use a wireless keyboard and mouse. Once you have successfully paired the wireless peripherals with your computer, they should work out of the box. However, if you encounter any issues or want to customize the keyboard or mouse settings, you may need to install software or drivers provided by the manufacturer.