
Printing from a Samsung tablet to a wireless printer can be a convenient and efficient way to bring your digital documents to life. Whether you need to print important work documents, school assignments, or memorable photos, knowing how to seamlessly connect and print from your tablet is essential. In this article, we will guide you through the process of printing from your Samsung tablet to a wireless printer, providing you with step-by-step instructions to ensure a smooth printing experience. Whether you’re using an Android-powered Samsung tablet or the latest Samsung Galaxy Tab, our comprehensive guide will help you harness the power of wireless printing and make printing from your tablet a breeze.
Inside This Article
- Step 1: Connect Your Samsung Tablet to the Same Wi-Fi Network as the Printer
- Step 2: Install the Printer App on Your Tablet
- Step 3: Add Your Printer to the Printer App
- Step 4: Select the Document or Photo You Want to Print
- Step 5: Customize Print Settings (Optional)
- Step 6: Print the Document or Photo
- Step 7: Troubleshooting Tips
- Conclusion
- FAQs
Step 1: Connect Your Samsung Tablet to the Same Wi-Fi Network as the Printer
Before you can print from your Samsung tablet to a wireless printer, you need to ensure that both devices are connected to the same Wi-Fi network. Here’s how you can do it:
1. Open the Settings app on your Samsung tablet by swiping down from the top of the screen and tapping on the gear icon.
2. In the Settings menu, scroll down and tap on “Wi-Fi” to access the Wi-Fi settings.
3. Make sure that the Wi-Fi on your tablet is turned on by tapping on the toggle switch next to “Wi-Fi”.
4. Once Wi-Fi is enabled, your tablet will start scanning for available networks. Wait for a moment until you see a list of available Wi-Fi networks.
5. Locate and tap on the Wi-Fi network that your wireless printer is connected to. This usually has the same name as your printer or the printer brand.
6. If the Wi-Fi network is secured with a password, enter the password and tap on “Connect”.
7. Your Samsung tablet will now connect to the selected Wi-Fi network. Wait for a few moments until the connection is established.
8. Once the connection is established, you will see a “Connected” status next to the Wi-Fi network name on your tablet’s screen.
By connecting your Samsung tablet to the same Wi-Fi network as the printer, you are now ready to proceed to the next step and install the printer app on your tablet.
Step 2: Install the Printer App on Your Tablet
Installing the printer app on your Samsung tablet is an essential step in enabling wireless printing. This app acts as a bridge between your tablet and the wireless printer, allowing seamless communication and print capabilities.
To install the printer app, follow these simple steps:
- Open the Google Play Store on your Samsung tablet.
- Search for the printer app by typing the printer brand or model name in the search bar. For example, if you have an HP printer, search for “HP printer app.”
- From the search results, find the official app developed by the printer manufacturer. Make sure it is compatible with your printer model.
- Click on the app to access its page. Check the reviews and ratings to ensure its reliability.
- Tap the “Install” button to begin downloading and installing the app on your tablet. Depending on your internet connection and the app’s size, the installation process may take a few moments.
- Once the installation is complete, you can find the printer app on your tablet’s home screen or in your app drawer.
It is important to note that different printer brands may have their own dedicated apps. For example, HP printers usually require the HP Smart app, while Epson printers may require the Epson iPrint app. Make sure to install the app specifically designed for your printer brand for optimal compatibility and functionality.
Installing the printer app on your tablet will provide you with convenient features, such as the ability to print directly from various apps, access to advanced print settings, and the option to monitor ink or paper levels from your tablet.
So, take a few minutes to install the printer app on your Samsung tablet, and get ready to experience the convenience and flexibility of wireless printing!
Step 3: Add Your Printer to the Printer App
Once you have installed the printer app on your Samsung tablet, it’s time to add your printer to the app. This will allow you to establish a wireless connection between your tablet and the printer, enabling you to print documents and photos seamlessly.
To add your printer, follow these simple steps:
- Open the printer app on your Samsung tablet.
- Navigate to the settings or setup section of the app.
- Select the “Add Printer” or “Search for Printer” option.
- The app will start scanning for available printers on your network.
- Once the scan is complete, a list of detected printers will be displayed.
- Tap on your printer from the list to select it.
- If prompted, enter the printer’s password or PIN (if applicable).
After completing these steps, your Samsung tablet will establish a connection with the printer, and you can now start printing documents and photos wirelessly.
It’s important to note that your printer must be turned on and connected to the same Wi-Fi network as your tablet in order for it to show up in the app’s list of detected printers.
If you are unable to find your printer in the list or if you encounter any issues during the setup process, refer to the troubleshooting tips in the next section or consult the user manual of your specific printer model.
Step 4: Select the Document or Photo You Want to Print
Now that your Samsung tablet is connected to the wireless printer and the printer app is installed, it’s time to select the document or photo you want to print. Here’s how:
1. Open the printer app on your Samsung tablet. The app may have a different name depending on the printer brand, so look for an app icon that represents your printer.
2. Once the app is open, navigate to the “Print” or “Print Options” section. This is where you’ll find the options to select your document or photo.
3. Tap on the “Select Document” or “Select Photo” button. This will open a file browser or gallery app on your tablet, allowing you to browse through your files and select the one you want to print.
4. In the file browser or gallery app, locate the document or photo you wish to print. You can navigate through folders or albums to find the file you need. Once you’ve found it, tap on it to select it.
5. After selecting the document or photo, you may have the option to preview it before printing. This can be useful to make sure everything looks correct and there are no formatting issues that may affect the printout.
6. Double-check the selected document or photo’s details on the app screen. Confirm that it is the correct file and that you are satisfied with the content before proceeding.
7. If you want to print multiple documents or photos at once, look for options to add additional files to the print queue. Some printer apps allow you to select multiple files and print them in a batch.
8. Once you are confident with your selection, proceed to the next step to customize print settings, if desired, or directly print the document or photo.
By following these steps, you can easily select the document or photo you want to print using your Samsung tablet and wireless printer. With just a few taps, you’ll be on your way to having a physical copy of your digital files.
Step 5: Customize Print Settings (Optional)
Once you have selected the document or photo you want to print from your Samsung tablet, you have the option to customize the print settings before sending it to the wireless printer. Customizing the print settings allows you to tailor the output to your specific needs and preferences.
Here are some key print settings that you can adjust:
- Page Layout: You can choose the page orientation (portrait or landscape) and the number of copies you want to print.
- Print Quality: This setting determines the resolution and clarity of the print output. Higher quality settings typically result in better print quality but may take longer to print.
- Paper Size: If your printer supports multiple paper sizes, you can select the appropriate paper size for your document or photo.
- Color Options: Depending on your printer and the document or photo you are printing, you may have the option to choose between color and black and white printing.
- Borderless Printing: If you want your document or photo to be printed without any borders, enable this option. It is particularly useful for printing photos that span the entire paper.
- Print Preview: Some printer apps offer a print preview feature that allows you to see how the final printout will look before sending it to the printer. This can help you make any necessary adjustments or corrections.
Keep in mind that the available print settings may vary depending on your printer model and the printer app you are using. Take a moment to explore the print settings options offered by your printer app and choose the settings that best suit your needs.
Once you have customized the print settings to your satisfaction, you are ready to proceed to the next step and print your document or photo.
Step 6: Print the Document or Photo
Once you have customized the print settings to your preference, you are now ready to print the document or photo from your Samsung tablet. Follow these simple steps:
- Ensure that your tablet is still connected to the Wi-Fi network where your wireless printer is connected.
- Open the app or document that you want to print. This could be an email, a photo from your gallery, a web page, or even a PDF file.
- Tap on the print icon or go to the Print option within the app. The specific location of the print option may vary depending on the app you are using.
- Select your wireless printer from the list of available printers. You should see the printer name that you added in the previous step.
- Choose the number of copies you want to print. You can also select whether you want to print in color or black and white.
- If needed, you can select specific pages or a range of pages to print.
- Review the print preview to ensure that everything looks good. This allows you to check the layout, formatting, and any other details before printing.
- Press the Print button to start printing. Depending on the size and complexity of the document or photo, it may take a few moments for the printing process to complete.
Once the printing is complete, retrieve your printed document or photo from the printer’s output tray. Remember to collect all your printed copies and organize them as needed.
Printing from your Samsung tablet to a wireless printer is a convenient way to bring your digital documents and photos into the physical world. Whether you need to print important documents, personal files, or cherished memories, this simple process allows you to do it all without the hassle of transferring files to a computer.
Now that you have successfully printed from your Samsung tablet to a wireless printer, you can enjoy the convenience and flexibility that this technology offers. Just remember to keep your tablet and printer connected to the same Wi-Fi network whenever you wish to print in the future.
Step 7: Troubleshooting Tips
Despite the convenience of wireless printing from a Samsung tablet to a wireless printer, you may sometimes encounter issues. But don’t worry, here are some troubleshooting tips to help you overcome common obstacles:
1. Check Wi-Fi Connection: Ensure that your Samsung tablet is connected to the same Wi-Fi network as your wireless printer. If they are not connected to the same network, you won’t be able to print. Double-check the Wi-Fi settings on both devices to ensure they are connected to the same network.
2. Restart Devices: Sometimes, a simple restart can resolve connectivity issues. Turn off your Samsung tablet and the wireless printer, and then turn them back on. This can help refresh the connection and resolve any temporary glitches.
3. Update Printer Software: Check if there are any available updates for your wireless printer’s software or firmware. Manufacturers often release updates to address compatibility issues and enhance performance. Visit the manufacturer’s website or use the printer app to check for updates and install them if necessary.
4. Clear Print Queue: If you are experiencing problems with a specific document or photo not printing, there might be a stuck print job in the print queue. Access the printer app on your Samsung tablet and check the print queue. Remove any pending print jobs and try printing again.
5. Verify Printer Compatibility: Ensure that your wireless printer is compatible with your Samsung tablet. Check the manufacturer’s specifications or consult the user manual to confirm compatibility. If the printer is not compatible, you may need to consider using a different printing method or investing in a compatible printer.
6. Check Ink or Toner Levels: Low ink or toner levels can also cause printing issues. Inspect the ink or toner cartridges in your wireless printer and replace them if they are running low. This simple step can help avoid print quality problems or incomplete documents.
7. Reinstall Printer App: If you’re still experiencing trouble, try uninstalling and reinstalling the printer app on your Samsung tablet. This can refresh the app’s settings and resolve any software-related issues that might be hindering the printing process.
8. Consult Manufacturer Support: If all else fails, don’t hesitate to reach out to the manufacturer’s support team for assistance. They are knowledgeable about their specific printer models and can provide guidance and troubleshooting steps tailored to your device.
By following these troubleshooting tips, you should be able to resolve most common printing issues when printing from your Samsung tablet to a wireless printer. Now you can enjoy the convenience of wireless printing without any hassles!
In conclusion, being able to print from your Samsung tablet to a wireless printer provides a convenient and efficient way to bring your digital documents into the physical realm. With the right setup and a compatible printer model, you can easily print your photos, documents, and other files directly from your tablet without the need for any cables or additional equipment.
Wireless printing not only saves you time and effort but also allows for greater flexibility and convenience. Whether you’re at home, in the office, or on the go, you can seamlessly connect and print from your tablet without being tethered to a printer through a physical connection.
By following the step-by-step instructions provided in this guide, you can set up your Samsung tablet to wirelessly print to a compatible printer and have the freedom to print whenever and wherever you need to. So why wait? Start enjoying the benefits of wireless printing from your Samsung tablet today!
FAQs
Q: Can I print from my Samsung tablet to a wireless printer?
A: Yes, you can print from your Samsung tablet to a wireless printer. Samsung tablets have built-in printing features that allow you to connect and print wirelessly to compatible printers.
Q: How do I connect my Samsung tablet to a wireless printer?
A: To connect your Samsung tablet to a wireless printer, follow these steps:
- Make sure your tablet and printer are connected to the same Wi-Fi network.
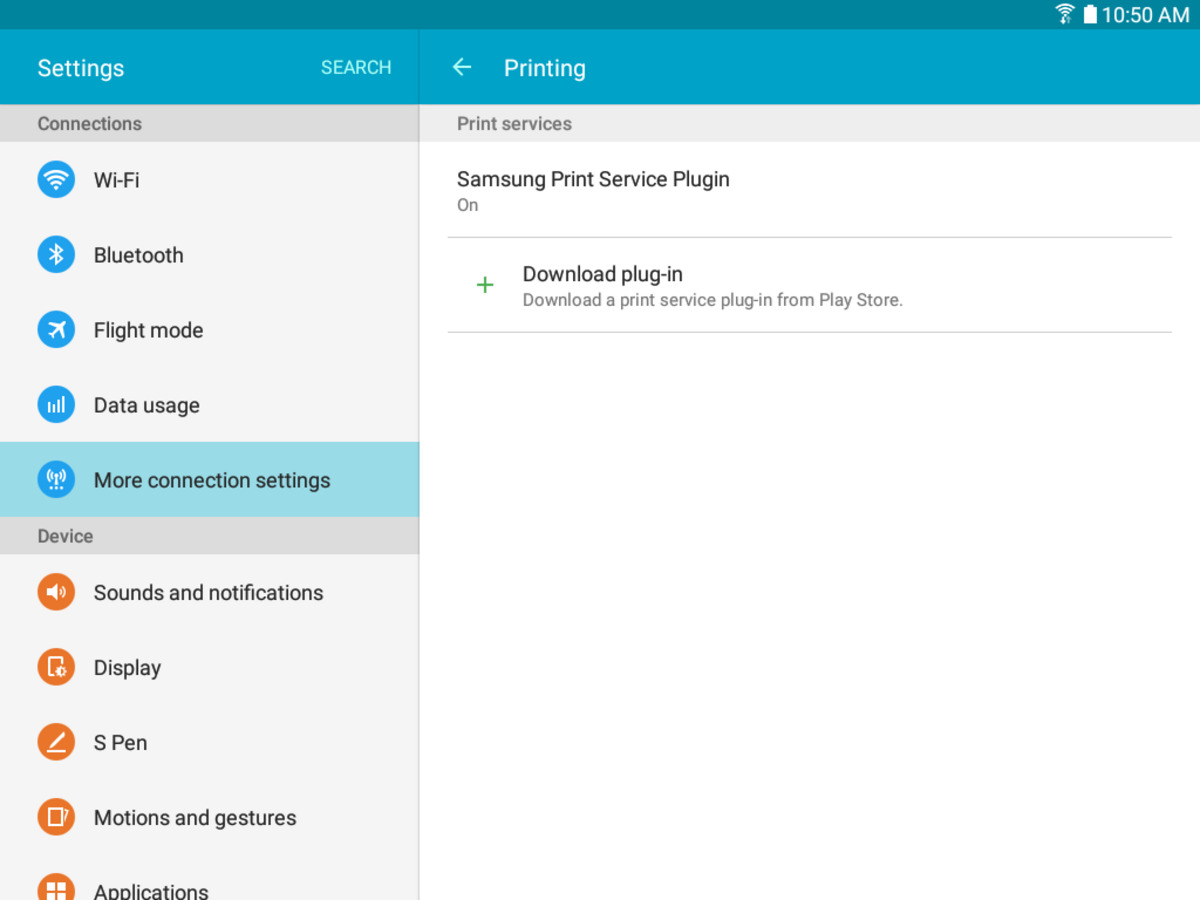
- On your tablet, go to “Settings” and select “Connections.”
- Tap on “Printing” and then choose “Printers.”
- Select “Add Printer” and wait for your tablet to detect available printers.
- Choose your wireless printer from the list of available printers and follow the prompts to complete the setup.
Q: What if my Samsung tablet does not recognize my wireless printer?
A: If your Samsung tablet does not recognize your wireless printer, try the following steps to troubleshoot the issue:
- Ensure that both your tablet and printer are connected to the same Wi-Fi network.
- Check if your printer supports mobile printing and if it is compatible with your Samsung tablet.
- Make sure the printer is turned on and properly connected to the Wi-Fi network.
- Restart both your tablet and printer to refresh the connection.
- If the issue persists, refer to the printer’s manual or contact the manufacturer for further assistance.
Q: Can I print documents other than photos from my Samsung tablet?
A: Yes, you can print various types of documents from your Samsung tablet, including photos, PDF files, emails, web pages, and more. Most wireless printers that are compatible with Samsung tablets support printing of a wide range of file formats.
Q: Can I print directly from apps on my Samsung tablet?
A: Yes, you can print directly from apps on your Samsung tablet. Many popular apps, such as Google Docs, Microsoft Office Suite, and Adobe Acrobat Reader, have built-in printing options. Simply open the document or file in the app, tap on the menu icon, and select the “Print” option.
Q: Are there any additional apps I need to install to print from my Samsung tablet?
A: In most cases, you do not need to install any additional apps to print from your Samsung tablet. The printing functionality is usually built-in to the operating system. However, if you want additional features or compatibility with specific printer models, you may choose to install printer manufacturer-specific apps from the Google Play Store.