
Have you ever wondered how to read live data on a scan tool? Whether you’re a car enthusiast or a professional mechanic, being able to access and interpret live data from your vehicle can be incredibly useful. With the advancements in automotive technology, scan tools have become an essential tool for diagnosing and troubleshooting issues in modern vehicles.
In this article, we will guide you through the process of reading live data on a scan tool. We’ll explore what live data is and why it’s important, how to connect a scan tool to your vehicle, and the step-by-step process of reading and interpreting live data. By the end of this article, you’ll have a thorough understanding of how to effectively use a scan tool to extract valuable information and diagnose any potential issues with your vehicle.
Inside This Article
- Understanding Scan Tools
- Connecting the Scan Tool to the Vehicle
- Navigating the Scan Tool Menu
- Interpreting Live Data on the Scan Tool
- Conclusion
- FAQs
Understanding Scan Tools
Scan tools are essential devices for diagnosing and troubleshooting problems in modern vehicles. They are portable computerized devices that connect to the vehicle’s On-Board Diagnostics (OBD) system. The primary function of a scan tool is to read and interpret the live data that is constantly being transmitted by various sensors and modules in the vehicle.
By accessing the live data, a scan tool provides real-time information about the vehicle’s performance, such as engine speed, coolant temperature, and fuel consumption. This valuable information allows technicians and car enthusiasts to detect any abnormalities or malfunctions in the system and address them promptly.
There are different types of scan tools available in the market, ranging from basic code readers to advanced diagnostic tools. Basic code readers can only retrieve and clear trouble codes, while advanced diagnostic tools offer advanced features like graphical data representation and bi-directional control.
One important factor to consider when choosing a scan tool is its compatibility with the vehicle’s OBD system. There are two main OBD standards: OBD-I and OBD-II. OBD-I scan tools are designed for older vehicles produced before 1996, while OBD-II scan tools are suitable for most vehicles manufactured after 1996.
Additionally, scan tools come in various forms, including handheld devices, mobile apps, and PC-based software. Handheld devices are compact and user-friendly, making them convenient for on-the-go diagnostics. Mobile apps utilize Bluetooth or Wi-Fi connections to pair with a smartphone or tablet, providing a portable and versatile solution. PC-based software, on the other hand, offers a more in-depth analysis with a larger display and advanced features.
Understanding the capabilities and limitations of your scan tool is crucial. While an advanced diagnostic tool may provide more comprehensive data, it may not be necessary for everyday car owners. Alternatively, basic code readers can be a cost-effective option for simple troubleshooting.
Connecting the Scan Tool to the Vehicle
Before you can read live data on a scan tool, you need to connect it to your vehicle. Follow these steps to ensure a successful connection:
- Locate the OBD-II port: The On-Board Diagnostics II (OBD-II) port is usually located under the dashboard on the driver’s side. It is a 16-pin connector that allows the scan tool to communicate with your vehicle’s computer system.
- Turn off the vehicle: Ensure that the vehicle’s ignition is turned off before connecting the scan tool. This will prevent any potential damage to the tool or the vehicle’s electrical system.
- Plug in the scan tool: Take the connector end of the scan tool and insert it firmly into the OBD-II port. Ensure that the connection is secure to establish proper communication.
- Power on the scan tool: Once you have plugged in the scan tool, power it on. Follow the instructions provided by the manufacturer to turn on the device.
- Select the vehicle’s make and model: Some scan tools require you to input the specific make and model of your vehicle. Use the menu options or buttons on the device to select the correct information. This will ensure accurate readings.
- Wait for the scan tool to establish a connection: The scan tool might take a few moments to establish communication with the vehicle’s computer. Be patient and wait for the connection to be established.
- Confirm the connection: Once the scan tool has established a connection, it may display a confirmation message or provide a menu of options. This indicates that the tool is ready to read live data from your vehicle.
Remember, it is important to consult the user manual or instructions that come with your specific scan tool for detailed information on connecting it to your vehicle. Different models and brands may have slightly different procedures.
Navigating the Scan Tool Menu
Once you have successfully connected your scan tool to the vehicle, you will be presented with a menu on the tool’s display. Navigating this menu is essential to access the various features and functions of the scan tool. Here’s a step-by-step guide to help you efficiently navigate the scan tool menu:
- Language and Vehicle Selection: The first step is to select your preferred language, as well as the make and model of the vehicle you are working on. This ensures that the scan tool’s software is compatible with the specific vehicle.
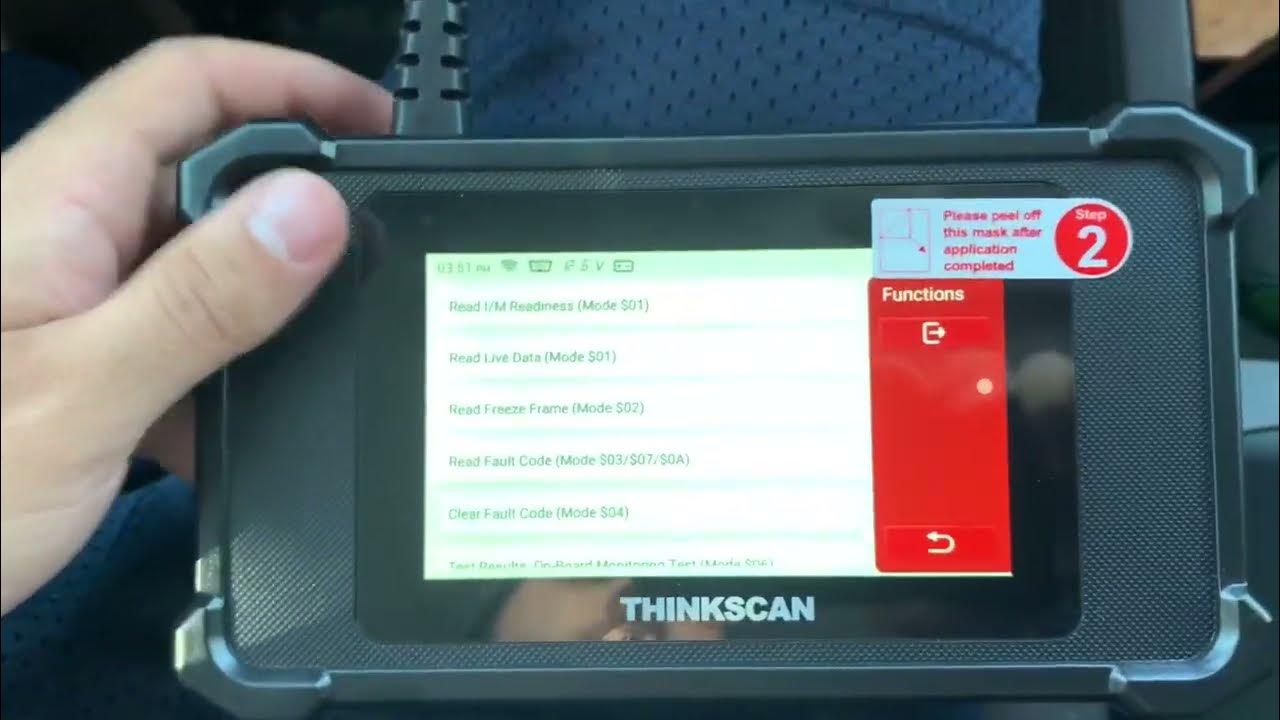
- Diagnostic Options: After selecting the vehicle, you will likely be presented with diagnostic options such as “Read Codes,” “Clear Codes,” “View Live Data,” and “Perform Tests.” These options allow you to perform various diagnostic functions on the vehicle.
- Read Codes: Choosing the “Read Codes” option will initiate a scan of the vehicle’s computer system to identify any stored trouble codes. These codes provide valuable information about the issues the vehicle is experiencing.
- Clear Codes: If the scan tool identifies any trouble codes, you can choose the “Clear Codes” option to reset the vehicle’s computer system. This is helpful when performing repairs and ensuring that the problem has been resolved.
- View Live Data: One of the most important functions of a scan tool is the ability to view live data. Selecting this option will allow you to monitor real-time information from various sensors and modules in the vehicle. This can include data such as engine RPM, coolant temperature, fuel trim, and much more.
- Perform Tests: Some scan tools offer the functionality to perform tests on specific components or systems in the vehicle. This can include tests such as activating relays, cycling solenoids, and checking sensor outputs. Selecting this option will provide you with a list of available tests for further diagnosis.
- Data Playback: Certain scan tools have the capability to record and playback live data. This feature allows you to capture data during a specific event or test drive and play it back later for analysis. It can be especially useful when diagnosing intermittent issues.
- Additional Features: Depending on the scan tool model, there may be additional features and functions available in the menu. These can include accessing vehicle information, performing special functions like programming key fobs, and even updating the scan tool’s software.
Navigating the scan tool menu may vary slightly depending on the model and brand of the tool you are using. However, the general process remains the same, allowing you to efficiently utilize the scan tool’s capabilities for effective vehicle diagnostics and troubleshooting.
Interpreting Live Data on the Scan Tool
Once you have successfully connected your scan tool to the vehicle and navigated through the menu, you will have access to a wealth of live data. But how do you make sense of all the information displayed on the screen?
Interpreting live data on a scan tool requires some knowledge of what each parameter represents and how it relates to the vehicle’s performance. Here are a few key points to keep in mind:
- Identify the Parameters: The first step is to identify the specific parameters displayed on the scan tool. This may include engine RPM, coolant temperature, oxygen sensor voltage, fuel trim values, and more. Each parameter represents a different aspect of the vehicle’s operation.
- Understand Normal Ranges: It’s important to have a good understanding of the normal operating ranges for each parameter. These ranges can vary depending on the make and model of the vehicle. Consult the vehicle’s service manual or online resources to determine what is considered normal for each parameter.
- Monitor Values in Real-Time: As you drive the vehicle, pay close attention to the values displayed on the scan tool. The data should update in real-time, allowing you to see any fluctuations or abnormalities. Look for any drastic changes or values that are outside the normal range.
- Compare Values: When interpreting live data, it’s useful to compare the values of different parameters. For example, the oxygen sensor voltage should fluctuate in relation to the engine RPM and fuel trim values. By analyzing the relationships between different parameters, you can gain insight into the overall health of the vehicle’s systems.
- Look for Patterns: Patterns in the live data can often indicate underlying issues. For example, if the fuel trim values consistently show a lean condition, it could be a sign of a vacuum leak or a faulty oxygen sensor. Analyzing the data for any recurring patterns can help pinpoint the root cause of a problem.
- Document and Analyze: It’s a good practice to document any abnormal values or patterns observed during the live data analysis. This information can be valuable when diagnosing and troubleshooting vehicle problems. Take notes and capture screenshots or recordings of the live data for further analysis.
Interpreting live data on a scan tool takes practice and familiarity with the specific parameters for each vehicle. By understanding the normal ranges, monitoring values in real-time, comparing values, looking for patterns, and documenting observations, you can gain valuable insights into the health and performance of the vehicle.
Conclusion
In conclusion, learning how to read live data on a scan tool is a valuable skill for anyone working with cars or interested in DIY car maintenance. By understanding the real-time information provided by the scan tool, you can diagnose and troubleshoot issues more accurately and efficiently. Whether you’re a professional mechanic or a car enthusiast, having the ability to access and interpret live data can save you time and money.
Remember to follow the manufacturer’s instructions for your specific scan tool and make sure to use it safely and responsibly. Regularly updating your scan tool software will ensure that you have the latest features and improvements available.
So, don’t hesitate to invest in a quality scan tool and start exploring the world of live data. Mastering this skill will not only empower you to take better care of your vehicle but also open up new opportunities in the automotive industry. Happy scanning!
FAQs
Q: What is live data on a scan tool?
Live data refers to real-time information gathered and displayed by a scan tool from various sensors and systems in a vehicle. It provides a snapshot of the current operating conditions of the vehicle, including engine RPM, coolant temperature, fuel trim values, oxygen sensor data, and more.
Q: Why is it important to read live data on a scan tool?
Reading live data on a scan tool is crucial for diagnosing and troubleshooting vehicle issues. It allows mechanics and car enthusiasts to monitor the performance of different components and systems in real-time, helping them identify any anomalies or errors. With live data, they can make informed decisions and pinpoint the root cause of problems more efficiently.
Q: How do I connect a scan tool to my vehicle?
To connect a scan tool to your vehicle, you typically need to locate the OBD-II (On-Board Diagnostics) port, which is usually located under the dashboard, near the driver’s side. Once you find the port, plug the scan tool’s connector into it. Some scan tools might require additional steps, such as turning on the ignition or following specific instructions mentioned in the user manual.
Q: Can I read live data on a scan tool without professional knowledge?
While it is possible to read live data on a scan tool without professional knowledge, it is generally recommended to have some understanding of automotive systems and diagnostics. Without proper knowledge, it can be challenging to interpret the live data accurately and effectively diagnose any issues. It is advisable to consult with a qualified mechanic or technician if you are unsure about the readings or if you need assistance in troubleshooting.
Q: Are all scan tools capable of reading live data?
Not all scan tools are created equal, and not all of them have the capability to read live data. When purchasing a scan tool, it is essential to check its features and specifications to ensure it has the functionality you require. Higher-end scan tools, especially those designed for professional use, tend to have more advanced live data reading capabilities, providing a more comprehensive view of the vehicle’s performance.