
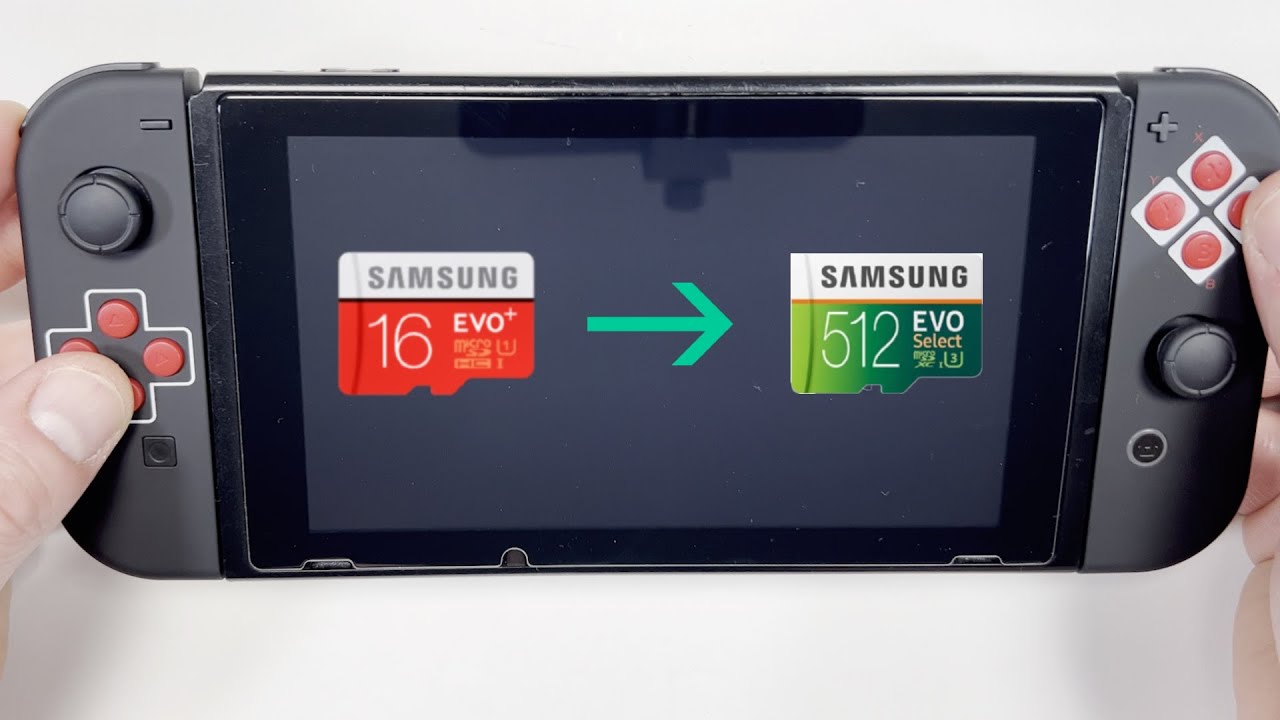
Are you a proud owner of a Nintendo Switch, looking to transfer your data from one micro SD card to another? Well, you’ve come to the right place! The process of transferring data between micro SD cards on a Nintendo Switch can seem daunting, but with the right guidance, it can be a breeze. Whether you’re looking to upgrade to a higher capacity card or simply need to replace a faulty one, we’ve got you covered. In this article, we will walk you through the step-by-step process of transferring your precious data, including game saves, screenshots, and game updates, from one micro SD card to another. So, get ready to seamlessly transfer your Nintendo Switch data and continue your gaming adventure without any hiccups!
Inside This Article
- Step 1: Turn off the Nintendo Switch
- Step 2: Remove the micro SD card from the Nintendo Switch
- Step 3: Insert the micro SD card into the new Nintendo Switch
- Step 4: Format the micro SD card (optional)
- Step 5: Transfer data from the old micro SD card to the new one
- Step 6: Test the new micro SD card on the Nintendo Switch
- Conclusion
- FAQs
Step 1: Turn off the Nintendo Switch
Before transferring data from one micro SD card to another on your Nintendo Switch, it is crucial to ensure that the device is turned off. This will prevent any potential data corruption or loss during the transfer process. Follow the steps below to properly turn off your Nintendo Switch:
- Press and hold the power button on the top of your Nintendo Switch for a few seconds.
- A pop-up menu will appear on the screen.
- Select the “Power Options” icon to access the power settings.
- In the power settings menu, choose the “Turn Off” option.
- Confirm your decision by selecting “Turn Off” again on the confirmation prompt.
Once you have successfully turned off your Nintendo Switch, you can proceed to the next step of transferring data from one micro SD card to another.
Step 2: Remove the micro SD card from the Nintendo Switch
Removing the micro SD card from your Nintendo Switch is a straightforward process. Follow the steps below:
1. Start by powering off your Nintendo Switch. Press and hold the power button until the power options menu appears, then select “Power Options” and choose “Power Off.”
2. Once the console is completely powered off, locate the micro SD card slot on the back of the Nintendo Switch. It is located under the kickstand, near the game cartridge slot.
3. Gently push the kickstand open and you will see a small plastic cover. Slide the plastic cover off to reveal the micro SD card slot and the micro SD card.
4. Carefully push the micro SD card inward until you hear a click. This indicates that the micro SD card has been released from the slot.
5. To remove the micro SD card, use your fingernail or a small tool to pull it out from the slot. Be cautious not to use excessive force or damage the card or the slot.
6. Once you have successfully removed the micro SD card, close the plastic cover and push the kickstand back into place.
That’s it! You have successfully removed the micro SD card from your Nintendo Switch and are now ready to insert it into another device or replace it with a new one.
Step 3: Insert the micro SD card into the new Nintendo Switch
Once you have successfully removed the micro SD card from the old Nintendo Switch, it’s time to insert it into the new one. This step is crucial for transferring your data and ensuring a smooth gaming experience on your new device.
Before inserting the micro SD card, make sure the new Nintendo Switch is turned off. This will prevent any potential data loss or damage to the card during the insertion process. Take a moment to power down your device and proceed to the next steps.
Locate the micro SD card slot on the new Nintendo Switch. The slot is typically located on the back of the device, behind a small cover. Gently lift the cover to reveal the slot where the micro SD card will be inserted. Be sure to handle the card with care to avoid any accidental damage.
Now, take the micro SD card that you removed from the previous Nintendo Switch and carefully align it with the slot on the new device. The card has a notch on one side that matches the slot, ensuring the correct orientation for insertion. Make sure the metal contacts on the card are facing downwards and slide it into the slot until it is fully inserted.
Once the micro SD card is inserted, you can gently push it in until it clicks into place. This ensures a secure connection and prevents the card from accidentally coming loose during gameplay or travel. Once you hear the click, you can be confident that the micro SD card is securely inserted and ready for use in the new Nintendo Switch.
It’s important to note that if this is the first time you are using a micro SD card on your new Nintendo Switch, you may need to format the card. Formatting the card prepares it for use with the new device and ensures compatibility. However, formatting will erase any existing data on the card, so be sure to back up your files beforehand if necessary.
After inserting the micro SD card and potentially formatting it, you can proceed to the next step of transferring your data from the old micro SD card to the new one. This step is crucial for preserving your game saves, downloads, and other content, ensuring a seamless transition to your new Nintendo Switch.
Step 4: Format the micro SD card (optional)
Formatting the micro SD card is an optional step, but it can be helpful to ensure the best performance and compatibility with your new Nintendo Switch. When you format a micro SD card, it erases all the data stored on it and prepares it for use with the new device. Here’s how you can format the micro SD card:
1. Insert the micro SD card into a computer or a card reader.
2. Open the file explorer on your computer and locate the micro SD card.
3. Right-click on the micro SD card and select the “Format” option from the drop-down menu.
4. A formatting window will appear with various options. Choose the default settings unless you have specific requirements.
5. Click on the “Start” button to begin the formatting process.
6. Wait for the formatting process to complete. This may take a few minutes depending on the size of the micro SD card.
7. Once the formatting is complete, you will receive a notification indicating that the process was successful.
8. Safely eject the micro SD card from your computer or card reader.
Formatting the micro SD card ensures that it is ready to be used with your new Nintendo Switch. It eliminates any potential compatibility issues and allows for a smoother gaming experience. However, it’s important to note that formatting the micro SD card will erase all the data stored on it, so make sure to backup any important files before proceeding with the formatting process.
Step 5: Transfer data from the old micro SD card to the new one
Transferring data from your old micro SD card to the new one is a simple process that ensures all your game progress, digital purchases, and saved data are seamlessly transferred to the new card. Follow the steps below to complete the transfer:
1. Insert the old micro SD card into a card reader or adapter and connect it to your computer. Make sure the computer recognizes the card and assigns it a drive letter.
2. Navigate to the location where the old micro SD card is recognized on your computer and open the folder containing the Nintendo Switch data.
3. Select all the files and folders in the Nintendo Switch folder and copy them to a temporary location on your computer, such as the desktop.
4. Safely eject the old micro SD card from your computer and remove it from the card reader or adapter.
5. Insert the new micro SD card into the card reader or adapter and connect it to your computer. Ensure that the new card is recognized and assigned a drive letter.
6. Open the location of the new micro SD card on your computer and create a new folder named “Nintendo Switch”.
7. Paste the copied files and folders from the temporary location on your computer into the new “Nintendo Switch” folder on the new micro SD card.
8. Safely eject the new micro SD card from your computer and remove it from the card reader or adapter.
9. Insert the new micro SD card into your Nintendo Switch.
10. Power on your Nintendo Switch and check if all your game progress, digital purchases, and saved data are intact. You should be able to access all your content as before.
By following these steps, you can successfully transfer data from the old micro SD card to the new one, ensuring a seamless gaming experience on your Nintendo Switch.
Step 6: Test the new micro SD card on the Nintendo Switch
Once you have successfully transferred your data from the old micro SD card to the new one, it’s time to test the new card on your Nintendo Switch. This step ensures that all the data has been transferred correctly and that the new card is functioning properly.
To test the new micro SD card, follow these steps:
- Power on your Nintendo Switch and make sure it is running on the latest firmware.
- Ensure that the new micro SD card is properly inserted into the card slot of the Nintendo Switch.
- Access the “System Settings” menu on your Nintendo Switch. You can find this option on the home screen, represented by a gear icon.
- Scroll down and select the “Data Management” option.
- Within the “Data Management” menu, choose “Manage Software.”
- You should see a list of all the software and data stored on your micro SD card. Make sure that the titles and icons are displayed correctly.
- Select a game or application from the list and ensure that it launches without any issues. Play the game or explore the application to confirm that all the data is accessible.
- Repeat the previous step for multiple games or applications to verify that the new micro SD card is working properly across different titles.
If you encounter any issues during the testing process, such as games not loading properly or data being inaccessible, try removing and reinserting the micro SD card. If the problem persists, double-check that the data transfer was completed correctly and consider repeating the transfer process.
It’s important to note that if the new micro SD card fails the testing process or if you experience any unexpected issues, it may be a sign of a faulty card. In such cases, it is advisable to replace the micro SD card with a new one and repeat the data transfer process.
With proper testing, you can ensure that your new micro SD card is functioning as expected and that all your data is accessible on your Nintendo Switch. Now you can enjoy your favorite games and applications without any worries!
Conclusion
Transferring data from one micro SD card to another on your Nintendo Switch is a simple process that can be done quickly and efficiently. By following the steps outlined in this guide, you can ensure that all your games, saved data, and other content seamlessly migrate to the new micro SD card.
Whether you want to upgrade to a larger capacity card or simply need to replace a faulty one, knowing how to transfer data is essential to ensure that you don’t lose any progress or valuable information. The Nintendo Switch provides an intuitive and user-friendly interface that makes the process accessible to even the most novice users.
Remember to back up your data regularly and keep track of your micro SD card’s storage capacity to prevent any unexpected issues. With the knowledge gained from this article, you can confidently manage your Nintendo Switch’s storage and enjoy a seamless gaming experience on your favorite console.
FAQs
Q: Can I transfer data from one Micro SD card to another on the Nintendo Switch?
A: Yes, you can transfer data from one Micro SD card to another on the Nintendo Switch. The process allows you to move games, save data, and other files to a new Micro SD card while retaining your progress and settings.
Q: What do I need to transfer data from one Micro SD card to another on the Nintendo Switch?
A: To transfer data, you will need both the old Micro SD card and a new one with sufficient capacity to hold the data. You will also need a computer with an SD card reader or an external SD card reader to connect the Micro SD cards to your computer.
Q: How do I transfer data from one Micro SD card to another on the Nintendo Switch?
A: To transfer data, follow these steps:
- Power off your Nintendo Switch completely.
- Remove the old Micro SD card from the Nintendo Switch.
- Insert the old Micro SD card into a card reader and connect it to your computer.
- Copy the contents of the old Micro SD card to a folder on your computer.
- Remove the old Micro SD card from the card reader.
- Insert the new Micro SD card into the card reader and connect it to your computer.
- Copy the contents of the folder on your computer to the new Micro SD card.
- Remove the new Micro SD card from the card reader and insert it into your Nintendo Switch.
- Power on your Nintendo Switch and verify that the transferred data is accessible.
Q: Will transferring data from one Micro SD card to another on the Nintendo Switch delete my data?
A: No, transferring data from one Micro SD card to another on the Nintendo Switch will not delete your data. The process simply copies the data from the old Micro SD card to the new one while preserving your existing files and settings.
Q: Do I need to format the new Micro SD card before transferring data?
A: No, you do not need to format the new Micro SD card before transferring data. The data transfer process will automatically format the new Micro SD card to the appropriate file system required by the Nintendo Switch.