
Are you excited about getting your hands on the latest iPhone 13? But what about your old iPhone and all the valuable data stored on it? Don’t worry, transferring your old iPhone to the new iPhone 13 is a simple process that ensures you won’t lose any important files or settings. In this article, we will guide you through the step-by-step process of transferring your old iPhone to the new iPhone 13, ensuring a seamless transition between devices. Whether it’s contacts, photos, messages, or even your favorite apps, we’ve got you covered. So, let’s dive in and discover how you can effortlessly transfer all your data from your old iPhone to the shiny, new iPhone 13.
Inside This Article
- Preparation steps
- Method 1: Using Quick Start
- Method 2: Using iCloud
- Method 3: Using iTunes
- Conclusion
- FAQs
Preparation steps
Before transferring your data from your old iPhone to the new iPhone 13, there are a few important preparation steps to follow. These steps will help to ensure a smooth and successful transfer process. Here’s what you need to do:
- Backup your old iPhone: It is crucial to create a backup of your old iPhone before transferring to the new iPhone 13. You can back up your iPhone using iCloud or iTunes. This will ensure that all your data, settings, and preferences are saved and can be easily restored on the new device.
- Update your old iPhone: Make sure that your old iPhone is running the latest version of iOS. You can check for any available updates by going to Settings > General > Software Update. Updating your iPhone will help to avoid any compatibility issues or glitches during the transfer process.
- Charge your old iPhone: Ensure that your old iPhone has sufficient battery power before starting the transfer process. This will prevent any interruptions or sudden shutdowns during the data transfer.
- Connect to a stable internet connection: To transfer your data wirelessly, you need to connect both your old iPhone and new iPhone 13 to a stable Wi-Fi network. This will enable a fast and reliable transfer process.
- Prepare your new iPhone 13: Turn on your new iPhone 13 and go through the initial setup process. Make sure to connect it to the same Wi-Fi network as your old iPhone for a seamless transfer.
- Make sure you have enough storage: Check the storage capacity of your new iPhone 13 and ensure that it has enough space to accommodate the data from your old iPhone. You may need to delete unnecessary files or apps to free up space if needed.
By following these preparation steps, you can ensure that your data transfer from your old iPhone to the new iPhone 13 goes smoothly without any hiccups. Now, let’s move on to the different methods you can use for transferring your old iPhone data to the new iPhone 13.
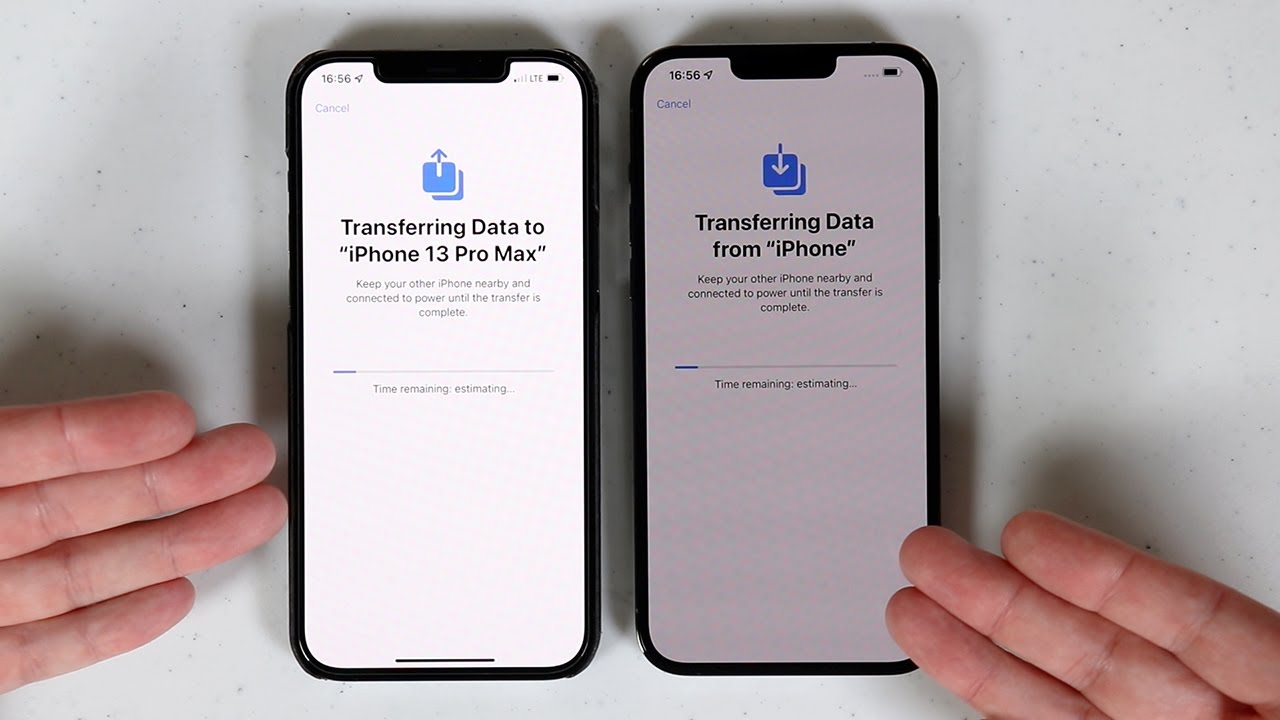
Method 1: Using Quick Start
When it comes to transferring data from your old iPhone to your shiny new iPhone 13, the Quick Start method is your best bet. This method allows you to transfer your data wirelessly and effortlessly.
To begin the process, make sure both your old and new iPhones are turned on and placed near each other. You’ll also need to ensure that both devices are connected to a stable Wi-Fi network.
On your old iPhone, you will see a pop-up message asking if you want to set up your new iPhone using your Apple ID. Tap “Continue” and scan the animation that appears on your new iPhone using your old iPhone’s camera.
Once the scan is complete, you will be prompted to enter your old iPhone’s passcode on your new iPhone. After entering the passcode, your new iPhone will begin the process of transferring your data, including apps, settings, and even your Apple Watch settings if applicable.
During the transfer, your new iPhone may ask you to enter your Apple ID and password to restore your apps and data from your iCloud backup. If you have enabled two-factor authentication, you may need to enter a verification code as well.
The duration of the transfer depends on the amount of data being transferred, so make sure both iPhones are charged or connected to a power source. Once the transfer is complete, your new iPhone will restart and display “Hello” in multiple languages.
Follow the prompts to set up Face ID or Touch ID, and you’ll be ready to enjoy your new iPhone 13 with all your precious data intact.
Method 2: Using iCloud
If you want a hassle-free way to transfer your old iPhone to your new iPhone 13, using iCloud is a great option. iCloud allows you to backup your old device and restore the data to your new device seamlessly. Just follow these simple steps:
Step 1: Ensure that both your old iPhone and new iPhone 13 are connected to a stable Wi-Fi network.
Step 2: On your old iPhone, go to “Settings” and tap on your Apple ID at the top of the screen.
Step 3: Tap on “iCloud” and make sure that the “iCloud Backup” option is turned on. If it’s not, toggle the switch to enable it.
Step 4: Tap on “Back Up Now” to initiate a backup of your old iPhone to iCloud. This may take some time depending on the amount of data on your device and your internet connection speed.
Step 5: Once the backup is complete, set up your new iPhone 13 by turning it on and following the on-screen instructions.
Step 6: During the setup process, you’ll come across the “Apps & Data” screen. Select “Restore from iCloud Backup.”
Step 7: Sign in to your Apple ID and choose the most recent backup from the list. Tap on “Restore” and wait for the process to complete.
Step 8: Your new iPhone 13 will now begin restoring all the backed-up data from iCloud, including your apps, settings, photos, messages, and more. Make sure to keep your device connected to Wi-Fi and plugged in until the process is finished.
That’s it! Your old iPhone data will now be transferred to your new iPhone 13 using iCloud. It’s a convenient and reliable method that ensures you don’t lose any important data during the transition.
Method 3: Using iTunes
If you prefer a more traditional method of transferring your data from your old iPhone to your new iPhone 13, you can use iTunes. iTunes allows you to create a backup of your old iPhone and restore that backup to your new device. Here’s how you can do it:
Step 1: Update iTunes
The first thing you need to do is make sure that you have the latest version of iTunes installed on your computer. You can do this by opening iTunes and going to the “Help” tab. From there, select “Check for Updates” and follow the prompts to update your software.
Step 2: Connect your old iPhone
Once you have updated iTunes, connect your old iPhone to your computer using a USB cable. iTunes should automatically detect your device. If it doesn’t, make sure your iPhone is unlocked and trust the computer when prompted.
Step 3: Create a backup
In iTunes, click on your iPhone icon at the top left corner of the screen. This will take you to the Summary page. Under the “Backups” section, click on “This Computer” and then click “Back Up Now” to initiate the backup process. Make sure to keep your old iPhone connected until the backup is completed.
Step 4: Set up your new iPhone 13
Once the backup is finished, disconnect your old iPhone and set it aside. Now, turn on your new iPhone 13 and follow the on-screen instructions to set it up. When you reach the “Apps & Data” screen, select “Restore from iTunes Backup.”
Step 5: Connect your new iPhone to iTunes
Using the same USB cable, connect your new iPhone 13 to your computer. iTunes should detect the new device. Select your iPhone icon and navigate to the Summary page, just like before.
Step 6: Restore from backup
In the Backups section, click on “Restore Backup…” and choose the most recent backup of your old iPhone. Click “Restore” and wait for the process to complete. Keep your new iPhone connected until the restoration is finished.
Step 7: Complete the setup
After the restoration process is done, your new iPhone 13 will restart and display the “Hello” screen. Follow the on-screen instructions to complete the setup, including signing in with your Apple ID and choosing your preferences.
That’s it! Using iTunes allows you to transfer all your data, including apps, photos, contacts, and settings, from your old iPhone to your new iPhone 13. It’s a reliable and secure method, especially if you have a large amount of data to transfer. So, if you prefer a more traditional approach, give this method a try!
Conclusion
Transferring your old iPhone data to your new iPhone 13 is a seamless process that ensures you can start using your new device without missing a beat. With the advancements in technology, Apple has made it easier than ever to transfer all your important data, including contacts, photos, apps, and settings.
By following the steps outlined in this article, you can rest assured that your transition from your old iPhone to your new iPhone 13 will be a smooth and hassle-free experience. Whether you choose to use iCloud, a physical transfer method, or a combination of both, you have the tools at your disposal to easily and efficiently transfer all your valuable data to your new iPhone.
So, go ahead and let the excitement of your new iPhone 13 take over, knowing that the process of transferring your old iPhone data is a simple and straightforward one. Enjoy exploring the features and capabilities of your new device, confident in the knowledge that your old iPhone’s data is securely and conveniently at your fingertips!
FAQs
Q: How do I transfer my data from my old iPhone to the new iPhone 13?
A: Transferring data from your old iPhone to the new iPhone 13 is a straightforward process. You can use the Quick Start feature, which allows you to transfer data wirelessly by placing your old iPhone near the new one during setup. Another option is to use iCloud backup to restore your data. Simply back up your old iPhone to iCloud and then sign in to your new iPhone 13 with your Apple ID to restore the backup.
Q: Can I transfer my apps to the new iPhone 13?
A: Yes, you can easily transfer your apps to the new iPhone 13. When you set up your new iPhone, you will be prompted to sign in with your Apple ID. Once signed in, you can go to the App Store and download any apps you had on your old iPhone. If you used iCloud backup, your apps will automatically be restored along with your other data.
Q: What about my photos and videos? How can I transfer them to the new iPhone 13?
A: There are several ways to transfer your photos and videos to the new iPhone 13. One option is to use iCloud Photo Library or iCloud Photo Sharing. Enable these features on your old iPhone and sign in with the same Apple ID on your new iPhone 13 to access your photo library. Additionally, you can use AirDrop to transfer individual photos and videos between your devices.
Q: Will my contacts and calendar entries be automatically transferred to the new iPhone 13?
A: If you are using iCloud to sync your contacts and calendar entries, they will be automatically transferred to your new iPhone 13. During the setup process, sign in with your Apple ID and ensure that Contacts and Calendars are enabled in the iCloud settings. Alternatively, you can also use the Quick Start feature or iTunes backup to transfer your contacts and calendar data.
Q: How can I transfer my music and other media to the new iPhone 13?
A: If you are subscribed to Apple Music, you can simply sign in with your Apple ID on the new iPhone 13 to access your music library. For non-Apple Music music files, you can sync them using iTunes on your computer by connecting the new iPhone 13 via USB. You can also use iCloud Music Library to upload your music collection and then download it to your new iPhone 13.