
Are you ready to upgrade from your trusty iPhone 7 to the latest and greatest iPhone 13? Congratulations on making the decision to elevate your mobile experience! As you embark on this exciting transition, it's essential to ensure that all your valuable data seamlessly transfers to your new device. From contacts and photos to apps and settings, this comprehensive guide will walk you through the process of transferring your cherished information from your iPhone 7 to your shiny new iPhone 13. Whether you're a tech enthusiast or a casual user, this article will equip you with the knowledge and confidence to make the transition smooth and hassle-free. Let's dive in and make the upgrade process a breeze!
Inside This Article
- Backing Up Your iPhone 7
- Setting Up Your iPhone 13
- Transferring Data Using iCloud
- Transferring Data Using Quick Start
- Conclusion
- FAQs
**
Backing Up Your iPhone 7
**
Before transferring data from your iPhone 7 to the new iPhone 13, it’s crucial to back up your current device to ensure that no data is lost during the transition. Backing up your iPhone 7 is a seamless process that can be done through iCloud or iTunes.
Firstly, ensure that your iPhone 7 is connected to a stable Wi-Fi network and plugged into a power source to prevent any interruptions during the backup process. Then, navigate to “Settings” on your iPhone 7, tap your name at the top of the screen, select “iCloud,” and then “iCloud Backup.”
Toggle the “iCloud Backup” option to enable it, and then tap “Back Up Now” to initiate the backup process. This will ensure that all your device’s settings, app data, photos, and more are securely stored in your iCloud account, ready to be transferred to your new iPhone 13.
Setting Up Your iPhone 13
Once you’ve unboxed your shiny new iPhone 13, the first step is to power it on by pressing and holding the side button until the Apple logo appears. After a warm welcome, select your language and region to personalize your device to your preferences.
Next, connect to a Wi-Fi network to ensure a smooth setup process. You’ll then be prompted to set up Face ID, Apple’s facial recognition technology, which adds an extra layer of security to your device. Simply follow the on-screen instructions to complete this process.
After setting up Face ID, you’ll have the option to create a passcode for additional security. This passcode will be required to unlock your iPhone, even if Face ID is enabled. Once your passcode is set, you can choose whether to restore your device from a previous backup or set it up as a new iPhone.
Finally, you’ll be prompted to sign in with your Apple ID, which allows you to access iCloud, the App Store, and other Apple services. If you don’t have an Apple ID, you can create one during this step. Once signed in, you can choose your preferences for Siri, app analytics, and screen time, customizing your iPhone 13 to suit your needs.
**
Transferring Data Using iCloud
**
Transferring data from your iPhone 7 to iPhone 13 using iCloud is a convenient and efficient method. iCloud enables you to seamlessly transfer your photos, videos, contacts, and more to your new device. Before initiating the transfer, ensure that both your iPhone 7 and iPhone 13 are connected to Wi-Fi and plugged into a power source to prevent any interruptions during the process.
First, on your iPhone 7, navigate to “Settings” and tap on your Apple ID at the top of the screen. Next, select “iCloud” and then “iCloud Backup.” Ensure that the iCloud Backup toggle is switched on. Tap “Back Up Now” to initiate the backup process. This will ensure that all your data is securely stored in iCloud.
Once the backup is complete, turn on your new iPhone 13. Follow the on-screen instructions until you reach the “Apps & Data” screen. Select “Restore from iCloud Backup” and sign in to your iCloud account using your Apple ID and password. Choose the most recent backup from your iPhone 7 and let the transfer commence.
During the transfer, ensure that your iPhone 13 remains connected to Wi-Fi and plugged into a power source. The duration of the transfer process may vary depending on the amount of data being transferred and the speed of your internet connection. Once the transfer is complete, your iPhone 13 will restart, and all your data from the iPhone 7 will be seamlessly transferred to your new device.
Sure, I'll craft the content with the appropriate HTML tags. Here's the content for "Transferring Data Using Quick Start" with the section title included:
html
Transferring Data Using Quick Start
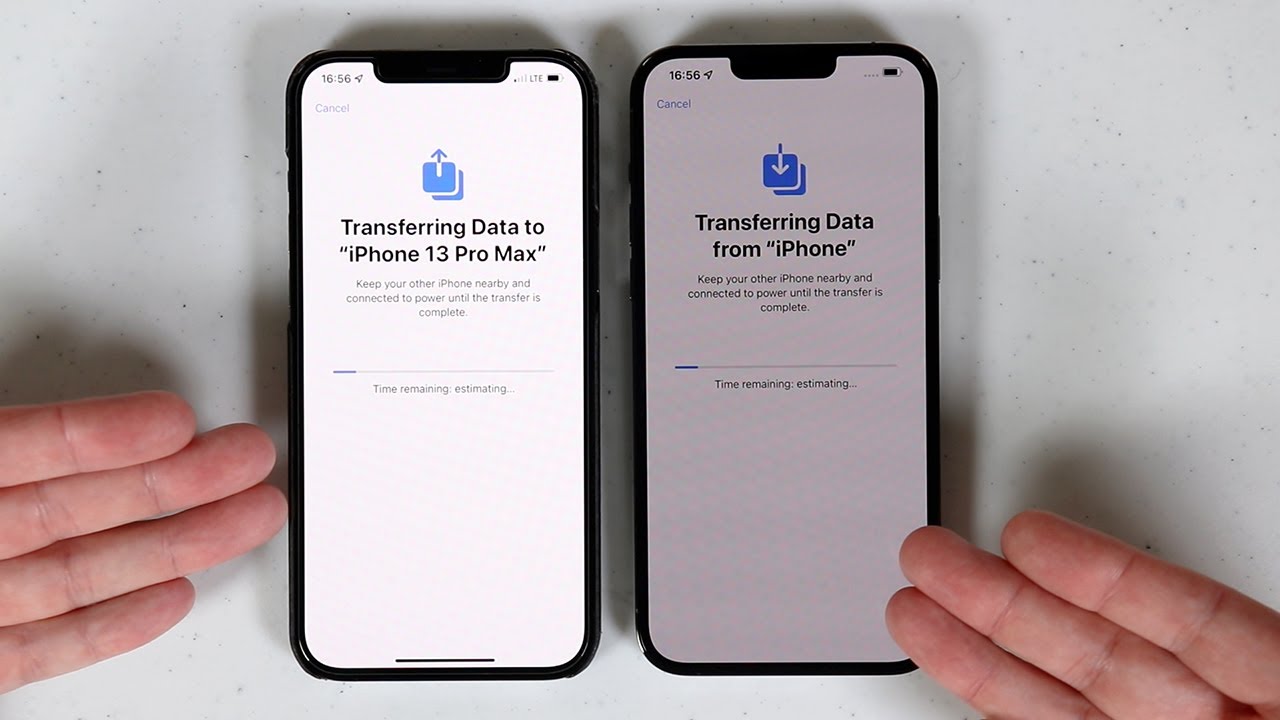
When setting up your new iPhone 13, you can use the Quick Start feature to transfer data from your iPhone 7 seamlessly. This method allows you to transfer your data wirelessly, ensuring a smooth transition to your new device.
To initiate the process, ensure that both your iPhone 7 and iPhone 13 are running on iOS 12.4 or later. Place the devices close to each other and follow the on-screen instructions. You’ll be prompted to use your current iPhone to scan the animation on your new iPhone 13.
After scanning the animation, you’ll be prompted to enter your current iPhone’s passcode on the new device. Once completed, you can set up Face ID or Touch ID on your iPhone 13 and proceed with the data transfer process.
Quick Start will then begin transferring your Apple ID, settings, and preferences to your new iPhone. It will also prompt you to transfer your apps, data, and content, ensuring that your new device mirrors your old one seamlessly.
During the transfer process, it’s essential to keep both devices close to each other and connected to power. Once the transfer is complete, your iPhone 13 will be ready with all your data, settings, and preferences from your iPhone 7.
This method is convenient and efficient, providing a hassle-free way to migrate to your new iPhone 13 without the need for cables or extensive setup processes.
Conclusion
Transferring from an iPhone 7 to an iPhone 13 can be an exciting and seamless process, thanks to the advanced technology and user-friendly features of Apple devices. By following the methods outlined in this guide, you can effortlessly migrate your data, settings, and apps to your new iPhone 13, ensuring a smooth transition without losing any valuable information. Whether you choose to utilize iCloud, iTunes, or the Quick Start feature, the key is to back up your data beforehand and carefully follow the step-by-step instructions provided by Apple. As technology continues to evolve, the process of transferring data between iPhones is becoming increasingly efficient, allowing users to enjoy their new devices with minimal hassle. With the wealth of resources and support available, transitioning to a new iPhone has never been easier.
FAQs
Q: Can I transfer data from my old iPhone 7 to the new iPhone 13?
A: Yes, you can easily transfer data from your iPhone 7 to the new iPhone 13 using various methods such as iCloud, iTunes, or Quick Start.
Q: What is the quickest way to transfer data between iPhones?
A: The quickest way to transfer data between iPhones is using the Quick Start feature, which allows you to transfer data wirelessly and seamlessly.
Q: Will my apps and app data be transferred to the new iPhone 13?
A: Yes, when you transfer data from your old iPhone 7 to the new iPhone 13, your apps and app data will be transferred as well, ensuring a smooth transition.
Q: Do I need an internet connection to transfer data between iPhones?
A: While an internet connection is not mandatory for transferring data between iPhones, having a stable Wi-Fi connection can expedite the process, especially when using iCloud for the transfer.
Q: Can I transfer data from an iPhone 7 to an iPhone 13 without losing any content?
A: Yes, you can transfer data from an iPhone 7 to an iPhone 13 without losing any content by following the proper steps and using reliable methods such as iCloud or iTunes.