
As the iPhone evolves, so do the features and functionalities it offers. One such feature that has changed the way we make payments is Apple Pay. With the release of the iPhone 14, Apple has continued to enhance and simplify the Apple Pay experience, making it easier and more convenient for users to make purchases. But how exactly do you use Apple Pay on the iPhone 14? In this comprehensive guide, we will walk you through the step-by-step process of setting up and using Apple Pay on your iPhone 14. Whether you’re new to Apple Pay or just need a refresher, this article will provide you with all the information you need to start using this convenient and secure digital payment method on your iPhone 14.
Inside This Article
- Setting Up Apple Pay on iPhone 14
- Adding credit or debit cards to Apple Pay
- Making a Payment with Apple Pay on iPhone 14
- Managing and Troubleshooting Apple Pay on iPhone 14
- Conclusion
- FAQs
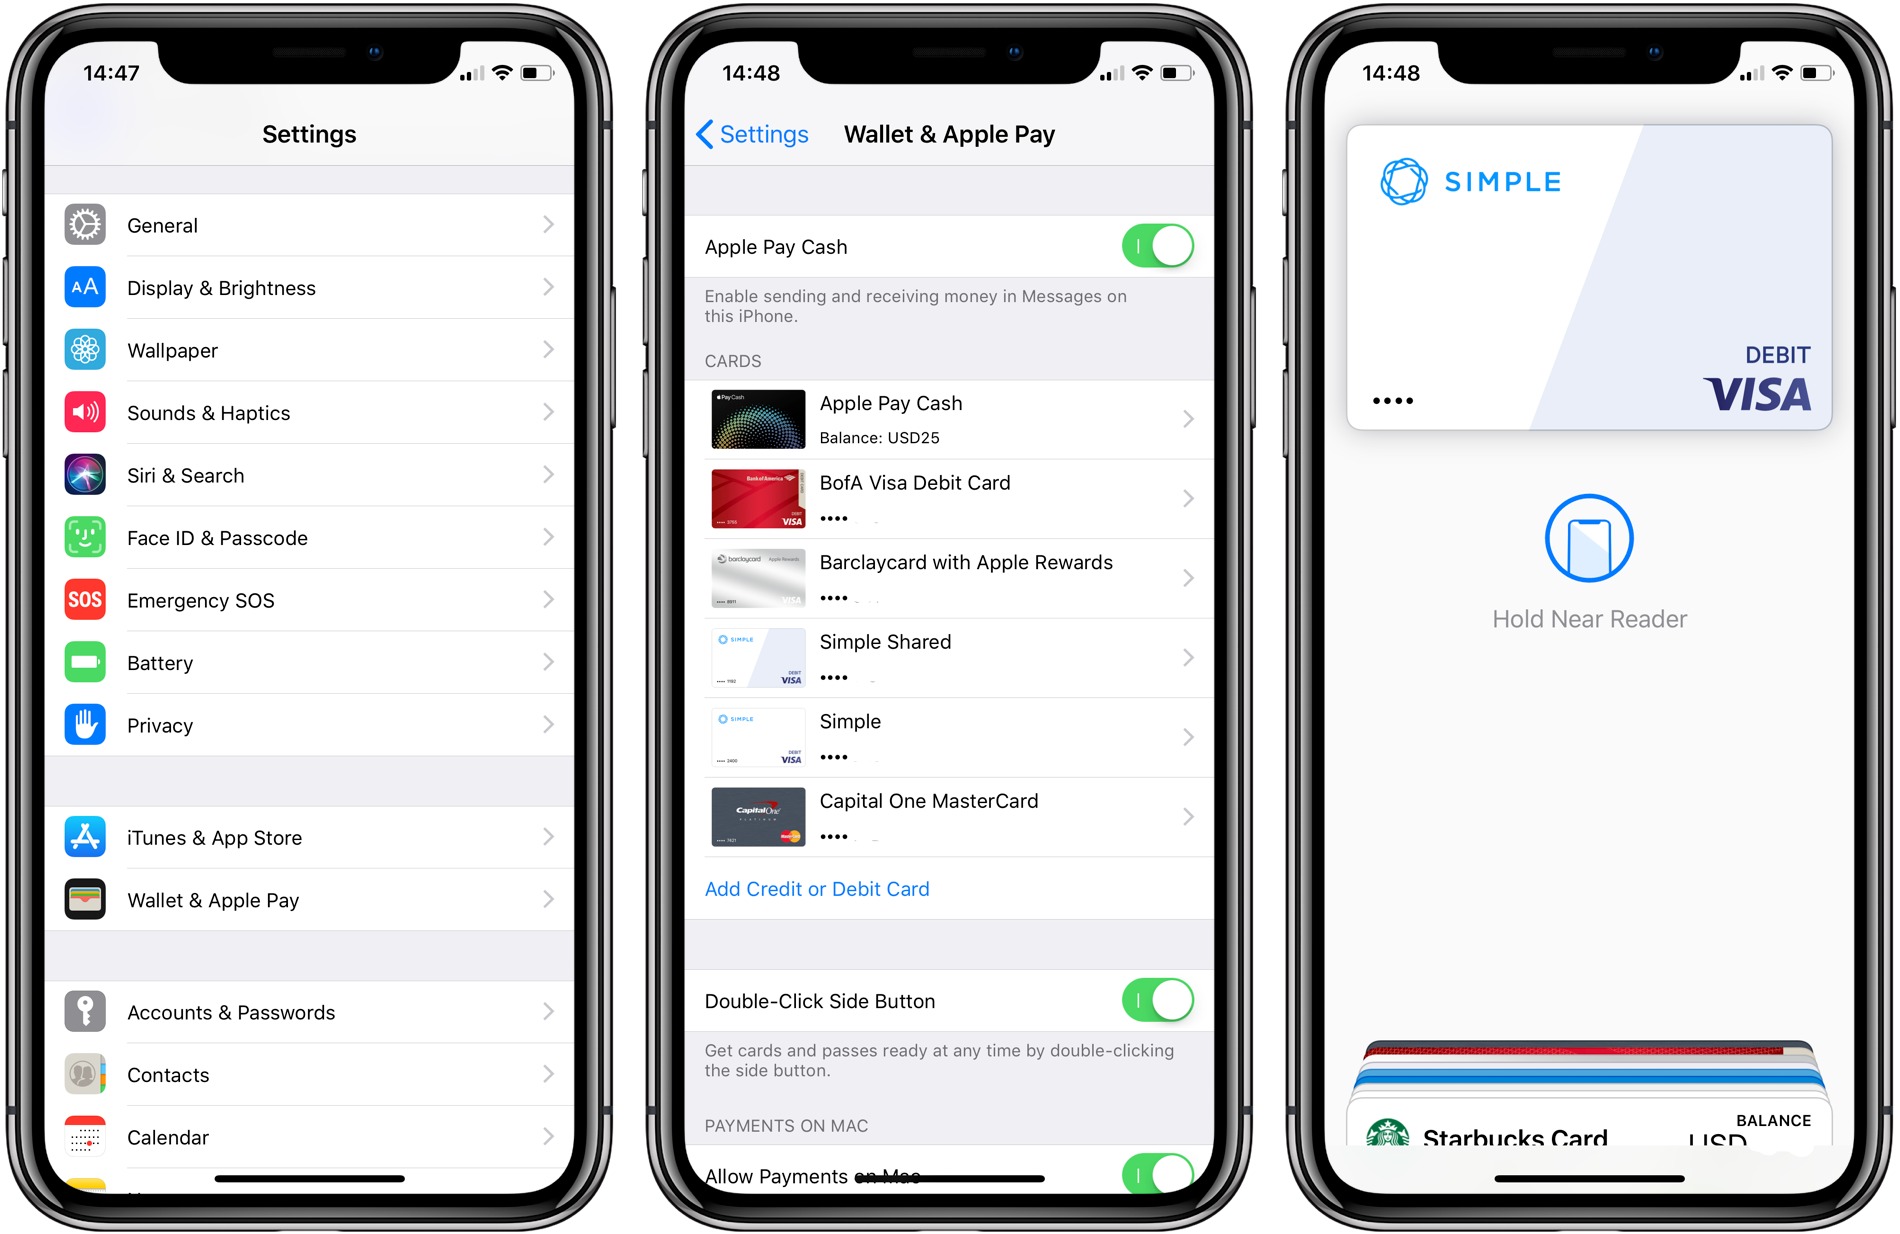
Setting Up Apple Pay on iPhone 14
Apple Pay is a convenient and secure way to make payments using your iPhone 14. Whether you’re buying groceries, shopping online, or paying for a cup of coffee, Apple Pay allows you to make fast and secure transactions with just a few taps on your device. To set up Apple Pay on your iPhone 14, follow these simple steps:
Step 1: Open the Wallet app
Locate the Wallet app on your iPhone 14 home screen and open it. The Wallet app is represented by an icon that looks like a wallet filled with credit cards.
Step 2: Add a card
Tap the “Add Card” button to start the process of adding your debit or credit card to Apple Pay. You can either use the camera to capture the card details or enter them manually. Make sure to follow the instructions on the screen to ensure accuracy.
Step 3: Verify your card
In order to ensure the security of your payment information, your card may need to undergo a verification process. This can be done through a verification code sent by your card issuer or by contacting the bank directly. Follow the prompts to complete the verification process.
Step 4: Set up Face ID or Touch ID
To add an extra layer of security to your Apple Pay transactions, you can set up Face ID or Touch ID. These features use facial recognition or fingerprint scanning technology to authenticate your payments. You can set this up during the initial card setup process or later in the Settings app.
Step 5: Start using Apple Pay
Once you’ve successfully set up Apple Pay on your iPhone 14, you’re ready to start making payments. Simply look for the Apple Pay logo or the contactless payment symbol at participating stores, and hold your iPhone near the payment terminal. Authenticate the transaction using Face ID or Touch ID, and you’re done!
With Apple Pay on your iPhone 14, you can enjoy the convenience of making secure payments with just a touch of your finger or a glance at your device. This contactless payment method eliminates the need to carry physical cards and provides an added layer of security for your financial transactions.
Adding credit or debit cards to Apple Pay
Apple Pay is a convenient and secure way to make payments using your iPhone 14. By adding your credit or debit cards to Apple Pay, you can easily make purchases both in-store and online without having to carry your physical cards with you.
To add a credit or debit card to Apple Pay on your iPhone 14, follow these simple steps:
- Open the Wallet app on your iPhone 14. It is pre-installed on your device and can be found on your home screen.
- Tap the “+” icon, typically located in the top right corner of the screen.
- Follow the on-screen instructions to add your card. You can choose to manually enter your card details or use your iPhone’s camera to scan the card.
- Once you’ve entered the card information, your bank or card issuer may require additional verification. This can be done through an SMS or email code, or by contacting your bank directly.
- Once your card is verified, it will be added to Apple Pay, and you can start using it for transactions.
It’s important to note that not all credit or debit cards are supported by Apple Pay. However, most major banks and card issuers now offer Apple Pay compatibility. If you encounter any issues adding your card, contact your bank or card issuer for assistance.
Adding your credit or debit cards to Apple Pay provides a convenient and secure payment method. With just a few simple steps, you can have all your cards readily available on your iPhone 14, making your shopping experiences seamless and hassle-free.
Making a Payment with Apple Pay on iPhone 14
Apple Pay has revolutionized the way we make payments, providing a convenient and secure method for transactions. If you’re an iPhone 14 user, you’ll be glad to know that using Apple Pay on your device is a breeze. With just a few simple steps, you can easily make payments without the need for physical credit cards or cash.
Here’s a step-by-step guide on how to make a payment with Apple Pay on your iPhone 14:
- First, ensure that your iPhone 14 has the latest version of iOS installed. To check for updates, go to Settings > General > Software Update and install any available updates.
- Next, open the Wallet app on your iPhone 14. If you haven’t set up Apple Pay yet, you’ll be prompted to add a credit or debit card. Follow the on-screen instructions to add your card to Apple Pay.
- Once your card is added, you can start making payments. Look for the Apple Pay logo or contactless payment symbol at participating merchants.
- To initiate the payment, simply double-click the side button on your iPhone 14. This action will bring up your default payment card on the screen.
- If you have multiple cards added to Apple Pay, you can swipe left or right to select the card you want to use for the payment.
- Hold your iPhone 14 near the payment terminal, ensuring that the device’s Face ID or Touch ID is authenticated. This will authorize the payment.
- Once the payment is successfully processed, you’ll receive a confirmation on your iPhone 14 and an optional email receipt, depending on the merchant’s settings.
It’s important to note that Apple Pay uses tokenization to protect your payment information. This means that your actual card details are never shared with the merchant during the transaction, adding an extra layer of security to your payments.
Whether you’re paying for groceries, dining out, or shopping online, Apple Pay on your iPhone 14 offers a fast, secure, and convenient way to make transactions. Embrace the future of payments and enjoy the benefits that Apple Pay brings to your daily life.
Managing and Troubleshooting Apple Pay on iPhone 14
Apple Pay is a convenient and secure payment method available on iPhone 14. However, like any technology, there may be instances where you may encounter issues or need to manage your Apple Pay settings. In this guide, we will explore some common troubleshooting steps and provide tips on managing your Apple Pay on iPhone 14.
1. Update Software: One of the first troubleshooting steps you should take is to ensure that your iPhone 14 is running the latest software version. Apple frequently releases updates that include bug fixes and enhancements for Apple Pay. To check for updates, go to Settings > General > Software Update.
2. Check Card Details: If you’re having trouble making payments with Apple Pay, double-check that your credit or debit card details are correct. Go to Settings > Wallet & Apple Pay and select the card you want to verify. Ensure the card details, including the card number, expiration date, and security code, are accurate.
3. Check Card Compatibility: Not all banks and financial institutions support Apple Pay. If you’re having difficulties adding a card or making a payment, ensure that your bank or card issuer supports Apple Pay. You can do this by visiting Apple’s official Apple Pay website or contacting your bank directly.
4. Reset Apple Pay: If all else fails, you can try resetting your Apple Pay settings. Go to Settings > Wallet & Apple Pay and tap on your card. Scroll down and select “Remove This Card.” Once the card is removed, you can add it again by tapping on “Add Card.” This can help resolve any configuration issues that may be causing problems.
5. Contact Customer Support: If you’ve tried all the troubleshooting steps and are still experiencing issues with Apple Pay on your iPhone 14, it may be time to reach out to Apple Support or your card issuer’s customer support. They will be able to provide personalized assistance and troubleshoot any underlying issues specific to your device or card.
6. Lost or Stolen iPhone: If your iPhone 14 is lost or stolen, it’s important to take immediate action to protect your Apple Pay accounts. You can use Find My iPhone to remotely lock your device and suspend Apple Pay. Additionally, contact your card issuer to report the loss or theft and request a card replacement.
By following these steps and tips, you’ll be able to effectively manage and troubleshoot Apple Pay on your iPhone 14. Enjoy the convenience and security that Apple Pay provides for your mobile payments.
Conclusion
Overall, using Apple Pay on the iPhone 14 provides users with a convenient and secure way to make purchases. With its advanced features and seamless integration into the iOS ecosystem, Apple Pay offers a hassle-free payment experience. The ability to store multiple cards and make transactions with just a tap of the Touch ID or Face ID adds an extra layer of convenience.
Apple Pay’s commitment to privacy and security reassures users that their personal and financial information is protected. The encryption and tokenization technologies used in Apple Pay ensure that sensitive data is never stored on the device or shared with merchants.
Whether you’re buying groceries, dining out, or shopping online, Apple Pay on the iPhone 14 is a fast and secure way to complete transactions. So, the next time you reach for your iPhone 14 at the checkout counter or online, remember to take advantage of the convenience and security offered by Apple Pay.
FAQs
1. What is Apple Pay?
Apple Pay is a digital payment service provided by Apple. It allows iPhone users to make secure and convenient purchases in stores, apps, and websites using their devices. With Apple Pay, you can store your credit and debit cards on your iPhone and make payments with just a simple touch or face recognition.
2. How do I set up Apple Pay on my iPhone 14?
To set up Apple Pay on your iPhone 14, follow these steps:
- Open the Wallet app on your iPhone 14.
- Tap the “+” icon to add a card.
- Follow the on-screen instructions to add your credit or debit card.
- Once your card is verified, you can start using Apple Pay.
3. Is Apple Pay secure?
Yes, Apple Pay is secure. When you make a payment using Apple Pay, your card information is not shared with merchants. Instead, a unique device account number is used to process the transaction. Additionally, Apple Pay requires authentication through Touch ID, Face ID, or a passcode, adding an extra layer of security.
4. Can I use Apple Pay with any merchant?
Apple Pay is widely accepted at millions of merchants worldwide. Look for the contactless payment symbol or the Apple Pay logo when making a purchase in stores or within apps and websites. If you are unsure, ask the merchant if they accept Apple Pay before making a payment.
5. What if my iPhone 14 is lost or stolen?
If your iPhone 14 is lost or stolen, you can use the Find My app or visit iCloud.com to remotely lock your device and suspend Apple Pay. This will prevent anyone from using your cards without your permission. If you believe your card information may have been compromised, contact your bank or card issuer immediately to deactivate your card and prevent unauthorized transactions.