
Sure, here's the introduction wrapped in a paragraph tag:
So, you’ve got the sleek and powerful iPhone 10, and you’re eager to take advantage of its convenient features, including Apple Pay. Adding Apple Pay to your iPhone 10 is a simple process that allows you to make secure and hassle-free payments with just a tap of your device. In this comprehensive guide, we’ll walk you through the steps to add Apple Pay on your iPhone 10, ensuring that you can enjoy the convenience and security it offers in no time. Let’s dive in and unlock the full potential of your iPhone 10 with Apple Pay!
Inside This Article
- Setting up Apple Pay on iPhone 10
- Adding credit or debit cards to Apple Pay
- Using Apple Pay in stores and online
- Managing Apple Pay on iPhone 10
- Conclusion
- FAQs
Setting up Apple Pay on iPhone 10
Apple Pay is a convenient and secure way to make payments using your iPhone 10. Setting it up is a straightforward process that allows you to use your device for contactless payments at stores, within apps, and on the web.
To begin, open the “Wallet” app on your iPhone 10. Tap the “+” icon to add a new card. If you already have a card linked to your Apple ID, you can simply add it to your Wallet by entering the security code. For new cards, you can use the iPhone’s camera to capture the card information or enter it manually.
Next, you may be prompted to verify your card with your bank or card issuer. This is typically done through a verification code sent via text, email, or a phone call. Once your card is verified, it will be added to your Wallet and ready for use with Apple Pay.
After adding your cards, you can set a default card for payments. This is the card that will be used when you make a purchase using Apple Pay. You can easily change the default card at any time by going to “Settings” > “Wallet & Apple Pay” and selecting “Default Card.”
Finally, you may need to enable Touch ID or Face ID for added security. This ensures that only you can authorize payments with your iPhone 10. You can do this by going to “Settings” > “Wallet & Apple Pay” and toggling on the “Allow Payments on iPhone Lock Screen” option.
Sure, here's the content for "Adding credit or debit cards to Apple Pay":
Adding credit or debit cards to Apple Pay
Adding your credit or debit cards to Apple Pay is a seamless process that allows you to make secure and convenient payments using your iPhone 10. Here’s how you can easily set it up:
Step 1: Open the Wallet app
Begin by launching the Wallet app on your iPhone 10. This app is where you can manage your cards and use Apple Pay for transactions.
Step 2: Tap the “+” icon
Look for the “+” icon within the Wallet app and tap on it. This action will prompt you to add a new card to Apple Pay.
Step 3: Follow the prompts
Next, follow the on-screen prompts to add your credit or debit card. You can choose to either use the camera to capture your card details or enter the information manually.
Step 4: Verify your card
After entering your card details, you may be required to complete the verification process. This typically involves receiving a verification code via SMS or email.
Step 5: Start using Apple Pay
Once your card is successfully added and verified, you can start using Apple Pay for in-store, online, and in-app purchases, making transactions more convenient and secure.
By following these simple steps, you can easily add your credit or debit cards to Apple Pay on your iPhone 10 and enjoy the benefits of quick and secure payments.
Using Apple Pay in stores and online
Once you’ve added your credit or debit cards to Apple Pay on your iPhone 10, using it in stores and online is a breeze. When shopping in physical stores, look for the contactless payment symbol or the Apple Pay logo at the checkout terminal. To make a payment, simply hold your iPhone 10 near the contactless reader and use Face ID or Touch ID to authenticate the transaction. It’s fast, convenient, and secure, as your actual card details are never shared with the merchant.
When shopping online or in apps, Apple Pay makes the checkout process seamless. Look for the “Apple Pay” button at participating online retailers or within supported apps. When you’re ready to complete your purchase, simply select Apple Pay as your payment method and use Face ID or Touch ID to authorize the transaction. With just a glance or a touch, your payment is processed without the need to manually enter your card details or billing information.
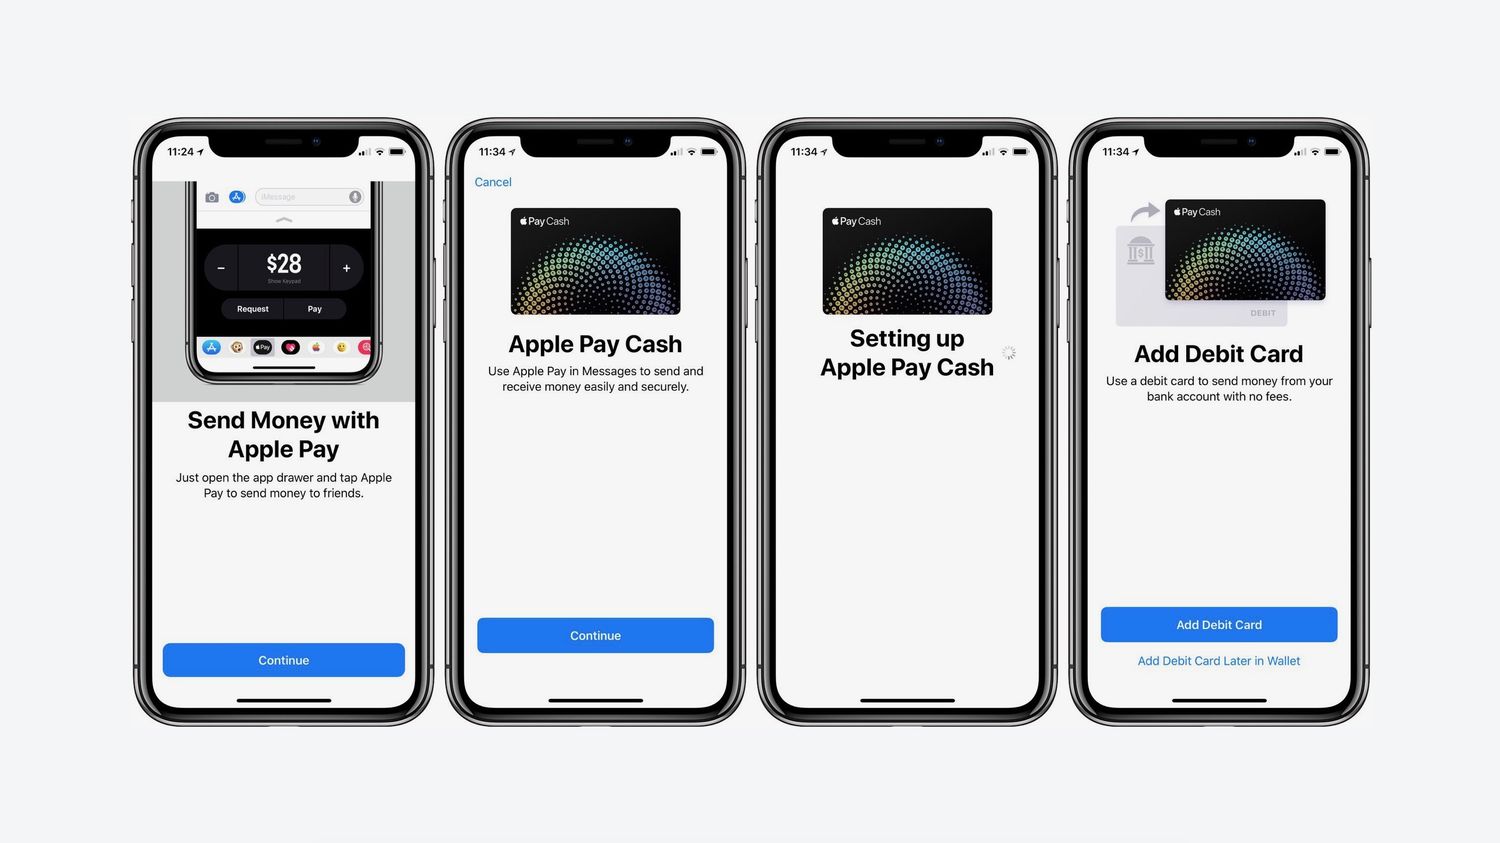
Apple Pay also offers a secure and private way to send and receive money through Messages. Whether you’re splitting a bill with friends or paying someone back, you can use Apple Pay Cash to send money directly from your iPhone 10. It’s a convenient way to handle peer-to-peer payments without the need for cash or checks.
Managing Apple Pay on iPhone 10
Managing Apple Pay on your iPhone 10 is a breeze, giving you control over your payment methods and transactions. Here’s what you need to know about managing Apple Pay on your iPhone 10.
Once you’ve added your credit or debit cards to Apple Pay, you can easily manage them in the Wallet app. Simply open the app, tap on the card you want to manage, and you’ll have access to options such as viewing transactions, setting a default card, or removing the card from Apple Pay.
Additionally, you can manage your Apple Pay settings in the Settings app on your iPhone 10. Here, you can control aspects such as transaction notifications, double-click shortcuts, and allowing access on the lock screen. These settings allow you to customize your Apple Pay experience to suit your preferences.
If you need to update your billing or contact information associated with your credit or debit cards on Apple Pay, you can do so directly in the Wallet app. This ensures that your payment information is always up to date and accurate.
Furthermore, managing your Apple Pay Cash, which allows you to send and receive money through iMessage, is also seamless on your iPhone 10. You can add money to your Apple Pay Cash card, transfer funds, and view your transaction history with ease.
For added security, you can manage your Apple Pay-connected devices and account through iCloud. This includes the ability to remotely erase your iPhone 10 if it’s lost or stolen, ensuring that your payment information remains secure.
By effectively managing Apple Pay on your iPhone 10, you can enjoy the convenience and security of contactless payments while maintaining full control over your payment methods and transactions.
**
Conclusion
**
Adding Apple Pay to your iPhone 10 is a seamless process that offers convenience and security for your transactions. With the ability to make payments in stores, apps, and on the web, Apple Pay enhances your shopping experience. The integration of Touch ID or Face ID ensures that your payments are protected, adding an extra layer of security. As mobile payment methods continue to gain popularity, Apple Pay remains at the forefront, providing a user-friendly and efficient way to make purchases. By following the simple steps outlined in this guide, you can easily set up and utilize Apple Pay on your iPhone 10, transforming the way you handle transactions and simplifying your daily routine.
FAQs
**Q: Can I add Apple Pay on my iPhone 10?**
A: Absolutely! Adding Apple Pay to your iPhone 10 is a straightforward process that can be completed in just a few simple steps.
Q: Is it safe to use Apple Pay on my iPhone 10?
A: Yes, Apple Pay is designed with multiple layers of security, including Touch ID or Face ID verification, tokenization, and device-specific account numbers, making it a secure and convenient way to make payments.
Q: Are there any fees associated with using Apple Pay on my iPhone 10?
A: Apple does not charge users any additional fees for using Apple Pay for transactions. However, some card issuers or banks may have their own fees or limits for using Apple Pay.
Q: Can I add multiple cards to Apple Pay on my iPhone 10?
A: Yes, you can add and manage multiple credit and debit cards within the Wallet app on your iPhone 10, allowing for flexibility and convenience when making payments.
Q: What should I do if my iPhone 10 is lost or stolen with Apple Pay enabled?
A: In the event that your iPhone 10 is lost or stolen, you can use the "Find My" app to remotely lock or erase the device, including your payment cards, ensuring the security of your financial information.