
Welcome to the world of iPhone 14! Whether you’ve just upgraded to the latest model or are simply switching to a new device, one thing remains constant – the need to transfer your data. Luckily, Apple makes this process seamless with its backup and restore feature. In this article, we will guide you through the step-by-step process of restoring your iPhone 14 from a backup. Whether you’ve backed up your data using iCloud or iTunes, we’ve got you covered. So, grab your coffee, sit back, and let’s dive into the world of data restoration. By the end of this article, you’ll be confidently enjoying your new iPhone 14 with all your precious data right where it belongs!
Inside This Article
- Overview of iPhone 14 Backup and Restore Process
- Step 1: Backing up your iPhone 14
- Step 2: Preparing your iPhone 14 for restoration
- Step 3: Restoring your iPhone 14 from backup
- Conclusion
- FAQs
Overview of iPhone 14 Backup and Restore Process
Backing up and restoring your iPhone 14 is an essential task to ensure the safety of your data and settings. Whether you’re upgrading to a new device or simply need to recover from a potential data loss, knowing how to backup and restore your iPhone 14 is crucial.
When you perform a backup, it creates a snapshot of your iPhone’s data and settings, including your apps, photos, messages, and more. This backup can be stored either in iCloud or on your computer using iTunes. By having a backup, you can easily restore your iPhone 14 with all your important data in case of accidental deletion, device malfunction, or when setting up a new device.
Restoring your iPhone 14 from a backup allows you to transfer all your data and settings from your previous device onto your new iPhone 14. This process ensures a seamless transition, as you can pick up right where you left off, with all your apps, photos, and settings intact.
Before proceeding with the backup and restore process, it’s important to ensure you have a compatible backup available. This means that the backup was created from a device running the same or a lower version of iOS. If you’re unsure about the compatibility of your backup, don’t worry – we’ll guide you through the necessary steps to check this. Once you’ve confirmed compatibility, you can proceed with the restore process.
There are two methods to restore your iPhone 14 from a backup – using iCloud or using iTunes. We’ll walk you through both methods to help you choose the one that suits your needs.
Step 1: Backing up your iPhone 14
Before we dive into the process of restoring your iPhone 14 from a backup, it’s crucial to ensure that you have a recent backup of your device. Backing up your iPhone regularly not only safeguards your valuable data but also makes the restoration process seamless and hassle-free.
Fortunately, backing up your iPhone 14 is a straightforward process. You have two primary options – iCloud and iTunes – to create a backup. Let’s explore both methods to help you decide which one suits your needs.
Option 1: Backing up with iCloud
iCloud is a cloud-based service provided by Apple that allows you to store your data securely and access it across multiple devices. To back up your iPhone 14 using iCloud, follow these steps:
- Make sure that your iPhone 14 is connected to a stable Wi-Fi network.
- Go to the “Settings” app on your iPhone 14 and tap your name at the top.
- Select “iCloud” and then tap on “iCloud Backup”.
- Toggle the switch to enable “iCloud Backup.
- Tap on “Back Up Now” to initiate the backup process. Keep in mind that the time taken to complete the backup depends on the size of your data and your internet connection speed.
Option 2: Backing up with iTunes
iTunes is a software developed by Apple that allows you to manage and sync your iOS devices. To create a backup of your iPhone 14 using iTunes, follow these steps:
- Connect your iPhone 14 to your computer using a USB cable.
- Launch iTunes on your computer. If you are using a Windows PC, make sure you have the latest version of iTunes installed.
- Click on the iPhone icon that appears in the top-left corner of the iTunes window.
- In the “Summary” tab, you will find the “Backups” section. Choose the option to “Back up all of the data on your iPhone 14 to this computer”.
- Lastly, click on “Back Up Now” to begin the backup process. Ensure that you do not disconnect your iPhone until the backup is complete.
Backing up your iPhone 14 is an essential step to safeguard your data and ensure a smooth restoration process. Whether you opt for iCloud or iTunes, remember to perform regular backups to prevent any data loss. With your iPhone backed up, you can now move on to the next step and restore your iPhone 14 from the backup.
Step 2: Preparing your iPhone 14 for restoration
Before you begin the restoration process for your iPhone 14, it’s important to ensure that your device is prepared accordingly. Taking the necessary steps to prepare your iPhone will help ensure a smooth and successful restoration. Here are some important things to keep in mind:
1. Backup Verification: Double-check that you have a recent backup of your iPhone 14. This backup can be either from iCloud or iTunes, depending on your preference. Having a backup is crucial as it will allow you to restore your device and retrieve your data and settings.
2. Stable Connection: Connect your iPhone 14 to a stable and reliable internet connection. This is essential as the restoration process may involve downloading a large amount of data from the backup. A stable connection will help prevent any interruptions during the restoration process.
3. Sufficient Battery: Ensure that your iPhone 14 has enough battery power to complete the restoration process. It is recommended to have at least 50% battery before starting the restoration. If needed, plug your device into a power source during the process.
4. Disable Find My iPhone: Turn off the Find My iPhone feature on your device. This feature needs to be disabled in order to proceed with the restoration process. You can do this by going to Settings > [Your Name] > Find My > Find My iPhone and toggling off the switch.
5. Secure Your Data: If you have any sensitive or important data on your iPhone 14, consider taking additional measures to secure it before proceeding with the restoration. This can include backing up your photos, documents, and other important files to a computer or external storage device.
6. Remove Passcode or Touch ID: Temporarily disable any passcodes or Touch ID on your iPhone 14. This will make the restoration process smoother and avoid any potential issues during the restore. You can disable the passcode by going to Settings > Touch ID & Passcode and entering your passcode.
By taking these steps to prepare your iPhone 14 for restoration, you can ensure that the process goes smoothly and your data is successfully retrieved from the backup. Once you have completed these preparations, you can proceed with the actual restoration process, which will be covered in the next section.
Step 3: Restoring your iPhone 14 from backup
Once you have your compatible backup ready, you can now proceed to restore your iPhone 14. Restoring your device from a backup is a simple process that will bring back all your important data, settings, and even apps. Follow the steps below to restore your iPhone 14 from backup:
1. Connect your iPhone 14 to a stable Wi-Fi network. This is essential as it will enable your device to access the backup stored in iCloud or iTunes.
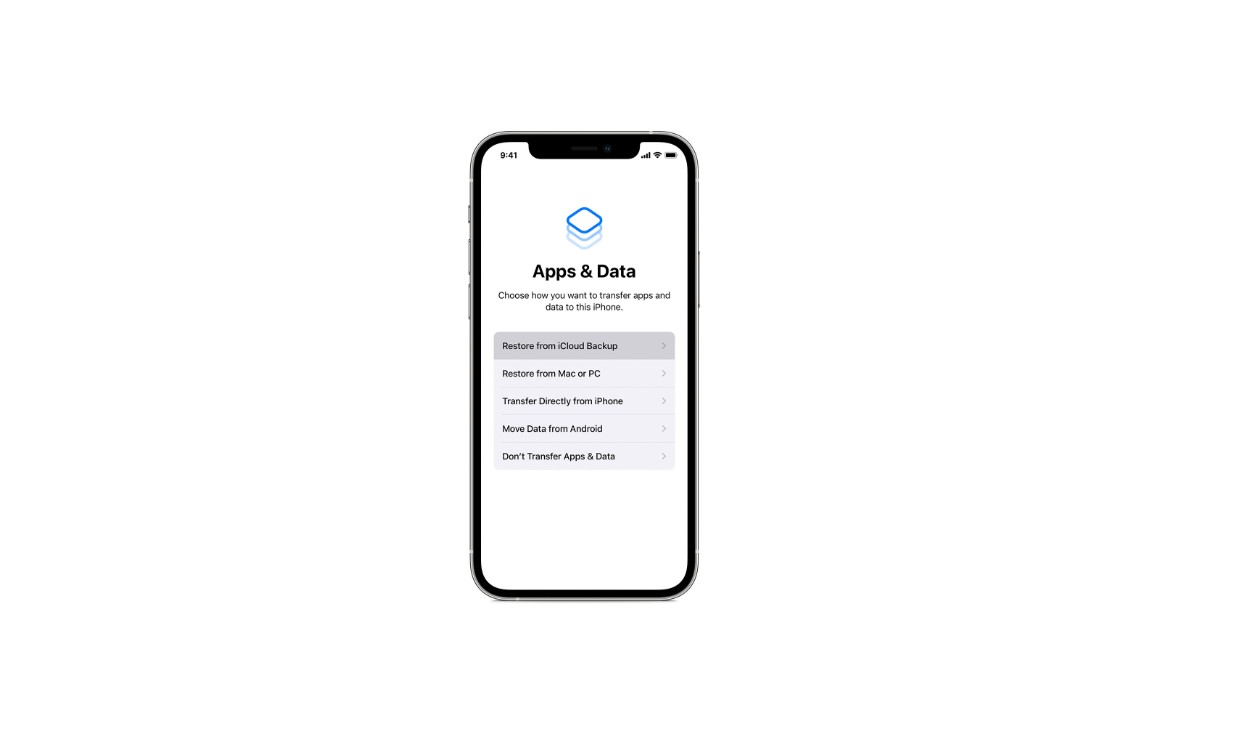
2. On your iPhone 14, navigate to the ‘Apps & Data’ screen during the setup process. You can do this by turning on your device and following the on-screen instructions.
3. Choose the option ‘Restore from iCloud Backup’ or ‘Restore from iTunes Backup’, depending on where you have your backup stored.
4. If you chose ‘Restore from iCloud Backup’, sign in to your iCloud account using your Apple ID and password. Select the backup you want to restore from the list of available backups. Keep in mind that larger backups may take longer to restore. Ensure you have a stable internet connection throughout the process.
5. If you opted for ‘Restore from iTunes Backup’, connect your iPhone 14 to the computer where you have the backup stored. Open iTunes and select your device. Choose the backup you want to restore from the list of available backups.
6. Wait for the restore process to complete. This may take some time, depending on the size of the backup and the speed of your internet connection or computer. Avoid disconnecting your device during this process.
7. Once the restore process is finished, your iPhone 14 will restart. Follow the on-screen instructions to complete the setup and sign in with your Apple ID.
8. After signing in, you will be asked if you want to restore apps and data from your iCloud account. Choose the option ‘Restore from iCloud Backup’ and select the same backup you used earlier in the process. If you chose ‘Restore from iTunes Backup’, you can skip this step as the apps and data would already be included in the restore.
9. Allow your iPhone 14 to finish syncing all apps, photos, and other data from iCloud or iTunes. This may take some time, so be patient and ensure that your device remains connected to Wi-Fi and is charging if needed.
Once the syncing process is complete, your iPhone 14 will be fully restored, with all your data and settings back in place. You can now start using your device as before, with the peace of mind that comes from knowing your valuable data is safe and accessible.
Conclusion
In conclusion, restoring an iPhone 14 from backup is a simple and effective way to recover your data and settings. Whether you’ve experienced a software issue, upgraded to a new device, or simply want to revert back to a previous state, the backup and restore process can save you time and effort.
By following the steps outlined in this article, you can ensure that your iPhone 14 is restored successfully and that all of your important files, contacts, and settings are preserved. Remember to always create regular backups of your device to prevent data loss and improve overall device security.
Now that you have the knowledge and confidence to restore your iPhone 14 from a backup, you can enjoy a seamless and uninterrupted experience with your device. So, go ahead and give it a try!
FAQs
1. How do I restore my iPhone 14 from a backup?
To restore your iPhone 14 from a backup, follow these steps:
- Connect your iPhone 14 to a stable Wi-Fi network.
- Go to Settings on your iPhone and tap on your name at the top.
- Select iCloud and tap iCloud Backup.
- Make sure that the iCloud Backup is turned on and then tap Back Up Now to create a recent backup of your device’s data.
- Once the backup is complete, go to Settings, tap General, and then tap Reset.
- Tap Erase All Content and Settings and enter your passcode if prompted.
- Follow the on-screen instructions and choose to Restore from iCloud Backup when asked. Sign in to your iCloud account and select the most recent backup to restore.
- Wait for the restore process to complete.
- Your iPhone 14 will restart and your device will be restored with all your data from the backup.
- Set up your iPhone 14 by following the on-screen instructions.
2. Can I restore my iPhone 14 from a backup if I have never backed it up before?
No, you cannot restore your iPhone 14 from a backup if you have never backed it up before. The restore process requires a backup of your device’s data to be available in either iCloud or iTunes. If you have never backed up your iPhone 14, you will not have any backups to restore from.
3. How long does it take to restore an iPhone 14 from a backup?
The time it takes to restore an iPhone 14 from a backup can vary depending on the size of the backup and the speed of your internet connection. Generally, it can take anywhere from a few minutes to several hours. It is recommended to connect to a stable Wi-Fi network and ensure that your device is connected to a power source during the restore process to avoid any interruptions.
4. Will restoring my iPhone 14 from a backup delete any existing data?
Yes, restoring your iPhone 14 from a backup will erase all the existing data on your device and replace it with the data from the backup. It is important to make sure that you have a recent backup of your iPhone 14 before performing a restore to avoid losing any important data.
5. Can I selectively restore specific data from a backup to my iPhone 14?
When restoring your iPhone 14 from a backup, you cannot selectively restore specific data. The restore process replaces all the data on your device with the data from the backup. If you want to restore specific data, such as contacts, photos, or messages, you might consider using third-party software or services that offer selective data restoration options.