
Setting up an eSIM on your iPhone 13 can revolutionize the way you use your device. With the eSIM, you can enjoy the flexibility of having multiple phone numbers on a single device without the need for physical SIM cards. This advanced technology allows you to seamlessly switch between different carriers and plans, making it incredibly convenient for frequent travelers or individuals who require separate numbers for personal and business use. In this comprehensive guide, we will walk you through the process of setting up an eSIM on your iPhone 13, allowing you to unlock the full potential of this innovative feature. So, let's dive in and explore the seamless world of eSIM technology!
Inside This Article
- Step 1: Check eSIM Compatibility
- Step 2: Contact Your Mobile Carrier
- Step 3: Scan the QR Code
- Step 4: Set Up eSIM on Your iPhone 13
- Conclusion
- FAQs
**
Step 1: Check eSIM Compatibility
**
Before setting up eSIM on your iPhone 13, it’s crucial to ensure that your device and mobile carrier support this feature. Fortunately, most major carriers around the world now offer eSIM support, enabling you to enjoy the benefits of this technology.
First, verify whether your iPhone 13 model supports eSIM. All iPhone 13 models are eSIM compatible, allowing you to use both eSIM and a physical SIM card simultaneously. This flexibility empowers you to choose the best plan for your needs, whether for travel, work, or personal use.
Additionally, check with your mobile carrier to confirm their eSIM support. Most leading carriers provide eSIM services, but it’s always wise to double-check. If your carrier doesn’t yet support eSIM, consider exploring other carriers that do, as this technology offers numerous advantages, such as the ability to add a secondary line without the need for a physical SIM card.
Step 2: Contact Your Mobile Carrier
After confirming your iPhone 13’s eSIM compatibility, the next step is to contact your mobile carrier. Reach out to your carrier’s customer service or visit their website to inquire about eSIM activation. Ensure that your carrier supports eSIM and offers compatible plans for your device. It’s essential to verify this information to avoid any potential issues during the setup process.
When contacting your mobile carrier, be prepared to provide your device’s details, such as the IMEI and EID numbers, which are necessary for activating the eSIM. Your carrier’s customer support team will guide you through the process and provide the required instructions to enable eSIM functionality on your iPhone 13. They may also offer assistance in choosing the best eSIM plan based on your usage and preferences.
Keep in mind that different carriers may have specific procedures for eSIM activation, so it’s crucial to follow their guidelines carefully. Some carriers may require you to visit a physical store for eSIM setup, while others offer online activation options. By contacting your mobile carrier, you can ensure a smooth and hassle-free eSIM activation experience tailored to your specific network provider’s requirements.
Step 3: Scan the QR Code
Once you’ve obtained the eSIM activation card or QR code from your mobile carrier, it’s time to proceed with scanning the QR code to set up your eSIM on the iPhone 13. This step is crucial in ensuring a seamless transition to the eSIM functionality.
Start by unlocking your iPhone 13 and navigating to the Settings app. Here, you’ll find the Cellular option, which is where you’ll initiate the eSIM setup process. Tap on Cellular to access the next set of options.
Within the Cellular settings, look for the Add Cellular Plan option. This is where you’ll be prompted to use your iPhone’s camera to scan the QR code provided by your mobile carrier. Once you’ve located the option, tap on it to launch the camera interface.
Position the iPhone 13 so that the QR code is clearly visible within the camera frame. Ensure that there is adequate lighting to facilitate a smooth scanning process. Once the QR code is properly aligned within the camera viewfinder, your iPhone 13 will automatically recognize and scan the code.
After successfully scanning the QR code, your iPhone 13 will retrieve the necessary information to activate the eSIM. This may include network-specific details and authentication parameters. Once the information is processed, you’ll receive a confirmation message indicating that the eSIM setup is complete.
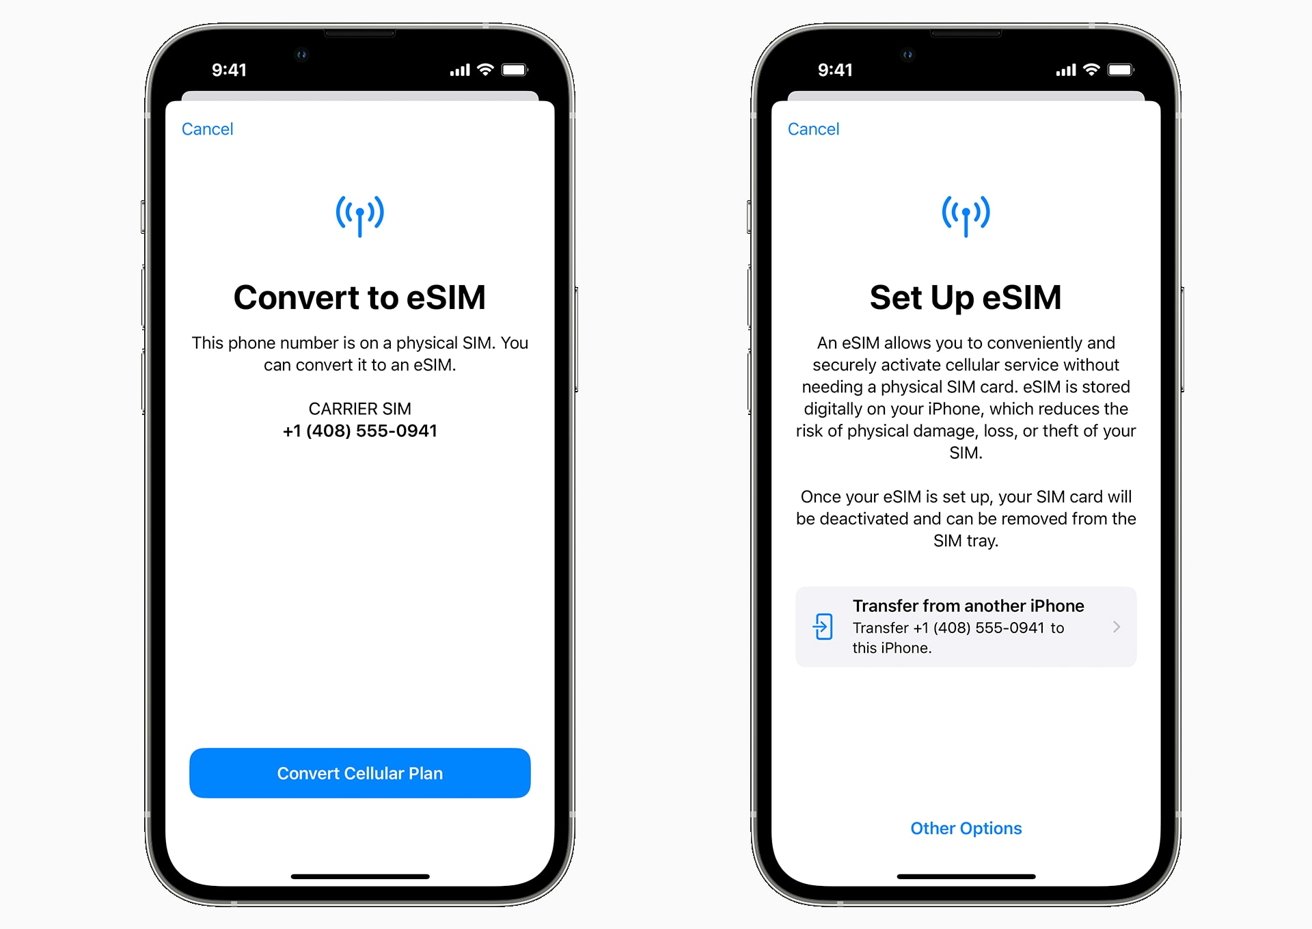
Step 4: Set Up eSIM on Your iPhone 13
Once you have obtained the eSIM activation card or QR code from your mobile carrier, you can proceed with setting up the eSIM on your iPhone 13. This process is straightforward and can be completed within a few simple steps.
To initiate the eSIM setup, ensure that your iPhone 13 is connected to a stable Wi-Fi network or a cellular data connection. Then, navigate to Settings on your device and tap on Cellular.
Next, select Add Cellular Plan and follow the on-screen instructions. You may be prompted to scan the QR code provided by your mobile carrier or enter the details manually. If scanning the QR code, position your iPhone’s camera so that it captures the entire QR code within the frame.
After scanning the QR code, your iPhone 13 will automatically begin the activation process. Once the activation is complete, you will receive a confirmation message, indicating that the eSIM has been successfully set up on your device.
Upon successful setup, your iPhone 13 will display the details of the eSIM cellular plan, allowing you to manage and configure the settings as per your preferences. You can now enjoy the benefits of having a secondary cellular plan on your device without the need for a physical SIM card.
Setting up eSIM on your iPhone 13 offers a convenient and flexible way to manage your cellular plans. By following the simple steps outlined in this guide, you can seamlessly activate and utilize the eSIM feature, allowing you to enjoy the benefits of multiple phone numbers on a single device. Whether it’s for personal or business use, eSIM empowers you to stay connected without the hassle of physical SIM cards. With the growing support for eSIM across various carriers, the future of mobile connectivity is undoubtedly heading in this direction. Embrace the convenience and versatility of eSIM on your iPhone 13 and experience the freedom of a truly connected lifestyle.
FAQs
Q: What is eSIM, and how does it differ from a physical SIM card?
A: eSIM, or embedded SIM, is a digital SIM card that is built into your device, eliminating the need for a physical SIM card. It offers the flexibility of storing multiple carrier profiles simultaneously, allowing you to switch between them without swapping physical cards.
Q: Is eSIM available on all iPhone models?
A: eSIM functionality is available on iPhone 12 and 13 models, including iPhone 13, iPhone 13 mini, iPhone 13 Pro, and iPhone 13 Pro Max. It is also supported on some earlier models, such as iPhone XR, XS, and later.
Q: Can I use eSIM and a physical SIM card simultaneously on my iPhone?
A: Yes, iPhone models that support eSIM allow you to use both eSIM and a physical SIM card at the same time. This feature is particularly useful for individuals who require multiple phone numbers or travel frequently.
Q: How do I set up eSIM on my iPhone 13?
A: The process involves scanning a QR code provided by your carrier or manually entering the details to add an eSIM plan. You can then set your eSIM as the primary line or use it alongside a physical SIM card.
Q: Can I switch between eSIM and a physical SIM card easily?
A: Yes, you can seamlessly switch between eSIM and a physical SIM card on your iPhone, allowing you to adapt to various connectivity needs and travel situations.