To take a picture of the moon with iPhone 12, open the Camera app and wait for Night mode to activate in low light; then tap the yellow Night mode button and choose the longest available exposure time from the controls menu. The iPhone 12 can photograph the moon using its built-in Night mode and manual exposure adjustments, with stability being key to a sharp result.
Activate and adjust Night mode for the moon
Apple documents that on supported iPhone models, Night mode turns on automatically when the camera detects low light. To photograph the moon with your iPhone 12, follow these steps from Apple's support pages:
- Research the moon's phases and rise/set times to determine the optimal time for your photoshoot.
- Choose a location with an unobstructed view of the moon's trajectory.
- Select a spot with minimal light pollution, avoiding urban areas with excessive artificial lighting; consider rural or remote locations.
- Open the Camera app.
- Wait for the yellow Night mode button to appear at the top of the viewfinder. It shows a seconds count that changes as the camera evaluates the scene.
- Tap the yellow Night mode button to open the controls.
- Tap the controls button (the arrow or slider icon) to see available exposure options.
- Choose the longest exposure time shown, often labeled "Max."
The camera sets the exact exposure time automatically based on the available light and whether the iPhone is held steady. You can experiment with the Auto and Max timers that appear in the camera UI, as the seconds available vary by scene.
Lock focus and fine-tune exposure manually
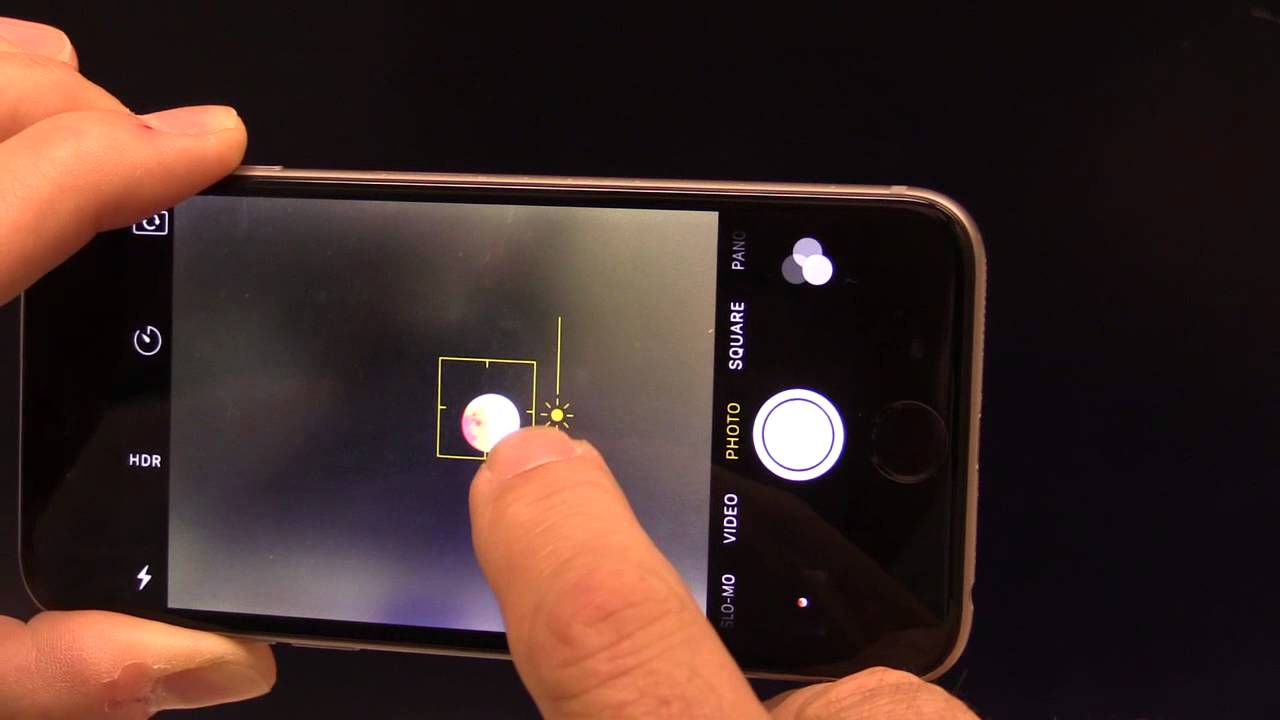
Apple's camera guidance explains that tapping the screen shows the automatic focus area and exposure setting, then lets you tap where you want focus and drag up or down next to that area to change exposure. For a moon photo:
- Tap and hold on the moon in the viewfinder to lock focus. You will see "AF Lock" briefly appear.
- Keep holding until the yellow focus square locks on the moon.
- Drag the sun icon that appears next to the locked focus area upward to brighten or downward to darken the exposure.
Dragging the exposure down generally makes the moon's surface detail and craters more visible against a darker sky. The iPhone camera automatically sets focus and exposure before you take a photo, but locking focus manually prevents the camera from refocusing on the dark sky instead of the moon.
Keep your iPhone 12 steady for a sharp shot
Apple states that you must hold the iPhone still until the Night mode capture completes. The camera detects motion and may extend the exposure time if it senses movement. To achieve the sharpest moon photo with your iPhone 12:
- After tapping the Shutter button, do not move the phone until the shutter animation and the seconds count on screen disappear.
- Use a tripod to keep the phone perfectly still during the entire exposure.
- Set a timer (tap the timer icon above the viewfinder and choose 3 or 10 seconds) to avoid the small shake from pressing the Shutter button.
- Use the self-timer function to further enhance precision and sharpness.
Stability is the single most important factor for a clear moon image, as even slight hand movement blurs the fine details that Night mode tries to capture.
For readers interested in comparing camera capabilities, Apple documents that Night mode works on supported iPhone models and the exact light sensitivity and processing vary by device. If you use Android devices for moon photography, you may want to explore Google's Night Sight adjustment for Pixel phones or Samsung's Expert RAW Astrophotography mode for Galaxy phones. However, no single resource covers all Android options completely; for a broader selection of Android camera software, refer to "26 best Android camera apps [updated 2022]" for alternatives that may include manual exposure controls and focus locking features. When evaluating phone camera capabilities, the key factors are always the sensor quality, lens apertures, and software processing ― factors that Apple documents under "iPhone models and camera specs" in its support pages.
Frequently Asked Questions
Does the iPhone 12 have a special moon mode?
No. You use the standard Camera app with Night mode and manual exposure adjustments to photograph the moon.
Do I need additional equipment to take moon photos with iPhone 12?
A tripod is not required according to Apple's support pages, but it is recommended because it helps you keep the phone still for the longer exposure times Night mode requires for the moon. No lens attachments or external apps are needed.
Why does my moon photo look like a white blur?
The moon is a very bright object against a dark sky, and the camera's automatic exposure often overexposes it. Locking focus on the moon and dragging the exposure slider down (darker) will restore surface detail and sharpness.
Can Night mode capture moon phases like a crescent or full moon?
Yes. Night mode works the same way regardless of the moon phase, as long as the moon is visible and the scene is considered low-light by the iPhone 12 camera. The exposure time adjusts automatically based on available light, which varies with the phase.
What is the maximum zoom I should use for the moon on iPhone 12?
Apple's support pages do not specify a maximum zoom limit for moon photography. However, using digital zoom beyond 2x or 3x will reduce image quality. It is better to take the photo at 1x and crop it later than to zoom in significantly and lose sharpness.
How can I improve my moon photos after taking them?
Post-processing techniques such as adjusting contrast and sharpness can further enhance moon photo quality.