
Are you tired of typical mirrors that only reflect your appearance? Well, it’s time to transform your mundane reflection into something futuristic and functional. Welcome to the world of touchscreen smart mirrors, where ordinary mirrors are given a tech-savvy makeover.
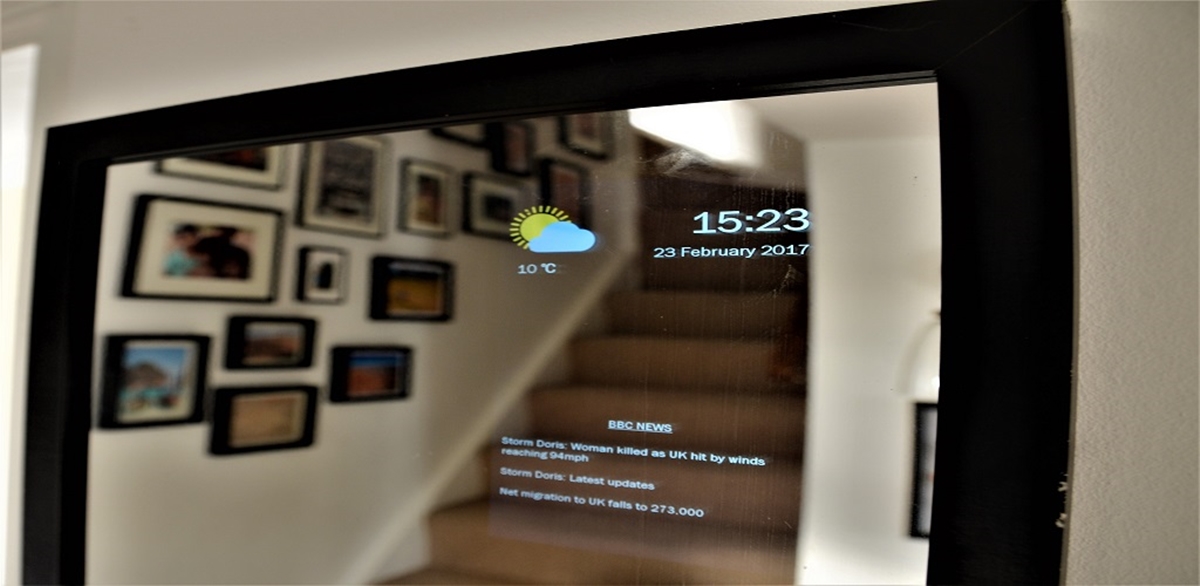
A touchscreen smart mirror is a contemporary take on traditional mirrors that combines the utility of a mirror with the functionality of a touchscreen device. Imagine having a sleek, mirror-like surface that can display the time, weather updates, news headlines, calendar appointments, and even your social media feeds. With just a touch, you can access all the information you need while getting ready for the day.
In this article, we will guide you through the process of making your very own touchscreen smart mirror. From the required materials to step-by-step instructions, you’ll discover how to create a personalized and interactive mirror that will impress your friends and add a modern touch to your home decor.
Inside This Article
- Materials Needed
- Step 1: Setting Up the Hardware
- Step 2: Installing the Operating System
- Step 3: Configuring the Touchscreen
- Step 4: Installing Smart Mirror Software
- Step 5: Customizing the Display
- Step 6: Connecting to Smart Home Devices
- Step 7: Adding Additional Features
- Conclusion
- FAQs
Materials Needed
To create a touchscreen smart mirror, you’ll need a few essential materials. Here’s a list of what you’ll need:
- Raspberry Pi: The heart of your smart mirror project, a Raspberry Pi is a small yet powerful single-board computer that acts as the brain behind the mirror.
- Touchscreen Display: Look for a high-resolution touchscreen display that will easily fit behind your mirror. Make sure it supports touch functionality to enable interaction with the mirror’s interface.
- Two-Way Mirror: A two-way mirror is a key component, as it allows the display to show through while still reflecting like a regular mirror when the screen is off. You can easily find two-way mirror film or acrylic sheets for this purpose.
- Wood Frame or Picture Frame: Choose a frame that complements your home decor and fits the size of your display. A wooden frame or a picture frame with the glass removed works well for this project.
- Power Supply: Make sure to have a reliable power supply that can deliver enough power to run the Raspberry Pi and the display.
- HDMI Cable: This cable is required to connect the Raspberry Pi to the touchscreen display.
- Mirror Film: If you’re using a regular mirror instead of a two-way mirror, you’ll need mirror film to transform it into a reflective surface.
- USB Keyboard and Mouse: A keyboard and mouse will be needed during the initial setup and configuration of the smart mirror.
- Smart Home Devices: If you want to connect your smart mirror to your smart home devices, make sure you have any necessary hubs or devices required for integration.
- Smart Mirror Software: Lastly, you’ll need to download and install the software required to turn your mirror into a functional smart device. There are various open-source options available that offer a range of features and customization.
Once you have gathered all the necessary materials, you can move on to setting up the hardware and building your touchscreen smart mirror.
Step 1: Setting Up the Hardware
Setting up the hardware is the crucial first step in creating a touchscreen smart mirror. By properly assembling and configuring the necessary components, you can lay a solid foundation for the rest of the project. Here is a straightforward guide to help you through the process.
The first item on your checklist is acquiring a two-way mirror. This specialized mirror allows you to see your reflection while also displaying information from the screen behind it. You can purchase a pre-made smart mirror kit that includes the two-way mirror or source the mirror separately and cut it to fit your desired size.
Next, you’ll need a display panel. A popular choice is a Raspberry Pi or a similar single-board computer. Make sure it has the necessary ports and capabilities to run a touchscreen interface. When choosing a display, consider factors such as size, resolution, and touch sensitivity to ensure the optimal viewing experience.
Once you have your display panel, you’ll need a frame to hold the mirror and the screen securely. You can either purchase a pre-made frame or build one yourself, using materials like wood or acrylic. The frame should be sturdy enough to support the weight of the mirror and the display without interfering with the touchscreen functionality.
Before proceeding, ensure that all the necessary connections are made. Connect the display and the Raspberry Pi following the manufacturer’s instructions. It usually involves plugging in cables for power, HDMI, and USB connection (if applicable). Double-check that the connections are secure to avoid any loose connections that could disrupt the functionality of the smart mirror.
The last step in setting up the hardware is attaching the two-way mirror to the frame. Carefully place the mirror on one side of the frame, making sure it fits perfectly. Use adhesive strips or clips to secure the mirror in place. Take your time, as any misalignment can affect the overall appearance and functionality of the smart mirror.
With the hardware set up, you’re one step closer to creating your very own touchscreen smart mirror. Proceed to the next step to install the operating system and start configuring the touchscreen functionality.
Step 2: Installing the Operating System
Once you have set up the hardware for your touchscreen smart mirror, the next step is to install the operating system. The operating system acts as the brain of your device, allowing it to run various applications and perform different functions.
To install the operating system, you will need an SD card with enough storage capacity to hold the system files. Most smart mirror projects use the Raspberry Pi, a small and affordable computer, as the hardware platform. Therefore, you will need to choose an operating system that is compatible with the Raspberry Pi.
One popular choice is Raspberry Pi OS, formerly known as Raspbian, which is a Linux-based operating system specifically designed for the Raspberry Pi. Raspberry Pi OS comes with a user-friendly interface and a wide range of pre-installed software, making it a great option for beginners.
To install Raspberry Pi OS, you will first need to download the operating system image file from the official Raspberry Pi website. Once the image file is downloaded, you will need to use a program like Etcher to write the image to the SD card. Simply insert the SD card into your computer, open Etcher, select the image file, and click on the “Flash” button to complete the process.
Once the image is written to the SD card, you can insert it into the Raspberry Pi and power it on. The Raspberry Pi will boot up and guide you through the initial setup process, including choosing your language, connecting to Wi-Fi, and creating a new user account.
During the setup process, it’s important to enable SSH (Secure Shell) so that you can remotely access your Raspberry Pi later on. This will allow you to control your smart mirror from another device on the same network.
After the initial setup is complete, you can proceed to update the operating system and install any additional software or drivers that may be required for your smart mirror project. Raspberry Pi OS has a built-in package manager called apt-get, which makes it easy to install and update software packages.
Once the operating system is installed and updated, you will have a solid foundation for your touchscreen smart mirror. The next step is to configure the touchscreen and install the necessary smart mirror software.
Step 3: Configuring the Touchscreen
Now that you have set up the hardware and installed the operating system for your touchscreen smart mirror, it’s time to configure the touchscreen functionality. This step is crucial as it allows you to interact with the smart mirror using touch gestures, just like you would with a smartphone or tablet.
The process of configuring the touchscreen may differ slightly depending on the operating system you have installed on your smart mirror. However, the general steps remain the same. Here’s a guide to help you through the configuration process:
-
Access the settings menu: Start by navigating to the settings menu on your smart mirror. This can typically be done by tapping on the “Settings” icon on the home screen or by swiping down from the top of the screen and selecting the settings option.
-
Find the touchscreen settings: Once you are in the settings menu, look for the option related to the touchscreen. It may be labeled as “Touchscreen”, “Input”, or “Gestures”. Tap on this option to access the touchscreen settings.
-
Calibrate the touchscreen: Calibration ensures that the touchscreen accurately registers your touches. Look for the calibration option within the touchscreen settings menu and follow the on-screen instructions to calibrate the touchscreen. This usually involves tapping on specific points on the screen and adjusting the sensitivity settings.
-
Enable touch gestures: Touch gestures provide you with the ability to perform various actions on the smart mirror. Common gestures include swiping, scrolling, pinching to zoom, and tapping to select. Make sure that these gestures are enabled in the touchscreen settings menu.
-
Adjust touch sensitivity: If you find that the touchscreen is either too sensitive or not sensitive enough, you can adjust the touch sensitivity settings. This option is typically found within the touchscreen settings menu. Experiment with different sensitivity levels until you find the one that suits your preference.
Once you have completed the aforementioned steps, your touchscreen should be properly configured and ready to use. Test it out by interacting with the smart mirror using touch gestures. You should be able to navigate through menus, open applications, and perform other actions effortlessly.
Note that some smart mirror software may have additional touchscreen settings and customization options. Feel free to explore these options and adjust them according to your preferences. Additionally, keep in mind that touchscreen functionality may vary depending on the hardware and operating system used. Make sure to consult the user manual or the software documentation for any specific instructions related to your smart mirror.
In the next step, we will guide you through the process of installing smart mirror software to bring your device to life with a range of features and functionalities.
Step 4: Installing Smart Mirror Software
Once you have set up the hardware and configured the touchscreen on your DIY touchscreen smart mirror, it’s time to install the software that will turn your mirror into a functional, interactive device. Installing smart mirror software will allow you to display information such as weather updates, calendar events, news headlines, and more.
To begin, you’ll need to choose which smart mirror software to use. There are several options available, each with its own features and customization options. Two popular choices are MagicMirror² and HomeMirror. MagicMirror² is an open-source platform that offers extensive customization and a wide range of modules for displaying various types of information. HomeMirror, on the other hand, is a user-friendly option that focuses on simplicity and ease of use.
Before installing the software, make sure to connect your smart mirror to the internet. This will allow you to download the necessary files and modules directly from the software’s website or repository. You can use an Ethernet cable or connect to a Wi-Fi network, depending on your mirror’s capabilities.
Once your mirror is connected to the internet, you can proceed with the installation process. This typically involves running a command or script that will automatically download and install the software and its dependencies. The specific steps may vary depending on the software you choose, so it’s important to follow the installation instructions provided by the software’s developer.
After the installation is complete, you can customize your smart mirror by adding or removing modules and configuring their settings. This will allow you to choose which information you want to display on your mirror and how it should be presented. For example, you can add a weather module to show the current temperature and forecast, a calendar module to display upcoming events, and a news module to show headlines from your favorite sources.
Additionally, many smart mirror software options offer support for third-party modules created by the community. These modules can further enhance the functionality of your mirror by adding features such as voice control, music streaming, and smart home integration. Exploring the available modules and experimenting with different configurations will help you transform your smart mirror into a personalized and powerful device.
Once you have installed and customized the smart mirror software, you’re ready to enjoy the full functionality of your touchscreen smart mirror. You can now interact with the mirror, swipe through modules, and access the information you need with just a touch. Whether you use it as a personal assistant, a home automation hub, or simply as a cool gadget, your DIY touchscreen smart mirror is sure to impress.
Step 5: Customizing the Display
Once you have successfully set up the hardware, installed the operating system, and configured the touchscreen for your smart mirror, it’s time to move on to customizing the display. This step allows you to personalize your mirror’s appearance and tailor it to your specific needs and preferences.
Here are some key aspects to consider when customizing the display of your touchscreen smart mirror:
- Layout and Design: Decide on the layout and design of your mirror’s interface. You can choose from a variety of templates or create your own using HTML and CSS. Consider the positioning of widgets, clock, weather information, and any other elements you want to display on the screen. Experiment with different styles and arrangements until you achieve the desired look.
- Background and Themes: Select a background image or color scheme that complements the overall aesthetic of your smart mirror. You can choose from a wide range of built-in backgrounds or upload your own image. Additionally, you may have the option to choose from predefined themes that offer a cohesive and visually appealing interface.
- Widget Customization: Customize the widgets on your smart mirror’s display to showcase the information that matters most to you. Depending on the software you’re using, you may have the ability to add or remove widgets, resize and reposition them, and even modify their appearance. This allows you to prioritize the information you want to see at a glance.
- Notification Options: Determine how notifications will be displayed on your smart mirror. You can choose to receive notifications for incoming calls, text messages, emails, calendar events, and more. Decide whether you want to display these notifications as overlays or in a separate section of the mirror’s interface.
- Integration with Smart Home Devices: If you have smart home devices, such as lights, thermostats, or speakers, consider integrating them into your smart mirror’s display. This allows you to control and monitor these devices directly from your mirror, eliminating the need for separate apps or devices.
Remember, the customization options may vary depending on the software you’re using for your smart mirror. Be sure to explore the available settings and features to make the most out of your touchscreen smart mirror’s display.
Once you have customized the display to your liking, take some time to test and fine-tune the settings. This will ensure that your smart mirror not only looks great but also functions smoothly and efficiently.
Step 6: Connecting to Smart Home Devices
Once you have set up the hardware and installed the necessary software on your touchscreen smart mirror, it’s time to take it a step further and connect it to your smart home devices. This integration will allow you to control various aspects of your home, such as lighting, temperature, and security, right from the mirror’s interface.
The first thing you need to do is identify the smart home devices that you want to connect to your smart mirror. These devices may include smart lights, thermostats, door locks, security cameras, and more. Make sure that the devices you choose are compatible with the system running on your smart mirror.
Next, check if the smart home devices require a hub or a bridge for connectivity. Some devices can directly connect to your home’s Wi-Fi network, while others require an additional hub or bridge to communicate with your mirror. Follow the instructions provided with each device to set it up properly.
Once your smart home devices are connected to your home network, you can proceed to link them with your smart mirror. Most smart mirror software platforms have built-in integration options for popular smart home devices. Look for the settings or configuration menu within the smart mirror software to add and link your devices.
Within the settings, you will likely find a section for device integration or smart home control. Here, you can add your devices by selecting them from a list or by entering their specific details, such as IP addresses or device IDs. The software will then establish a connection between your smart mirror and the designated devices.
After successfully connecting your smart home devices, you can enjoy the convenience of controlling them through your smart mirror’s interface. Depending on the software you are using, you may be able to turn lights on or off, adjust thermostat settings, lock or unlock doors, view camera feeds, and more.
Remember to test the connectivity and functionality of each device through the smart mirror to ensure everything is working as expected. If you encounter any issues, refer to the device’s user manual or consult the smart mirror software’s support documentation for troubleshooting tips.
It’s important to note that the available features and capabilities may vary depending on the software and smart home devices you are using. Make sure to explore the options and customization settings within your smart mirror software to maximize the integration and create a personalized smart home experience.
By connecting your smart mirror to your smart home devices, you can transform it into a powerful control center for your entire home. Enjoy the convenience and efficiency of managing your smart home ecosystem right from your mirror’s touchscreen interface.
Step 7: Adding Additional Features
Once you have set up your touchscreen smart mirror and customized its display, you may want to explore adding some additional features to make it even more functional and interactive. Here are some exciting options to consider:
-
Weather Integration: Adding weather integration to your smart mirror will allow you to see real-time weather updates directly on the mirror’s surface. You can use weather APIs to fetch weather data and display it in a visually appealing format. This will help you plan your day accordingly and stay informed about the current weather conditions.
-
Calendar Integration: By integrating your calendar with the smart mirror, you will be able to view your upcoming events and appointments without any hassle. This feature is especially useful for busy individuals who need a quick overview of their schedule before leaving the house. You can sync your calendar with popular services like Google Calendar, Microsoft Outlook, or Apple Calendar.
-
Smart Home Control: If you have smart home devices like smart bulbs, thermostats, or speakers, you can integrate them with your smart mirror for convenient control. With the right software, you can manage your smart devices directly from the mirror’s interface, allowing you to adjust the lighting, temperature, or play music with just a few taps on the reflective surface.
-
Voice Assistant Integration: Integrating a voice assistant like Amazon Alexa or Google Assistant can bring a whole new level of convenience and hands-free functionality to your smart mirror. With voice commands, you can perform various tasks such as checking the weather, playing music, setting reminders, or controlling your smart home devices without even touching the mirror.
-
Fitness Tracking: If you’re health-conscious, you can consider adding fitness tracking features to your smart mirror. This can include integrating fitness apps or devices to display your daily steps, calories burned, heart rate, and other health-related metrics. You can even set fitness goals and track your progress directly on the mirror’s surface, keeping you motivated and accountable.
These are just a few examples of additional features you can explore for your touchscreen smart mirror. The possibilities are endless, and you can customize your mirror according to your preferences and needs. Remember to research and select compatible software and plugins to ensure seamless integration of these features into your smart mirror setup.
With the right combination of features, your touchscreen smart mirror will become a versatile and interactive centerpiece in your home, providing you with valuable information, convenience, and entertainment with just a simple touch or voice command.
Conclusion
Creating a touchscreen smart mirror is a fascinating project that combines technology and creativity. By following the step-by-step guide, you can transform a regular mirror into a futuristic interactive device. The integration of a touchscreen allows for a wide range of functionalities, from displaying the weather forecast to controlling smart home devices.
Building a touchscreen smart mirror requires some technical skills, but with the right materials and resources, it can be a fun and rewarding DIY project. The mirror not only serves as a functional piece but also adds a modern and sleek touch to any space.
As technology continues to advance, projects like a touchscreen smart mirror demonstrate the endless possibilities in merging everyday objects with digital capabilities. So, why settle for a regular mirror when you can turn it into something extraordinary?
FAQs
1. What is a touchscreen smart mirror?
A touchscreen smart mirror is a unique and innovative device that combines the functionality of a mirror with a touchscreen display. It allows you to interact with the mirror by using touch gestures and accessing various features and applications.
2. How does a touchscreen smart mirror work?
The touchscreen smart mirror utilizes a two-way mirror that overlays a high-resolution display. The display is usually hidden behind the mirror and becomes visible when activated. The mirror’s touch-sensitive surface enables you to control and navigate through the interface.
3. What are the benefits of a touchscreen smart mirror?
A touchscreen smart mirror offers a range of benefits including:
– Convenient access to information: You can view weather updates, calendar appointments, news feeds, and more, all at a glance.
– Personalized experience: You can customize the mirror to suit your preferences, such as displaying your favorite widgets, photos, or reminders.
– Multi-functionality: The mirror can be integrated with home automation systems, allowing you to control smart devices like lights, thermostats, and security systems.
– Entertainment: You can stream music, watch videos, or even video call with friends and family.
– Style and aesthetics: The sleek design of a smart mirror adds a touch of modernity and sophistication to any space.
4. Can I install apps on a touchscreen smart mirror?
Yes, most touchscreen smart mirrors feature an app store or allow sideloading of applications. This means you can install and use various apps, just like you would on a smartphone or tablet. Popular apps include weather updates, news apps, social media widgets, and more.
5. Is it difficult to install a touchscreen smart mirror?
The installation process varies depending on the specific model and brand. However, many touchscreen smart mirrors are designed to be user-friendly, with detailed installation instructions provided. It typically involves mounting the mirror on a wall or surface, connecting it to a power source, and setting up any necessary software or Wi-Fi connections. If you are unsure, it is always recommended to consult the manufacturer’s instructions or seek professional assistance.