
Are you an avid gamer who loves streaming and sharing your gameplay experiences with the world? If so, you may have come across the ELGato PS4, a popular device that allows you to capture and record high-quality video footage from your gaming sessions. While the ELGato PS4 is primarily known for its video recording capabilities, it is also possible to record headset audio using this versatile device.
Recording headset audio with the ELGato PS4 can enhance your gaming content by capturing the immersive sound effects, in-game dialogue, and multiplayer communication that often takes place through the headset. Whether you’re a professional streamer or a casual gamer looking to add some flair to your gameplay videos, this guide will provide you with step-by-step instructions on how to record headset audio with the ELGato PS4, ensuring that you can fully capture and share your gaming experiences with your audience.
Inside This Article
- Requirements
- Setting up the Elgato Game Capture HD60 or HD60 S
Connecting the HD60 or HD60 S to the PS4
Adjusting the audio settings - Connecting the headset to the Elgato Game Capture – Connecting the headset to the PS4 controller – Connecting the headset to the Elgato Game Capture using the 3.5mm audio cable
- Adjusting the audio settings on the PS4- Enabling chat audio output to the headset- Adjusting the audio mix to prioritize game audio or chat audio
- Troubleshooting- Common issues and solutions – Ensuring all connections are secure- Checking audio settings on the PS4
- Conclusion
- FAQs
Requirements
In order to record headset audio with Elgato PS4, you will need the following:
- A PS4 console, which is the gaming system you will be using.
- An Elgato Game Capture HD60 or HD60 S, which is the hardware device that allows you to capture and record gameplay.
- A headset with a 3.5mm audio jack, which is necessary to capture the audio from your gameplay.
- A 3.5mm audio cable, which is used to connect your headset to the Elgato Game Capture device.
- An audio adapter, if required to connect your headset to the Elgato Game Capture device.
These are the essential requirements to ensure that you can record headset audio while using the Elgato Game Capture with your PS4.
Setting up the Elgato Game Capture HD60 or HD60 S
Connecting the HD60 or HD60 S to the PS4
Adjusting the audio settings
Setting up the Elgato Game Capture HD60 or HD60 S is a crucial step in recording headset audio with your PS4. To get started, make sure you have the necessary equipment: a PS4 console, an Elgato Game Capture HD60 or HD60 S, a headset with a 3.5mm audio jack, a 3.5mm audio cable, and an audio adapter if needed.
To connect the Elgato Game Capture device to your PS4, follow these steps:
- Ensure that your PS4 is turned off.
- Connect one end of the included HDMI cable to the HDMI Out port on the Elgato Game Capture device.
- Connect the other end of the HDMI cable to the HDMI In port on your TV or display.
- Connect the micro USB cable from the Elgato Game Capture device to your computer.
- Connect the supplied USB cable from the Elgato Game Capture device to one of the USB ports on your PS4.
- Power on your PS4 and TV or display.
- Set your TV or display to the correct input source for the Elgato Game Capture device.
- Open the Elgato Game Capture software on your computer.
Now that you have successfully connected the Elgato Game Capture device to your PS4, it’s time to adjust the audio settings to ensure your headset audio is recorded. Here’s how:
- Launch the Elgato Game Capture software on your computer.
- Go to the settings menu within the software.
- Select the “Audio” tab.
- Choose your desired audio input for your headset. This can be the default system microphone or the headset microphone.
- Adjust the audio levels to your preference by using the volume sliders within the software.
By following these steps, you have successfully set up the Elgato Game Capture HD60 or HD60 S, connected it to your PS4, and adjusted the audio settings. Now, you’re ready to start recording your headset audio with ease. Happy gaming!
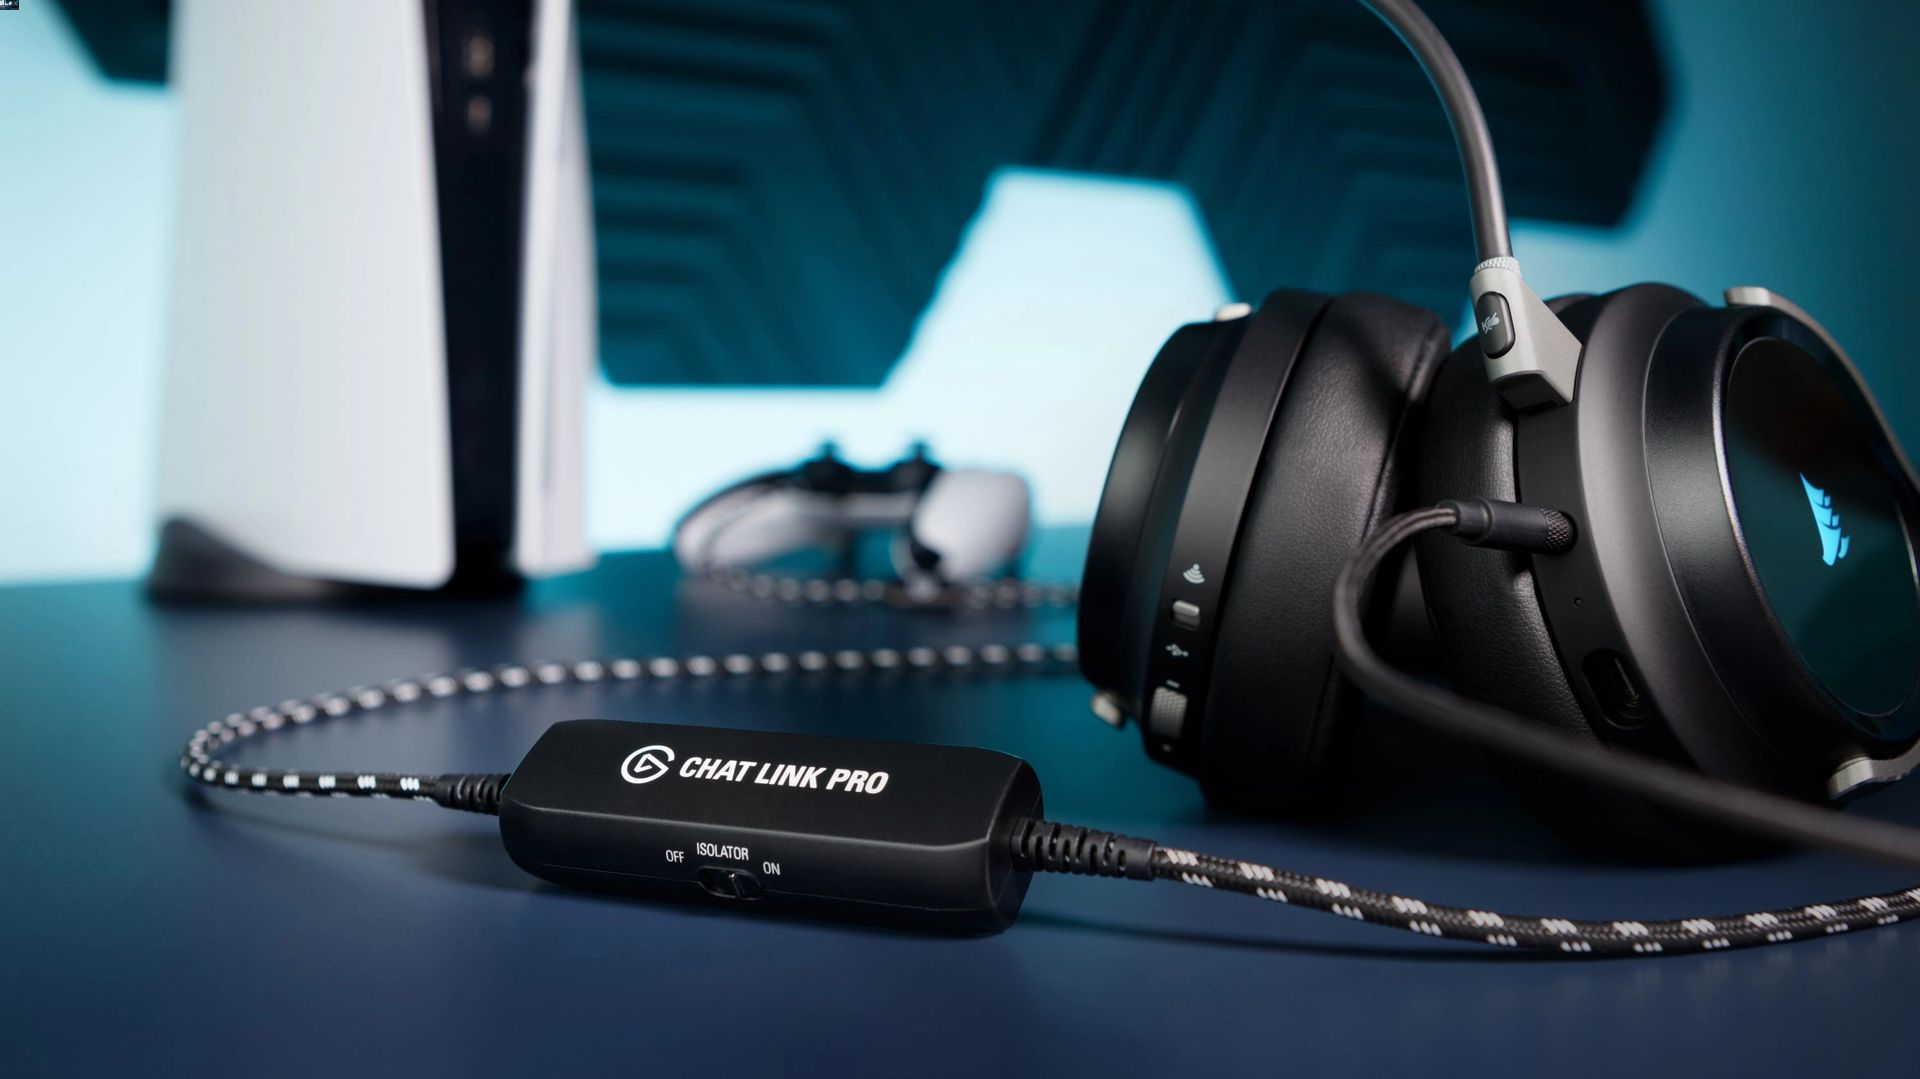
Connecting the headset to the Elgato Game Capture – Connecting the headset to the PS4 controller – Connecting the headset to the Elgato Game Capture using the 3.5mm audio cable
One of the key requirements for recording headset audio with Elgato Game Capture is to properly connect your headset to the Elgato device and the PS4 controller. By following these steps, you can ensure that you capture high-quality audio while gaming.
To begin, let’s start with connecting the headset to the PS4 controller. Locate the 3.5mm audio jack on your controller and plug in the headset’s audio cable securely. This step allows you to hear the audio from your game and communicate with your team or fellow gamers through the headset’s microphone.
Next, you need to connect the headset to the Elgato Game Capture device. Depending on the model you have, it may have a designated audio input/output port. Take the 3.5mm audio cable and connect one end to the audio output jack in the PS4 controller. Ensure it is firmly plugged in.
Now, locate the audio input/output ports on the Elgato Game Capture device. Connect the other end of the 3.5mm audio cable to the corresponding audio input jack on the Elgato. This step establishes the audio connection between your headset and the Elgato, allowing it to capture the audio feed directly.
It’s essential to make sure all the connections are secure. Check that the cables are plugged in snugly without any looseness or wiggle. This helps prevent any interference or audio disruptions during your gameplay recording sessions.
With the headset successfully connected to both the PS4 controller and the Elgato Game Capture device, you are ready to capture high-quality audio while gaming. Whether you’re recording your gameplay for streaming or creating content, the audio integration allows you to provide a more immersive experience for your audience.
Please note that the specific instructions may vary slightly depending on the model of your headset, PS4 controller, and Elgato Game Capture device. Refer to the manufacturer’s documentation for more information.
Adjusting the audio settings on the PS4- Enabling chat audio output to the headset- Adjusting the audio mix to prioritize game audio or chat audio
When using a headset with your PS4, it’s essential to adjust the audio settings to ensure the best gaming experience. This involves enabling chat audio output to the headset and adjusting the audio mix to prioritize either game audio or chat audio. Let’s take a closer look at how to do this:
To enable chat audio output to the headset, start by accessing the settings on your PS4. Navigate to the “Devices” menu and select “Audio Devices.” From there, choose “Output to Headphones.” You’ll have two options: “All Audio” and “Chat Audio.” Selecting “Chat Audio” will ensure that game audio is played through your speakers or TV, while chat audio will be directed to your headset. This way, you can hear your teammates clearly while still enjoying immersive game sound.
Adjusting the audio mix is another crucial step in optimizing your audio experience. In the same “Audio Devices” menu, select “Adjust Microphone Level.” Here, you’ll find two sliders: “Volume Control (Headphones)” and “Microphone Level.” By adjusting the “Volume Control (Headphones)” slider, you can fine-tune the balance between game audio and chat audio. Move the slider towards the left to increase the chat audio volume, or towards the right to boost the game audio. This allows you to prioritize the audio that matters most to you during gameplay.
It’s worth noting that some headsets may have additional audio settings or controls that can be adjusted directly on the headset itself. Refer to the user manual or manufacturer’s website for specific instructions on how to optimize audio settings for your particular headset model.
By taking the time to adjust the audio settings on your PS4 and prioritize game audio or chat audio, you’ll be able to immerse yourself fully in your gaming experience. Whether you’re playing with friends or diving into a solo mission, clear and balanced audio can make all the difference in enhancing your gaming sessions. Experiment with different settings to find the perfect audio mix for your preferences, and enjoy an audio experience that’s tailored to your liking.
Troubleshooting- Common issues and solutions – Ensuring all connections are secure- Checking audio settings on the PS4
Despite following the steps outlined above, you might encounter some common issues when trying to record headset audio with the Elgato Game Capture and PS4. Here are some possible solutions:
1. Problem: No audio is being captured or recorded.
Solution: Make sure that all connections are secure. Check that the 3.5mm audio cable is properly plugged into both the headset and the Elgato Game Capture. Also, ensure that the Elgato device is properly connected to the PS4 and that the audio settings are correctly configured.
2. Problem: The audio quality is poor or distorted.
Solution: In some cases, poor audio quality can occur due to a faulty audio cable or headphone jack. Try using a different audio cable or connecting the headset to a different device to isolate the issue. If the problem persists, consider replacing the headset or contacting technical support for further assistance.
3. Problem: The chat audio is not being captured or recorded.
Solution: Verify that the chat audio is enabled in the PS4 settings. Go to the “Devices” menu, select “Audio Devices,” and make sure that “Output to Headphones” is set to “Chat Audio” instead of “All Audio.” If the issue persists, double-check the connections between the headset, controller, and Elgato Game Capture, ensuring that all cables are securely plugged in.
4. Problem: The audio mix is unbalanced.
Solution: Adjust the audio mix on the PS4 to prioritize either game audio or chat audio. This can be done by going to the “Sound and Screen” settings, selecting “Audio Output Settings,” and adjusting the “Audio Mix” slider to the desired level.
5. Problem: There is no sound coming through the headset.
Solution: First, confirm that the headset is properly connected to the PS4 controller. Check that the volume is turned up on both the PS4 and the headset itself. Additionally, make sure that the headset is not muted or on a separate audio output channel. If necessary, consult the headset’s manual for specific troubleshooting steps.
By addressing these common issues and ensuring that all connections are secure, you should be able to successfully record headset audio with the Elgato Game Capture and PS4. If you continue to experience problems, don’t hesitate to reach out to technical support for further assistance.
Conclusion
Recording headset audio with an ELGato PS4 is a useful feature that allows gamers to capture high-quality audio during gameplay. By following the steps outlined in this guide, you can easily connect your headset to the ELGato device and start recording crystal-clear audio.
Whether you’re a content creator, a streamer, or simply want to preserve memorable gaming moments, the ability to record headset audio adds depth and immersion to your recordings. With the ELGato PS4, you have a versatile tool at your disposal that can elevate your gaming experience and content creation to new heights.
Remember to choose a high-quality headset, ensure compatibility with the ELGato device, and adjust the audio settings to suit your preferences. Experiment with different recording setups to find the best configuration for your needs.
So, harness the power of the ELGato PS4, unleash your creativity, and share your gaming experiences with the world!
FAQs
1. Can I record headset audio with ELGato on PS4?
Yes, you can record headset audio with ELGato on PS4. The ELGato device allows you to capture game audio and chat audio simultaneously, providing you with a complete recording experience.
2. What do I need to record headset audio with ELGato on PS4?
To record headset audio with ELGato on PS4, you will need the following:
- An ELGato capture card
- An HDMI cable
- A compatible headset
- An audio splitter cable
- A PC or Mac for capturing the audio
3. How do I connect my headset to ELGato for audio recording?
To connect your headset to ELGato for audio recording, follow these steps:
- Connect the HDMI cable from your PS4 to the input of the ELGato capture card.
- Connect an HDMI cable from the output of the ELGato capture card to your TV or monitor.
- Use the audio splitter cable to split the audio output from your PS4 controller.
- Connect one end of the audio splitter cable to the headset jack on your controller.
- Connect the other end of the audio splitter cable to the audio input on the ELGato capture card.
- Ensure that the audio settings on your PS4 are set to output audio through the headset.
4. Can I record microphone audio with ELGato on PS4?
Yes, you can record microphone audio with ELGato on PS4. If your headset has a built-in microphone or if you are using a standalone microphone connected to your PS4, the ELGato capture card will capture both game audio and microphone audio during your recording sessions.
5. Are there any limitations when recording headset audio with ELGato on PS4?
While the ELGato capture card allows you to record headset audio on PS4, there are a few limitations to keep in mind:
- Some headsets and controllers may require additional adapters or cables to work with the ELGato capture card.
- The quality of the recorded audio may vary depending on the headset and microphone you are using.
- Make sure to check for any firmware updates for your ELGato capture card to ensure compatibility with your PS4.