
Looking to crop photos on your Mac? You’re in luck! In this article, we will explore the easiest way to crop photos on your Mac and achieve the perfect composition for your images. Whether you are a professional photographer or just someone who loves capturing moments, knowing how to crop photos can greatly enhance the visual impact of your images.
With the increasing popularity of social media platforms and the need to have visually appealing content, being able to crop photos quickly and efficiently has become a valuable skill. Luckily, Mac offers a variety of built-in tools and applications that make the process of cropping photos a breeze.
So, if you’re ready to take your photo editing skills to the next level and create stunning visuals, let’s dive into the easiest way to crop photos on your Mac!
Inside This Article
Using the Photos App
When it comes to cropping photos on a Mac, one of the easiest and most convenient ways is to use the built-in Photos app. This app is pre-installed on all Mac devices and offers a wide range of powerful editing features, including cropping.
To crop a photo using the Photos app, follow these simple steps:
- Open the Photos app on your Mac.
- Select the photo you want to crop by clicking on it.
- Click on the “Edit” button in the top-right corner of the screen. This will open the editing panel.
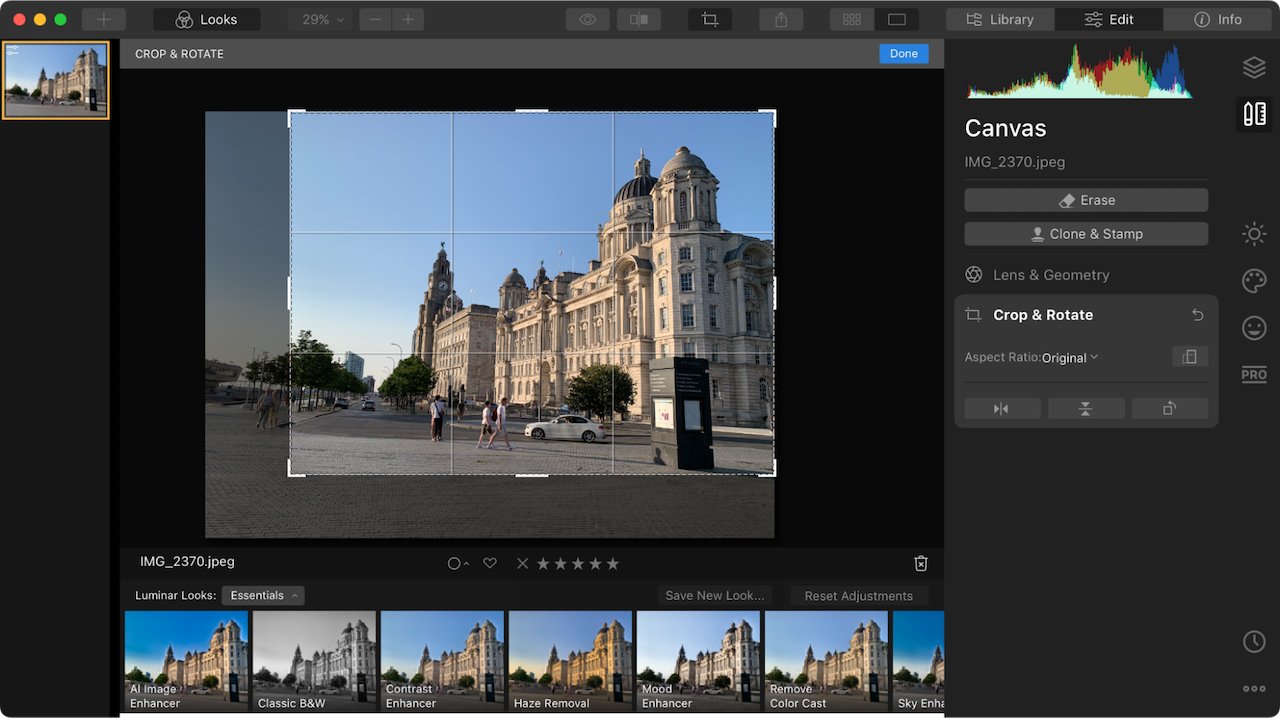
- On the right side of the screen, you will see a toolbar with various editing options. Click on the “Crop” icon, which looks like a square with diagonal lines.
- Adjust the crop box by clicking and dragging the handles or by inputting specific dimensions in the toolbar.
- Once you’re satisfied with the crop, click on the “Done” button to apply the changes.
- The cropped version of the photo will be saved as a new image in your Photos library, while the original photo remains intact.
Using the Photos app to crop your photos is not only convenient, but it also ensures that you can easily revert back to the original image if needed. The app provides a user-friendly interface and intuitive controls, making it suitable for users of all levels of expertise.
Keep in mind that the Photos app allows you to crop photos, but it also offers other editing options like adjusting exposure, enhancing colors, and applying filters. Explore these features to further enhance your photos and unleash your creativity.
Using Preview App
If you’re looking for a built-in solution to crop photos on your Mac, the Preview app is a powerful tool at your disposal. Preview is a lightweight and versatile application that comes pre-installed on every Mac, making it easily accessible for your photo editing needs.
To crop a photo using Preview, follow these simple steps:
- Open the photo you want to crop in the Preview app.
- Click on the Markup Toolbar icon in the top-right corner of the Preview window. It looks like a toolbox.
- In the Markup Toolbar, click on the Selection Tool icon. It looks like a rectangle made of dotted lines.
- Drag and adjust the selection box over the portion of the photo you want to keep. You can also resize and reposition the selection box as needed.
- Once you have the desired selection, go to the Tools menu and select Crop. Alternatively, you can use the shortcut Command + K to crop the image.
- The photo will be cropped based on your selection, and you can save the cropped image by clicking File > Save or using the shortcut Command + S.
The Preview app also offers additional editing capabilities, such as adjusting brightness, contrast, and saturation, as well as adding text annotations. It’s a versatile tool that goes beyond just cropping photos on your Mac.
One pro tip when using Preview to crop photos is to pay attention to the resolution and aspect ratio. If you need specific dimensions, consider using the Tools menu to adjust the size and aspect ratio of the selection box before cropping. This ensures that your cropped photo meets your requirements.
Overall, the Preview app provides a straightforward and efficient way to crop photos on your Mac. Give it a try, and you’ll be able to easily trim and enhance your images without the need for third-party software.
Using Third-Party Apps
If you’re looking for more advanced features or additional options for cropping photos on your Mac, you can turn to third-party apps. These apps offer a wide range of editing tools and customization options, allowing you to take full control of your photo cropping process.
One popular third-party app for photo editing is Adobe Photoshop. Widely regarded as the industry standard for professional photo editing, Photoshop offers powerful cropping tools along with a plethora of other features. With Photoshop, you can fine-tune your crop by adjusting the aspect ratio, rotating the image, and even applying filters or effects.
Another great option is Pixelmator, a user-friendly app that provides a comprehensive set of photo editing tools, including advanced cropping features. It offers a simple and intuitive interface, making it easy for beginners to get started. Pixelmator allows you to crop your photos with precision and offers a variety of additional editing options like adjusting the brightness, contrast, or saturation.
For those who prefer a more streamlined editing experience, Skitch is an excellent choice. Developed by Evernote, Skitch is a lightweight and straightforward app that focuses on simplicity and ease of use. While it may not offer as many advanced features as Photoshop or Pixelmator, it still provides the basic cropping functionality along with the ability to add annotations and sketches.
If you’re on a tight budget or looking for a free option, GIMP (GNU Image Manipulation Program) is worth considering. It’s an open-source photo editing software that offers a wide range of editing tools, including cropping. While it may have a steeper learning curve compared to other apps, GIMP is a powerful tool that can fulfill your photo editing needs without breaking the bank.
Before choosing a third-party app, consider your specific needs and preferences. Take into account the level of complexity you’re comfortable with, the range of features you require, and your budget. By selecting the right third-party app for photo cropping on your Mac, you can unlock a whole new world of creative possibilities.
Summary and Tips
When it comes to cropping photos on a Mac, there are several options available to you. In this article, we explored three different methods: using the Photos app, using the Preview app, and using third-party apps. Let’s summarize the key points and provide some additional tips to help you get the best results.
1. The Photos app is a convenient and user-friendly option for basic photo editing tasks, including cropping. It allows you to easily crop your photos using simple tools and even provides some additional editing options like adjusting brightness, contrast, and saturation.
2. The Preview app, which comes pre-installed on your Mac, can also be used for cropping photos. While it may not have as many advanced editing features as some third-party apps, it still offers a straightforward and reliable way to crop your images.
3. If you prefer more advanced editing options or want to explore additional features, there are plenty of third-party apps available for cropping photos on your Mac. These apps often offer a variety of tools and effects to enhance your images further.
4. When cropping photos, keep in mind the aspect ratio and composition. The aspect ratio refers to the proportional relationship between the width and height of the image. Consider whether you want to maintain the original aspect ratio or adjust it to fit a specific size or layout.
5. Experiment and play around with different cropping options. Cropping can drastically change the focus and composition of your photos, so don’t be afraid to try different cropping techniques to achieve the desired result.
6. Always save a copy of the original photo before cropping. This way, if you’re not satisfied with the cropped version or want to try different cropping options later on, you’ll still have the original photo to work with.
7. Don’t forget to consider the purpose or platform for which you’re cropping the photo. Different platforms may have specific image size requirements, so double-check the guidelines to ensure your cropped photo meets the necessary specifications.
Overall, cropping photos on a Mac is a straightforward process, with different options available depending on your needs and preferences. Whether you choose to use the Photos app, the Preview app, or a third-party app, always keep in mind the aspect ratio, composition, and the purpose of the photo. With a bit of practice and experimentation, you can easily crop your photos to perfection.
Conclusion
Mastering the art of cropping photos on your Mac is now easier than ever. With the simple and intuitive tools provided by macOS, you have the power to transform your images with just a few clicks. Whether you’re looking to resize, straighten, or enhance your pictures, the built-in Preview app and third-party options like Adobe Photoshop provide the necessary flexibility and precision.
By following the step-by-step instructions outlined in this article, you have learned how to crop photos on your Mac using the easiest methods available. Remember to consider your desired aspect ratio, composition, and resolution when cropping to ensure that your photos look their best. With practice, you will become more comfortable with the process and develop your own personal style.
So go ahead, unleash your creativity, and start cropping photos on your Mac today. Whether you want to create stunning visuals for your projects or simply enhance your personal photos, the possibilities are endless. Enjoy the process and have fun exploring the art of cropping!
FAQs
1. Can I crop photos on Mac?
Yes, absolutely! Mac computers come with built-in photo editing tools that allow you to crop and edit your photos effortlessly.
2. What is the easiest way to crop photos on Mac?
The easiest way to crop photos on Mac is to use the native photo editing software, Photos. It offers a user-friendly interface and a range of intuitive tools to help you crop your photos with just a few clicks.
3. How do I crop a photo using Photos on Mac?
To crop a photo using Photos on Mac, follow these steps:
- Open the photo in the Photos app.
- Click on the ‘Edit’ button in the top-right corner of the screen.
- Click on the ‘Crop’ button in the toolbar.
- Adjust the crop box by dragging the handles or inputting precise dimensions.
- Click ‘Apply’ to apply the crop and save the changes.
4. Can I maintain the original aspect ratio when cropping a photo on Mac?
Yes, you can. When you’re in the crop mode in Photos on Mac, click on the ‘Original’ aspect ratio option in the toolbar. This ensures that the cropped photo maintains the same aspect ratio as the original.
5. What other photo editing options are available in Photos on Mac?
In addition to cropping, Photos on Mac offers a wide range of editing options such as adjusting brightness, contrast, saturation, and sharpness, applying filters, removing red-eye, and more. It’s a powerful tool for enhancing your photos and personalizing them according to your preferences.