
Are you a Mac user who is unfamiliar with how to properly eject a USB device? Whether you are new to the Mac ecosystem or simply need a refresher, learning how to safely remove a USB device from your Mac is essential to protect your data and ensure the longevity of your hardware. In this article, we will guide you step by step through the process of ejecting a USB from your Mac, no matter what model or version of macOS you are using. By following these instructions, you can avoid potential data loss or damage to your USB device. Let’s dive in and learn the best practices for safely ejecting a USB from your Mac.
Inside This Article
- How to Eject a USB from a Mac
- Determining Which USB to Eject
- Safely Ejecting the USB Drive
- Using the Eject Option in Finder
- Conclusion
- FAQs
How to Eject a USB from a Mac
Determining Which USB to Eject:
When working with multiple USB drives connected to your Mac, it’s important to first determine which specific drive you want to eject. This is especially crucial if you are working with sensitive data or have multiple drives with similar names or appearances. To identify the USB drive you wish to eject, follow these steps:
- Open Finder by clicking on its icon in the dock or by pressing Command + Spacebar and typing “Finder” in the spotlight search.
- Look for the USB drive under the “Devices” section in the left-hand sidebar of the Finder window. USB drives are typically indicated with a removable disk icon.
- If you are still unsure, you can double-click on the USB drive to open it and verify its content before proceeding with the ejection process.
Safely Ejecting the USB Drive:
Before physically removing a USB drive from your Mac, it’s important to eject it properly to prevent potential data corruption or damage. Follow these steps to safely eject a USB drive:
- Make sure all files and applications stored on the USB drive are closed.
- Locate the USB drive on your desktop or in the Finder window.
- Click on the eject icon next to the USB drive’s name. Alternatively, you can right-click on the USB drive and select “Eject” from the context menu.
- Wait for the USB drive to disappear from your desktop or Finder window before physically removing it from the Mac.
Using the Eject Option in Finder:
One way to eject a USB drive from your Mac is by using the Eject option in the Finder. Follow these steps:
- Open Finder by clicking on its icon in the dock or by pressing Command + Spacebar and typing “Finder” in the spotlight search.
- Locate the USB drive in the left-hand sidebar under the “Devices” section.
- Click on the eject icon next to the USB drive’s name.
Ejecting a USB Drive Using the Menu Bar:
Another method to eject a USB drive from your Mac is by using the menu bar. Here’s how:
- Ensure that the USB drive is connected to your Mac.
- Click on the “Finder” menu in the menu bar at the top of the screen.
- Scroll down and locate the USB drive in the “Locations” section.
- Click on the eject icon next to the USB drive’s name.
By following these methods, you can safely and easily eject a USB drive from your Mac without the risk of data loss or hardware damage.
Determining Which USB to Eject
When you have multiple USB drives connected to your Mac, it can sometimes be a bit tricky to identify the specific one you need to eject. However, there are a couple of methods you can use to determine which USB drive to eject.
Locating the USB Drive Icon: One way to identify the USB drive is by looking for its icon on your desktop or in the Finder sidebar. USB drives typically have a distinctive icon, usually in the shape of a disk or an external storage device. Take a moment to visually scan your desktop or sidebar for the USB drive icon.
Checking the USB Drive’s Name: Another method is to check the name of the USB drive. When you connect a USB drive to your Mac, it is usually assigned a default name, such as “Untitled” or “No Name.” If you remember the name of the specific USB drive you want to eject, you can look for that name in the Finder sidebar or by hovering over the USB drive icon on your desktop.
Safely Ejecting the USB Drive
Ejecting a USB drive from a Mac is an important step to ensure that the data on the drive is not corrupted and that no information is lost. Follow these steps to safely eject a USB drive from your Mac:
Closing Any Open Files or Applications
Before ejecting the USB drive, make sure to close any files or applications that are currently being accessed from the drive. This step is crucial as it ensures that no data is being actively written or read from the drive, reducing the risk of data corruption.
Dragging the USB Drive Icon to the Trash
Locate the USB drive icon on your Mac’s desktop or in the Finder window. To eject the drive, simply click and drag the icon to the Trash bin located in the dock. This action initiates the ejection process and prepares the drive for safe removal.
Waiting for the LED Light to Stop Flashing (If applicable)
If your USB drive has an LED light indicator, wait for it to stop flashing before physically disconnecting the drive. This indicates that there is no active data transfer or operation occurring on the drive. Removing the drive while the LED light is still flashing can lead to data loss or corruption.
Ejecting a USB drive from a Mac is a simple process that ensures the integrity of your data. By following these steps, you can safely remove your USB drive without any risk of data loss or damage.
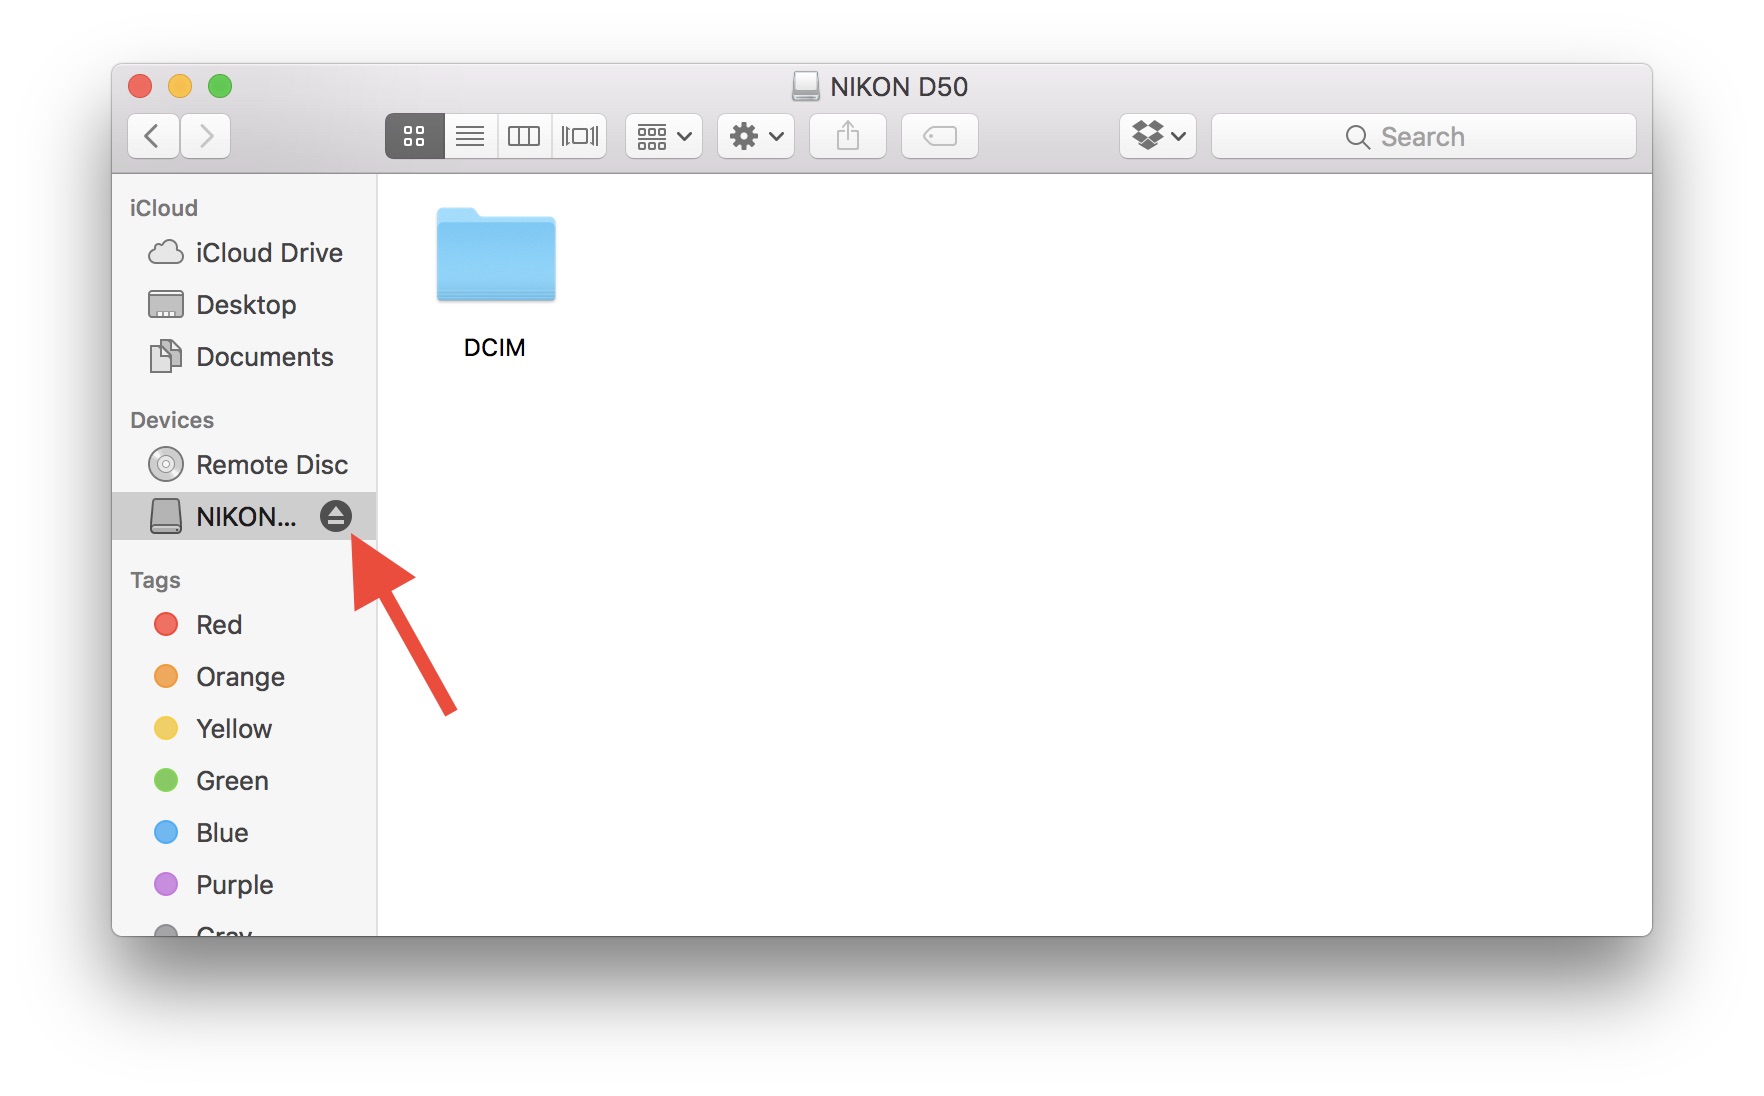
Using the Eject Option in Finder
When it comes to safely ejecting a USB drive from your Mac, using the Eject option in Finder is one of the simplest and most effective methods. Here’s how you can do it:
-
Opening Finder: Start by opening the Finder application on your Mac. You can do this by clicking on the blue smiley face icon located on your Dock or by navigating to the Applications folder and clicking on the Finder icon.
-
Locating the USB Drive in the Sidebar: Once the Finder application is open, locate the sidebar on the left-hand side of the window. Under the “Locations” section, you should see the USB drive listed. It is usually labeled with the name or brand that corresponds to your USB device.
-
Clicking on the Eject Button next to the USB Drive: To safely eject the USB drive, simply hover your cursor over the USB drive name in the sidebar. You will notice an eject icon (a triangle with a line underneath) appear next to the drive’s name. Click on this eject button to begin the ejection process.
Ejecting the USB drive using the Eject option in Finder ensures that any read or write operations are completed before removing the device. This helps prevent data loss or damage to the files stored on the drive.
Conclusion
In conclusion, ejecting a USB from a Mac is a simple and crucial step to ensure the safe removal of your devices. By following the steps outlined in this article, you can avoid data loss, device damage, and other potential issues that may arise from improper removal.
Remember to always properly eject your USB drives before physically disconnecting them from your Mac. This will help protect your data integrity, prevent file corruption, and maintain the overall health of your devices.
With the easy-to-follow methods provided, you can confidently eject your USB drive from your Mac and continue using your devices hassle-free. So remember, take the extra few seconds to properly eject your USB and keep your valuable data safe and sound.
FAQs
Q: Can I safely remove a USB from a Mac without ejecting it?
A: While it is possible to remove a USB drive from a Mac without ejecting it, it is not recommended. Ejecting the USB ensures that all data has been written to the drive and that no files are in use. Simply pulling out the USB without ejecting it can result in data corruption or loss.
Q: How do I eject a USB drive from a Mac?
A: To eject a USB drive from a Mac, you can either click on the eject icon next to the drive’s name in the Finder sidebar, right-click on the drive and select “Eject,” or drag the drive’s icon to the Trash on the Dock until it changes to an eject symbol and release.
Q: Why does it take longer to eject a USB drive from a Mac sometimes?
A: There can be various reasons for a USB drive to take longer to eject from a Mac. It could be due to an active process running or files being accessed from the drive. To expedite the ejecting process, make sure all files and applications associated with the USB drive are closed before attempting to eject it.
Q: What should I do if a USB drive won’t eject from my Mac?
A: If a USB drive is not ejecting from your Mac, try the following troubleshooting steps:
1. Close all files and applications that might be using the drive.
2. Restart your Mac and try ejecting the drive again.
3. If the drive still won’t eject, you can force eject it by pressing and holding the “Option” key while clicking on the eject icon next to the drive’s name in the Finder sidebar.
Q: What are the consequences of removing a USB drive without ejecting it?
A: Removing a USB drive without ejecting it can lead to several consequences, such as:
1. Data corruption or loss: Unfinished write operations may result in data being left in cache and not saved to the drive, leading to potential file corruption or loss.
2. File system errors: Abruptly disconnecting a USB drive can cause issues with the file system, making it difficult to access or use the drive in the future.
3. Hardware damage: In some cases, forcefully removing a USB drive can damage the USB port or the drive itself, rendering it unusable.