
In the digital age, music streaming has become an integral part of our lives. With a plethora of songs at our fingertips, it’s essential to have a well-organized playlist to ensure a seamless listening experience. If you’re an Apple Music user, you might be wondering how to sort your playlists. Whether you want to arrange your songs alphabetically, by artist, or by release date, Apple Music offers a range of options to help you curate your perfect playlist. In this article, we will guide you through the steps to sort your playlists in Apple Music, allowing you to easily access your favorite tunes in the order that suits you best. So, let’s dive in and make your music library more organized and enjoyable than ever before!
Inside This Article
- Overview
- Method 1: Sorting Playlists Manually
- Method 2: Sorting Playlists Alphabetically
- Method 3: Sorting Playlists by Recently Added
- Method 4: Sorting Playlists by Custom Order
- Conclusion
- FAQs
Overview
In today’s digital age, music streaming has become a popular way for music lovers to enjoy their favorite tunes anywhere and anytime. Apple Music, with its vast music library and user-friendly interface, has become a go-to platform for music enthusiasts. One of the key features of Apple Music is the ability to create and customize playlists. However, as your playlist library grows, it can become challenging to find the desired playlists quickly. This is where the sorting feature in Apple Music comes in handy.
Sorting your playlists in Apple Music allows you to organize and categorize your playlists in a way that makes sense to you. Whether you want to sort them alphabetically, by date added, or even by specific criteria like artist, album, or genre, Apple Music provides you with various methods to achieve this. In this article, we will explore the different ways to sort your playlists in Apple Music, enabling you to find your favorite playlist effortlessly.
Method 1: Sorting Playlists Manually
Sorting your playlists manually in Apple Music gives you complete control over the order of your songs. This method is ideal if you have specific preferences or want to create a personalized playlist experience. Here’s how you can do it:
1. Open the Apple Music app on your device and navigate to the “Library” tab.
2. Tap on “Playlists” to view all your playlists.
3. Select the playlist you want to sort manually.
4. Tap on the three dots (…) next to the playlist’s name to access the options menu.
5. Choose “Edit” to enter the editing mode for the playlist.
6. You can now rearrange the songs in the desired order by tapping and holding on the three lines icon next to each song.
7. Drag the songs to the desired position in the playlist.
8. Once you have finished rearranging the songs, tap on “Done” to save your changes.
That’s it! Your playlist will now be sorted according to your manual arrangement. You can repeat these steps for any other playlists you want to sort manually.
Manual sorting provides flexibility and allows you to curate your playlists according to your mood, preference, or any other criteria you desire. It’s a great way to create a personalized listening experience in Apple Music.
Method 2: Sorting Playlists Alphabetically
If you prefer a more organized approach to managing your playlists in Apple Music, you can easily sort them alphabetically. This method allows you to quickly locate specific playlists and keeps your library neat and tidy. Here’s how you can sort your playlists alphabetically:
Step 1: Launch the Apple Music app on your device and navigate to the “Playlists” tab.
Step 2: Locate the playlist you want to sort alphabetically and tap on it to open it.
Step 3: Once the playlist is open, tap on the three-dot menu icon located at the top-right corner of the screen.
Step 4: From the menu that appears, select the “Edit” option.
Step 5: In the editing mode, you will notice three horizontal lines on the right side of each song in the playlist. Tap and hold on the three horizontal lines next to any song.
Step 6: Drag the song up or down to the desired position in the playlist. As you drag the song, you will see other songs moving accordingly, indicating the new order.
Step 7: Continue dragging and arranging the songs in alphabetical order. You can also use two fingers to select multiple songs at once and rearrange them simultaneously.
Step 8: Once you have arranged the songs in the desired order, tap on the “Done” button to save the changes.
Now, your playlist will be sorted alphabetically based on the title of each song. This makes it easier to find specific songs or browse through your playlist in a more organized manner.
Note: If you have a large playlist, manually rearranging the songs can be time-consuming. In such cases, you might want to consider using other sorting methods, such as sorting by recently added, artist, album, or genre, which we will discuss in the following sections.
Method 3: Sorting Playlists by Recently Added
If you want to quickly access the newly added songs in your playlists, sorting them by the date they were added can be a convenient option. With Apple Music, you can easily sort your playlists by the recently added songs to stay up to date with your music collection.
To sort your playlists by recently added songs, follow these simple steps:
- Open the Apple Music app on your device.
- Navigate to the “Library” section located at the bottom of the screen.
- Select “Playlists” to view your existing playlists.
- Choose the playlist you want to sort by recently added songs.
- Once inside the playlist, tap on the three-dot menu icon located at the top-right corner.
- From the menu options, select “Edit” to enter the editing mode.
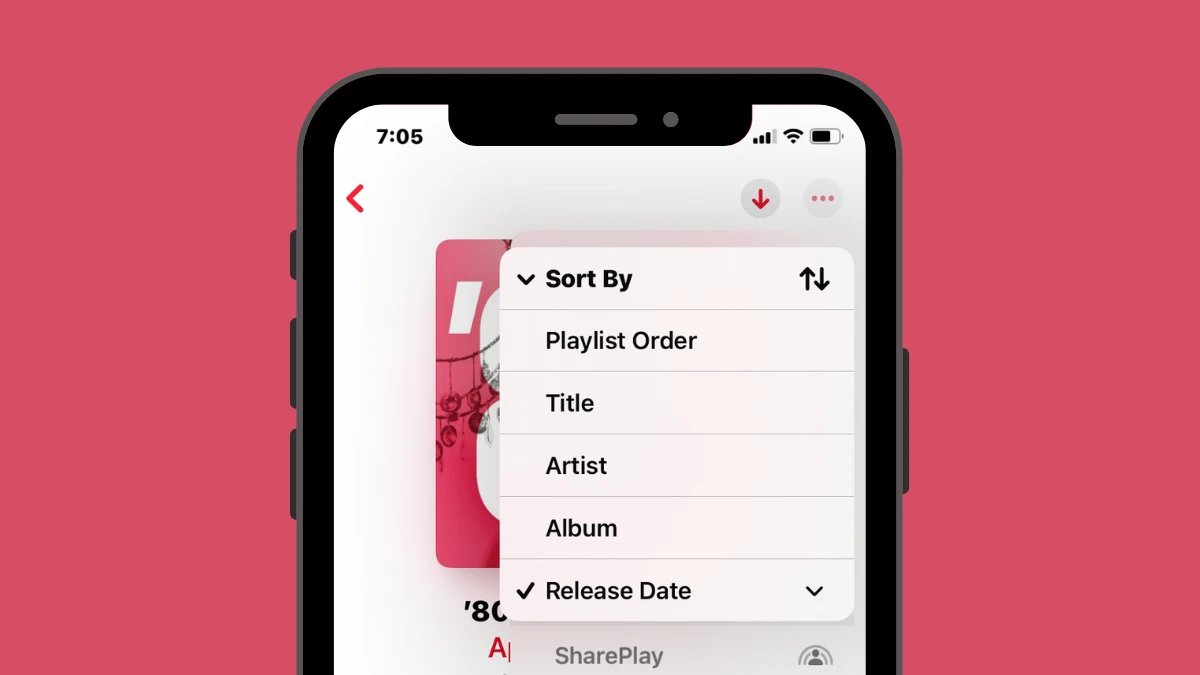
- Scroll down until you find the sorting options and tap on it.
- In the sorting options, choose “Recently Added” to sort the songs in the playlist accordingly.
- Exit the editing mode by tapping on the “Done” button.
After following these steps, your playlist will be sorted based on the date the songs were added, with the most recently added songs appearing at the top of the list. This makes it easier for you to find and enjoy the latest additions to your music collection.
However, it’s important to note that sorting by recently added songs will only display the songs within the playlist that have been added recently. It does not affect the overall arrangement of the playlist itself.
Method 4: Sorting Playlists by Custom Order
While the previous methods focus on sorting your playlists based on specific criteria like title, recently added, or artist, album, or genre, there may be instances where you prefer a more personalized order. Fortunately, Apple Music allows you to sort your playlists in a custom order, giving you complete control over the arrangement and sequence of your favorite tracks.
To sort your playlists by custom order in Apple Music, follow these simple steps:
- Open Apple Music on your device and navigate to the playlist you want to customize.
- Tap on “Edit” located at the top-right corner of the screen. This will allow you to make changes to the playlist.
- Tap and hold on the three horizontal lines next to each song in the playlist. You can rearrange the songs by dragging them to the desired position.
- Release your finger to drop the song in its new position. Repeat this process for all the songs you want to reorder.
- Once you are satisfied with the custom order of the playlist, tap on “Done” to save your changes.
That’s it! Your playlist will now be sorted according to the custom order you have set. This gives you the flexibility to arrange your songs in any way you prefer, allowing for a more personalized listening experience.
Whether you want to create a playlist for a specific mood, a road trip, or a workout session, sorting your playlists by a custom order in Apple Music gives you the freedom to curate your music collection exactly the way you want it.
By utilizing the custom order sorting method, you can ensure that your favorite tracks always play in the sequence that resonates with your mood and preferences.
Now that you know how to sort your playlists in Apple Music by custom order, you can take your music listening experience to the next level by creating personalized playlists that perfectly match every occasion.
In conclusion, sorting your playlists in Apple Music can greatly enhance your music streaming experience. By organizing your songs and albums in a way that suits your preferences, you can easily find and enjoy your favorite tracks without any hassle. Whether you want to arrange your playlists alphabetically, by artist, genre, or custom order, Apple Music offers a variety of sorting options to cater to your needs.
With the step-by-step guide provided in this article, you now have the knowledge and tools to sort your playlists efficiently. Take advantage of the flexibility and convenience offered by Apple Music to curate your music library and create personalized playlists that will enhance your listening pleasure.
So go ahead, dive into your Apple Music library, and start organizing your playlists today. Happy sorting!
FAQs
1. How do I sort my playlists in Apple Music?
Sorting your playlists in Apple Music is a straightforward process. Follow these steps:
- Open the Apple Music app on your device.
- Navigate to the “Library” tab at the bottom of the screen.
- Tap on “Playlists.”
- Choose the playlist you want to sort.
- Tap on the “Edit” button located at the top right corner of the screen.
- Drag and drop the songs within the playlist to reorder them as desired.
- Once you’re satisfied with the new order, tap on “Done” to save your changes.
2. Can I sort playlists on Apple Music on my computer?
Absolutely! Sorting your playlists on Apple Music can be done on your computer as well. Here’s how to do it:
- Launch iTunes on your computer and sign in to your Apple Music account.
- Click on the “Library” tab located at the top of the screen.
- Select “Playlists” from the sidebar on the left-hand side of the iTunes window.
- Choose the playlist you want to sort.
- Click on the “Edit” button at the top of the playlist.
- Use your mouse to drag and drop the songs within the playlist to rearrange them.
- Once you’re done, click on “Done” to save your changes.
3. Will sorting my playlist in Apple Music affect the order of the songs in my iCloud Library?
No, sorting your playlist in Apple Music will only impact the order of the songs within that specific playlist. The order of songs in your iCloud Library will remain unchanged.
4. Can I sort my playlists alphabetically in Apple Music?
Unfortunately, Apple Music does not currently offer an option to automatically sort playlists alphabetically. However, you can manually organize your playlists by dragging and dropping the songs into the desired order.
5. Is it possible to reverse the order of songs in a playlist on Apple Music?
Yes, you can reverse the order of songs in a playlist on Apple Music. Simply follow the steps outlined earlier to access the edit mode for the playlist, and then drag the last song in the list to the top. This will reverse the order of all the songs in the playlist.