You just updated your mobile device’s software or opened an app via your Android launcher, but suddenly cannot proceed to use your gadget. A pop-up error notification on the device says “Process system isn’t responding” and asks if you want to stop the running process or wait until it goes back to normal. Although the problem does not usually persist, it is troublesome when it does and you do not know how to stop it from occurring again.
If you are frequently experiencing the error, this guide is perfect for you. We will help you understand and solve the problem in a breeze.
What Causes the Process System Error?
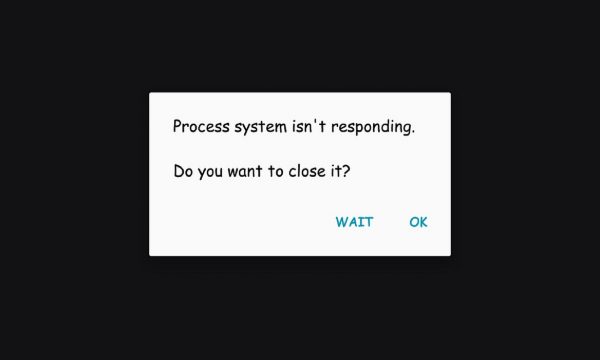
The scenario where the process system or system UI isn’t responding often happens in old devices. That does not mean your new smartphone or tablet PC is exempted from it, though. Any Android gadget can display the error message when the following happens:
1. OS Update Has Errors
Operating System (OS) or software updates are hit-or-miss. Those can be nearly perfect with only minor issues or almost useless with plenty of bugs. You will only find out how new software works after installing it. If the OS has too many flaws, you might get alerted about the process system not responding immediately after the update.
2. RAM Already Low
Random Access Memory (RAM) in mobile devices is a type of storage that keeps the data of apps you ran since you booted up your gadget. It allows the device to quickly regain information and reload the apps for you in an instant. When RAM is low, there might be no more space for files or programs the system needs to function.
3. App Malfunctions
When an app freezes or crashes, it can also lead to a process system that isn’t responding. Apps that are most likely the culprit to the error are those that have viruses or came from a sketchy source outside of the Google Play Store.
4. MicroSD Card Gets Corrupted
Android devices can read and write memory onto a microSD card. When the process fails, you might also experience the problem where the system UI isn’t responding. To elaborate, what could happen is that the app’s files will become corrupted or not get transferred in full to the microSD card. Apps need all the supporting files to work smoothly; otherwise, they might freeze and affect the system.
5. Rooting Goes Wrong
Rooting lets you install new software and features to your Android devices besides those that officially came from Google. With the process of how to root an Android phone being technical, beginners tend to fail to root the gadgets. That is also what usually the error message stating that the process system isn’t responding.
What to Do When Process System Won’t Respond
Even if many things can cause the problem, there is no lack of solutions for it. When the process system isn’t responding, you simply have to try one or more of the following effective fixes:
1. Restart Android Gadget
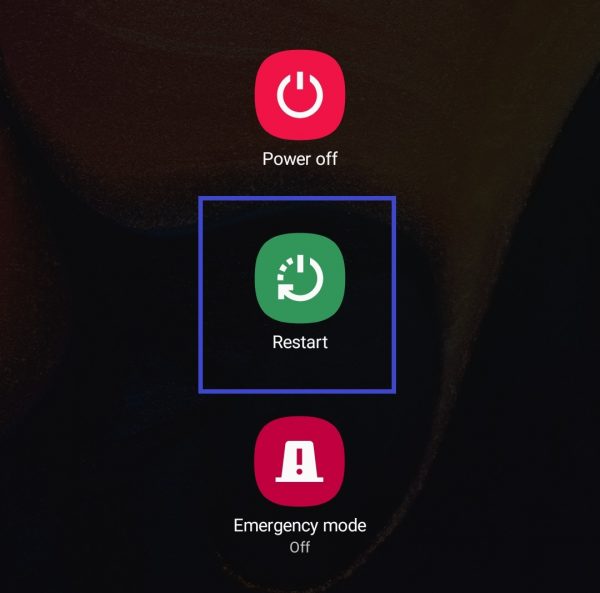
Sometimes, the least technical solutions are the most effective. One of the easiest fixes that can work most of the time is a restart. You only have to hit your device’s power button or menu shortcuts for a quick reboot.
Restarting your Android gadget eases the burden of running apps temporarily. The device gets a short rest to start once again. The solution is like washing your face with water, which effectively wakes you up anytime you feel sluggish.
2. Check and Increase RAM
System UI isn’t responding due to low RAM? It is easy to free up or upgrade RAM on Android. In fact, you have multiple ways to do that. You can clean the storage via settings, uninstalling apps, deactivating live animations and effects, or using RAM-boosting apps.
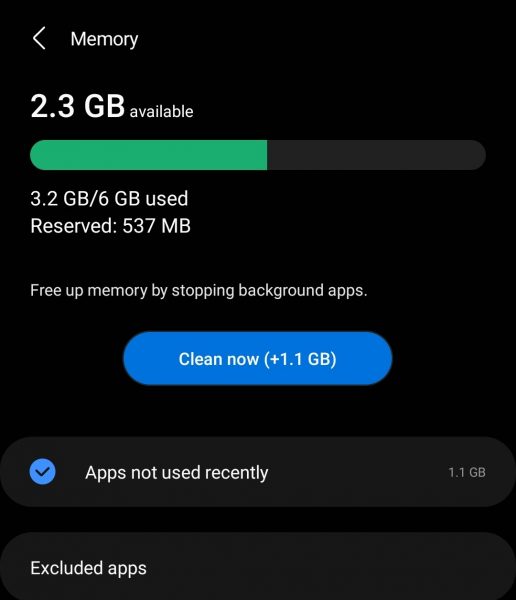
Before everything else, double-check if your RAM is indeed full. On Android, the amount of RAM consumed can be seen within the device’s Settings app or menu.
Via Device Care Menu
1. Open Settings from your Android device’s app dashboard.
2. Go to Device Care.
3. Click Memory.
Via Developer Options
1. Launch Settings via its app on your Android home screen.
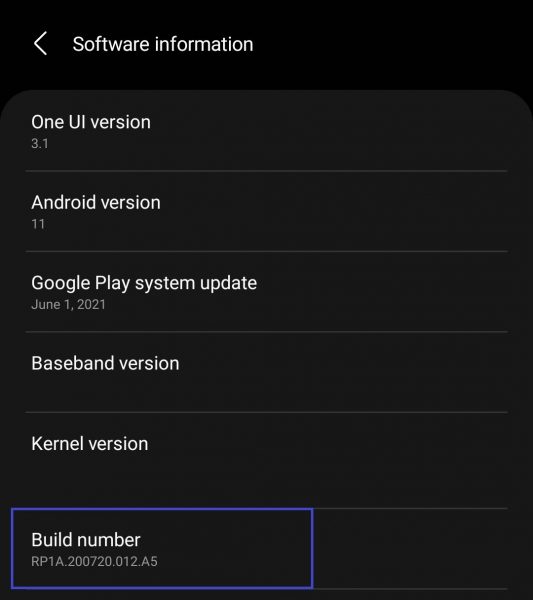
2. Look for and click About Phone, then Software Information.
3. Tap Build Number more than once until it shows an alert saying you have become a developer.
4. Return to the Settings menu.
5. Open System, then tap Advanced.
6. Access Developer Options.
7. Tap Memory to see the total memory used up by your device.
Once you have confirmed that there is not enough RAM for more apps, you can click the Clean Now option from the Memory details page if there is one. If none, you can try the methods specified in our guide on how to upgrade RAM for Android devices.
3. Get Latest Version of Apps
Apps are frequently updated for your and other users’ good, not just because developers want to showcase their new features. Updates patch errors or bugs in any program, so make sure you get the latest version of your apps.
All you need for that is to visit the Google Play Store or hit the Update prompt once the app alerts you. You will most likely be doing the former, so here are the two ways to update your apps via the Google Play Store.
Update a Single App
1. Pick Google Play Store from your Android app dashboard.
2. Use a quick search in the store to find the app you want to update.
3. Tap the app once found.
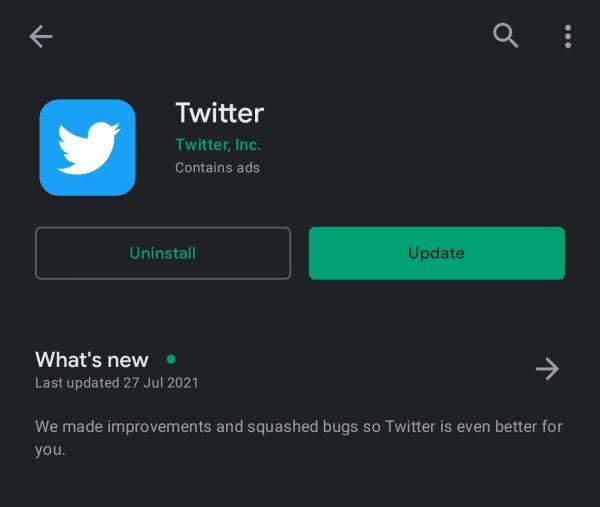
4. Hit the Update button on the app page.
Update All Apps at Once
1. Access the Google Play Store through its app on your Android device.
2. Click your profile icon near the store’s search bar.
3. Tap Manage Apps and Devices from the drop-down options.
4. Go to the Manage tab, then select the app to update.
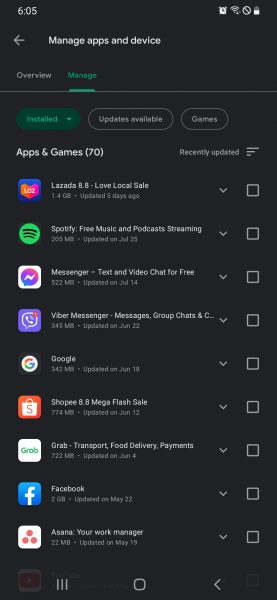
5. Tick the boxes beside the apps to update.
6. Click the Update button or Refresh icon on the top-right corner of the interface to update the apps.
4. Remove Apps While in Safe Mode
When the process system isn’t responding and you suspect that it is due to an errant program, it is best to enable Safe Mode on your device to confirm the root cause. That is because the mode disables third-party apps.
Here is how to activate Safe Mode:
1. Shut down your Android device.
2. Restart the gadget.
3. While rebooting is in progress and when the phone logo shows up, long-press the Power and Volume Down buttons simultaneously.
4. Check if the words Safe Mode appears on the lower-left corner of the home screen.

5. If Safe Mode is not activated, repeat the process.
Here is an alternative method for enabling Safe Mode:
1. Hold the Power button of your gadget.
2. Hold Restart from the quick options.
3. Release the button once Reboot to Safe Mode appears.
4. Allow the device to reboot by clicking OK.
5. Wait for the gadget to restart in Safe Mode.
If the Android device no longer alerts about the process system issue in Safe Mode, an app is indeed the culprit. You have to uninstall the program you were using or recently running when the error occurred. Remove the problematic app or apps the way you usually do it on your gadget. Restart the device to exit Safe Mode afterward.
5. Replace MicroSD Card
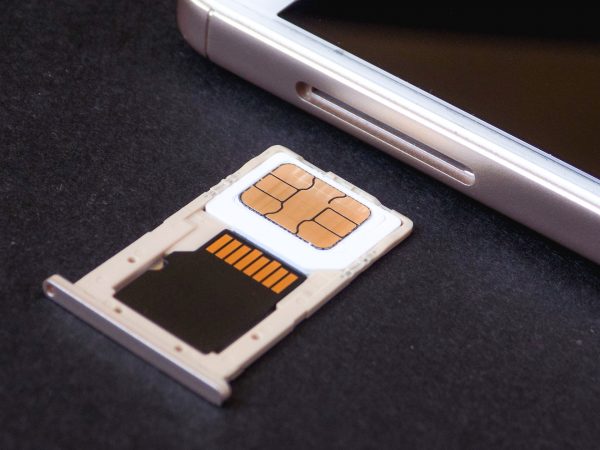
A microSD card, being a form of physical storage, is vulnerable to wear and tear, which can cause it to malfunction or get corrupted. For example, it fails to save parts of the file or the whole file. Those lost data might be vital to device functionality. If those indeed are, then it is no wonder you are experiencing a system UI that isn’t responding.
You might or might not need to replace your microSD card. In the meantime, move apps saved in the said accessory to your Android device’s internal storage. Take the microSD card out of the gadget afterward. When its gold contacts have serious scratches or are fading, it is time to swap the card with a new one.
If you think that the chip is still fine physically, try our best fixes for an SD card that’s not recognized before throwing the accessory into the bin.
6. Free Up Cache Partition
Cache partition can be overloaded like RAM, although that rarely happens. Given that the cache partition might be full that’s why the process system isn’t responding, you can try to free up space for it. You will not risk losing settings and personal data with the method, unlike a factory reset which we will discuss later. On Android, emptying the cache partition can only be done in Recovery Mode.
Follow these steps to free up cache partition space:
1. Switch off your Android device.
2. Hold the Power and Volume Up buttons simultaneously, then release the former once the Android logo appears.
3. Hold the two buttons from Step 2 again until you see the black background with text, which indicates your device is already in Recovery Mode.
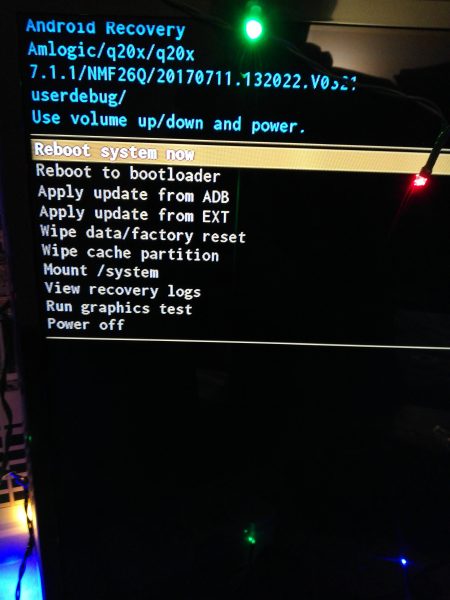
5. Once the “Wipe Cache Partition” option appeared, hit the Power button to select it.
7. Wait for New Android OS
When an update you previously installed has many bugs, you have no choice but to wait for a new version of the Android OS. You will most likely settle for this solution when the system UI error does not happen frequently, which means you still have the time to wait.
Do the following to upgrade OS:
1. Access your device’s Settings menu from its app.
2. Scroll down then tap Software Update from the options.
3. Hit Download and Install to check available OS.
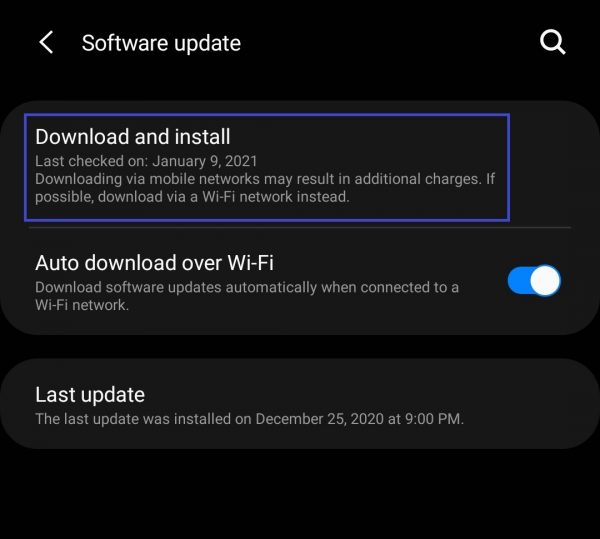
4. If there is an update, click Install Now.
5. Wait for the new Android OS to be downloaded and installed on your device.
8. Factory Reset Android Gadget
If the message notifying that the process system isn’t responding appears again after trying our abovementioned recommendations, consider a factory reset. Prepare to say goodbye to your existing settings and credentials, though. Technically, that is because the procedure will make your device revert to how it was when it was brand new.
Here is how to successfully revert your device to its factory state:
1. Open Settings from the app dashboard.
2. Tap General Management from the menu.
3. Click Reset from the available options.
4. Select Factory Data Reset afterward.
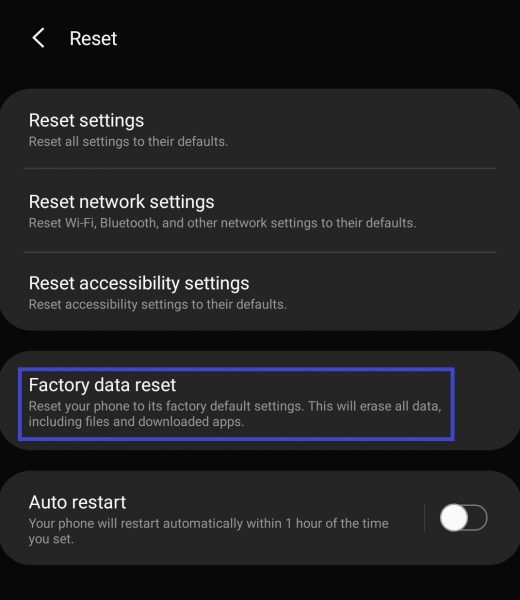
5. Click the Reset button once you have understood the specified risks.
6. Wait for your Android phone or tablet PC to reboot.
9. Unroot Your Android Gadget
If you rooted your Android device recently and think that could have caused the system UI error, you will need to unroot the gadget. Unrooting can be as complicated as rooting, though. Fortunately, there are a few easy methods: update your OS or use a file manager app like ES File Manager. To do the former, follow the steps we previously discussed in this article. For the latter, we will go over the procedures briefly.
Unroot via File Manager App (ES File Manager)
1. Download and launch ES Explorer.
2. Click the three-horizontal line icon to the left of Home or the top-left corner of the interface.
3. Tap Root from the sidebar menu.
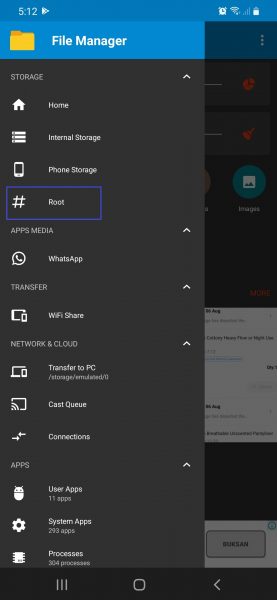
4. Remove Busybox and Su files within the Root subfolder.
5. Go to the App folders, then look for and remove the Superuser apk file.
6. Reboot the Android gadget afterward.
Download ES File Manager on Google Play Store
10. Ask for Guidance from Technician
If you still frequently get alerted about the process system that isn’t responding or having trouble unrooting your Android device, seek guidance from a technician. Android experts usually know even the hidden tricks to revive your gadget’s system, and that makes it worth it to contact them. You can reach the pros easily by calling your mobile device provider’s service centers or inquiring via their official websites.
Get Your Android Process System Running Now
When the process system isn’t responding occasionally, you risk your software or apps becoming unreliable by the day. With 10 solutions in this article, though, you will certainly find one that can fix the error in a jiffy. Get that process system running now and let us know which method worked for you!
