
Are you looking for ways to disconnect your iPhone from your Mac? We’ve got you covered! When it comes to using your iPhone with your Mac, it’s important to know how to safely disconnect the two devices to avoid any data loss or damage. Whether you need to transfer files, update your software, or simply disconnect for a while, we have 12 easy ways to help you do just that. From using the Finder to Bluetooth options, we’ll guide you through each step to ensure a seamless disconnection process. So, if you’re ready to learn how to disconnect your iPhone from your Mac effortlessly, let’s dive right in!
Inside This Article
- How to Disconnect iPhone from Mac: A Complete Guide
- How to Eject iPhone from Mac – Using Finder – Using iTunes
- Disconnecting iPhone from Mac via USB Cable
- Disconnecting iPhone from Mac Wirelessly- Disabling Wi-Fi Sync- Turning off Handoff feature
- Managing iPhone Sync Settings in iTunes
- Logging out of iCloud on Mac and iPhone
- Deactivating Continuity Features – Disabling Continuity and Handoff – Turning off Auto Unlock
- Unpairing iPhone from Mac via Bluetooth- Removing the device from Bluetooth settings- Resetting Bluetooth connections
- Disconnecting iPhone from Mac in macOS Catalina and Later – Using the Finder sidebar – Safely ejecting the device from sidebar options
- Turning off AirDrop to Disconnect iPhone from Mac- Disabling AirDrop on Mac- Turning off AirDrop on iPhone
- Disabling Automatic Syncing in iTunes
- Removing iPhone Backup from Mac
- Conclusion
- FAQs
How to Disconnect iPhone from Mac: A Complete Guide
When it comes to using your iPhone with your Mac, there may come a time when you need to disconnect the two devices. Whether you’re finished syncing files, transferring data, or just want to separate the two temporarily, learning how to disconnect your iPhone from your Mac is essential. In this complete guide, we will explore various methods of disconnecting your iPhone from your Mac, ensuring a seamless transition and preserving the integrity of your data.
1. How to Eject iPhone from Mac
One of the simplest and most common methods of disconnecting your iPhone from your Mac is by ejecting it. This ensures that all active connections and processes are properly terminated before unplugging the device. There are two primary ways to eject your iPhone from your Mac:
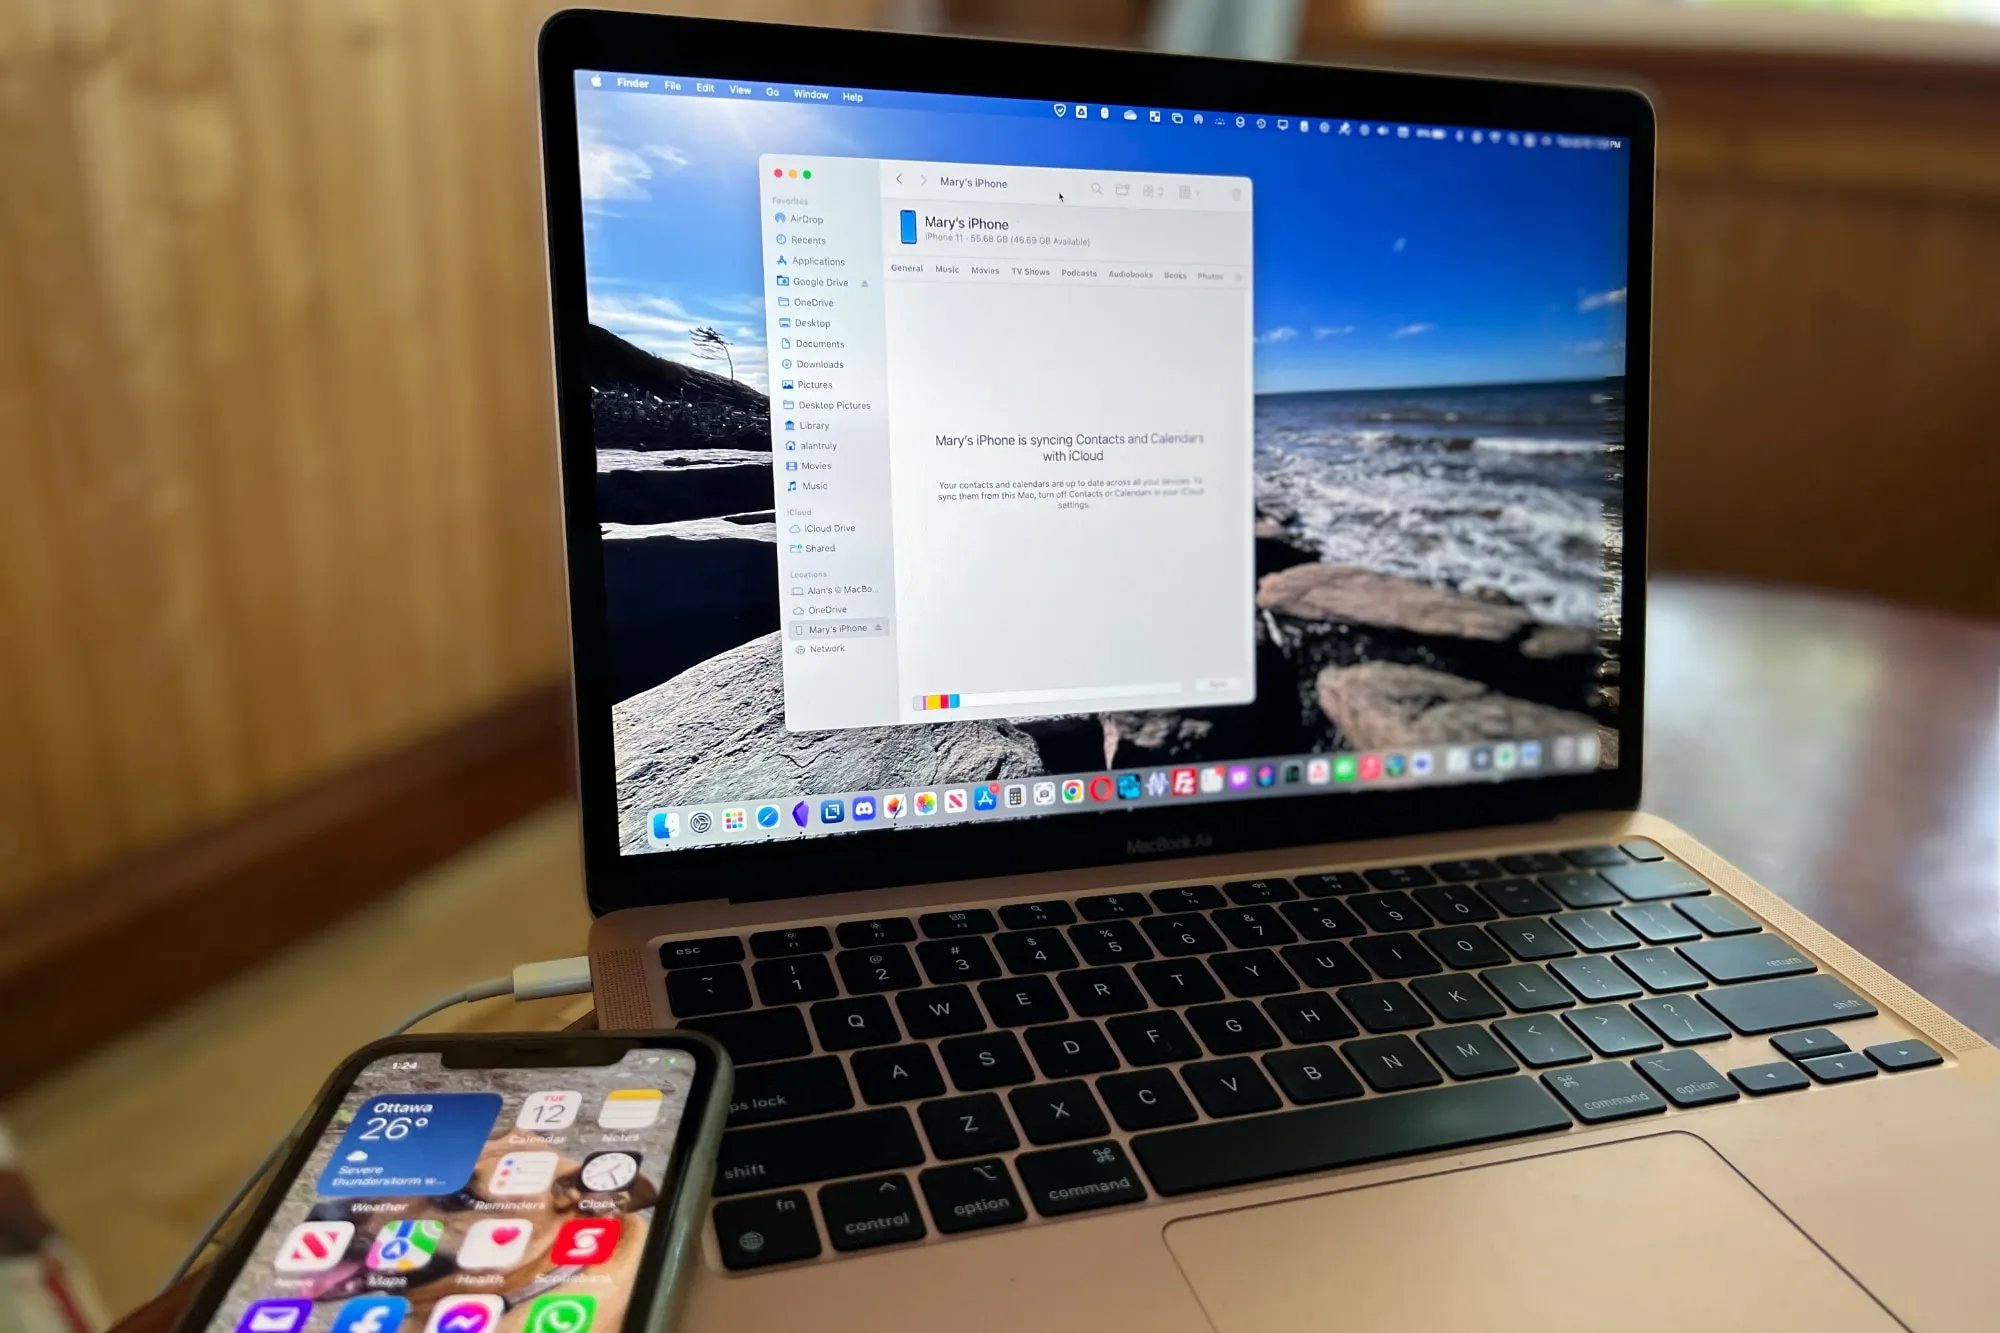
- Using Finder: In the Finder sidebar, locate your iPhone under the “Locations” section. Right-click on your iPhone and select “Eject” from the dropdown menu.
- Using iTunes: Open iTunes and select your iPhone icon at the top-left corner of the window. Click on the eject button (an upward arrow inside a horizontal line) next to your device name.
2. Disconnecting iPhone from Mac via USB Cable
If you’re using a USB cable to connect your iPhone to your Mac, there are proper steps to follow when disconnecting the two:
- Unplugging the USB cable: Before unplugging the USB cable, ensure that all syncing processes have completed and your iPhone is not actively transferring any data. Once you’re certain, gently unplug the USB cable from your Mac.
- Safely removing the device from the system: On your Mac, locate the USB icon in the menu bar. Click on it, and a dropdown menu will appear. Select your iPhone and choose the option to safely remove the device.
3. Disconnecting iPhone from Mac Wirelessly
For wireless connections between your iPhone and Mac, such as Wi-Fi sync and handoff features, here’s how to disconnect them:
- Disabling Wi-Fi Sync: On your iPhone, go to “Settings” > “General” > “iTunes Wi-Fi Sync.” Toggle off the “Sync with this iPhone over Wi-Fi” option.
- Turning off Handoff feature: On your iPhone, go to “Settings” > “General” > “Handoff.” Toggle off the “Handoff” option.
4. Managing iPhone Sync Settings in iTunes
If you want more control over the data that syncs between your iPhone and Mac, you can manage the sync settings in iTunes. Here’s how:
- Changing sync preferences: Open iTunes and connect your iPhone. Click on the device icon, navigate to the “Summary” tab, and scroll down to the “Options” section. Select the desired sync options for your iPhone.
- Limiting the data synced between iPhone and Mac: In the same “Options” section, you can choose to sync only selected items like music, photos, or videos, or even disable syncing altogether.
5. Logging out of iCloud on Mac and iPhone
Logging out of your iCloud account is another way to disconnect your iPhone from your Mac. Here are steps to do this:
- Steps to log out of iCloud on Mac: Go to “System Preferences” > “Apple ID.” Click on “Overview” and then “Sign Out.” Follow the prompts to sign out of your iCloud account.
- Steps to log out of iCloud on iPhone: On your iPhone, go to “Settings” > [Your Name] at the top > “Sign Out.” Follow the prompts to sign out of your iCloud account.
6. Deactivating Continuity Features
Continuity features like Handoff, Auto Unlock, and Universal Clipboard can keep your iPhone connected to your Mac. If you want to disconnect them, here’s how:
- Disabling Continuity and Handoff: On your Mac, go to “System Preferences” > “General” and uncheck the box next to “Allow Handoff between this Mac and your iCloud devices.”
- Turning off Auto Unlock: On your Mac, go to “System Preferences” > “Security & Privacy” > “General” and uncheck the option for “Allow your Apple Watch to unlock your Mac.
7. Unpairing iPhone from Mac via Bluetooth
If you have paired your iPhone with your Mac via Bluetooth, you can unpair them when you want to disconnect. Here’s how:
- Removing the device from Bluetooth settings: On your Mac, go to “System Preferences” > “Bluetooth.” Find your iPhone in the list of devices, right-click on it, and choose “Remove” or “Forget Device.”
- Resetting Bluetooth connections: On your iPhone, go to “Settings” > “Bluetooth.” Find your Mac in the list of devices and tap on the “i” icon next to it. Select “Forget This Device.”
8. Disconnecting iPhone from Mac in macOS Catalina and Later
If you’re using macOS Catalina and later versions, you can disconnect your iPhone from the Finder sidebar. Here’s how:
- Using the Finder sidebar: In the Finder, look for your iPhone under the “Locations” section in the sidebar. Right-click on it and choose “Eject [Your iPhone Name].” Then, you can safely unplug your iPhone.
- Safely ejecting the device from sidebar options: Alternatively, you can click on the eject button (an upward arrow inside a horizontal line) next to your iPhone name in the sidebar to safely eject and disconnect it.
9. Turning off AirDrop to Disconnect iPhone from Mac
If you want to disconnect your iPhone from your Mac completely, you can disable AirDrop. Here’s how:
- Disabling AirDrop on Mac: On your Mac, go to “Finder” > “AirDrop” in the menu bar. Set your AirDrop visibility to “No One” or “Contacts Only.”
- Turning off AirDrop on iPhone: On your iPhone, swipe up from the bottom of the screen to open the Control Center. Tap on the AirDrop icon and select “Receiving Off.”
10. Disabling Automatic Syncing in iTunes
If you prefer manual control over syncing content between your iPhone and Mac, you can disable automatic syncing in iTunes. Here’s how:
- Preventing automatic syncing between Mac and iPhone: Open iTunes, go to “Preferences” > “Devices.” Check the box next to “Prevent iPods, iPhones, and iPads from syncing automatically.”
- Manually syncing content with iPhone: Connect your iPhone to your Mac, select it in iTunes, and head to the specific tabs (such as Music, Photos, or Apps) to manually choose the content you want to sync.
11. Removing iPhone Backup from Mac
If you want to disconnect your iPhone from your Mac and remove all associated backups, you can do so in both Finder and iTunes:
- Deleting iPhone backups from Finder: On your Mac, open a Finder window and go to “~/Library/Application Support/MobileSync/Backup/.” Find and delete the folder containing your iPhone backup.
- Removing backups from iTunes: Open iTunes, go to “Preferences” > “Devices.” Select the backup you want to remove and click on the “Delete Backup” button.
12. Troubleshooting Common Issues with Disconnecting iPhone from Mac
Lastly, if you encounter any issues while disconnecting your iPhone from your Mac, here are some common troubleshooting steps:
- Fixing unrecognized iPhone issues: Restart both your iPhone and Mac, update your iOS and macOS to the latest version, and ensure you have the latest iTunes installed.
- Resolving connection problems: Check your USB cable for any damage, try a different USB port or cable, and make sure you have a stable internet connection for wireless syncing or use.
By following these comprehensive guides, you can safely and effectively disconnect your iPhone from your Mac. Whether you’re using a USB cable, Bluetooth, or wireless connections like Wi-Fi sync, understanding the methods outlined in this complete guide will enable you to disconnect your devices without any hassle. So, go ahead and explore the various options to disconnect your iPhone from your Mac and enjoy the flexibility and independence of both devices.
How to Eject iPhone from Mac – Using Finder – Using iTunes
Ejecting your iPhone from your Mac is a crucial step to ensure that you safely disconnect your device without causing any data loss or damage. There are two methods you can use to eject your iPhone: using Finder or using iTunes.
Using Finder:
To eject your iPhone from your Mac using Finder, follow these simple steps:
- Connect your iPhone to your Mac using a USB cable.
- Open a Finder window by clicking on the Finder icon in your dock.
- In the sidebar of the Finder window, under the “Locations” section, you’ll see your iPhone listed. It might be under the “Devices” or “External” section.
- Hover your mouse over the iPhone icon, and you’ll see an eject button (a small upward-pointing arrow) appear next to it.
- Click on the eject button to safely disconnect your iPhone from your Mac.
Once you’ve clicked the eject button, you’ll see your iPhone disappear from the sidebar in Finder. It is now safe to unplug the USB cable from your Mac and your iPhone. You have successfully ejected your iPhone from your Mac using Finder.
Using iTunes:
If you prefer using iTunes to eject your iPhone from your Mac, here’s how you can do it:
- Launch iTunes on your Mac. If you don’t have it installed, you can download it from the Apple website.
- Connect your iPhone to your Mac using a USB cable.
- In the upper-left corner of the iTunes window, you’ll see an iPhone icon. Click on it to view your iPhone’s summary page.
- Under the “Options” section, you’ll find a checkbox labeled “Manually manage music and videos.” Make sure this checkbox is unchecked.
- Next to the checkbox, you’ll see an eject button (a small upward-pointing arrow). Click on it to safely eject your iPhone from iTunes.
Once you’ve clicked the eject button, you can disconnect your iPhone from your Mac. Your iPhone is now safely disconnected from iTunes, and you can unplug the USB cable.
Remember, it is essential to eject your iPhone from your Mac before unplugging it to prevent any potential data corruption or damage. Following these simple steps using either Finder or iTunes ensures a safe disconnection and helps to maintain the integrity of your iPhone and its data.
Disconnecting iPhone from Mac via USB Cable
When it comes to disconnecting your iPhone from a Mac, one of the simplest methods is by unplugging the USB cable. This is a straightforward process that ensures a quick disconnection and minimal hassle.
To begin, locate the USB cable that connects your iPhone to your Mac. This cable is typically white and has a Lightning connector on one end and a USB connector on the other. It is used to establish a physical connection between your iPhone and your Mac.
Once you have located the USB cable, carefully unplug it from either the USB port on your Mac or the charging adapter if connected to a power source. It’s important to handle the cable delicately to avoid any damage to either the cable or the iPhone.
After unplugging the USB cable, it’s essential to safely remove the device from your Mac’s system. This step ensures that all data transfer processes are finished, preventing any potential data loss or corruption.
To safely remove your iPhone from your Mac, follow these steps:
- On your Mac, click on the Finder icon located in the dock. Alternatively, you can use the keyboard shortcut Command + Spacebar, type “Finder,” and then hit Enter.
- In Finder, locate your iPhone under the “Locations” section in the sidebar. It is usually listed by its name or as “Your iPhone.”
- Click on your iPhone to select it in the Finder window. You should see an option to eject your iPhone from your Mac.
- Right-click on your iPhone and select the “Eject” option from the context menu. Alternatively, you can also click on the eject button (a small upward-pointing arrow) next to your iPhone’s name in the Finder sidebar.
Once you have safely ejected your iPhone from your Mac, you can now disconnect it from the USB cable. Remember to handle the device with care to avoid any accidental drops or damage.
Disconnecting your iPhone from your Mac via the USB cable provides a straightforward and quick way to separate the two devices. By following the steps outlined above, you can ensure that your iPhone is disconnected safely and efficiently, without risking any data loss or potential damage.
Disconnecting iPhone from Mac Wirelessly- Disabling Wi-Fi Sync- Turning off Handoff feature
When it comes to disconnecting your iPhone from your Mac, you have the option to do it wirelessly. This can be done by disabling the Wi-Fi Sync and turning off the Handoff feature. Here’s how to accomplish this:
To disable Wi-Fi Sync, start by opening the iTunes application on your Mac. Once iTunes is open, connect your iPhone to your Mac using the USB cable. Next, click on the device icon located at the top-left corner of the iTunes window.
From the left sidebar, select “Summary” and scroll down to the “Options” section. There, you’ll find the “Sync with this iPhone over Wi-Fi” option. Simply uncheck this option, and Wi-Fi Sync will be disabled.
To turn off the Handoff feature, go to the “System Preferences” on your Mac. Click on “General” and look for the “Allow Handoff between this Mac and your iCloud devices” option. Uncheck the box next to it, and Handoff will be turned off.
By disabling the Wi-Fi Sync and turning off the Handoff feature, you can effectively disconnect your iPhone from your Mac wirelessly. This means that your iPhone will no longer sync automatically with your Mac or utilize the Handoff feature between devices.
Managing iPhone Sync Settings in iTunes
When it comes to managing the sync settings between your iPhone and Mac, iTunes provides a wide range of options. By changing the sync preferences, you can tailor the syncing process to suit your needs and ensure that only the desired data is transferred between your devices.
To begin, open iTunes on your Mac and connect your iPhone using a USB cable. Once connected, click on the device icon in the top left corner of the iTunes window. This will take you to the summary page of your iPhone.
From here, you can navigate to the various tabs such as Music, Movies, Photos, and more, to customize the syncing options for each category.
Changing Sync Preferences:
Under each tab, you will find a checkbox labeled “Sync [category]” which is usually checked by default. Simply uncheck the box for any category that you do not want to sync with your iPhone. For example, if you do not want to sync movies, uncheck the “Sync Movies” box.
Limiting the Data Synced Between iPhone and Mac:
In addition to changing the sync preferences for individual categories, you can also limit the amount of data that is synced between your iPhone and Mac. This can be helpful if you have limited storage space on either device or if you only want to transfer specific data.
To do this, go to the “Options” section on the summary page of your iPhone in iTunes. Here, you will find various options such as “Automatically sync when this iPhone is connected” and “Sync only checked songs and videos”. Uncheck these options to prevent automatic syncing or to sync only selected items.
Furthermore, if you want to sync specific playlists, albums, or artists with your iPhone, you can do so by selecting the “Selected playlists, albums, artists, and genres” option under the Music tab. This allows you to choose exactly which music is transferred during the syncing process.
Once you have made the desired changes to the sync preferences and limited the data synced between your iPhone and Mac, click on the “Apply” or “Sync” button in the bottom right corner of the iTunes window to save the changes and initiate the syncing process.
By managing the sync settings in iTunes, you have full control over what data gets transferred between your iPhone and Mac. This allows you to optimize storage space, ensure privacy, and have a more customized syncing experience.
Logging out of iCloud on Mac and iPhone
Logging out of your iCloud account is a simple process that allows you to disconnect your iPhone from your Mac. By signing out of iCloud, you can ensure that your personal data and settings remain secure.
Steps to log out of iCloud on Mac:
1. Open the Apple menu on your Mac by clicking on the Apple logo in the top left corner of the screen.
2. Select “System Preferences” from the drop-down menu.
3. In the System Preferences window, click on “Apple ID” (or “iCloud” if using an older macOS version).
4. You will be prompted to enter your Apple ID password. Enter the password and click “Continue”.
5. On the left side of the Apple ID/iCloud window, you will see a list of options. Click on “Sign Out”.
6. A confirmation window will appear asking if you want to keep a copy of your iCloud data on your Mac. Choose your preferred option and click “Continue”.
7. Enter your Apple ID password one more time to confirm the sign out process.
8. Finally, click on “Sign Out” to log out of your iCloud account on your Mac.
Steps to log out of iCloud on iPhone:
1. Open the Settings app on your iPhone.
2. Scroll down and tap on your Apple ID name at the top of the Settings menu.
3. On the Apple ID page, scroll to the bottom and tap on “Sign Out”.
4. You will be asked to confirm whether you want to keep a copy of your iCloud data on your iPhone or delete it. Choose the appropriate option based on your preference.
5. If you have Find My enabled, you will need to enter your Apple ID password or passcode.
6. Once entered, tap on “Turn Off” or “Sign Out” to log out of your iCloud account on your iPhone.
By following these steps, you can easily log out of iCloud on both your Mac and iPhone, ensuring a secure disconnection between the two devices. Remember to backup any important data before signing out to avoid data loss.
Deactivating Continuity Features – Disabling Continuity and Handoff – Turning off Auto Unlock
Continuity features such as Continuity, Handoff, and Auto Unlock are designed to provide seamless integration between your iPhone and Mac. However, there may be instances where you want to disconnect your iPhone from your Mac and disable these features. Here are the steps to deactivate continuity features:
To disable Continuity and Handoff, follow these steps:
- On your Mac, go to the Apple menu and select “System Preferences.”
- Click on “General.”
- Uncheck the box that says “Allow Handoff between this Mac and your iCloud devices.”
By unchecking this option, you are disabling the Continuity and Handoff feature, preventing your iPhone and Mac from communicating with each other seamlessly.
To turn off Auto Unlock, follow these steps:
- On your Mac, go to the Apple menu and select “System Preferences.”
- Click on “Security & Privacy.”
- Go to the “General” tab.
- Uncheck the box that says “Allow your Apple Watch to unlock your Mac.”
Disabling Auto Unlock prevents your Apple Watch from unlocking your Mac automatically when they are in close proximity.
By deactivating Continuity features, you can disconnect your iPhone from your Mac and prevent any automatic syncing or communication between the devices.
Unpairing iPhone from Mac via Bluetooth- Removing the device from Bluetooth settings- Resetting Bluetooth connections
When you connect your iPhone to your Mac via Bluetooth, it allows for easy syncing and sharing of data between the two devices. However, there may come a time when you need to unpair your iPhone from your Mac for various reasons. In this section, we will explore two methods to disconnect your iPhone from your Mac via Bluetooth: removing the device from Bluetooth settings and resetting Bluetooth connections.
To start, you can unpair your iPhone from your Mac by removing the device from the Bluetooth settings. Follow these steps:
- On your Mac, go to the Apple menu and click on “System Preferences”.
- In the System Preferences window, locate and click on “Bluetooth”.
- A list of available Bluetooth devices will appear. Find your iPhone in the list and click on the “X” button next to it.
- A confirmation window will pop up, asking if you want to remove the device. Click on “Remove” to unpair your iPhone from your Mac.
By following these steps, you have successfully removed your iPhone from the Bluetooth settings on your Mac. However, if you are experiencing issues with the Bluetooth connection between your iPhone and Mac, you may need to reset the Bluetooth connections. Here’s how:
- On your Mac, go to the Apple menu and click on “System Preferences”.
- In the System Preferences window, locate and click on “Bluetooth”.
- Find the Bluetooth icon in the bottom-left corner and click on it.
- A dropdown menu will appear. Select “Debug” and then click on “Reset the Bluetooth module”.
- A confirmation window will pop up, asking if you want to reset the Bluetooth module. Click on “Reset” to proceed.
After resetting the Bluetooth module, your Mac will restart the Bluetooth connections. This may resolve any issues you were having with the connection between your iPhone and Mac.
Remember, unpairing your iPhone from your Mac via Bluetooth can be helpful in situations where you no longer want to sync or share data between the two devices. Whether you choose to remove the device from Bluetooth settings or reset the Bluetooth connections, these steps will ensure a smooth disconnection process.
Disconnecting iPhone from Mac in macOS Catalina and Later – Using the Finder sidebar – Safely ejecting the device from sidebar options
In the macOS Catalina update and later versions, Apple introduced a new way to disconnect your iPhone from your Mac using the Finder sidebar. This method provides a convenient and straightforward way to safely eject your device. Follow the steps below to disconnect your iPhone from a Mac running macOS Catalina or a newer version.
1. Connect your iPhone to your Mac using a USB cable.
2. On your Mac, open a Finder window by clicking on the Finder icon located in the dock.
3. In the left-hand sidebar of the Finder window, you will see a section titled “Locations.” Under the “Locations” section, you will find your connected iPhone listed.
4. Click on your iPhone’s name in the sidebar to select it.
5. Once your iPhone is selected, you will see an eject icon (a small upward arrow enclosed in a circle) next to its name in the sidebar.
6. Click on the eject icon to safely disconnect your iPhone from your Mac.
7. After clicking the eject icon, you may see a confirmation prompt asking if you want to disconnect the device. Click “Eject” to proceed with the disconnection.
8. Once the iPhone is safely ejected, you can unplug the USB cable from your Mac and proceed with using your device independently.
Note: It is essential to follow the proper disconnection process to prevent data loss and potential damage to your iPhone. Safely ejecting the device ensures that all ongoing data transfers between your iPhone and Mac are completed before disconnection.
Using the Finder sidebar to disconnect your iPhone from your Mac in macOS Catalina and later versions eliminates the need to open iTunes or navigate through additional menus. This streamlined method saves you time and provides a more seamless experience when transitioning between your iPhone and Mac.
Remember to always disconnect your iPhone from your Mac using the proper method to avoid any data corruption or hardware issues. By following the steps above, you can safely and efficiently disconnect your iPhone from your Mac using the Finder sidebar in macOS Catalina and later versions.
Turning off AirDrop to Disconnect iPhone from Mac- Disabling AirDrop on Mac- Turning off AirDrop on iPhone
If you’re looking to disconnect your iPhone from your Mac, one effective method is by turning off AirDrop. AirDrop is a feature that allows you to wirelessly transfer files between supported Apple devices. By disabling AirDrop, you can ensure that your iPhone is disconnected from your Mac’s AirDrop network.
To disable AirDrop on your Mac, follow these steps:
- Open Finder on your Mac.
- In the menu bar, click on “Go”.
- Select “AirDrop” from the drop-down menu.
- In the AirDrop window, click on “Allow me to be discovered by” and choose “No One”.
By selecting “No One”, you are effectively disabling AirDrop on your Mac, preventing any device from connecting to it via AirDrop.
Now, let’s take a look at how to turn off AirDrop on your iPhone:
- Unlock your iPhone and open the Control Center.
- Long-press or firmly press on the network settings card (the one that displays Wi-Fi, Bluetooth, and AirDrop options).
- In the expanded network settings, you will see the AirDrop section. Tap on it.
- Select “Receiving Off” or “Contacts Only” to disable AirDrop.
Disabling AirDrop on your iPhone ensures that your device is not visible to other devices for file sharing purposes.
By turning off AirDrop on both your Mac and iPhone, you effectively disconnect your iPhone from your Mac’s AirDrop network. This ensures that no files or data can be transferred between the two devices using AirDrop.
Remember, AirDrop can be a convenient feature for quick file transfers, but if you’re looking to disconnect your iPhone from your Mac, disabling AirDrop is a reliable method.
Disabling Automatic Syncing in iTunes
One common concern for iPhone users is the automatic syncing that occurs between their device and their Mac when connected. While this can be convenient for some, it may not be ideal for everyone. If you prefer to have more control over your syncing process, you have the option to disable automatic syncing in iTunes.
By preventing automatic syncing between your Mac and iPhone, you can manually manage the content that gets synced. This allows you to choose what files, apps, and media are transferred between the two devices.
To disable automatic syncing, follow these steps:
- Open iTunes on your Mac.
- Connect your iPhone to your Mac using a USB cable.
- In the iTunes toolbar, click on the iPhone icon to go to the device’s summary page.
- Under the “Options” section, uncheck the box that says “Automatically sync when this iPhone is connected”.
- Click on the “Apply” or “Sync” button to save the changes.
Once automatic syncing is disabled, you can manually sync specific content between your iPhone and your Mac. This gives you the freedom to choose which photos, music, videos, and other data are transferred.
To manually sync content with your iPhone, follow these steps:
- Connect your iPhone to your Mac using a USB cable.
- Open iTunes on your Mac.
- In the iTunes toolbar, click on the iPhone icon to go to the device’s summary page.
- Select the content categories you want to sync, such as Music, Movies, Photos, or Apps.
- Click on the “Apply” or “Sync” button to start the manual syncing process.
By manually syncing content, you have greater control over the files that are transferred between your iPhone and your Mac. This allows you to manage your storage space more efficiently and keep your devices synced the way you want.
Remember, if you ever change your mind and want to enable automatic syncing again, simply follow the same steps and check the box for “Automatically sync when this iPhone is connected” in the iTunes options.
Removing iPhone Backup from Mac
If you’ve been backing up your iPhone to your Mac but find that you no longer need certain backups taking up space, it’s a good idea to remove them. By deleting old iPhone backups from your Mac, you can free up storage and keep your backup list clean and organized. Here are two methods to remove iPhone backups from your Mac: deleting backups from Finder and removing backups from iTunes.
Deleting iPhone backups from Finder:
In macOS Catalina and later versions, Finder replaces iTunes for managing your iPhone backups. To remove an iPhone backup from Finder, follow these steps:
- Connect your iPhone to your Mac using the USB cable.
- Open a new Finder window and click on your iPhone under the “Locations” section in the sidebar.
- In the main window, you’ll see a list of backup archives for your iPhone. Right-click on the backup you want to remove.
- Select “Delete Backup” from the context menu.
- A confirmation dialog will appear. Click on “Delete” to confirm the removal of the backup.
Removing backups from iTunes:
If you’re still using an older version of macOS with iTunes, you can remove iPhone backups from iTunes using the following steps:
- Launch iTunes on your Mac.
- Click on the “iTunes” menu at the top-left corner of the screen and select “Preferences.”
- In the Preferences window, click on the “Devices” tab.
- You’ll see a list of iPhone backups. Select the backup you want to delete.
- Click on the “Delete Backup” button to remove the selected backup.
- A confirmation dialog will appear. Click on “Delete Backup” again to confirm the removal.
Remember that once you delete a backup, it will be permanently removed from your Mac and you won’t be able to restore your iPhone from that backup. Therefore, make sure you only delete backups that you no longer need or have copies of elsewhere.
By regularly managing and removing old iPhone backups, you can ensure that your Mac’s storage space is optimized and that you have enough room for new backups and other files. It’s always a good idea to periodically review and clean up your backups to keep them organized and efficient.
Conclusion
In conclusion, disconnecting your iPhone from your Mac is a simple and essential task that allows you to regain control over your devices. Whether you want to free up space, transfer files, or troubleshoot connectivity issues, knowing how to disconnect your iPhone properly is crucial.
Throughout this article, we have explored 12 different methods to successfully disconnect your iPhone from your Mac. From using the Finder to iCloud, iTunes, or simply unplugging the USB cable, you have a variety of options to choose from based on your specific needs and preferences.
Remember to follow the proper steps outlined in each method to avoid any potential data loss or damage to your devices. By safely disconnecting your iPhone from your Mac, you can ensure a seamless and efficient experience while using your devices.
So, the next time you need to disconnect your iPhone from your Mac, refer back to this article for a comprehensive guide on the different methods available. Explore these methods, find the one that suits you best, and enjoy the freedom and control that comes with seamlessly disconnecting your iPhone from your Mac.
FAQs
1. How do I disconnect my iPhone from my Mac?
- Answer: To disconnect your iPhone from your Mac, simply unplug the USB cable connecting them.
2. Can I disconnect my iPhone from my Mac without unplugging the USB cable?
- Answer: Yes, you can also disconnect your iPhone from your Mac by clicking the eject button next to your iPhone’s name in the Finder or iTunes application.
3. Are there any keyboard shortcuts to disconnect my iPhone from my Mac?
- Answer: Unfortunately, there are no specific keyboard shortcuts to disconnect your iPhone from your Mac. You will need to either unplug the USB cable or use the eject button in Finder or iTunes.
4. Is it necessary to eject my iPhone from my Mac before disconnecting?
- Answer: It is recommended to eject your iPhone from your Mac before disconnecting to ensure that any ongoing data transfer is completed and there is no risk of data corruption. However, it is not always necessary, especially if there are no active data transfers.
5. What should I do if my iPhone is not recognized by my Mac after disconnecting and reconnecting it?
- Answer: If your iPhone is not recognized by your Mac after disconnecting and reconnecting it, try the following steps:
- Make sure you are using a certified Apple USB cable.
- Restart both your iPhone and your Mac.
- Ensure that you have the latest version of iTunes or Finder installed on your Mac.
- Try connecting your iPhone to a different USB port on your Mac.
- If none of the above steps work, you may need to troubleshoot further or seek assistance from Apple Support.