
Screen sharing has become an essential feature in our increasingly connected world, allowing us to effortlessly transfer images, videos, and presentations between devices. If you own an iPhone and a Mac, you’ll be pleased to know that screen sharing from your iPhone to your Mac is a breeze.
Whether you want to showcase a photo album, demonstrate a new app, or collaborate with a colleague, being able to mirror your iPhone screen on your Mac can be incredibly beneficial. In this article, we will guide you through the process of screen sharing from your iPhone to your Mac, so you can easily share your device’s content on a larger screen.
Inside This Article
- How To Screen Share From iPhone To Mac
- Prerequisites- Ensure that both your iPhone and Mac are connected to the same Wi-Fi network- Make sure your iPhone and Mac are running on the latest software versions
- Using QuickTime Player: Step-by-step instructions on how to screen share from iPhone to Mac using QuickTime Player
- Using third-party apps- Explore alternative methods of screen sharing from iPhone to Mac through third-party apps
- Troubleshooting Tips- Common issues that may arise during screen sharing and how to resolve them
- Conclusion
- FAQs
How To Screen Share From iPhone To Mac
Screen sharing is a powerful feature that allows you to display and control your iPhone’s screen on your Mac. Whether you want to showcase a presentation, demonstrate a mobile app, or troubleshoot a problem, being able to share your iPhone’s screen with your Mac can be incredibly useful. In this article, we will guide you through the steps to screen share from your iPhone to your Mac.
Enable Screen Mirroring on your iPhone
The first step to screen share from your iPhone to your Mac is to enable screen mirroring on your iPhone. To do this:
- Swipe down from the top-right corner of your iPhone screen to open the Control Center.
- Tap on the “Screen Mirroring” icon.
- A list of available devices will appear. Select your Mac from the list.
- If prompted, enter the passcode shown on your Mac to establish the connection.
Once the screen mirroring is enabled on your iPhone, you are ready to connect it to your Mac.
Connect your iPhone to your Mac via AirPlay
Next, you need to connect your iPhone to your Mac using AirPlay. Follow these steps:
- Make sure your Mac and iPhone are connected to the same Wi-Fi network.
- On your Mac, click on the AirPlay icon on the menu bar.
- A list of available devices will appear. Select your iPhone from the list.
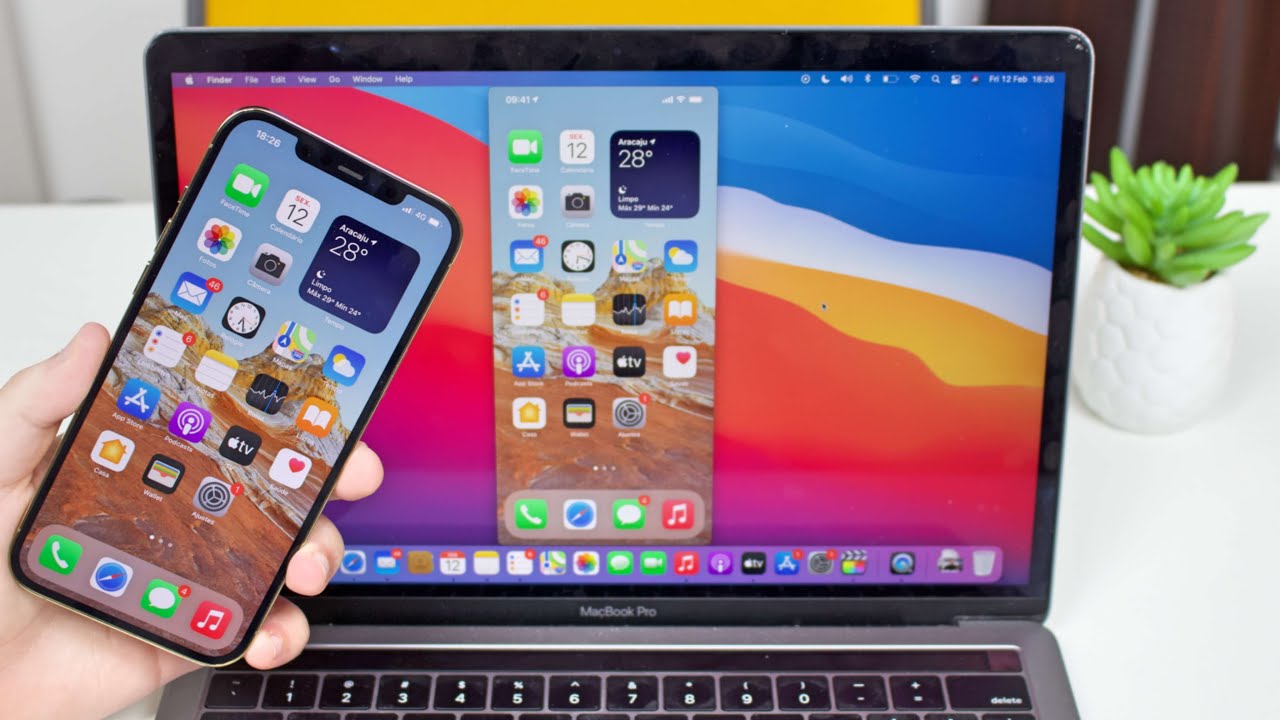
- Your iPhone’s screen will now be mirrored on your Mac.
You can now view and control your iPhone’s screen on your Mac.
Use QuickTime Player on your Mac to mirror and record iPhone screen
If you prefer to mirror and record your iPhone screen on your Mac, you can use QuickTime Player, a built-in application on your Mac. Here’s how:
- Open QuickTime Player on your Mac. You can find it in the Applications folder or use Spotlight to search for it.
- Click on “File” in the menu bar and select “New Movie Recording”.
- A recording window will appear. Click on the down arrow next to the red record button and select your iPhone as the camera and microphone source.
- Your iPhone’s screen will be displayed on your Mac through QuickTime Player.
- To start recording, click on the red record button. To stop recording, click on the same button again.
You can now mirror and record your iPhone screen on your Mac using QuickTime Player.
Utilize third-party apps for screen sharing from iPhone to Mac
In addition to built-in options like screen mirroring and QuickTime Player, you can also explore third-party apps that offer more advanced features for screen sharing from your iPhone to your Mac. These apps often provide additional functionalities like annotation, remote control, and collaboration. Some popular apps for screen sharing include Reflector, AirServer, and ApowerMirror.
By following these steps, you can easily screen share from your iPhone to your Mac, enabling you to demonstrate, collaborate, and troubleshoot with ease. Whether you’re a teacher, presenter, developer, or simply someone who wants more flexibility in using their iPhone on a bigger screen, screen sharing is a valuable tool to have in your arsenal.
Prerequisites- Ensure that both your iPhone and Mac are connected to the same Wi-Fi network- Make sure your iPhone and Mac are running on the latest software versions
In order to successfully screen share from your iPhone to your Mac, there are a few prerequisites that you need to fulfill. These prerequisites are crucial for establishing a stable and seamless connection between your devices. By adhering to these requirements, you can ensure a smooth screen sharing experience. Let’s take a closer look at them:
1. Ensure that both your iPhone and Mac are connected to the same Wi-Fi network. Screen sharing relies on the Wi-Fi network to establish a connection between your devices. If your iPhone and Mac are not connected to the same network, they won’t be able to communicate with each other, and screen sharing won’t be possible.
2. Make sure your iPhone and Mac are running on the latest software versions. Software updates often include bug fixes and improvements that enhance the compatibility and performance of your devices. By keeping your iPhone and Mac up to date, you can minimize any potential compatibility issues and ensure that they are optimized for screen sharing.
Before proceeding with screen sharing, it is essential to check that both your devices meet these prerequisites. Once you have confirmed that they are connected to the same Wi-Fi network and running on the latest software versions, you can proceed to the screen sharing process.
Using QuickTime Player: Step-by-step instructions on how to screen share from iPhone to Mac using QuickTime Player
Screen sharing from your iPhone to your Mac can be a useful feature when you want to share your device’s screen for presentations, gaming, or troubleshooting purposes. One of the easiest and built-in ways to accomplish this is by using QuickTime Player on your Mac.
Here are the step-by-step instructions on how to screen share from your iPhone to your Mac using QuickTime Player:
- Connect your iPhone to your Mac using a lightning cable. Make sure your Mac is updated to the latest version of macOS.
- On your Mac, open QuickTime Player. You can find it in the Applications folder or use Spotlight to search for it.
- Once QuickTime Player is open, go to the menu bar at the top of your screen and click on “File”.
- In the dropdown menu, click on “New Movie Recording”. This will open a new window.
- Within the new window, you will see a small arrow next to the red record button. Click on this arrow to reveal a dropdown menu.
- In the dropdown menu, you will see the name of your iPhone listed under the “Camera” section. Select your iPhone from the list.
- After selecting your iPhone, QuickTime Player will display your iPhone’s screen on your Mac. You can now see and control your iPhone’s screen directly from your Mac.
- If you want to record your iPhone’s screen, you can click on the red record button in QuickTime Player to start recording. To stop recording, simply click on the stop button.
It’s worth mentioning that screen sharing using QuickTime Player requires a wired connection between your iPhone and your Mac. This means both devices must be physically connected using a lightning cable. Additionally, make sure you trust your iPhone on your Mac when prompted to establish the connection.
Overall, using QuickTime Player to screen share from your iPhone to your Mac is a convenient and straightforward method. You can easily showcase your iPhone’s screen on a larger display or even record it for future reference. Give it a try and enjoy the benefits of screen sharing!
Using third-party apps- Explore alternative methods of screen sharing from iPhone to Mac through third-party apps
While AirPlay and QuickTime Player are the primary methods for screen sharing from iPhone to Mac, there are also numerous third-party apps available that offer additional features and flexibility. These apps can enhance your screen sharing experience and allow you to customize your workflow. Let’s explore some of the popular third-party apps that can help you seamlessly share your iPhone screen with your Mac.
1. Apolsoft: Apolsoft is a feature-rich screen sharing app that enables you to mirror your iPhone’s screen on your Mac. Along with screen sharing, it also allows you to control your iPhone remotely from your Mac. This can be useful for presentations, demonstrations, or even accessing your iPhone’s screen without physically handling the device.
2. Reflector 3: Reflector 3 is a powerful screen sharing app that offers a variety of advanced features. It allows you to wirelessly mirror your iPhone screen on your Mac with high-quality resolution. Moreover, Reflector 3 supports additional functionalities such as screen recording, multiple device mirroring, and even mirroring multiple devices simultaneously. This makes it an excellent choice for professional use or group collaborations.
3. LonelyScreen: LonelyScreen is a simple yet effective screen mirroring app that enables you to project your iPhone screen onto your Mac. It offers an easy-to-use interface and supports both video and audio streaming. Additionally, LonelyScreen allows you to customize the screen resolution and aspect ratio according to your preferences, ensuring a seamless and immersive screen sharing experience.
4. ApowerMirror: ApowerMirror is a versatile screen mirroring app that not only supports iPhone to Mac screen sharing but also allows cross-platform screen mirroring between different devices. It offers a user-friendly interface and provides seamless connectivity. With ApowerMirror, you can not only mirror your iPhone screen but also control it from your Mac, making it a convenient option for various tasks like gaming, streaming, or presenting.
5. X-Mirage: X-Mirage is a reliable screen mirroring app specifically designed for iOS devices. It offers effortless screen sharing from your iPhone to your Mac, along with options for recording your screen, streaming media, and even playing iOS games on your Mac. X-Mirage provides smooth and lag-free mirroring with high-quality visuals, making it an ideal choice for showcasing apps, videos, or slideshows.
Note: Before using any third-party screen sharing app, ensure that you download them from trusted sources and verify their compatibility with your devices. Additionally, make sure to follow any necessary setup instructions and grant the required permissions on both your iPhone and Mac.
By leveraging these third-party apps, you can elevate your screen sharing experience and unlock additional functionalities for a more seamless and personalized workflow. Experiment with these apps and find the one that best suits your needs and preferences, enhancing your productivity and collaboration when sharing your iPhone screen to your Mac.
Troubleshooting Tips- Common issues that may arise during screen sharing and how to resolve them
Screen sharing is a convenient way to share your iPhone screen on your Mac. However, there may be some common issues that can arise during the process. To help you troubleshoot these issues, here are some tips to resolve them:
1. Connection Issues: If you encounter connection issues while trying to screen share from your iPhone to your Mac, ensure that both devices are connected to the same Wi-Fi network. Additionally, make sure that AirPlay is enabled on both devices and that you have entered the correct AirPlay password.
2. Lag or Delay: If you experience lag or delay during screen sharing, it could be due to a slow internet connection. Check your internet speed and try to connect to a faster network if possible. It’s also recommended to close any unnecessary apps or processes running in the background on both your iPhone and Mac.
3. Disconnection Issues: If the screen sharing gets disconnected frequently, make sure that both devices have sufficient battery power. Low battery levels can affect the stability of the connection. Additionally, try restarting both your iPhone and Mac to refresh their settings and resolve any temporary software glitches.
4. Audio Issues: If you’re unable to hear audio while screen sharing, ensure that the volume is turned up on both your iPhone and Mac. Check the sound settings on your iPhone and Mac to make sure that the correct audio output is selected. You can also try disconnecting and reconnecting the screen sharing session to see if that resolves the audio issue.
5. Compatibility Issues: In some cases, compatibility issues may arise between your iPhone and Mac when it comes to screen sharing. Ensure that both devices are running on the latest software updates. If the problem persists, try using a different screen sharing app or contact the app’s support team for further assistance.
6. Full-Screen Mode: If you encounter any issues when trying to view the screen sharing session in full-screen mode, try exiting the full-screen mode and then re-entering it. Sometimes, this simple step can resolve any display discrepancies or glitches.
7. Firewall or Security Software: If you have a firewall or any security software installed on your Mac, it could potentially block the screen sharing connection. Temporarily disable the firewall or adjust its settings to allow screen sharing. Remember to re-enable the firewall afterwards to maintain your device’s security.
8. Reinstalling AirPlay: If none of the above solutions work, you can try reinstalling AirPlay on your iPhone and Mac. Remove the AirPlay settings from both devices and then set it up again from scratch. This can sometimes resolve any underlying compatibility issues or conflicts.
By following these troubleshooting tips, you should be able to overcome common issues that may arise during screen sharing from your iPhone to your Mac. Remember, patience and persistence are key when troubleshooting technology-related problems. If the issue persists, consider seeking further technical support or assistance.
Conclusion
In conclusion, screen sharing from your iPhone to your Mac can be a seamless and convenient way to share your device’s screen with others. Whether you need to demonstrate something to a colleague, provide remote support to a friend, or simply want to enjoy your iPhone’s content on a larger screen, the screen sharing feature can come in handy.
By following the steps outlined in this article, you can easily enable screen sharing on both your iPhone and Mac and establish a connection between the two devices. Remember to ensure that both devices are connected to the same Wi-Fi network and that you have the necessary permissions and settings enabled.
Once the screen sharing is set up, you can effortlessly share your iPhone’s screen in real-time with your Mac, enabling you to collaborate, troubleshoot, or simply enjoy a larger view of your favorite apps and media. So go ahead and try out screen sharing from your iPhone to your Mac today!
FAQs
1. How do I screen share from my iPhone to my Mac?
To screen share from your iPhone to your Mac, follow these steps:
- Ensure that both your iPhone and Mac are connected to the same Wi-Fi network.
- On your Mac, open the QuickTime Player.
- In the menu bar, click on “File” and select “New Movie Recording.”
- A window will appear with your Mac’s built-in camera activated. Click on the small arrow next to the record button.
- From the dropdown menu, select your iPhone under the “Camera” section.
- Your iPhone’s screen will now be mirrored on your Mac. You can use QuickTime Player to record or take screenshots of your iPhone’s screen.
2. Can I screen share from my iPhone to a Windows computer?
Unfortunately, the built-in screen sharing functionality from an iPhone to a Windows computer is not available. However, you can use third-party software or apps to achieve screen sharing between these two platforms. Some popular options include TeamViewer, AnyDesk, and VNC Viewer.
3. Are there any requirements for screen sharing from iPhone to Mac?
Yes, there are a few requirements for screen sharing from iPhone to Mac:
- Your iPhone and Mac should be running on compatible operating systems.
- Both devices should be connected to the same Wi-Fi network.
- You need a compatible version of QuickTime Player installed on your Mac.
- Ensure that both devices have sufficient battery power to avoid interruptions during the screen sharing session.
4. Can I control my iPhone from my Mac while screen sharing?
No, screen sharing from iPhone to Mac only allows you to view the iPhone’s screen on your Mac. You cannot control your iPhone using your Mac’s keyboard or mouse. However, you can interact with the iPhone’s screen directly by touching it while it is being mirrored on your Mac.
5. Can I screen share from an iPad to my Mac?
Yes, you can screen share from an iPad to your Mac using the same method described for screen sharing from an iPhone to a Mac. Ensure that both your iPad and your Mac are connected to the same Wi-Fi network and follow the steps using QuickTime Player on your Mac to mirror and view the iPad’s screen.