
Managing your Apple ID is an essential part of using your Apple devices to their full potential. Whether you’re a long-time Apple user or new to the ecosystem, understanding how to create, log in, and manage your Apple ID is crucial. With an Apple ID, you have access to a wealth of services, including the App Store, iCloud storage, and personalized settings across multiple devices.
In this comprehensive guide, we will walk you through the process of creating an Apple ID, logging in to your account, managing your account information, changing your Apple ID email or password, and setting up Family Sharing to share purchases and subscriptions with your loved ones.
By the end of this article, you’ll have the knowledge and confidence to take control of your Apple ID, ensuring a smooth and seamless experience with all your Apple devices.
Inside This Article
- Creating an Apple ID
- Logging In to Your Apple ID
- Managing Your Apple ID
- Changing Your Apple ID
- Setting Up Family Sharing
- Conclusion
- FAQs
Creating an Apple ID
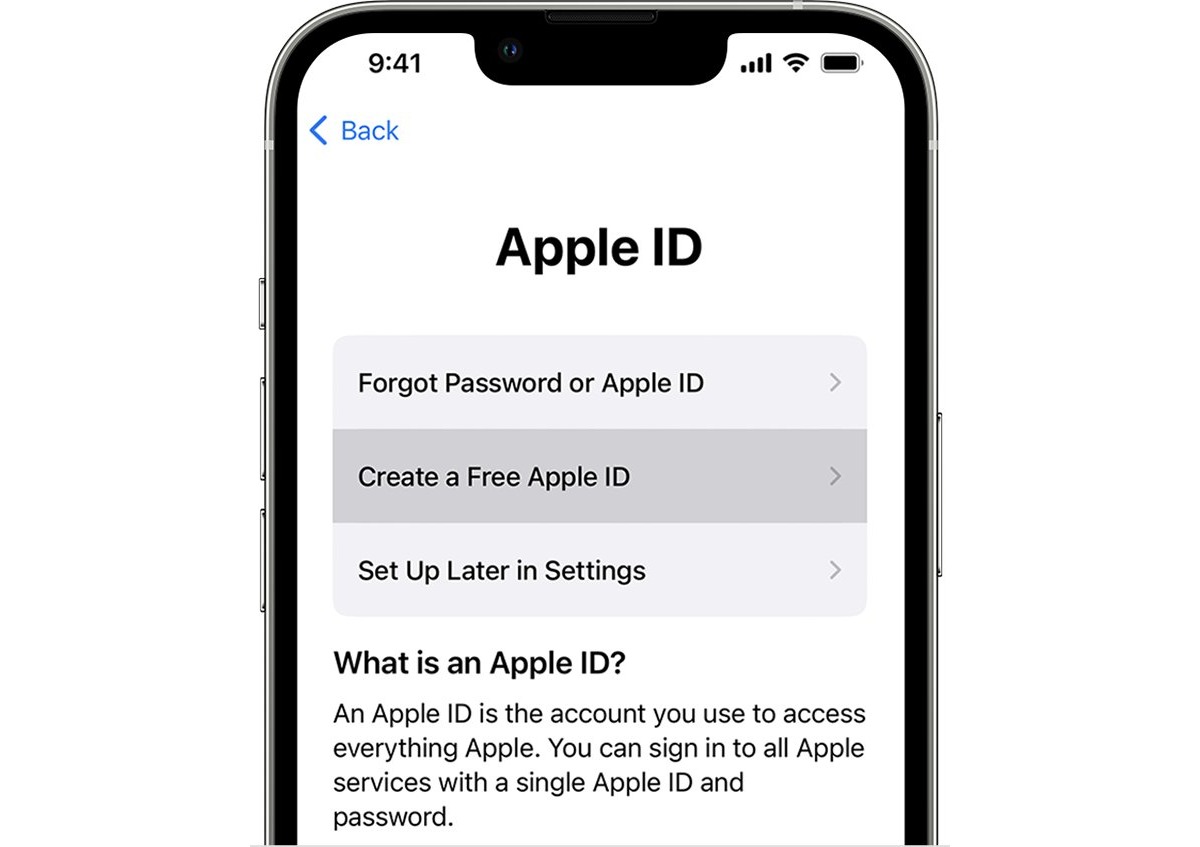
Creating an Apple ID is essential if you want to make the most of your Apple devices and services. With an Apple ID, you can access the App Store, purchase music and movies from iTunes, use iCloud to backup and sync your data, and much more. Here’s a step-by-step guide on how to create your Apple ID:
- Go to the Apple ID account page by visiting the Apple website.
- Click on the “Create Your Apple ID” button.
- Fill in the required information, including your name, email address, and password. Make sure to choose a strong password to protect your account.
- Select security questions and provide answers. These will be used to verify your identity if needed.
- Review and agree to the Terms and Conditions.
- Click on the “Create Apple ID” button.
- A verification email will be sent to the email address you provided. Open the email and click on the verification link to activate your Apple ID.
- Once your Apple ID is activated, you can start using it to sign in to your Apple devices and services.
Keep in mind that you can use your existing email address to create an Apple ID, or you can create a new iCloud email address. It’s recommended to use a reliable email address that you have access to, as important notifications and updates will be sent to it.
By following this simple process, you’ll have your Apple ID up and running in no time, allowing you to enjoy all the features and benefits that come with it.
Logging In to Your Apple ID
Logging in to your Apple ID is a straightforward process that allows you to access and manage your account and all associated services on Apple devices. Whether you own an iPhone, iPad, Mac, or any other Apple device, the login process remains the same. Here’s a step-by-step guide on how to log in to your Apple ID:
1. Open the Settings app: On your Apple device’s home screen, locate the Settings app. It is represented by a gear icon.
2. Scroll down and tap on “Sign in to your [device]”: In the Settings menu, scroll down until you find the option to sign in to your device. For example, if you are using an iPad, it will say “Sign in to your iPad.” Tap on this option.
3. Enter your Apple ID: You will be prompted to enter your Apple ID email address or phone number. Make sure to enter the correct information associated with your Apple ID.
4. Enter your password: Once you have entered your Apple ID, you will be asked to enter your password. Type in your password carefully, making sure to include any uppercase or special characters correctly.
5. Two-Factor Authentication: If you have enabled Two-Factor Authentication for your Apple ID, you might be required to enter a verification code sent to your trusted device or phone number. Enter this code to complete the login process.
6. Successful login: Once you have entered your Apple ID and password correctly, you will be logged in to your account. You can now access all the features and settings associated with your Apple ID.
It’s important to note that the login process may vary slightly depending on your device’s software version and any additional security measures you have enabled for your Apple ID. However, the above steps should provide a general guideline to help you log in to your Apple ID effortlessly.
Managing Your Apple ID
Once you have created your Apple ID and logged in, it’s important to know how to effectively manage your account to ensure a smooth and secure experience. Here are some key tips and steps for managing your Apple ID:
1. Update your personal information: Keeping your personal information up to date is crucial, as it ensures that your account information is accurate and helps in case you need to recover your account. You can update your personal information, such as your name, email address, and phone number, in the Account Settings section of your Apple ID.
2. Review your security settings: Apple provides various security features to protect your account from unauthorized access. Take the time to review your security settings and enable two-factor authentication for an extra layer of security. This will require you to enter a verification code on trusted devices whenever you sign in.
3. Manage your payment methods: If you have linked a credit or debit card to your Apple ID, you can manage your payment methods to ensure they are up to date. You can add new cards, remove old ones, or update the billing information for your existing cards in the Payment & Shipping section of your Apple ID.
4. Control your app and media purchases: Your Apple ID is used to make purchases from the App Store, iTunes Store, and other Apple services. To manage your app and media purchases, you can review your purchase history, enable or disable in-app purchases, and set up Ask to Buy for family members using your Apple ID.
5. Manage iCloud storage: Your Apple ID comes with a limited amount of free iCloud storage for backing up your devices and storing files. If you find that your storage is running out, you can manage your iCloud storage by upgrading to a higher tier plan, deleting unnecessary backups or files, and optimizing your device settings to minimize storage usage.
6. Access Family Sharing: If you have set up Family Sharing, you can manage the members of your family group using your Apple ID. This includes managing shared purchases, setting up parental controls for family members, and controlling screen time limits for children.
By proactively managing your Apple ID, you can ensure that your account is secure, your personal information is up to date, and you have control over your purchases and device backups. Take a few minutes to review and adjust your settings regularly to maintain a smooth and hassle-free experience with your Apple products and services.
Changing Your Apple ID
Your Apple ID is the primary way you access and manage your Apple services, such as iCloud, the App Store, and Apple Music. If you need to make changes to your Apple ID, whether it’s updating personal information or switching to a new email address, it’s important to know how to do it correctly.
Here is a step-by-step guide on how to change your Apple ID:
- Open the Apple ID account page on your device or computer using your preferred web browser.
- Sign in with your current Apple ID and password.
- In the Account section, locate the “Edit” button next to your Apple ID.
- Click on “Edit” and enter the new email address you want to use as your Apple ID.
- Click on “Continue” and follow the on-screen instructions to verify your new email address.
- Once you’ve verified your email address, you will be prompted to sign in again with your new Apple ID.
It’s important to note that when you change your Apple ID, all the information associated with your previous Apple ID, such as purchases, subscriptions, and iCloud data, will still be tied to the original account. However, by changing your Apple ID, you will now be using the new email address as your primary identifier.
Additionally, if you have Family Sharing set up with your previous Apple ID, you will need to remove your old Apple ID from the Family Sharing group and invite your new Apple ID to join the family. This ensures that all family members can continue to share purchases and access shared content seamlessly.
If you encounter any issues or have questions, Apple provides comprehensive support to guide you through the process of changing your Apple ID. You can reach out to their support team for assistance or visit their online support forums for helpful tips and solutions.
Remember, it’s important to keep your Apple ID information up to date to ensure a smooth and seamless experience across all Apple services. By following these steps, you can easily change your Apple ID and continue enjoying the full range of features and benefits offered by Apple.
Setting Up Family Sharing
Family Sharing is a convenient feature offered by Apple that allows you to share your purchased apps, music, movies, and more with your family members. It’s a great way to save money and keep everyone connected. Here’s a step-by-step guide on how to set up Family Sharing:
Step 1: Set Up Family Sharing
To get started, make sure you have an Apple ID and that all family members have their own Apple IDs as well. Open the Settings app on your iOS device or go to System Preferences on your Mac. Tap on your name at the top or click on the Apple menu icon on your Mac and select “Family Sharing.”
Step 2: Add Family Members
Next, tap on “Add Family Member” or click on the “+” button on your Mac. You can choose to invite family members through iMessage or send them an invitation via email. Each family member will receive an invitation and can accept and join the Family Sharing group.
Step 3: Set Up Payment Method
Once family members have joined, you can set up a shared payment method. This will allow all members to make purchases using the same credit card or payment method. You can also choose to approve purchases made by children under the age of 18.
Step 4: Share Purchases
Now that you’ve set up Family Sharing, you can start sharing your purchases. Any app, music, movie, or other content you purchase will be available to all family members. They can access these shared purchases in their respective App Store, Music, and TV apps.
Step 5: Set Up Family Calendar, Photos, and more
In addition to sharing purchases, Family Sharing allows you to share a Family Calendar, Photos, Reminders, and even your location. This makes it easier to coordinate schedules, share memorable moments, and stay connected with your loved ones.
Step 6: Customize Sharing Options
If you want more control over what you share, you can customize the sharing options for each family member. You can choose to share or not share certain apps, decide which types of content can be purchased by each member, and limit access to explicit content.
Step 7: Enjoy Family Sharing
Now that you’ve set up Family Sharing, you and your family members can enjoy the benefits of sharing purchases and staying connected. Whether it’s sharing a favorite app or creating memories with shared photos, Family Sharing brings the whole family closer together.
So why wait? Set up Family Sharing today and make the most out of your Apple devices!
Conclusion
In conclusion, having a solid understanding of Apple IDs is essential for anyone who owns or plans to own an Apple device. Whether it’s creating a new Apple ID, logging in to an existing one, managing your account settings, changing your password, or setting up Family Sharing, these are all important aspects of using Apple devices and maximizing their functionality.
By following the steps outlined in this guide, you can easily navigate through the different features and settings of Apple IDs. Remember to keep your Apple ID credentials safe and secure, as it contains your personal information and serves as a gateway to various Apple services.
With your Apple ID, you gain access to the Apple ecosystem, including the App Store, iCloud, Apple Music, and more. It allows you to seamlessly sync data across your devices, protect your privacy, and enjoy a personalized user experience.
So, whether you’re a new Apple user or a seasoned enthusiast, mastering the ins and outs of Apple IDs will greatly enhance your overall experience with your iPhone, iPad, Mac, or other Apple devices.
FAQs
1. How do I create an Apple ID?
To create an Apple ID, you can follow these steps:
- Open the App Store or iTunes Store on your iPhone, iPad, or iPod touch.
- Click on “Create New Apple ID” or “Sign in with your Apple ID” if you already have one.
- Follow the prompts and fill in your personal details. This includes your name, email address, password, and security questions.
- Agree to the terms and conditions and verify your email address.
2. How do I log in to my Apple ID?
To log in to your Apple ID, you can do the following:
- On your device, go to Settings, then tap on your name at the top of the screen.
- Tap on “Sign In to your iPhone” and enter your Apple ID and password.
- You can also log in to your Apple ID on the App Store, iTunes Store, or iCloud by entering your credentials when prompted.
3. How do I manage my Apple ID?
Managing your Apple ID allows you to control various aspects of your account, such as your payment information, security settings, and connected devices. To manage your Apple ID, follow these steps:
- Go to Settings on your device and tap on your name at the top of the screen.
- Select “iTunes & App Store” or “iCloud” to access different settings.
- Here, you can update your payment details, change your password, manage subscriptions, and more.
4. How do I change my Apple ID?
If you want to change your Apple ID, here’s what you need to do:
- Go to the Apple ID account page on appleid.apple.com and sign in.
- Scroll down to the “Account” section and click on “Edit” next to your Apple ID.
- Enter your new email address and click “Continue.”
- Follow the prompts to verify your new email address and update your Apple ID.
5. How do I set up Family Sharing with my Apple ID?
Family Sharing allows you to share your purchases, subscriptions, and iCloud storage with up to six family members. Here’s how to set it up:
- Go to Settings on your device and tap on your name at the top of the screen.
- Select “Set Up Family Sharing” and follow the prompts to invite family members to join.
- You can share your purchases, including apps, music, movies, and more, as well as set up parental controls and share iCloud storage.