
Welcome to our comprehensive guide on the Apple Pencil! In this article, we will explore a variety of tips and tricks that will help you make the most out of your everyday use of this powerful and versatile digital tool. Whether you are an artist, student, or business professional, the Apple Pencil is designed to enhance your creativity, productivity, and overall user experience with compatible iPad models. From precision drawing and note-taking to markup and navigation, the Apple Pencil offers a wide range of features that can transform the way you interact with your device. So, whether you are a seasoned Apple Pencil user or someone who is considering investing in this innovative accessory, read on to discover handy tips and tricks that will elevate your iPad experience to new heights.
Inside This Article
- Getting Started with Apple Pencil
- Customizing Apple Pencil Settings
- Tips for Better Writing and Drawing
- Making the Most of Apple Pencil with Apps and Features
- Conclusion
- FAQs
Getting Started with Apple Pencil
Welcome to the wonderful world of Apple Pencil! Whether you’re an artist, a student, or someone who loves to take notes, the Apple Pencil is a fantastic tool that can enhance your creativity and productivity. But before you start doodling or jotting down ideas, let’s go through the basics of getting started with your Apple Pencil.
The first step is to ensure that your Apple Pencil is fully charged. It’s easy to charge it by simply attaching it to the magnetic connector at the side of your iPad Pro or iPad Air. You can also check the battery level of your Apple Pencil in the Notification Center widgets or the Batteries widget on your iPad. Keep in mind that a quick 15-second charge can give you up to 30 minutes of use, so it’s handy to give it a quick boost if you’re running low on battery.
Once your Apple Pencil is charged, it’s time to pair it with your iPad. Simply remove the cap from the back of your Apple Pencil and insert it into the Lightning connector on your iPad. A prompt will appear on your screen asking if you want to pair with your Apple Pencil. Just tap “Pair” and voila, your Apple Pencil is now connected to your iPad.
Now that your Apple Pencil is paired, it’s time to start using it. The Apple Pencil works seamlessly with various apps and features on your iPad. You can use it to write, draw, annotate, and navigate your device with precision and ease. It’s worth exploring the different gestures and techniques available to fully unleash the power of your Apple Pencil.
One handy feature of the Apple Pencil is its ability to instantly wake up your iPad when you tap the screen with it. This makes it convenient to jump right into your work without having to press any buttons. Additionally, you can double-tap the side of your Apple Pencil to switch between your current tool and the eraser, which is a time-saving alternative to selecting the eraser icon.
When it comes to writing and drawing, the Apple Pencil offers incredible accuracy and responsiveness. It can detect tilt and pressure, allowing you to apply different levels of shading and thickness to your strokes. You can experiment with different brush types and settings to achieve the desired effect in art-based apps. Don’t forget to try out the palm rejection feature, which ensures that your hand can rest on the screen while you’re using the Apple Pencil without accidentally registering any unwanted marks.
Finally, don’t limit yourself to just writing and drawing. The Apple Pencil can be used for various tasks like highlighting text, creating charts, and even annotating documents or presentations. With compatible apps, you can take advantage of features like handwriting recognition or converting handwritten notes into text for easy sharing and searching.
Now that you have a grasp of the basics, it’s time to explore and make the most of your Apple Pencil. Whether you’re a seasoned artist or just starting to explore your creative side, the Apple Pencil opens up a whole new world of possibilities on your iPad. Get ready to unleash your creativity and productivity with this incredible tool.
Customizing Apple Pencil Settings
Apple Pencil is not just a simple stylus. It’s a powerful tool that offers a range of customizable settings to enhance your drawing and writing experience. By delving into the settings, you can personalize your Apple Pencil to suit your specific needs and preferences. Here are some tips to help you make the most of these customization options.
Firstly, to access the Apple Pencil settings, you need to pair it with your compatible device. Simply connect the Apple Pencil to your iPad or iPhone, and it will automatically pair via Bluetooth. Once connected, head to the Settings app on your device and tap on “Apple Pencil” to access the customization menu.
One of the key settings you can adjust is the sensitivity of the Apple Pencil. By default, it is set to “Medium” sensitivity, but you can change it to “Low” or “High” according to your preference. If you find that the Pencil’s responsiveness needs tweaking, experimenting with different sensitivity settings can greatly improve your experience.
Another important setting is the double-tap functionality. Apple Pencil allows you to assign different actions when you double-tap on its side. For example, you can choose to switch between your current tool and eraser, activate the color picker, or toggle between the drawing and erasing modes. To customize the double-tap action, simply select your preferred option from the list provided in the settings menu.
Moreover, Apple Pencil also offers palm rejection settings. This feature allows you to rest your hand on the screen while using the Pencil without registering unwanted touch gestures. By default, palm rejection is enabled, but you have the option to adjust its sensitivity. If you find that the Pencil is not registering your touches accurately while your palm is resting on the screen, you can increase the palm rejection sensitivity to avoid any inconvenience.
Lastly, you can choose whether you want your Apple Pencil to automatically pair and engage with your device when you pick it up. This feature, called “Tap to Pair”, allows for seamless connectivity and a hassle-free user experience. To enable or disable this feature, simply toggle the switch in the settings menu.
Customizing the settings of your Apple Pencil can greatly enhance your productivity and overall usability. Experimenting with different sensitivities, double-tap actions, palm rejection settings, and “Tap to Pair” feature will help you tailor the Apple Pencil to your specific preferences. Take the time to explore these options and make the most of your Apple Pencil for a truly personalized experience.
Tips for Better Writing and Drawing
If you own an Apple Pencil, you know how it can bring your writing and drawing experience to a whole new level. Whether you use it for creative projects, note-taking, or simply doodling, here are some tips to help you make the most out of your Apple Pencil:
1. Adjusting the sensitivity: One of the great features of the Apple Pencil is its pressure sensitivity. You can adjust the sensitivity to suit your preferences by going to the settings on your iPad and selecting Apple Pencil. Experiment with different settings until you find the right balance for your writing and drawing needs.
2. Use the correct grip: Holding the Apple Pencil with the correct grip can greatly improve your control and precision. It is recommended to hold it like you would hold a traditional pencil or pen. This will allow you to have better control over the lines and strokes you make on the screen.
3. Use the tilt function: The Apple Pencil has a tilt function that allows you to create shading and textures just like you would with a traditional pencil. Tilt the Pencil to the side while drawing or shading to achieve different effects. This feature is particularly useful for artists who want to create more realistic and dynamic artwork.
4. Experiment with different apps: There are numerous apps available that are specifically designed to maximize the capabilities of the Apple Pencil. Whether you are into digital art, calligraphy, or simply want to enhance your note-taking experience, try out different apps and find the ones that work best for you.
5. Practice with precision: Like any other skill, writing and drawing with the Apple Pencil requires practice. Take some time each day to practice your strokes, lines, and shading techniques. This will help you become more proficient and confident in using the Pencil, whether for professional or personal projects.
6. Utilize the eraser: The Apple Pencil has an eraser feature that allows you to quickly erase mistakes or make adjustments to your artwork. Simply flip the Pencil around and use it as you would with a traditional eraser. This handy feature saves time and makes the editing process much smoother.
7. Explore different brush sizes: Many drawing apps offer options to change the size of brushes. Experiment with different brush sizes to achieve different effects in your artwork. From fine details to bold strokes, having a variety of brush sizes at your disposal can elevate your drawing skills.
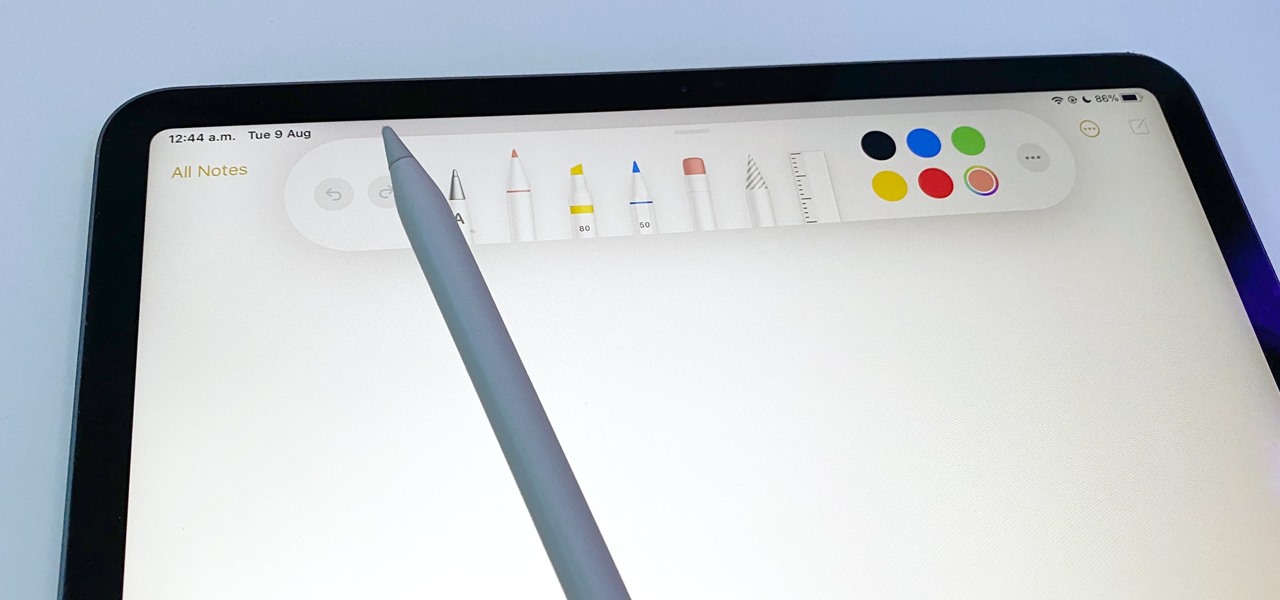
8. Use the ruler tool: If you need to create precise straight lines or shapes, take advantage of the ruler tool available in some drawing apps. This tool allows you to create perfectly straight lines or shapes with ease, giving your artwork a professional and polished look.
9. Take advantage of the “Undo” feature: Made a mistake? No worries! The Apple Pencil offers an “Undo” feature that allows you to quickly erase or revert your last action. This feature can be a lifesaver when you make a small error or want to try a different approach to your drawing or writing.
By following these tips, you can enhance your writing and drawing experience with the Apple Pencil. Whether you are a professional artist, a student, or simply enjoy expressing your creativity, these tips will help you get the most out of your Apple Pencil.
Making the Most of Apple Pencil with Apps and Features
Apple Pencil is not just a tool for writing and drawing, but it also offers a range of features and functionalities that can enhance your overall experience. In this section, we will explore some of the top apps and features that make Apple Pencil a powerful tool for creativity and productivity.
Note-taking apps: Apple Pencil works seamlessly with note-taking apps like Apple Notes, Notability, and Evernote, allowing you to jot down ideas, take handwritten notes, and sketch diagrams. These apps often offer additional features like text recognition and synchronization with cloud storage, making it easier to organize and access your notes across devices.
Digital art apps: If you’re an artist or enjoy creating digital artwork, apps like Procreate and Adobe Illustrator offer a wide range of tools and brushes that can be used with Apple Pencil. These apps provide a realistic drawing experience and allow you to unleash your creativity digitally, opening up endless possibilities for artistic expression.
PDF markup: Gone are the days of printing out documents just to make annotations. With Apple Pencil and apps like GoodNotes and PDF Expert, you can easily markup and highlight important sections of PDFs, sign documents, and even fill out forms directly on your iPad. This feature is a game-changer for students, professionals, and anyone who frequently deals with PDFs.
Photo editing: Apple Pencil can be a precise and intuitive tool for photo editing. Apps like Adobe Lightroom and Pixelmator Photo offer powerful editing tools that are enhanced when used with Apple Pencil. Fine-tune your images, adjust colors, and apply precise edits with ease, all using the natural feel of the Pencil.
Handwriting recognition: With apps like Nebo and MyScript, you can convert your handwritten notes into text. This can be incredibly useful when you need to quickly transcribe your notes into a more legible and shareable format.
Annotation and markup: Whether you’re a student reviewing lecture slides or a professional highlighting important details in a document, apps like LiquidText and MarginNote allow you to easily annotate and mark up your content. Apple Pencil makes it effortless to highlight text, add comments, and connect ideas, improving your comprehension and overall productivity.
Virtual whiteboards: Collaborative workspaces have become increasingly common, especially in remote work environments. Apps like Microsoft Whiteboard and Miro provide virtual whiteboard features where you can ideate, brainstorm, and collaborate with colleagues or classmates. Apple Pencil allows you to contribute to these virtual whiteboards naturally, just like you would with a traditional marker on a physical whiteboard.
After exploring the various tips and tricks for using the Apple Pencil, it is clear that this device is a game-changer for everyday users. Whether you are an artist, a student, or a professional, the Apple Pencil offers a whole new level of precision and functionality to enhance your productivity and creativity. From taking notes, sketching, annotating documents, to editing photos and videos, the Apple Pencil is a versatile tool that can tremendously improve your digital experience on an iPad.
By mastering features like pressure sensitivity, tilt detection, and customizing settings, you can truly unlock the full potential of the Apple Pencil. The seamless integration with various apps, such as Procreate, Notability, and Adobe Creative Cloud, further expands its capabilities and makes it an essential companion for any creative endeavor.
So, whether you are a digital artist aiming for realistic brush strokes, a student wanting to take efficient notes, or a professional seeking precision in your work, the Apple Pencil is the perfect tool to elevate your productivity and unleash your creativity. With these tips and tricks, you will be able to maximize your Apple Pencil experience and take full advantage of all its amazing features.
FAQs
1. What is the Apple Pencil and what devices is it compatible with?
2. How do I set up and pair my Apple Pencil with my device?
3. Does the Apple Pencil require charging? How long does the battery last?
4. Can I use the Apple Pencil as a regular stylus on non-Apple devices?
5. Are there any alternative stylus options for my Apple device?